はじめに
1年前に書いた「Rails5でdeviseをAmazon SES SMTPサーバーを使って動かす」をそのままRails6でやろうとしたら若干修正が必要だったので更新版を書いた。
1. Railsプロジェクト準備
(1) 空のRailsプロジェクト
空のRailsプロジェクトを rails new して、DB設定と rake db:create まで終わらせておきます。この記事の環境は次の通り。なお、ruby 2.6はbundler 1系を包含していて後々面倒になるので使わなかった。また、ruby 2.7はrailsでDefaultでインストールされるSpring 2.1が未対応でrails serverが起動しなかったので使わなかった。
- Rails 6.0.2.1
- Ruby 2.5.3
- Devise 4.7.1
/bin/bash -c "env RBENV_VERSION=2.5.3 /usr/local/Cellar/rbenv/1.1.2/libexec/rbenv exec ruby /Users/your_home/devise-rails6/bin/spring rails 'db:create'"
Created database 'devise_rails6_development'
Created database 'devise_rails6_test'

Process finished with exit code 0
(2) トップpageを作る。
私はpagesとしましたが、任意です。
$ rails g controller Pages index
(3) routingに作ったトップpageを localhost:3000 でアクセスできるように追加する。
Rails.application.routes.draw do
  root 'pages#index'  <=追加rootは特別なので / ではなく # を使う事に注意
  get 'pages/index'   <=rails gで自動作成されたもの
  # For details on the DSL available within this file, see http://guides.rubyonrails.org/routing.html
end
2. deviseインストール
基本的にはDeviseのREADMEの通りに進めます。
(1) Gemfileにdeviseを追記してbundle install
# devise
gem 'devise', '>=4.7.1'
/bin/bash -c "env RBENV_VERSION=2.5.3 /usr/local/Cellar/rbenv/1.1.2/libexec/rbenv exec bundle install"
The dependency tzinfo-data (>= 0) will be unused by any of the platforms Bundler is installing for. Bundler is installing for ruby but the dependency is only for x86-mingw32, x86-mswin32, x64-mingw32, java. To add those platforms to the bundle, run `bundle lock --add-platform x86-mingw32 x86-mswin32 x64-mingw32 java`.
Using rake 13.0.1
Using concurrent-ruby 1.1.5
省略
Using web-console 4.0.1
Using webpacker 4.2.2
Bundle complete! 15 Gemfile dependencies, 71 gems now installed.
Use `bundle info [gemname]` to see where a bundled gem is installed.

Process finished with exit code 0
(2) rails generate
$ rails generate devise:install
Running via Spring preloader in process 38797
      create  config/initializers/devise.rb
      create  config/locales/devise.en.yml
===============================================================================

Some setup you must do manually if you haven't yet:

  1. Ensure you have defined default url options in your environments files. Here
     is an example of default_url_options appropriate for a development environment
     in config/environments/development.rb:

       config.action_mailer.default_url_options = { host: 'localhost', port: 3000 }

     In production, :host should be set to the actual host of your application.

  2. Ensure you have defined root_url to *something* in your config/routes.rb.
     For example:

       root to: "home#index"

  3. Ensure you have flash messages in app/views/layouts/application.html.erb.
     For example:

       <p class="notice"><%= notice %></p>
       <p class="alert"><%= alert %></p>

  4. You can copy Devise views (for customization) to your app by running:

       rails g devise:views

===============================================================================
(3) development環境のDevise mailer用default URLオプション を設定
config/environments/development.rbに以下を追記
Rails.application.configure do
  # Settings specified here will take precedence over those in config/application.rb.

  途中省略

  # devise
  config.action_mailer.default_url_options = { host: 'localhost', port: 3000 }
end
(4) deviseで管理するユーザーのモデルを生成
$ rails generate devise Users
Running via Spring preloader in process 39709
[WARNING] The model name 'Users' was recognized as a plural, using the singular 'User' instead. Override with --force-plural or setup custom inflection rules for this noun before running the generator.
      invoke  active_record
      create    db/migrate/20200101012615_devise_create_users.rb
      create    app/models/user.rb
      insert    app/models/user.rb
       route  devise_for :users
(5) DB migrate
/bin/bash -c "env RBENV_VERSION=2.5.3 /usr/local/Cellar/rbenv/1.1.2/libexec/rbenv exec ruby /Users/your home/devise-rails6/bin/spring rails 'db:migrate'"
== 20200101012615 DeviseCreateUsers: migrating ================================
-- create_table(:users)
   -> 0.0179s
-- add_index(:users, :email, {:unique=>true})
   -> 0.0212s
-- add_index(:users, :reset_password_token, {:unique=>true})
   -> 0.0154s
== 20200101012615 DeviseCreateUsers: migrated (0.0547s) =======================


Process finished with exit code 0
(6) defaultのdevise viewをカスタマイズするためにアプリにViewを追加する
$ rails generate devise:views
Running via Spring preloader in process 41745
      invoke  Devise::Generators::SharedViewsGenerator
      create    app/views/devise/shared
      create    app/views/devise/shared/_error_messages.html.erb
      create    app/views/devise/shared/_links.html.erb
      invoke  form_for
      create    app/views/devise/confirmations
      create    app/views/devise/confirmations/new.html.erb
      create    app/views/devise/passwords
      create    app/views/devise/passwords/edit.html.erb
      create    app/views/devise/passwords/new.html.erb
      create    app/views/devise/registrations
      create    app/views/devise/registrations/edit.html.erb
      create    app/views/devise/registrations/new.html.erb
      create    app/views/devise/sessions
      create    app/views/devise/sessions/new.html.erb
      create    app/views/devise/unlocks
      create    app/views/devise/unlocks/new.html.erb
      invoke  erb
      create    app/views/devise/mailer
      create    app/views/devise/mailer/confirmation_instructions.html.erb
      create    app/views/devise/mailer/email_changed.html.erb
      create    app/views/devise/mailer/password_change.html.erb
      create    app/views/devise/mailer/reset_password_instructions.html.erb
      create    app/views/devise/mailer/unlock_instructions.html.erb
(7) Userモデルの編集
omniauthable以外全部使ってみます。
class User < ApplicationRecord
  # Include default devise modules. Others available are:
  # :confirmable, :lockable, :timeoutable, :trackable and :omniauthable
  devise :database_authenticatable, :registerable,
         :recoverable, :rememberable, :validatable,
         :confirmable, :lockable, :timeoutable
end
(8) User migrationファイルの編集
Userモデルに合わせて編集します。全部使うのでコメントを全部外しました。
# frozen_string_literal: true

class DeviseCreateUsers < ActiveRecord::Migration[6.0]
  def change
    create_table :users do |t|
      ## Database authenticatable
      t.string :email,              null: false, default: ""
      t.string :encrypted_password, null: false, default: ""

      ## Recoverable
      t.string   :reset_password_token
      t.datetime :reset_password_sent_at

      ## Rememberable
      t.datetime :remember_created_at

      ## Trackable
      t.integer  :sign_in_count, default: 0, null: false
      t.datetime :current_sign_in_at
      t.datetime :last_sign_in_at
      t.string   :current_sign_in_ip
      t.string   :last_sign_in_ip

      ## Confirmable
      t.string   :confirmation_token
      t.datetime :confirmed_at
      t.datetime :confirmation_sent_at
      t.string   :unconfirmed_email # Only if using reconfirmable

      ## Lockable
      t.integer  :failed_attempts, default: 0, null: false # Only if lock strategy is :failed_attempts
      t.string   :unlock_token # Only if unlock strategy is :email or :both
      t.datetime :locked_at


      t.timestamps null: false
    end

    add_index :users, :email,                unique: true
    add_index :users, :reset_password_token, unique: true
    add_index :users, :confirmation_token,   unique: true
    add_index :users, :unlock_token,         unique: true
  end
end
再度migrationします。
/bin/bash -c "env RBENV_VERSION=2.5.3 /usr/local/Cellar/rbenv/1.1.2/libexec/rbenv exec ruby /Users/your home/devise-rails6/bin/spring rails 'db:migrate'"

Process finished with exit code 0
(9) 動作確認
とりあえず、ここまでで動作確認してみます。app/views/layouts/application.html.erbにサインアップ、ログインのリンクを追加してブラウザで確認します。
<!DOCTYPE html>
<html>
<head>
  <title>DeviseRails6</title>
  <%= csrf_meta_tags %>
  <%= csp_meta_tag %>

  <%= stylesheet_link_tag 'application', media: 'all', 'data-turbolinks-track': 'reload' %>
  <%= javascript_pack_tag 'application', 'data-turbolinks-track': 'reload' %>
</head>

<body>

------------------------- ここから
<header>
  <nav>
    <% if user_signed_in? %>
      <strong>Login account : <%= current_user.email %></strong>
      <strong><%= link_to "Home", root_path %></strong>
      <%= link_to 'プロフィール変更', edit_user_registration_path %>
      <%= link_to 'ログアウト', destroy_user_session_path, method: :delete %>
    <% else %>
      <%= link_to 'サインアップ', new_user_registration_path %>
      <%= link_to 'ログイン', new_user_session_path %>
    <% end %>
  </nav>
</header>

<p class="notice"><%= notice %></p>
<p class="alert"><%= alert %></p>
------------------------- ここまで

<%= yield %>
</body>
</html>
ブラウザで開いて以下のようになっていればDeviseは動いています。
localhost:3000を開いたところ
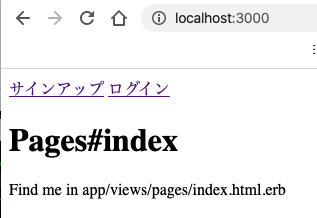
サインアップをクリックしたところ
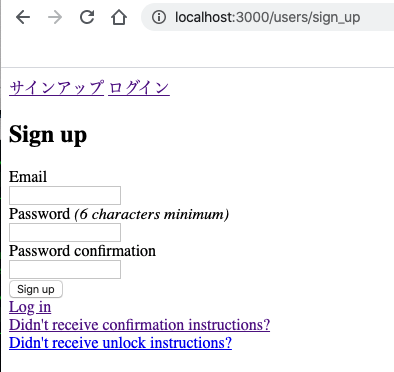
(10) SMTPの設定
まだSMTPの設定をしてませんから、サインアップしてもメールアドレス確認の自動メールが送信できないので、実際にユーザー登録をすることはまだできません。
メールの設定は私の過去記事「Rails5でdeviseをAmazon SES SMTPサーバーを使って動かす」を参照して下さい。
今回はAmazon SESではなく、ロリポップを試しました。
Rails.application.configure do

途中省略

  # devise default url
  config.action_mailer.default_url_options = { host: 'localhost', port: 3000 }

  # SMTP configuration
  config.action_mailer.raise_delivery_errors = true
  config.action_mailer.delivery_method = :smtp
  config.action_mailer.smtp_settings = {
    :address => "smtp.lolipop.jp",
    :port => 587,
    :user_name => "<ロリポップのユーザー名>",
    :password => Rails.application.credentials.LOLIPOP_PASSWORD, <=rails credential内にパスワードを定義しました。
    :authentication => :'login', <=ロリポップはこの設定にして下さい。
    :enable_starttls_auto => true
  }
end
基本的なDeviseの構築は以上で完了。
3. Userテーブルにカラム追加
現実的な業務用件には普通は氏名や電話番号などがあるだろう。その場合、Userテーブルにカラムを追加し、RegistrationのViewに該当項目を追加すれば良い。例えば、名前、苗字、会員番号を追加するなら以下のようになる。
    add_column :users, :AccountNum, :bigint
    add_column :users, :FirstName, :string
    add_column :users, :LastName, :string
関連記事
Rails5でdeviseをAmazon SES SMTPサーバーを使って動かす
Rails 6のDeviseのフォームをBootstrap4 + RailsLayoutでカッコ良くしたい