RasPi4 遂に入手したので久しぶりの環境構築しました。
ほぼ、Jetson_nanoと同じ方法でできました。
【参考】
0.【Jetson_nano】インストールからTensorflow,Chainer,そしてKeras環境構築出来たよ♬
1.Raspberry Pi 4のディープラーニングで画像認識する環境をゼロから1時間で構築する方法
やったこと
・組み立て
・SDコピーから起動
・スクリーンショット
・環境確認
・組み立て
参考1のハードウェアセットアップを見ながら結線します。
あと、RasPi4の説明ページも参考にしました。

上記説明ページより引用
SDカードは参考1を見てほしいところですが、USB入力の対面下側(NEWと書いてある方向)で爪で取り出せる方向に差し込みします。
・Wifi・Bluetooth付きなのでLanケーブルは使用しません
・セット購入なのでケース、HDMIケーブル・電源まで付属しているようです
・放熱板は付属の両面テープでCPUに貼り付けました。触れるけどかなり放熱しているので必須です
ここは以下の参考のとおり、必要に応じて変更するかも
・SDカードは32GB利用しました
・Display、無線キーボード・マウスは他のマシンと共用
【参考】
・ラズベリーパイのヒートシンクの効果は?ファンまで必要かを検証!
・SDコピーから起動
SDコピーの仕方は参考0のとおりです。
手順は以下のとおりです。
①Raspbian Buster with desktopをPCにダウンロード
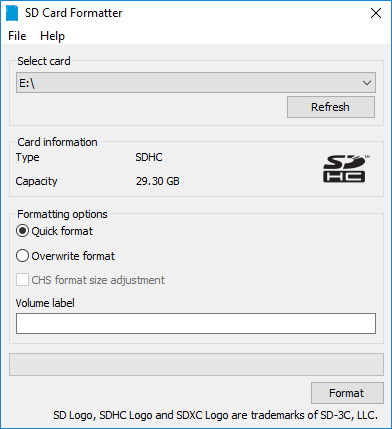
②WindowsにmaicroSDcardをセットして、以下のアプリでFormatします

1.Download, install, and launch SD Memory Card Formatter for Windows.
2.Select card drive
3.Select “Quick format”
4.Leave “Volume label” blank
5.Click “Format” to start formatting, and “Yes” on the warning dialog
マイクロSDカードへImageを書き込む
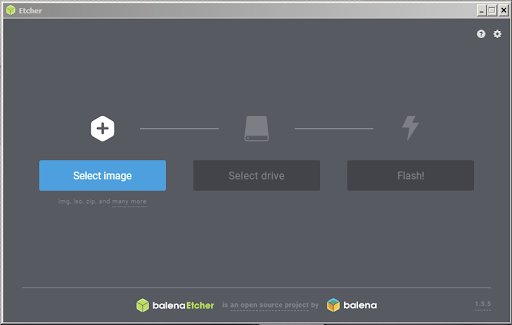
1.EtcherをDownload, installし実行すると以下の画面が表れます。

2.Click “Select image” and choose the zipped image file downloaded earlier.
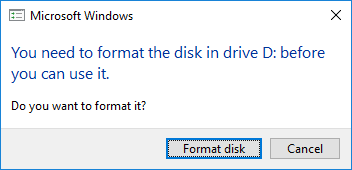
3.下の情報が重要で、以下のようなフォーマットしますか?という、drive;D..NみたいなWindowsプロンプト画面がたくさん出てきますが、すべてCancelしてください

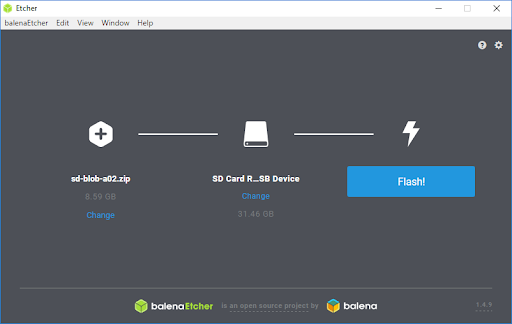
4.ここは指示に従って、セレクトしていきます。
セレクトイメージで、ダウンロードしたSDimageを選択します。
セレクトドライブで、SDカードを選択します。

5.そして、Flashを押すと書込みが始まり、10分位で終了します
画像は参考②のような画面ですが、省略します。
6.終了すると以下のような表示が出ていると思うので、これもcancelして下さい。

これで実際にRaspbianが起動できるSDカードができました。
Raspbian起動
すべて結線して、いよいよ電源ON。
いつものRaspbianが立ち上がります。
ここでRasPiのマークから以下のようにたどるとシステム設定が出力しますので、設定しましょう。
設定内容は参考1を参考にしてください。

スクリーンショット
ここでスクリーンショットを取得していますが、以下の参考ページを参考にscrot -d 5で取得しています。
ちなみに、scrotはインストール済みです。
【参考】
・Raspberry Pi(ラズベリーパイ)でスクリーンショットを保存する方法
$scrot --help
の結果はおまけに記載しています。
環境確認
$ lsb_release -a
No LSB modules are available.
Distributor ID:	Raspbian
Description:	Raspbian GNU/Linux 10 (buster)
Release:	10
Codename:	buster
busterでした。。。
$ cat  /etc/os-release
PRETTY_NAME="Raspbian GNU/Linux 10 (buster)"
NAME="Raspbian GNU/Linux"
VERSION_ID="10"
VERSION="10 (buster)"
VERSION_CODENAME=buster
ID=raspbian
ID_LIKE=debian
HOME_URL="http://www.raspbian.org/"
SUPPORT_URL="http://www.raspbian.org/RaspbianForums"
BUG_REPORT_URL="http://www.raspbian.org/RaspbianBugs"
debianでした。。。
【参考】ちょっと上記とは関係ないが、今後のためにはっておく
Raspberry Pi 公式ドキュメントを日本語訳@五十嵐システムズ
おまけ
$ scrot --help
Usage : scrot [OPTIONS]... [FILE]
  Where FILE is the target file for the screenshot.
  If FILE is not specified, a date-stamped file will be dropped in the
  current directory.
  See man scrot for more details
  -h, --help                display this help and exit
  -v, --version             output version information and exit
  -a, --autoselect          non-interactively choose a rectangle of x,y,w,h
  -b, --border              When selecting a window, grab wm border too
  -c, --count               show a countdown before taking the shot
  -d, --delay NUM           wait NUM seconds before taking a shot
  -e, --exec APP            run APP on the resulting screenshot
  -q, --quality NUM         Image quality (1-100) high value means
                            high size, low compression. Default: 75.
                            For lossless compression formats, like png,
                            low quality means high compression.
  -m, --multidisp           For multiple heads, grab shot from each
                            and join them together.
  -s, --select              interactively choose a window or rectangle
                            with the mouse
  -u, --focused             use the currently focused window
  -t, --thumb NUM           generate thumbnail too. NUM is the percentage
                            of the original size for the thumbnail to be,
                            or the geometry in percent, e.g. 50x60 or 80x20.
  -z, --silent              Prevent beeping

  SPECIAL STRINGS
  Both the --exec and filename parameters can take format specifiers
  that are expanded by scrot when encountered.
  There are two types of format specifier. Characters preceded by a '%'
  are interpreted by strftime(2). See man strftime for examples.
  These options may be used to refer to the current date and time.
  The second kind are internal to scrot  and are prefixed by '$'
  The following specifiers are recognised:
                  $f image path/filename (ignored when used in the filename)
                  $m thumbnail path/filename
                  $n image name (ignored when used in the filename)
                  $s image size (bytes) (ignored when used in the filename)
                  $p image pixel size
                  $w image width
                  $h image height
                  $t image format
                  $$  prints a literal '$'
                  \n prints a newline (ignored when used in the filename)
  Example:
          scrot '%Y-%m-%d_$wx$h_scrot.png' -e 'mv $f ~/images/shots/'
          Creates a file called something like 2000-10-30_2560x1024_scrot.png
          and moves it to your images directory.

This program is free software see the file COPYING for licensing info.
Copyright Tom Gilbert 2000
Email bugs to <scrot_sucks@linuxbrit.co.uk>