アイエンター #1 Advent Calendar 2018 18日目 の記事です。
はじめに
時間経過を表現するbarをUIProgressViewで実装しようとしていたのですが、
上手く表示出来ずUIView.animateを利用したため知識共有です。
作成したもの
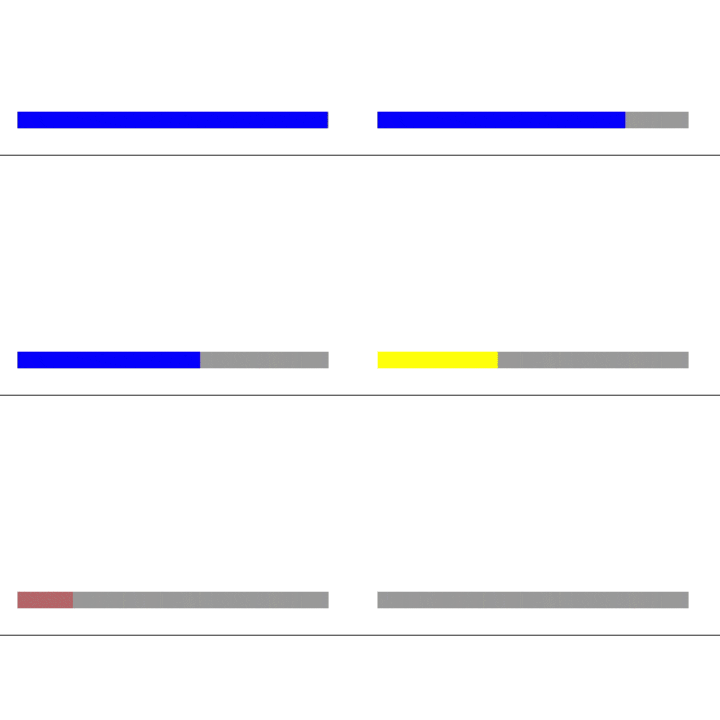
ボタンを押したら徐々にバーが減り指定した時間になると色がついたBarのWidthが0になる

最初に作成したもの
ボタンをタップしたらUIProgressViewが減り始める。
class ViewController: UIViewController {

    @IBOutlet weak var progressView: UIProgressView!

    var progressWidth: Float = 1.0
    var timer = Timer()

    override func viewDidLoad() {
        super.viewDidLoad()
    }

    @IBAction func tapButton(_ sender: Any) {
        progressView.progress = 1.0
        timer = Timer.scheduledTimer(timeInterval: 0.01, target: self, selector: #selector(didProgress), userInfo: nil, repeats: true)
    }

    @objc func didProgresse() {
        progressWidth -= 0.001
        if progressWidth < 0.0 {
            timer.invalidate()
        }
        progressView.progress = progressWidth
    }
GIFの画像では分かりにくいが、最後に中途半端に色のついているBarが残ってしまう。
実際にはもっとなめらかに動いているため、最後に不自然な動きをするこの実装は適していない。
UIView.animateを利用して実装
BaseのViewをストーリーボードに用意し、そのViewに合わせたViewをaddして徐々にWidthを減少
class ViewController: UIViewController {
    // ベースとなるView
    @IBOutlet weak var timeBarBaseView: UIView!
    // BaseViewにaddするView
    var timeBarView = UIView()

    // timeBarViewのWidthを保持する
    private var timeBarViewWidth: CGFloat = 0.0

    override func viewDidLoad() {
        super.viewDidLoad()

        // timeBarViewの設定
        timeBarView.frame = CGRect(x: 0, y: 0, width: timeBarBaseView.frame.size.width, height: timeBarBaseView.frame.size.height)
        timeBarView.backgroundColor = UIColor.blue
        timeBarViewWidth = self.timeBarView.frame.size.width
        timeBarBaseView.addSubview(self.timeBarView)
    }

    @IBAction func tapButton(_ sender: Any) {
        // 時間を指定
        timerStart(totalLimitTime: 10)
    }

    /// Barの減少開始
    ///
    /// - Parameter totalLimitTime: Widthが0になるときの経過時間
    func timerStart(totalLimitTime: TimeInterval) {
        // timeBarViewの位置と色を初期化
        self.timeBarView.frame = CGRect(x: 0, y: 0, width: self.timeBarBaseView.frame.size.width, height: self.timeBarBaseView.frame.size.height)
        self.timeBarView.backgroundColor = UIColor.blue

        UIView.animate(withDuration: totalLimitTime, delay: 0.0, options: [.curveLinear], animations: {
            timeBarView.frame = CGRect(x: timeBarView.frame.minX, y:  timeBarView.frame.minY, width: 0, height: timeBarView.frame.size.height)
        }, completion: nil)
    }
途中で色を変える場合
completion: nil の部分を変更することにより、アニメーション終了後の処理を記述することができます。
    /// Barの減少開始
    ///
    /// - Parameter totalLimitTime: Widthが0になるときの経過時間
    func timerStart(totalLimitTime: TimeInterval) {
        // timeBarViewの位置と色を初期化
        self.timeBarView.frame = CGRect(x: 0, y: 0, width: self.timeBarBaseView.frame.size.width, height: self.timeBarBaseView.frame.size.height)
        self.timeBarView.backgroundColor = UIColor.blue

        UIView.animate(withDuration: totalLimitTime / 2, delay: 0.0, options: [.curveLinear], animations: {
            self.timeBarView.frame = CGRect(x: self.timeBarView.frame.minX, y:  self.timeBarView.frame.minY, width: self.timeBarView.frame.size.width / 2, height: self.timeBarView.frame.size.height)
        }, completion: { _ in
            self.timeBarView.backgroundColor = UIColor.yellow
            UIView.animate(withDuration: totalLimitTime / 2, delay: 0.0, options: [.curveLinear], animations: {
                self.timeBarView.frame = CGRect(x: self.timeBarView.frame.minX, y:  self.timeBarView.frame.minY, width: 0, height: self.timeBarView.frame.size.height)
            }, completion: nil)
        })
    }
三段階に変更して、最後に点滅
Viewのalpha値を繰り返しのアニメーションで変更することにより実装
    /// Barの減少開始
    ///
    /// - Parameter
    ///   - totalLimitTime: Widthが0になるときの経過時間
    ///   - firstBetweenTime: timeBarViewが青でいる時間
    ///   - secondBetweenTime:  timeBarViewが黄でいる時間
    ///   - thirdBetweenTime:  timeBarViewが赤でいる時間
    func timerStart(totalLimitTime: TimeInterval, firstBetweenTime: TimeInterval, secondBetweenTime: TimeInterval ,thirdBetweenTime: TimeInterval) {
        // timeBarViewの位置と色を初期化
        self.timeBarView.frame = CGRect(x: 0, y: 0, width: self.timeBarBaseView.frame.size.width, height: self.timeBarBaseView.frame.size.height)
        self.timeBarView.backgroundColor = UIColor.blue

        // 時間に合わせてwidthを設定
        let firstTimeBarWidth = self.timeBarViewWidth * CGFloat(firstBetweenTime) / CGFloat(totalLimitTime)
        let secondTimeBarWidth = self.timeBarViewWidth * CGFloat(thirdBetweenTime) / CGFloat(totalLimitTime)

        UIView.animate(withDuration: firstBetweenTime, delay: 0.0, options: [.curveLinear], animations: {
            self.timeBarView.frame = CGRect(x: self.timeBarView.frame.minX, y:  self.timeBarView.frame.minY, width: firstTimeBarWidth, height: self.timeBarView.frame.size.height)
        }, completion: { _ in
            self.timeBarView.backgroundColor = UIColor.yellow
            UIView.animate(withDuration: secondBetweenTime, delay: 0.0, options: [.curveLinear], animations: {
                self.timeBarView.frame = CGRect(x: self.timeBarView.frame.minX, y:  self.timeBarView.frame.minY, width: secondTimeBarWidth, height: self.timeBarView.frame.size.height)
            }, completion: { _ in
                self.timeBarView.backgroundColor = UIColor.red
                // 点滅を始める
                UIView.animate(withDuration: 1.0, delay: 0, options: [.autoreverse ,.repeat], animations: {
                    self.timeBarView.alpha = 0.2
                }, completion: nil)
                UIView.animate(withDuration: thirdBetweenTime, delay: 0.0, options: [.curveLinear], animations: {
                    self.timeBarView.frame = CGRect(x: self.timeBarView.frame.minX, y:  self.timeBarView.frame.minY, width: 0, height: self.timeBarView.frame.size.height)
                }, completion: { _ in
                    print("時間切れ!")
                })
            })
        })
    }
点滅を実装した際、UIView.animateKeyframesでは上手く点滅の表現が出来なかっただめ、全てUIView.animateで実装致しました。
もし他に良いやり方がある場合はぜひコメントやリプ等で教えていただけるととても嬉しいです。
