前回の続きで、ほぼオマケレベルの「BluePill」がどの程度使えるのか試しています。
今回はCDC(Communication Device Class)をつかってみます。普通のArduinoボードにはUSBシリアル変換ICが載っており、デフォルトはそれで通信をしているようです。BluePillやBlackPillにそのようなICはありませんが、その代わりにCDCの機能が使えます。
まずは「ArduinoIDE 2.3.2」で使うために、「Tools」ではこのように設定しました。
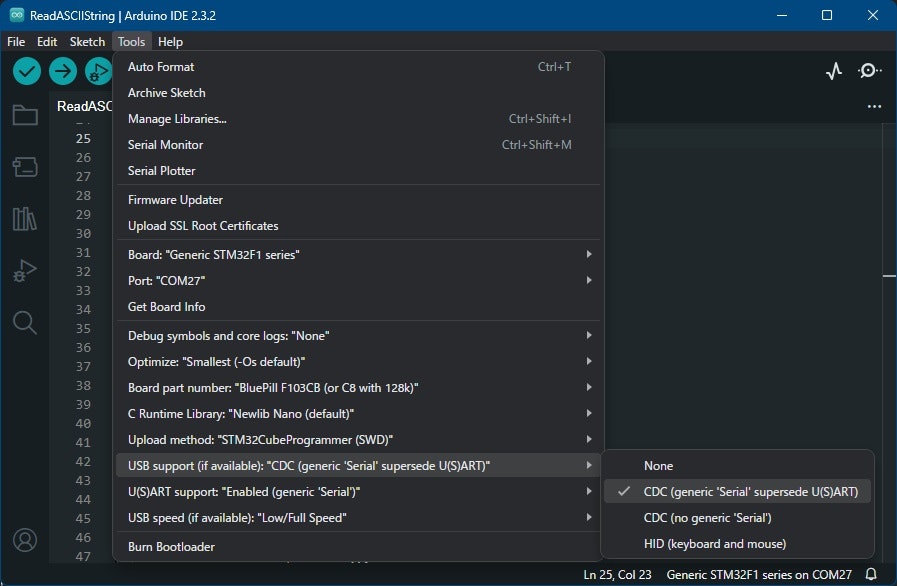
STM32CubeProgrammerで見ると「Flash size 128KB」なので、
Board part number:"BluePill F103CB(or C8 with 128k)
としてます。
Examples -> 04.Communication -> ReadASCIIString
を読み込んで少し変更を加えます。
ReadASIIString_1.ino
// pins for the LEDs:
const int redPin = PB10;
const int greenPin = PB1;
const int bluePin = PB0;

void setup() {
  // initialize serial:
  Serial.begin(9600);
  // make the pins outputs:
  pinMode(redPin, OUTPUT);
  pinMode(greenPin, OUTPUT);
  pinMode(bluePin, OUTPUT);
  Serial.println("Input 3 integers between delimmiter(sp or commma)");
}

void loop() {
  // if there's any serial available, read it:
  static int n=0;
  while (Serial.available() > 0) {

    // look for the next valid integer in the incoming serial stream:
    int red = Serial.parseInt();
    // do it again:
    int green = Serial.parseInt();
    // do it again:
    int blue = Serial.parseInt();

    // look for the newline. That's the end of your sentence:
    if (Serial.read() == '\n') {
      // constrain the values to 0 - 255 and invert
      // if you're using a common-cathode LED, just use "constrain(color, 0, 255);"
      red = constrain(red, 0, 255);
      green = constrain(green, 0, 255);
      blue = constrain(blue, 0, 255);

      // fade the red, green, and blue legs of the LED:
      analogWrite(redPin, red);
      analogWrite(greenPin, green);
      analogWrite(bluePin, blue);

      // print the three numbers in one string as hexadecimal:
      Serial.printf("No.%d - > R %d:",n++,red);
      Serial.printf(" G %d:",green);
      Serial.printf(" B %d\n\r",blue);
      Serial.println("Input R G B or R,G,B(0-255)");
    }
  }
}
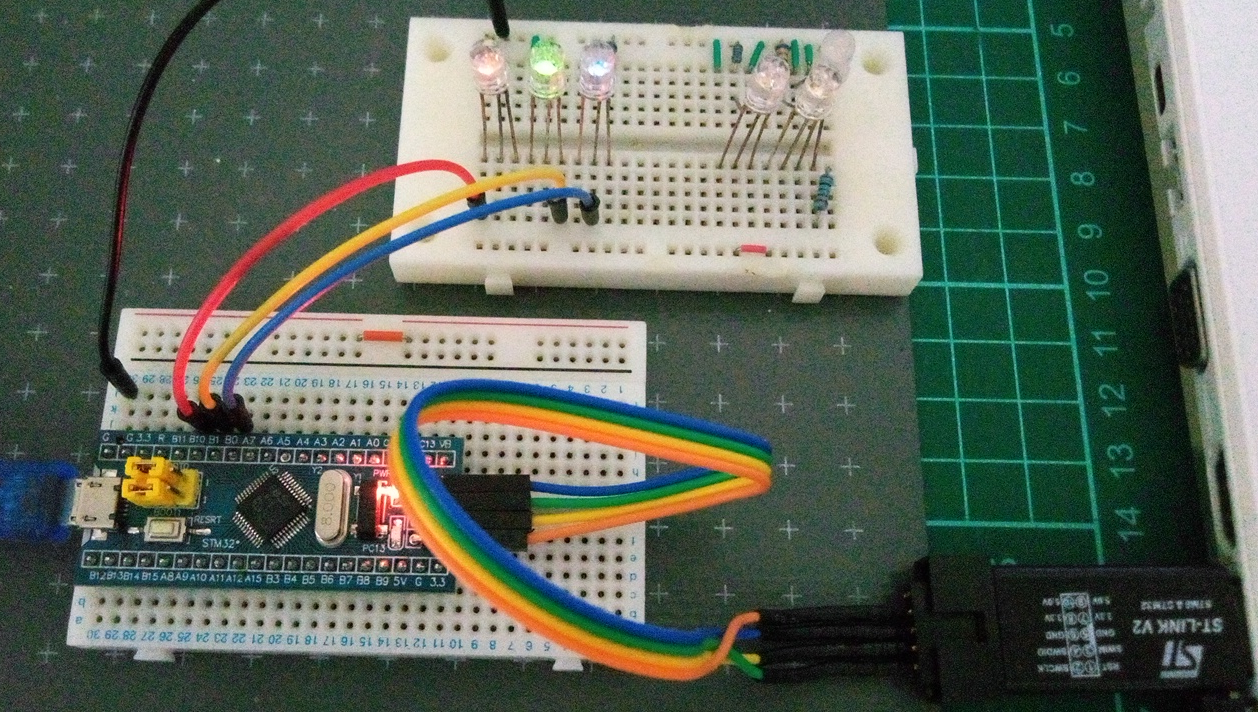
BluePillと4線(GND,SDCLK,SWDIO,3.3V)結線したST-LINKをUSBポートに、ボード本体もUSBケーブルを介しPCに接続しておきます。ArduinoIDEで普通に「Upload」をすると次のエラーが出ます。
Error: No STM32 target found!
Failed uploading: uploading error: exit status 1
そこで
ボード上のリセットボタンを押しながらUploadを始め、
コンパイルが終了し書込みが始まりそうな時点でボードのリセットボタンを離す
という”離れ業”を試してみたら、書込みが出来ました。
その後現れるシリアルポートを開き、255までの整数をスペースかカンマで区切って入力します。

USBケーブルを介して通信し、無事に動いているようです。一つ不明なのがSETUP最後、LOOP直前のSerial.printが無効になっているということです。これは「STM32CubeIDE」でも同様に起こる現象でした。それはまたの機会に。
本日も拙い内容にもかかわらず最後までご覧いただき有難うございました。