はじめに
React + CloudFront +WAF +S3を使用してメンテナンス画面を作成した備忘録です。
既存のアプリケーションにメンテナンス画面を実装し、状態管理で出しわけすることも考えたのですが、リダイレクトするまでに時間がかかり、アプリケーション画面が見えてしまうことが気になったのでこの方法を取りました。
今回の構成図
- WAFはリクエスト元のIPアドレスをチェックし、Blockとなった場合はCloudFrontに403エラーを返す
- CloudFrontのError Pagesの設定で、403エラーの向き先をメンテナンスページにし、503エラーを返すように設定する
設定方法
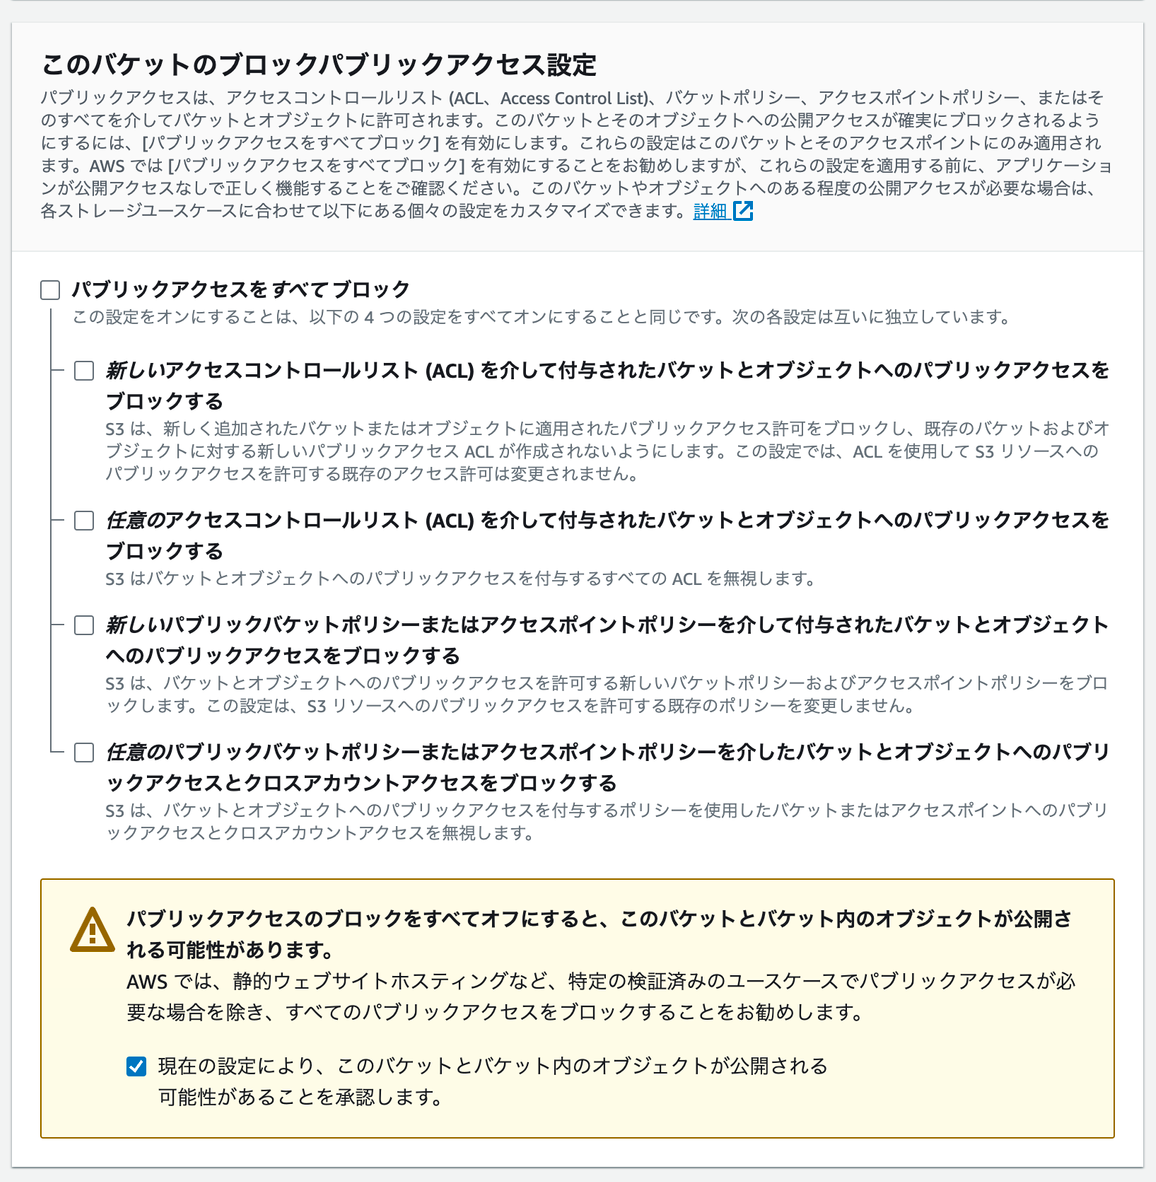
メンテナンス用のS3を作成する
作成したS3にメンテナンス用のhtmlファイルを格納する
- S3に格納するファイルはmaintenance.htmlのみ
- 今回はhtmlファイルとtypescriptファイルとcssファイルをwebpackで一つのファイルにまとめた
- 「html-inline-script-webpack-plugin」...typescriptファイルをインライン化
- 「css-minimizer-webpack-plugin」...cssファイルをインライン化
webpack.config.js
const path = require("path")
const HtmlWebpackPlugin = require("html-webpack-plugin")
const HtmlInlineScriptPlugin = require("html-inline-script-webpack-plugin")
const CssMinimizerPlugin = require("css-minimizer-webpack-plugin")

module.exports = {
    mode: "development",
    entry: "./src/index.tsx",
    output: {
        path: path.resolve(__dirname, "dist/"),
        publicPath: "/",
    },
    module: {
        rules: [
            {
                test: /\.(ts|tsx)$/,
                loader: "ts-loader",
                exclude: /node_modules/,
            },
            {
                test: /\.svg$/i,
                issuer: /\.[jt]sx?$/,
                use: ["@svgr/webpack"],
            },
            {
                test: /\.css$/i,
                use: ["style-loader", "css-loader", "postcss-loader"]
            }
        ],
    },
    plugins: [
        new HtmlWebpackPlugin({
            template: path.resolve(__dirname, "src", "index.html"),
            filename: "maintenance.html"
        }),
        new HtmlInlineScriptPlugin()
    ],
    devServer: {
        static: {
            directory: path.join(__dirname, "dist"),
        },
        hot: true,
    },
    optimization: {
        minimizer: [new CssMinimizerPlugin()],
    },
}
S3の設定を行う
- バケットポリシーを作成する
{
    "Version": "2012-10-17",
    "Statement": [
        {
            "Sid": "PublicReadGetObject",
            "Effect": "Allow",
            "Principal": "*",
            "Action": "s3:GetObject",
            "Resource": "${作成したS3のARN}"
        }
    ]
}
WAFの設定
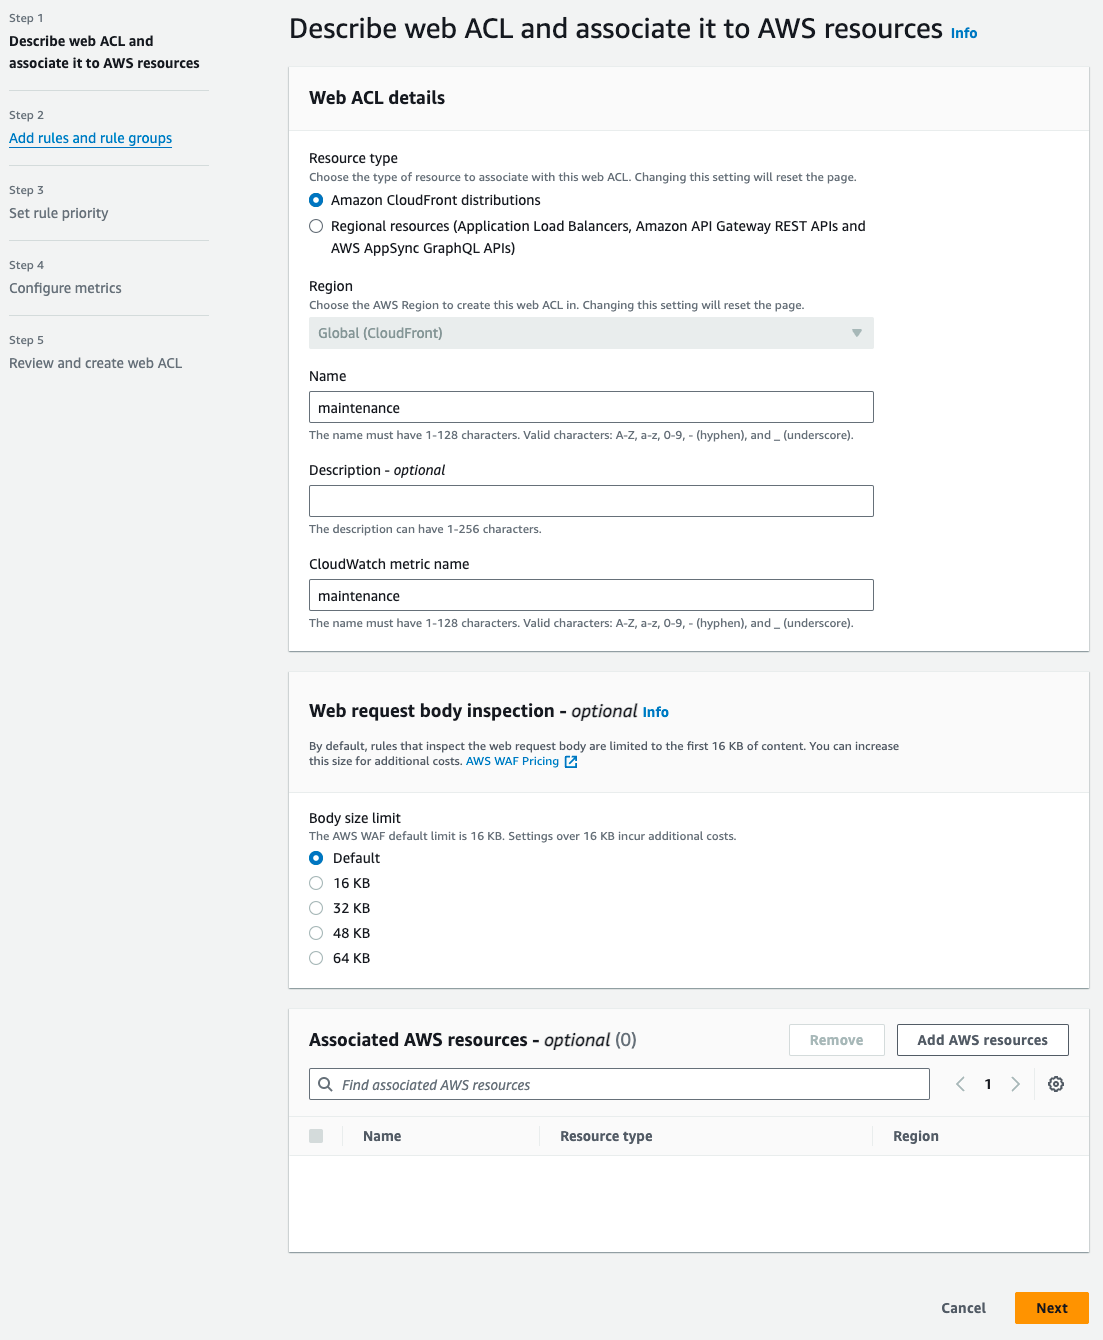
- 全てのアクセスをBlockするweb ACLを作成
*メンテナンス画面であっても表示を許可するIPアドレスを設定したい場合は、WAFでIP setを作成して、上記で作成したACLのRulesに追加する
CloudFrontの設定
- オリジンの作成
- オリジンドメインは先ほど作成したS3のバケット名
- ビヘイビアの追加
- カスタムエラーレスポンスの追加
メンテナンスモード切り替え手順
- WAF -> web ACLs から先ほど作成したmaintenanceをクリック
- 「Associated AWS resources」タブを開き、Add aws resourcesをクリック
- 該当リソースを選択してAddボタンをおす
メンテナンスモードを解除したいときは、上記で追加したリソースを削除する
まとめ
本記事ではメンテナンス画面をCloudFront +WAF +S3で表示切り替えする手順を紹介しました。
今回はメンテナンス画面を凝ったデザインで作成したかったのでS3も別途用意しましたが、HTMLのみで書ける内容であればWAFのみでメンテナンス画面の表示設定を行えるので、参考にしてみてください!


