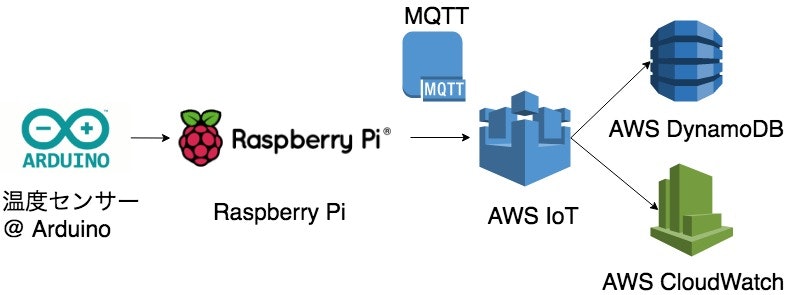
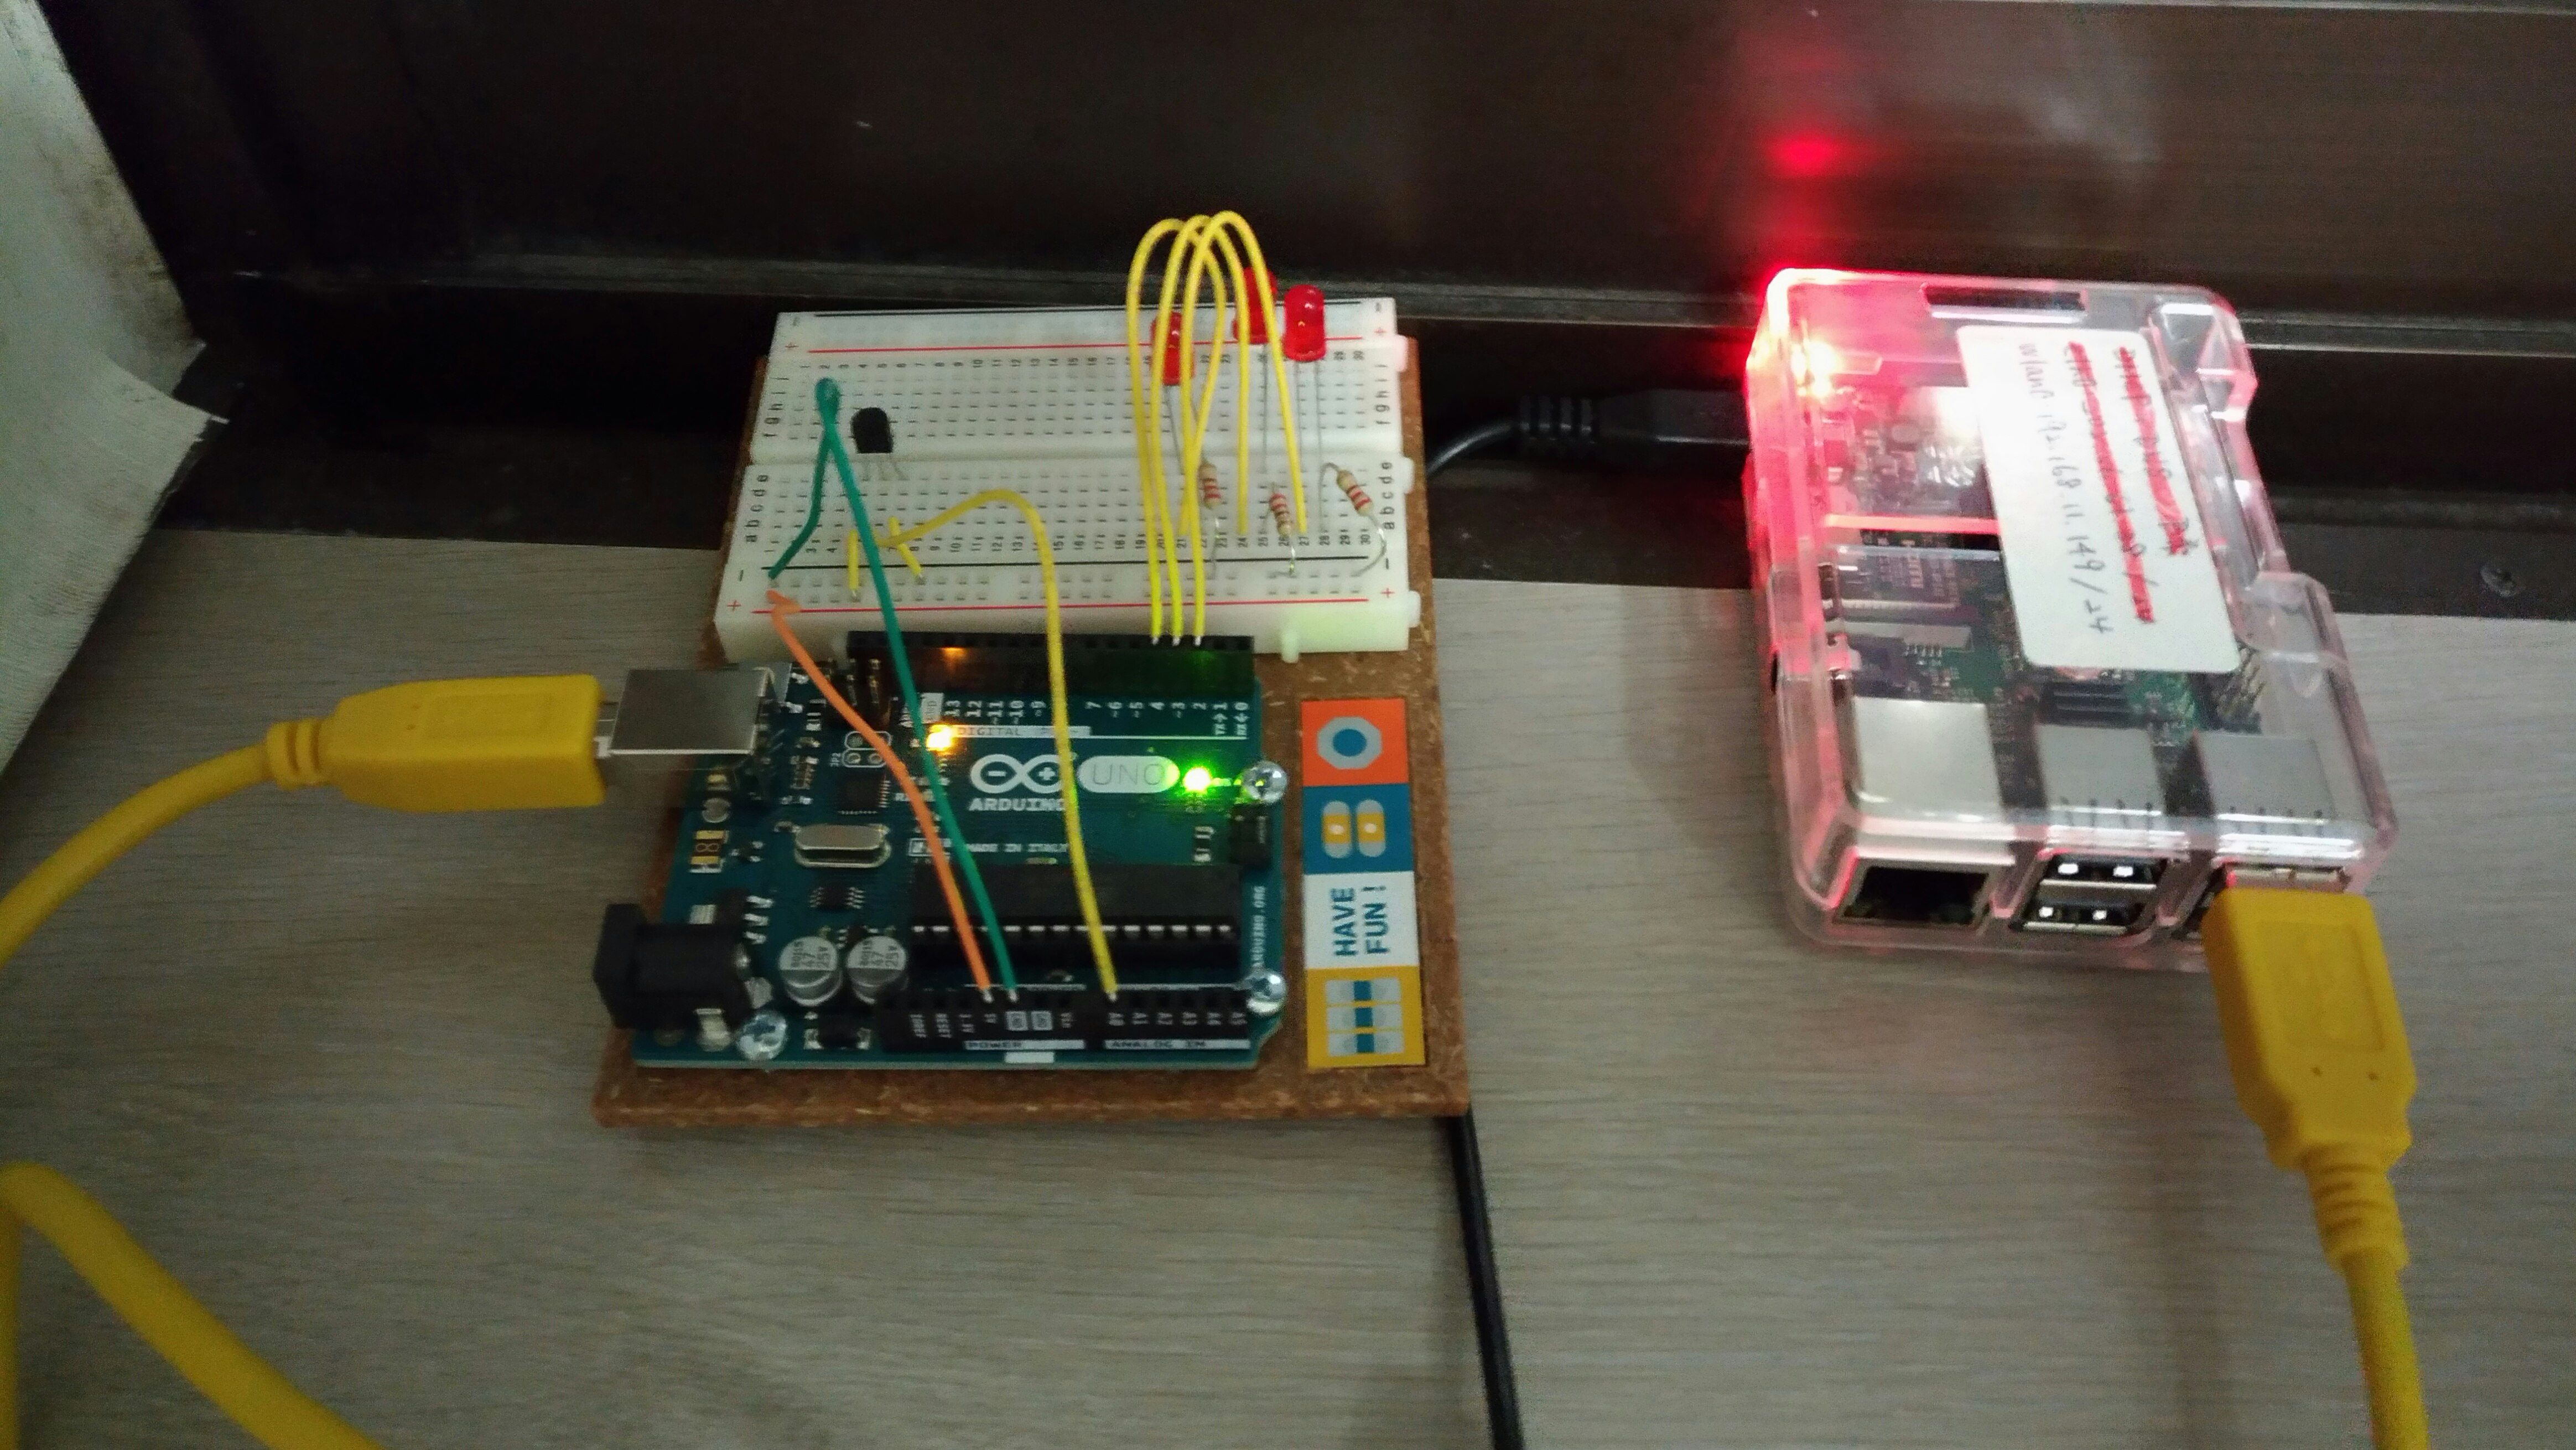
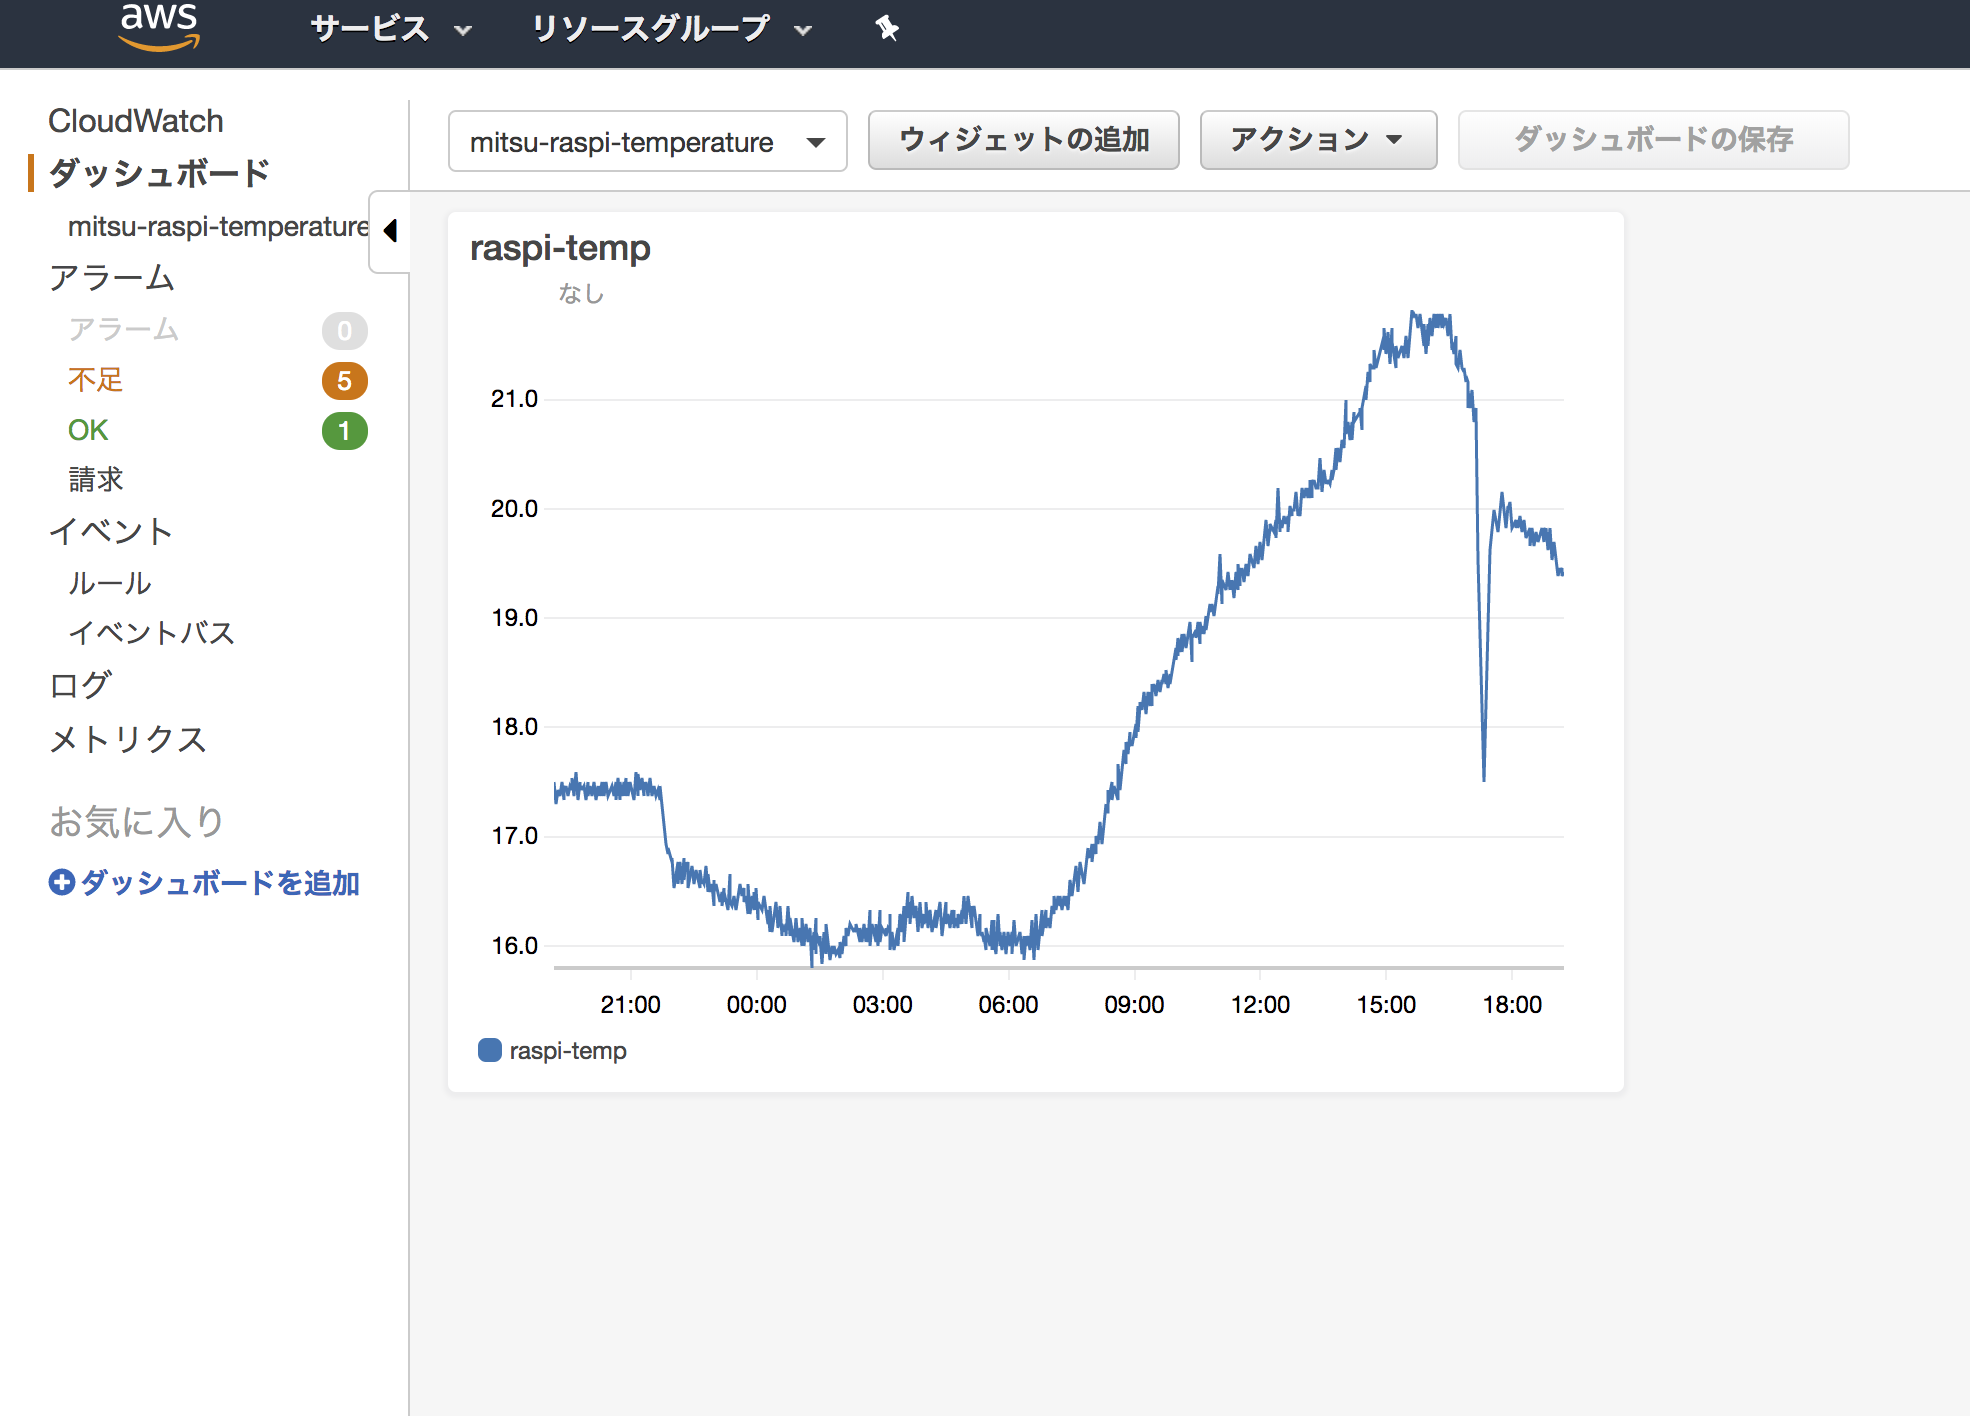
全体構成
Arduinoの設定
Arduino IDEを下記サイトからダウンロード
https://www.arduino.cc/en/Main/Software
基本的にThe Arduino Starter Kitに付属しているプロジェクトブックの通り温度センサを動かすプログラムを作成
const int sensorPin = A0;
const float baselineTemp = 25.0;

void setup() {
  Serial.begin(9600);
  for(int pinNumber =2; pinNumber<5; pinNumber++){
    pinMode(pinNumber,OUTPUT);
    digitalWrite(pinNumber, LOW);
  }

}

void loop() {
  int sensorVal = analogRead(sensorPin);
  Serial.print("Sensor Value: ");
  Serial.print(sensorVal);
  float voltage = (sensorVal/1024.0)*5;
  Serial.print(", Volts: ");
  Serial.print(voltage);
  Serial.print(", degree C: ");
  float temperature = (voltage - 0.5 )*100;
  Serial.println(temperature);

  if (temperature < baselineTemp){
    digitalWrite(2, LOW);
    digitalWrite(3, LOW);
    digitalWrite(4, LOW);
  }
  else if (temperature >= baselineTemp+2 && temperature < baselineTemp+4){
    digitalWrite(2, HIGH);
    digitalWrite(3, LOW);
    digitalWrite(4, LOW);
  }
  else if (temperature >= baselineTemp+4 && temperature < baselineTemp+6){
    digitalWrite(2, HIGH);
    digitalWrite(3, HIGH);
    digitalWrite(4, LOW);
  }
  else if (temperature >= baselineTemp+6){
    digitalWrite(2, HIGH);
    digitalWrite(3, HIGH);
    digitalWrite(4, HIGH);
  }
  delay(5000);
}
注意点
・ツールからボードとシリアルポートの設定を忘れない
忘れると avrdude: ser_open(): can't open device というerrorが出る
・delayはraspi側のシリアルの読み取りより遅くする必要がある
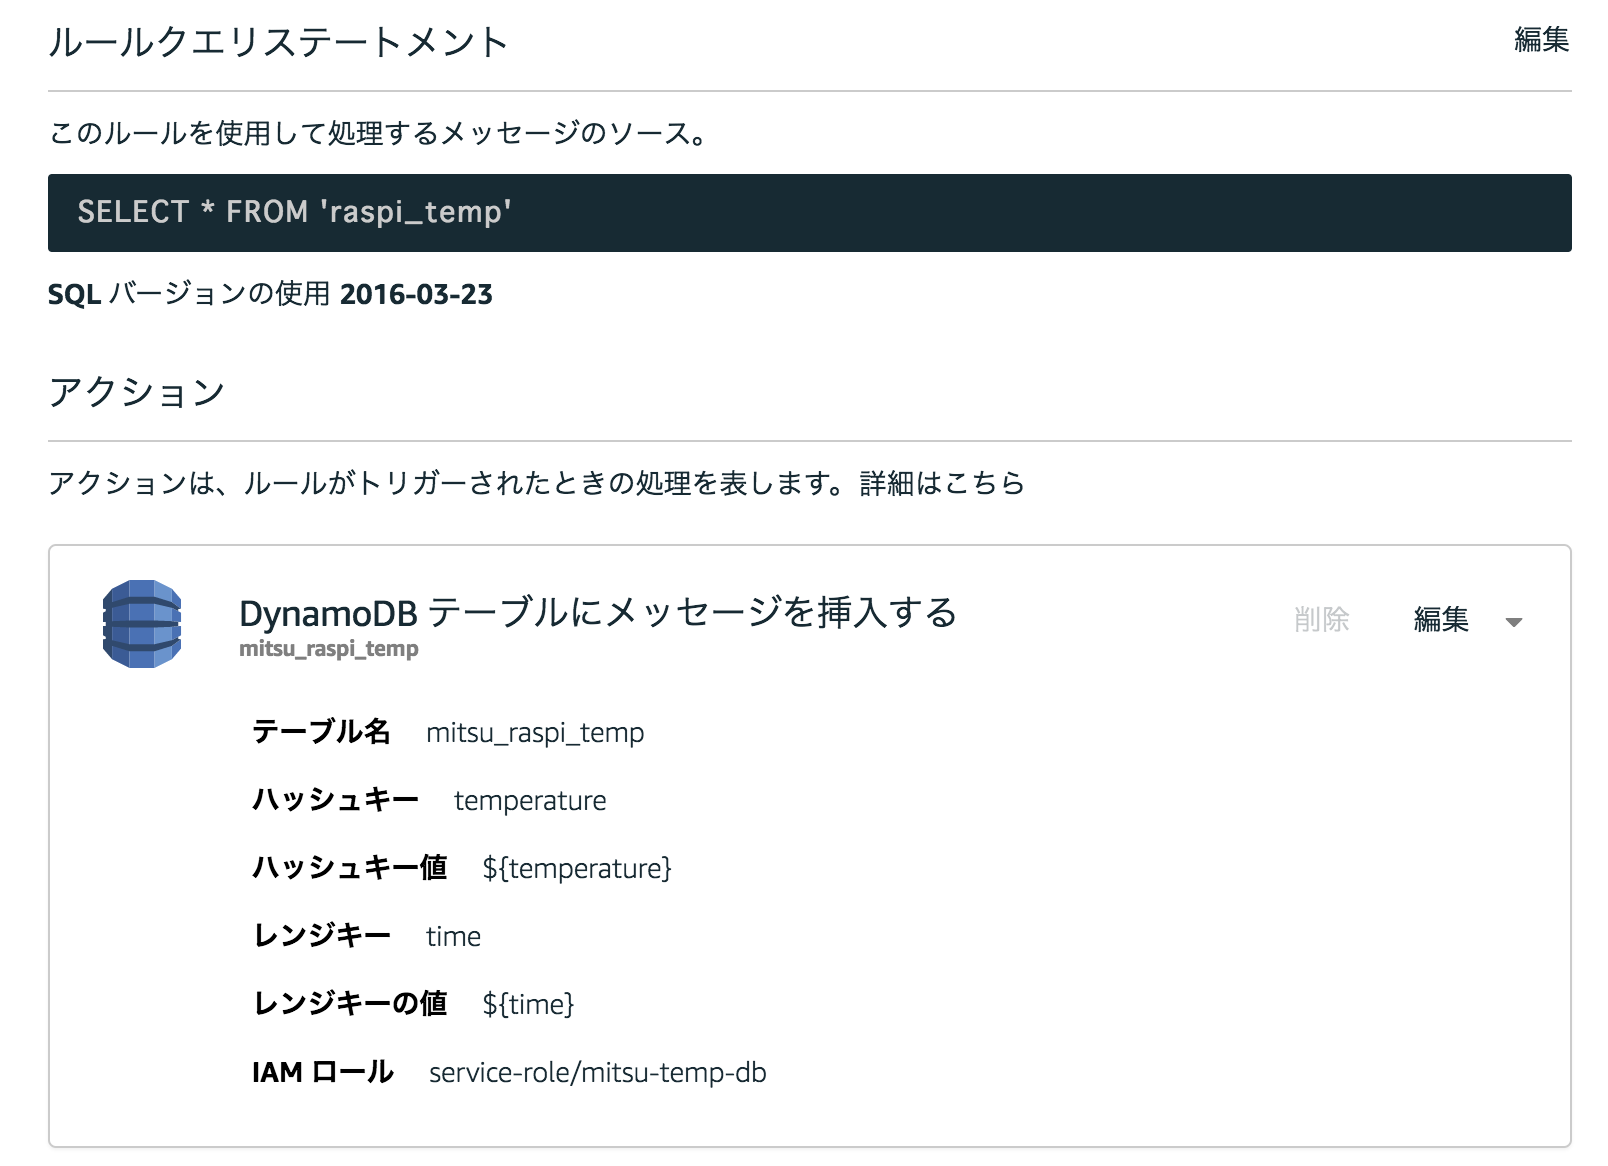
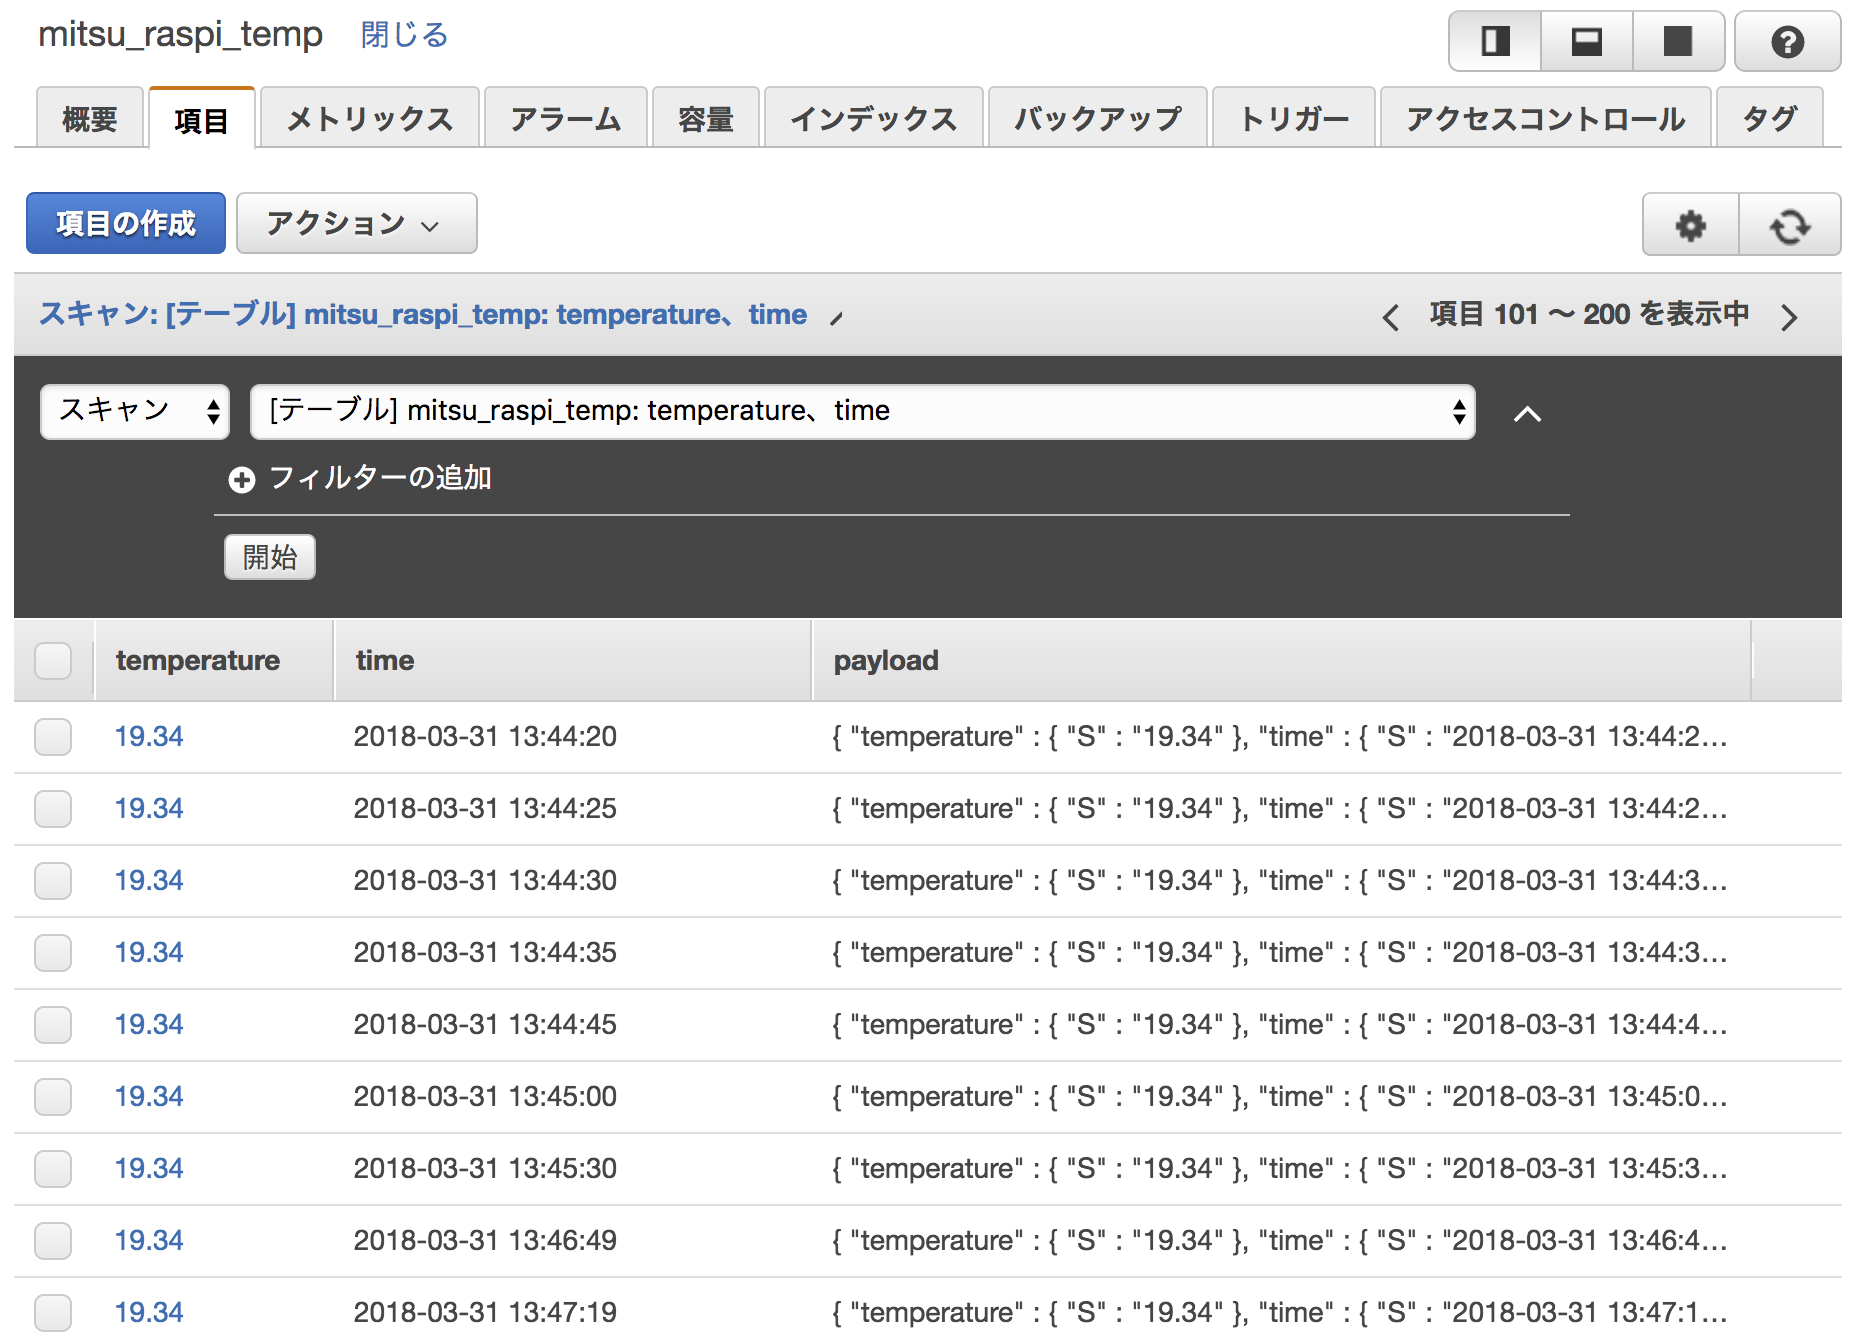
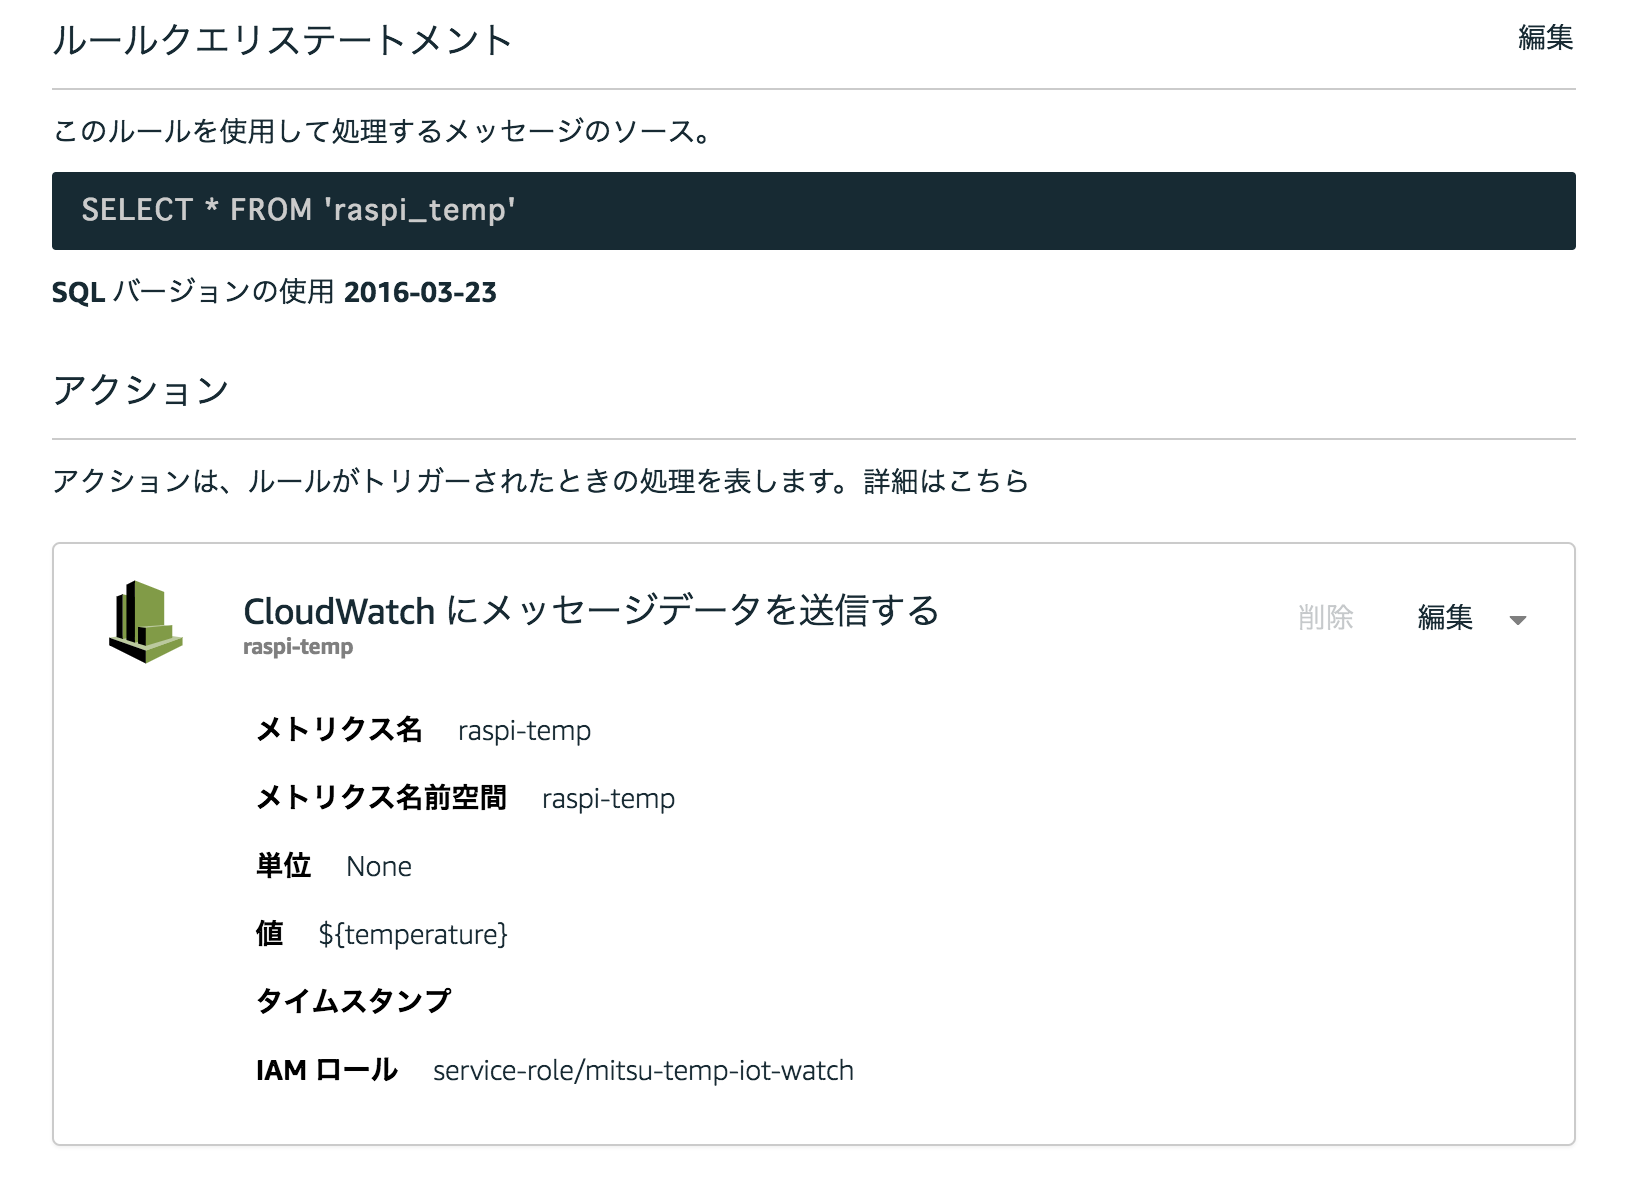
AWS IoTの設定
下記のサイトを参考
https://qiita.com/hase-ken/items/8d2d66e002625ca46e11
https://qiita.com/YamauchiHideki/items/13e1e6a28d4b71f7d159
https://qiita.com/h-sakano/items/f5cac9e1e81f93fc9277
rapiの設定
arduinoとの接続は付属のUSBケーブルで
上のサイトでも紹介されているようにpythonのAWS IoT用のSDKを使用する
sudo pip install AWSIoTPythonSDK
git clone https://github.com/aws/aws-iot-device-sdk-python.git
exampleにあるbasicPubSub.pyを改造して使用する
シリアル通信でAruduinoからの温度情報を読み取り現在時刻と合わせてMQTTでAWS IoTにpublishする。-tでtopic名を指定するのを忘れず
nohup python temp-iot.py --endpoint xxxxxxxx.iot.ap-northeast-1.amazonaws.com --rootCA ../cert/rootCA.pem --cert ../cert/xxxxxx-certificate.pem.crt --key ../cert/xxxxxx-private.pem.key -t raspi_temp &
from AWSIoTPythonSDK.MQTTLib import AWSIoTMQTTClient
import logging
import time
import argparse
import json
import serial
import time
import datetime
import boto3

# Read in command-line parameters
parser = argparse.ArgumentParser()
parser.add_argument("-e", "--endpoint", action="store", required=True, dest="host", help="Your AWS IoT custom endpoint")
parser.add_argument("-r", "--rootCA", action="store", required=True, dest="rootCAPath", help="Root CA file path")
parser.add_argument("-c", "--cert", action="store", dest="certificatePath", help="Certificate file path")
parser.add_argument("-k", "--key", action="store", dest="privateKeyPath", help="Private key file path")
parser.add_argument("-w", "--websocket", action="store_true", dest="useWebsocket", default=False,
                    help="Use MQTT over WebSocket")
parser.add_argument("-id", "--clientId", action="store", dest="clientId", default="basicPubSub",
                    help="Targeted client id")
parser.add_argument("-t", "--topic", action="store", dest="topic", default="sdk/test/Python", help="Targeted topic")

parser.add_argument("-M", "--message", action="store", dest="message", default="Hello World!",
                    help="Message to publish")

args = parser.parse_args()
host = args.host
rootCAPath = args.rootCAPath
certificatePath = args.certificatePath
privateKeyPath = args.privateKeyPath
useWebsocket = args.useWebsocket
clientId = args.clientId
topic = args.topic

# Init AWSIoTMQTTClient
myAWSIoTMQTTClient = None
myAWSIoTMQTTClient = AWSIoTMQTTClient(clientId)
myAWSIoTMQTTClient.configureEndpoint(host, 8883)
myAWSIoTMQTTClient.configureCredentials(rootCAPath, privateKeyPath, certificatePath)

# AWSIoTMQTTClient connection configuration
myAWSIoTMQTTClient.configureAutoReconnectBackoffTime(1, 32, 20)
myAWSIoTMQTTClient.configureOfflinePublishQueueing(-1)  # Infinite offline Publish queueing
myAWSIoTMQTTClient.configureDrainingFrequency(2)  # Draining: 2 Hz
myAWSIoTMQTTClient.configureConnectDisconnectTimeout(100)  # 10 sec
myAWSIoTMQTTClient.configureMQTTOperationTimeout(100)  # 5 sec

# Connect and subscribe to AWS IoT
myAWSIoTMQTTClient.connect()
time.sleep(2)

# Publish to the same topic in a loop forever
while True:
	seri = serial.Serial('/dev/ttyACM0', 9600, timeout=10)
	sensor = seri.readline()
	d = datetime.datetime.today()
	now = d.strftime("%Y-%m-%d %H:%M:%S")
	temperature = sensor[-7:-2]
    message = {}
    message['time'] = now
    message['temperature'] = temperature
    messageJson = json.dumps(message)
    myAWSIoTMQTTClient.publish(topic, messageJson, 1)
    print('Published topic %s: %s\n' % (topic, messageJson))
    time.sleep(1)
注意点
・通信が悪い時にはMQTTOperationTimeoutは長めにとる
・シリアル通信にはpyserialを使う
pip install pyserial
