構想
RaspberryPiから送信したセンサの情報をAWSIoTを使って、DynamoDBに格納する。
格納した情報をLambdaを使ってCloudWatchに流し、モニタリングする。
AWS IoTにモノを登録する
まずはAWSIoTに接続するモノを登録する。
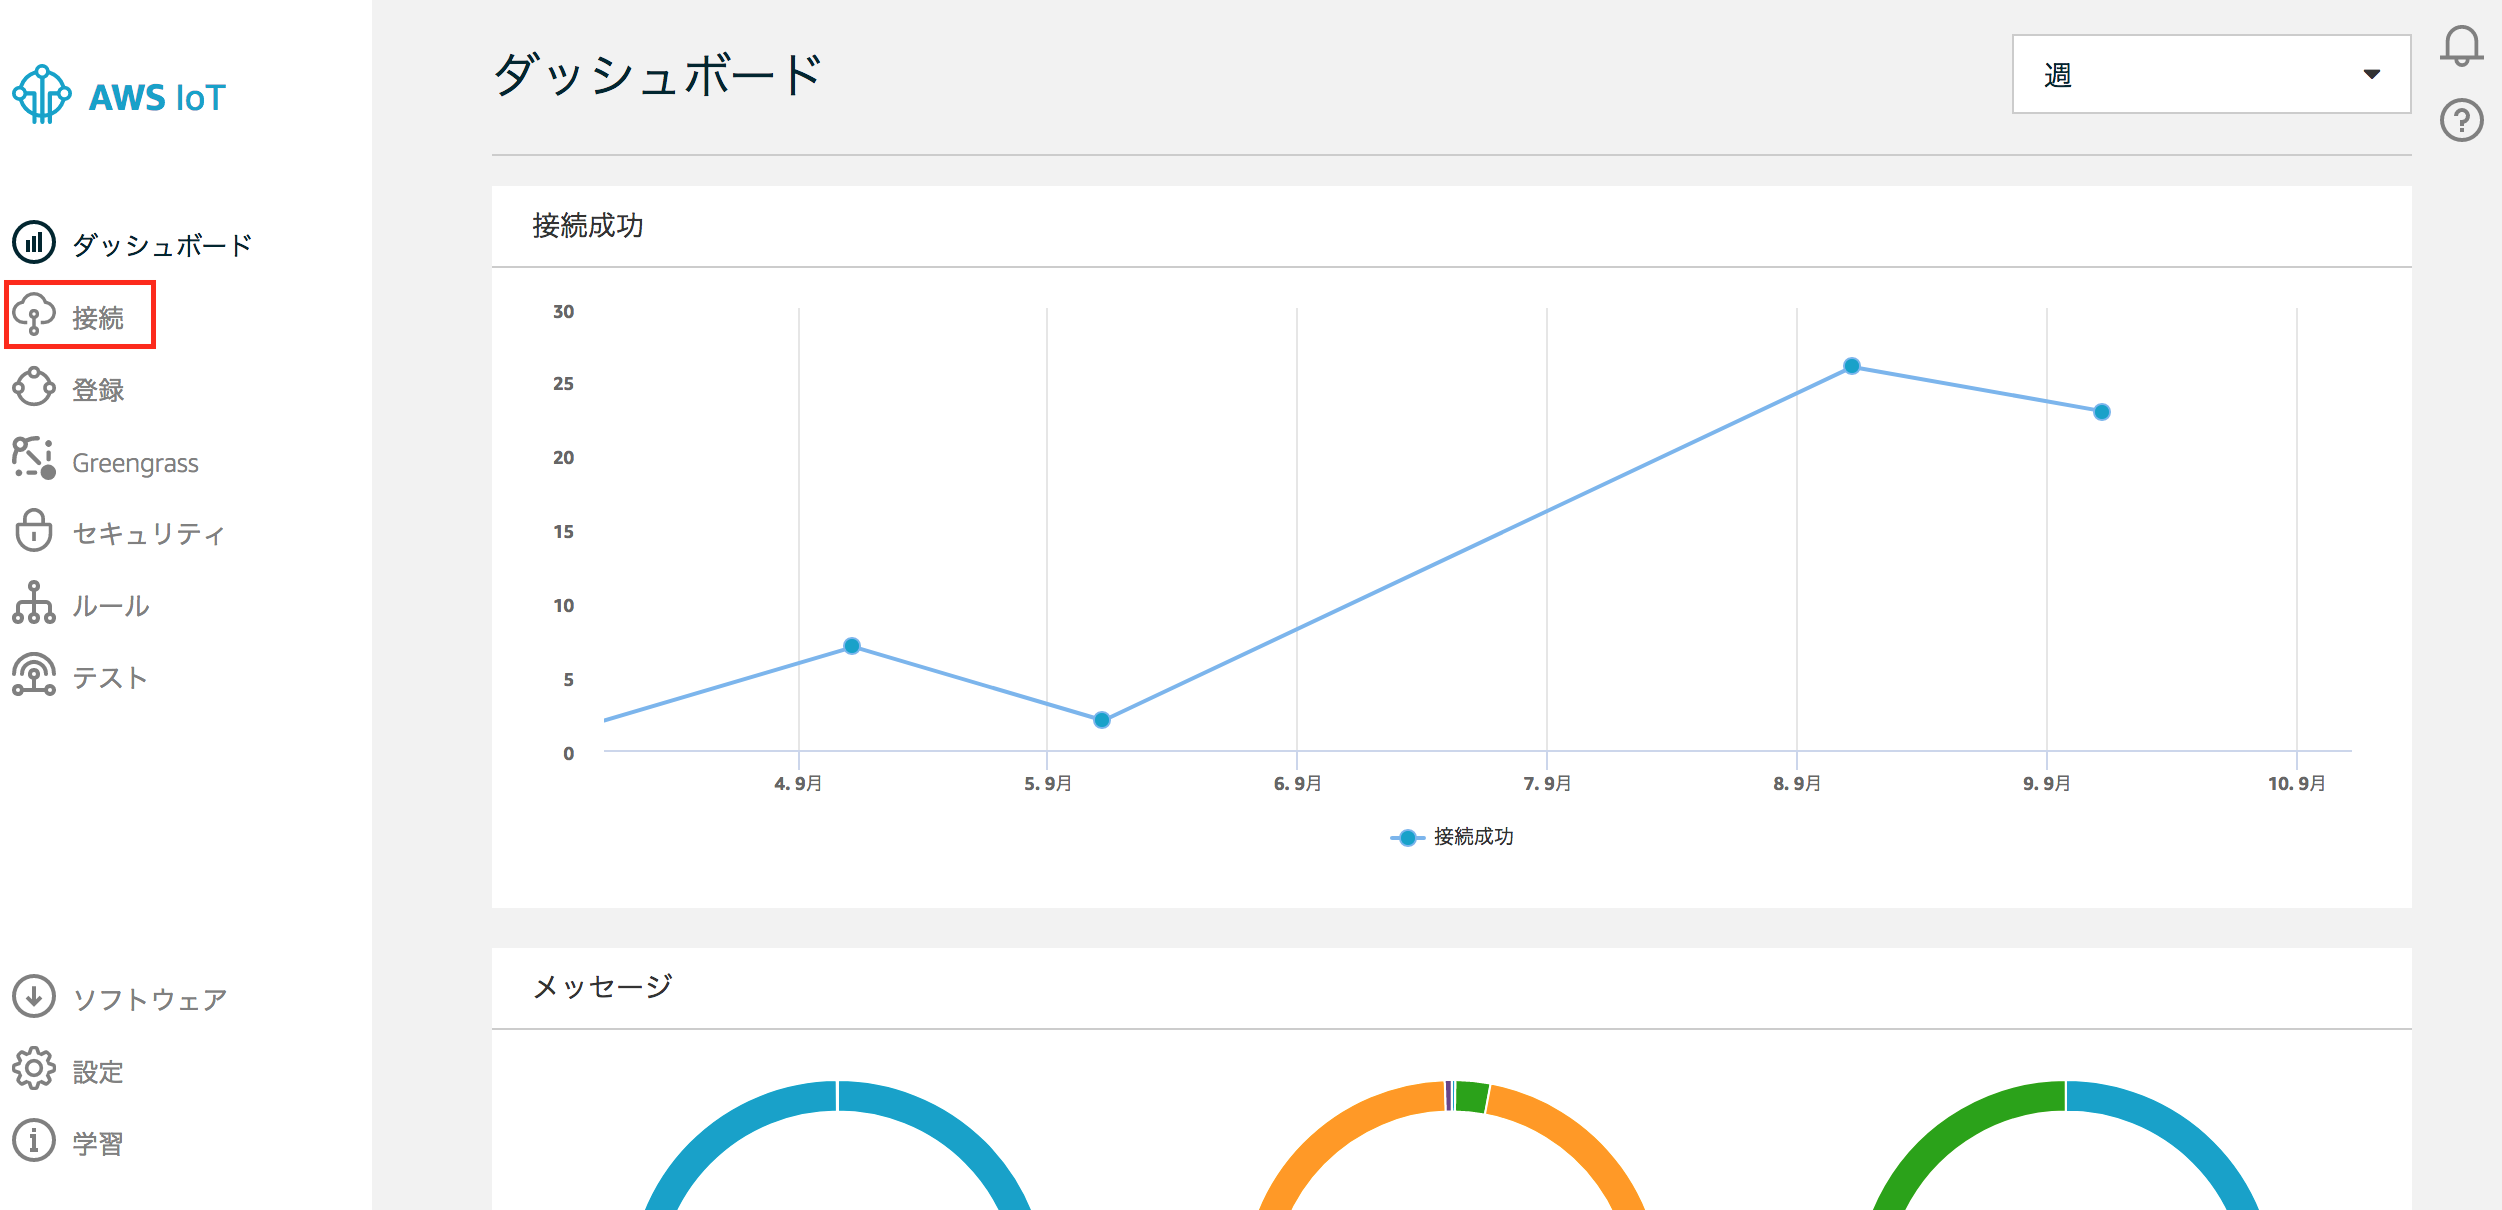
接続をクリック
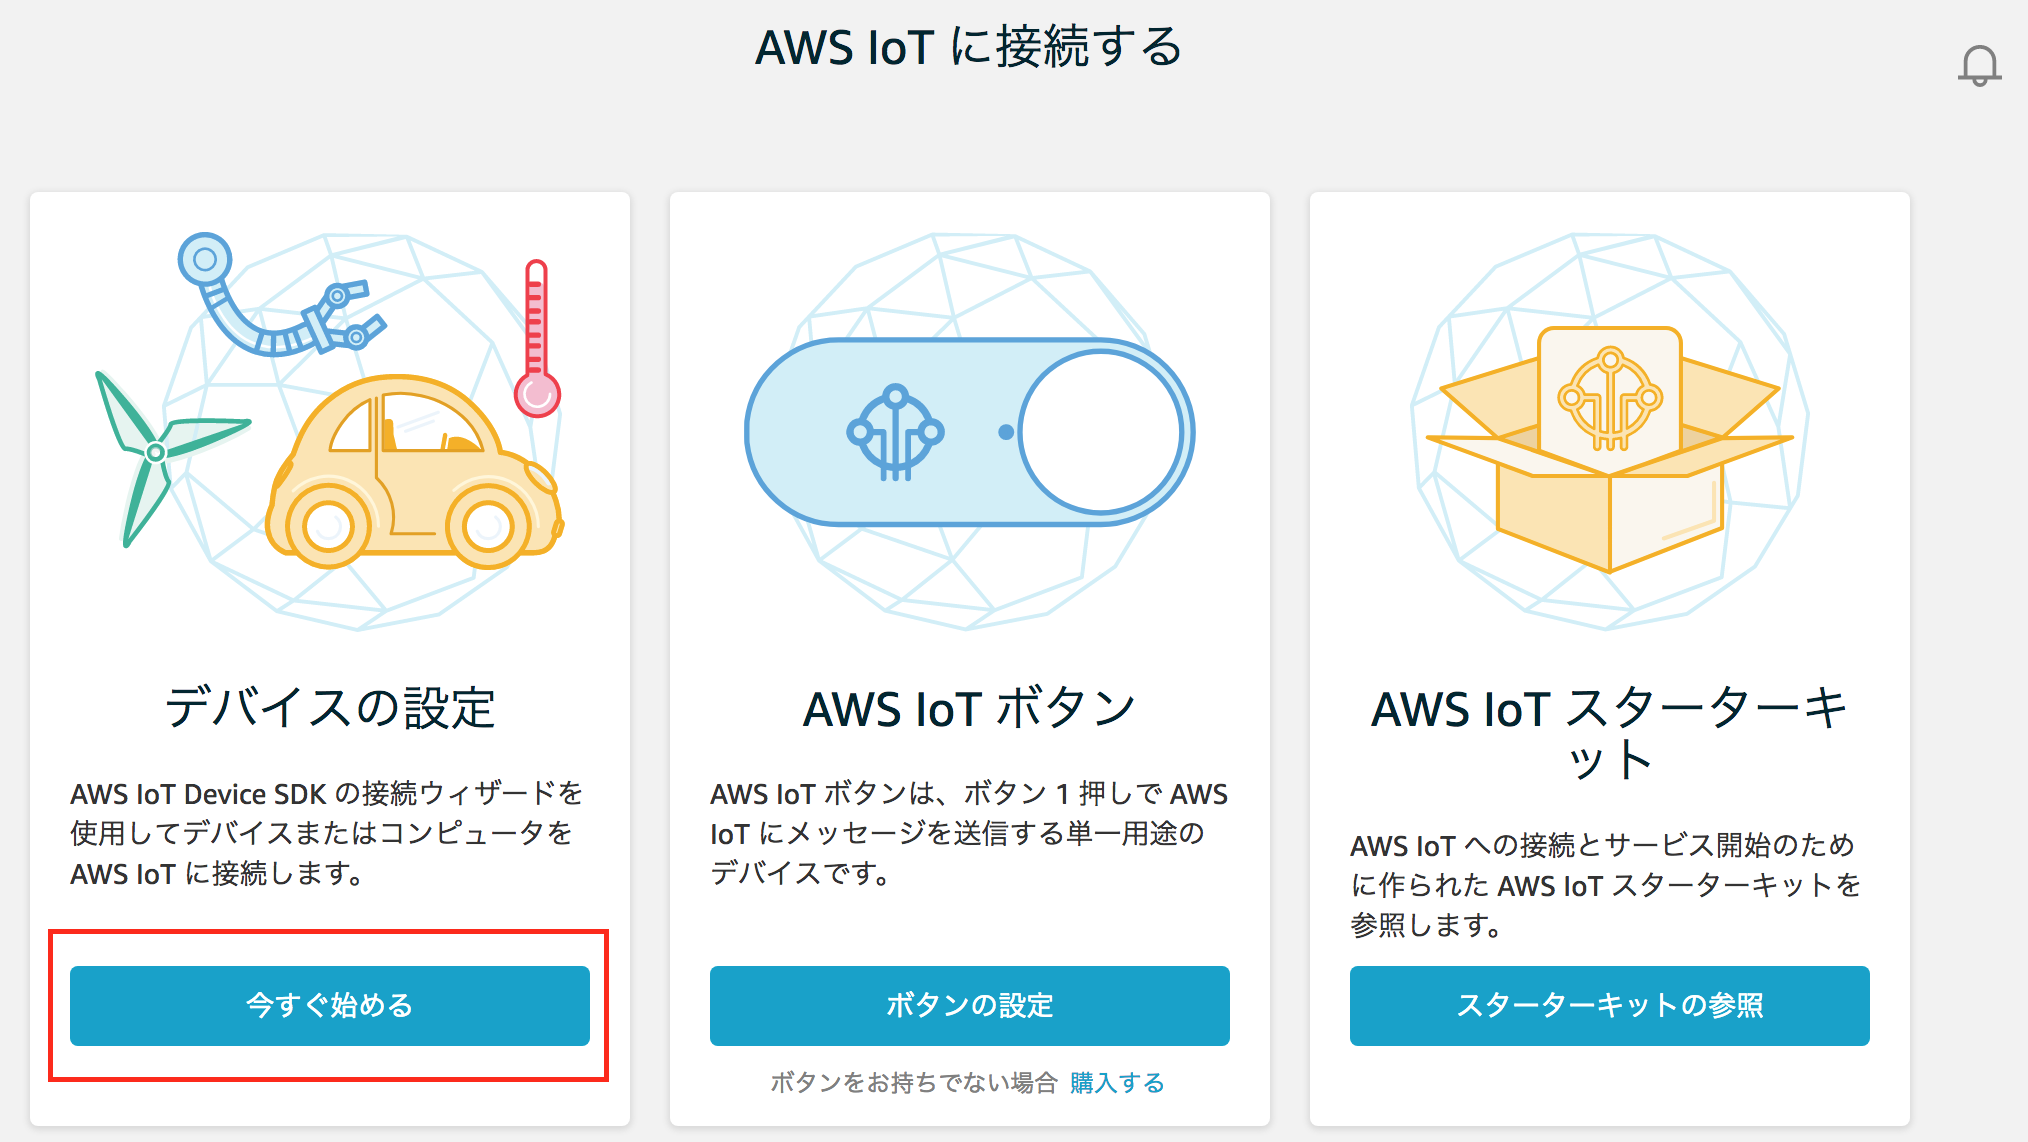
デバイスの設定の今すぐ始めるをクリック
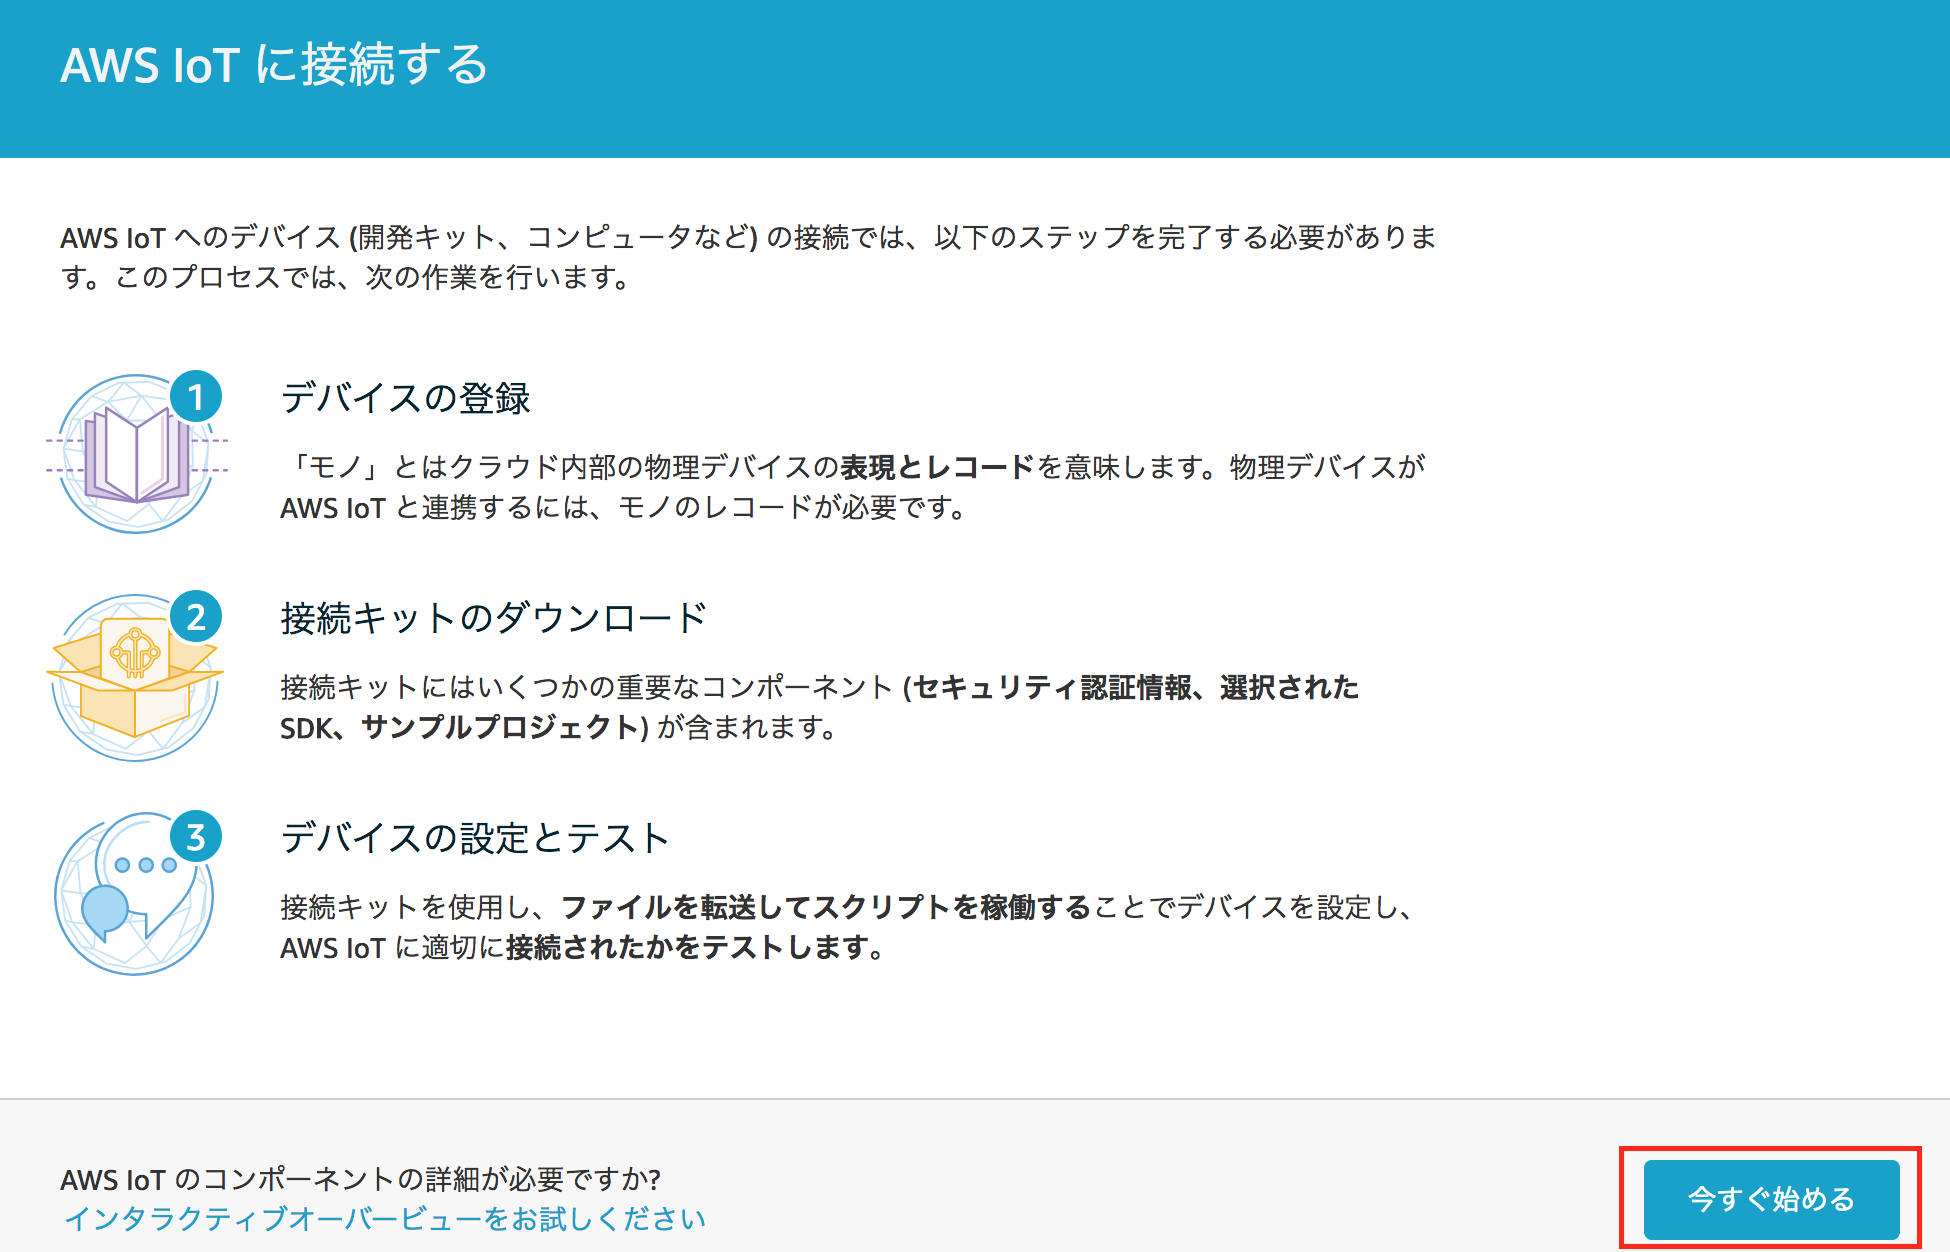
手順を確認して今すぐ始めるをクリック
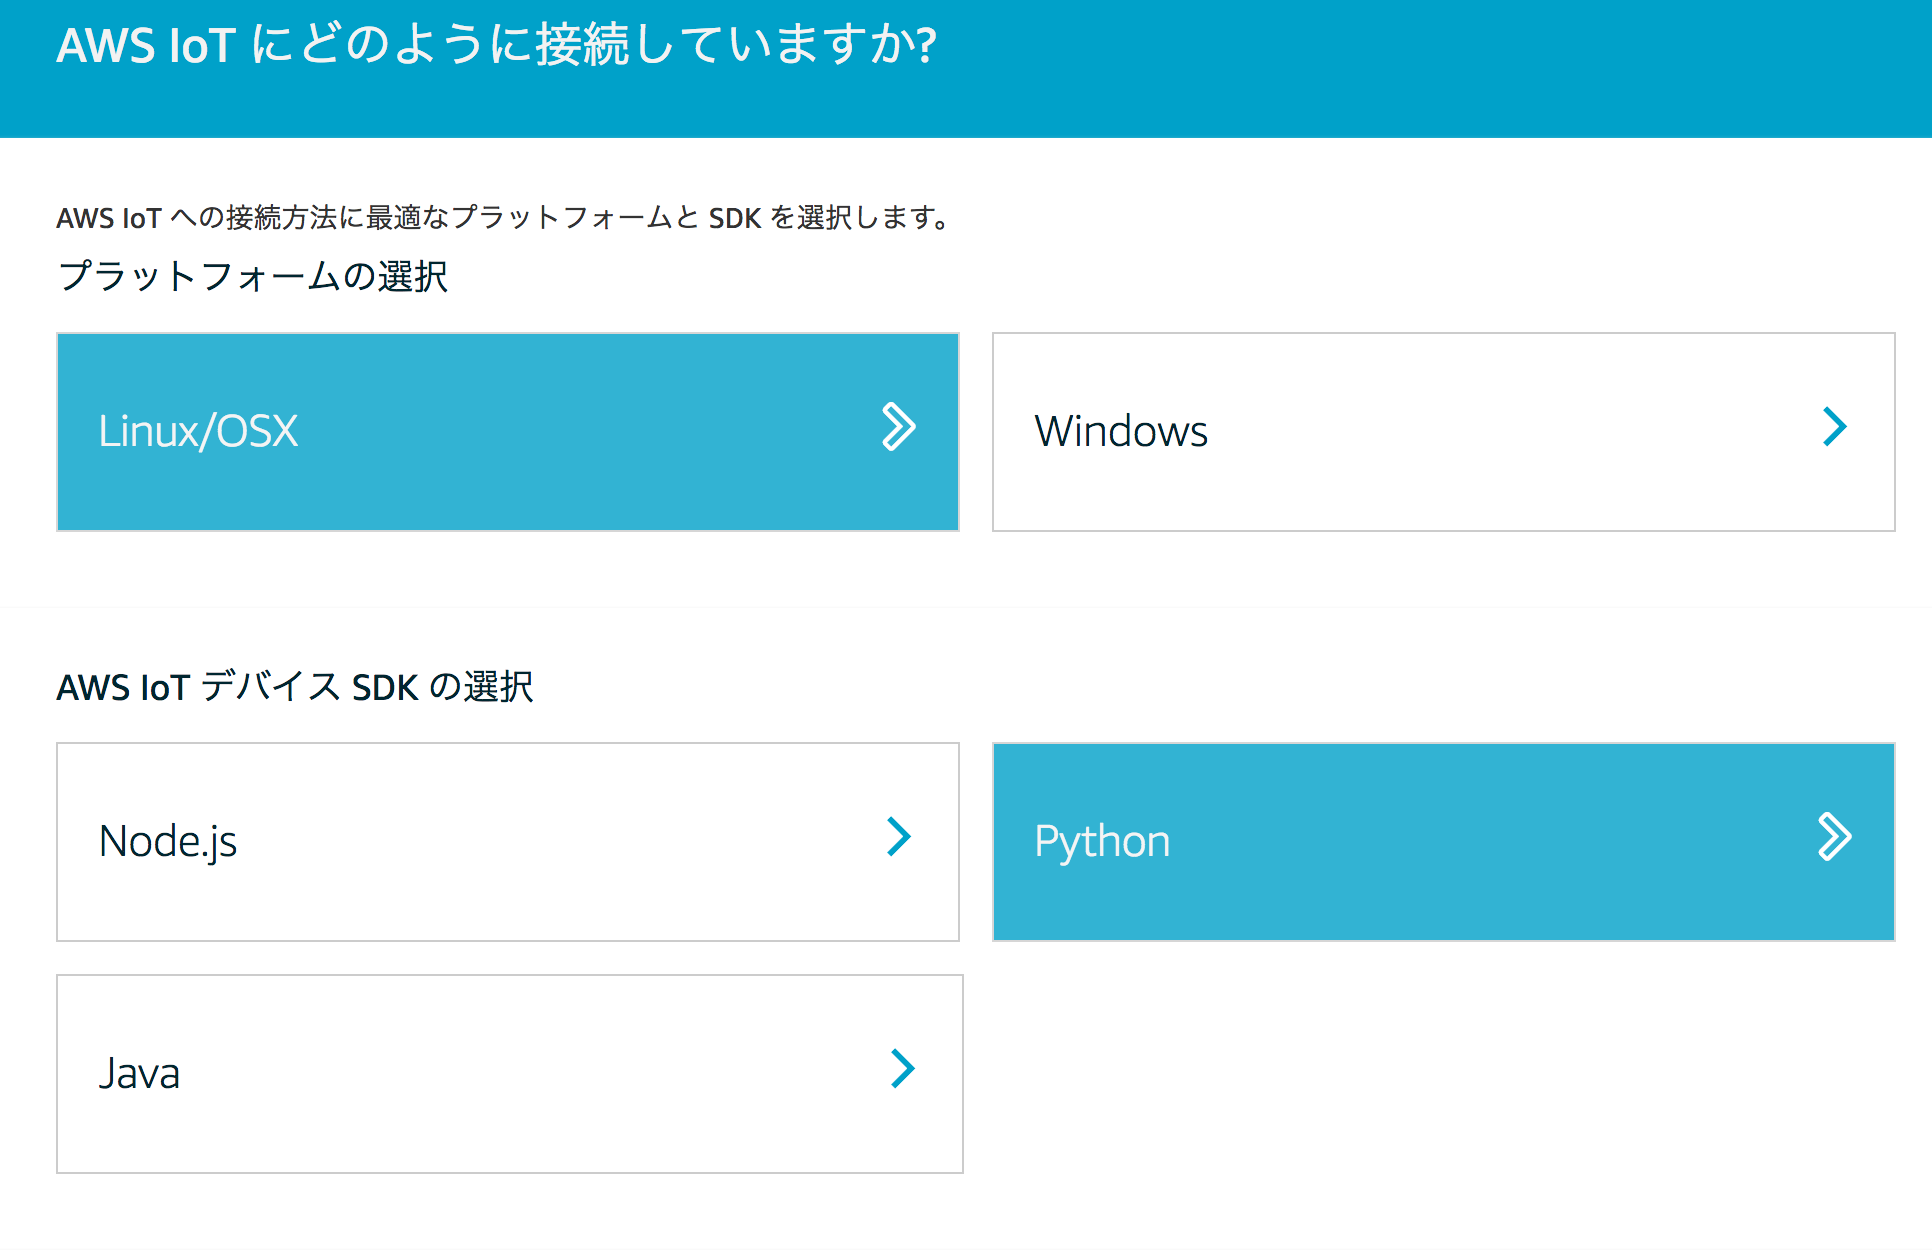
接続するモノの環境を選択
今回はRaspberryPiを使用するのでOSはLinux、言語はPythonを選択する。
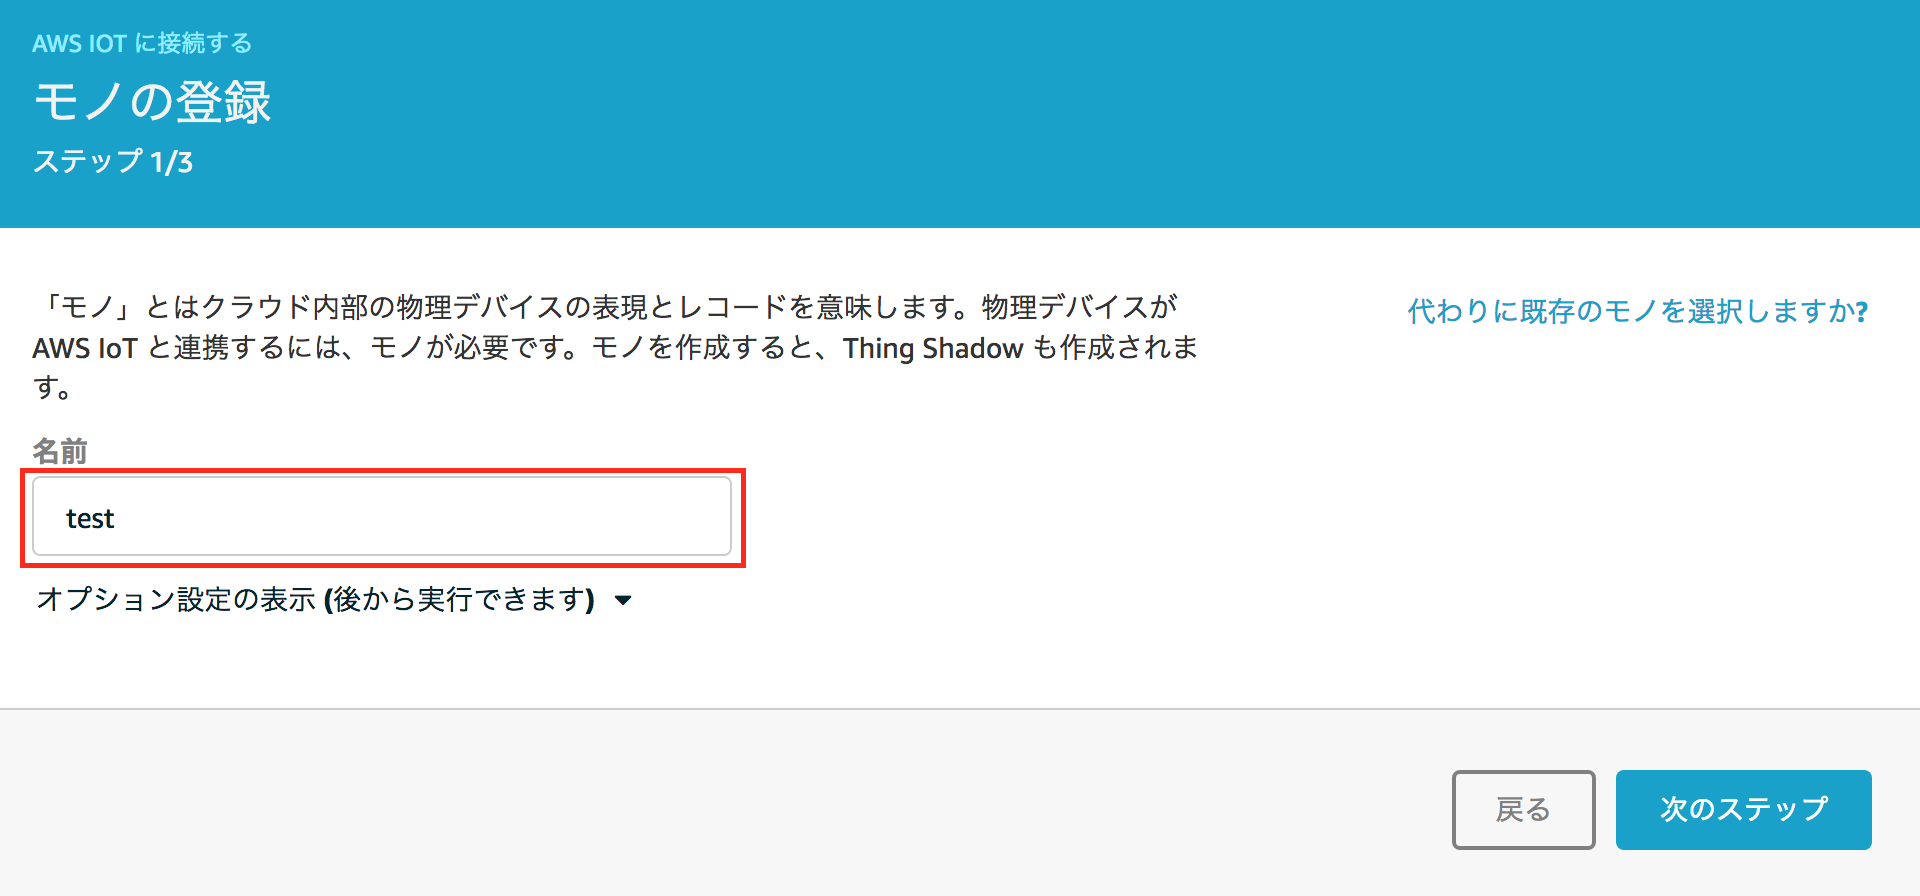
モノの名前を設定する
自分の好きな名前で良い。
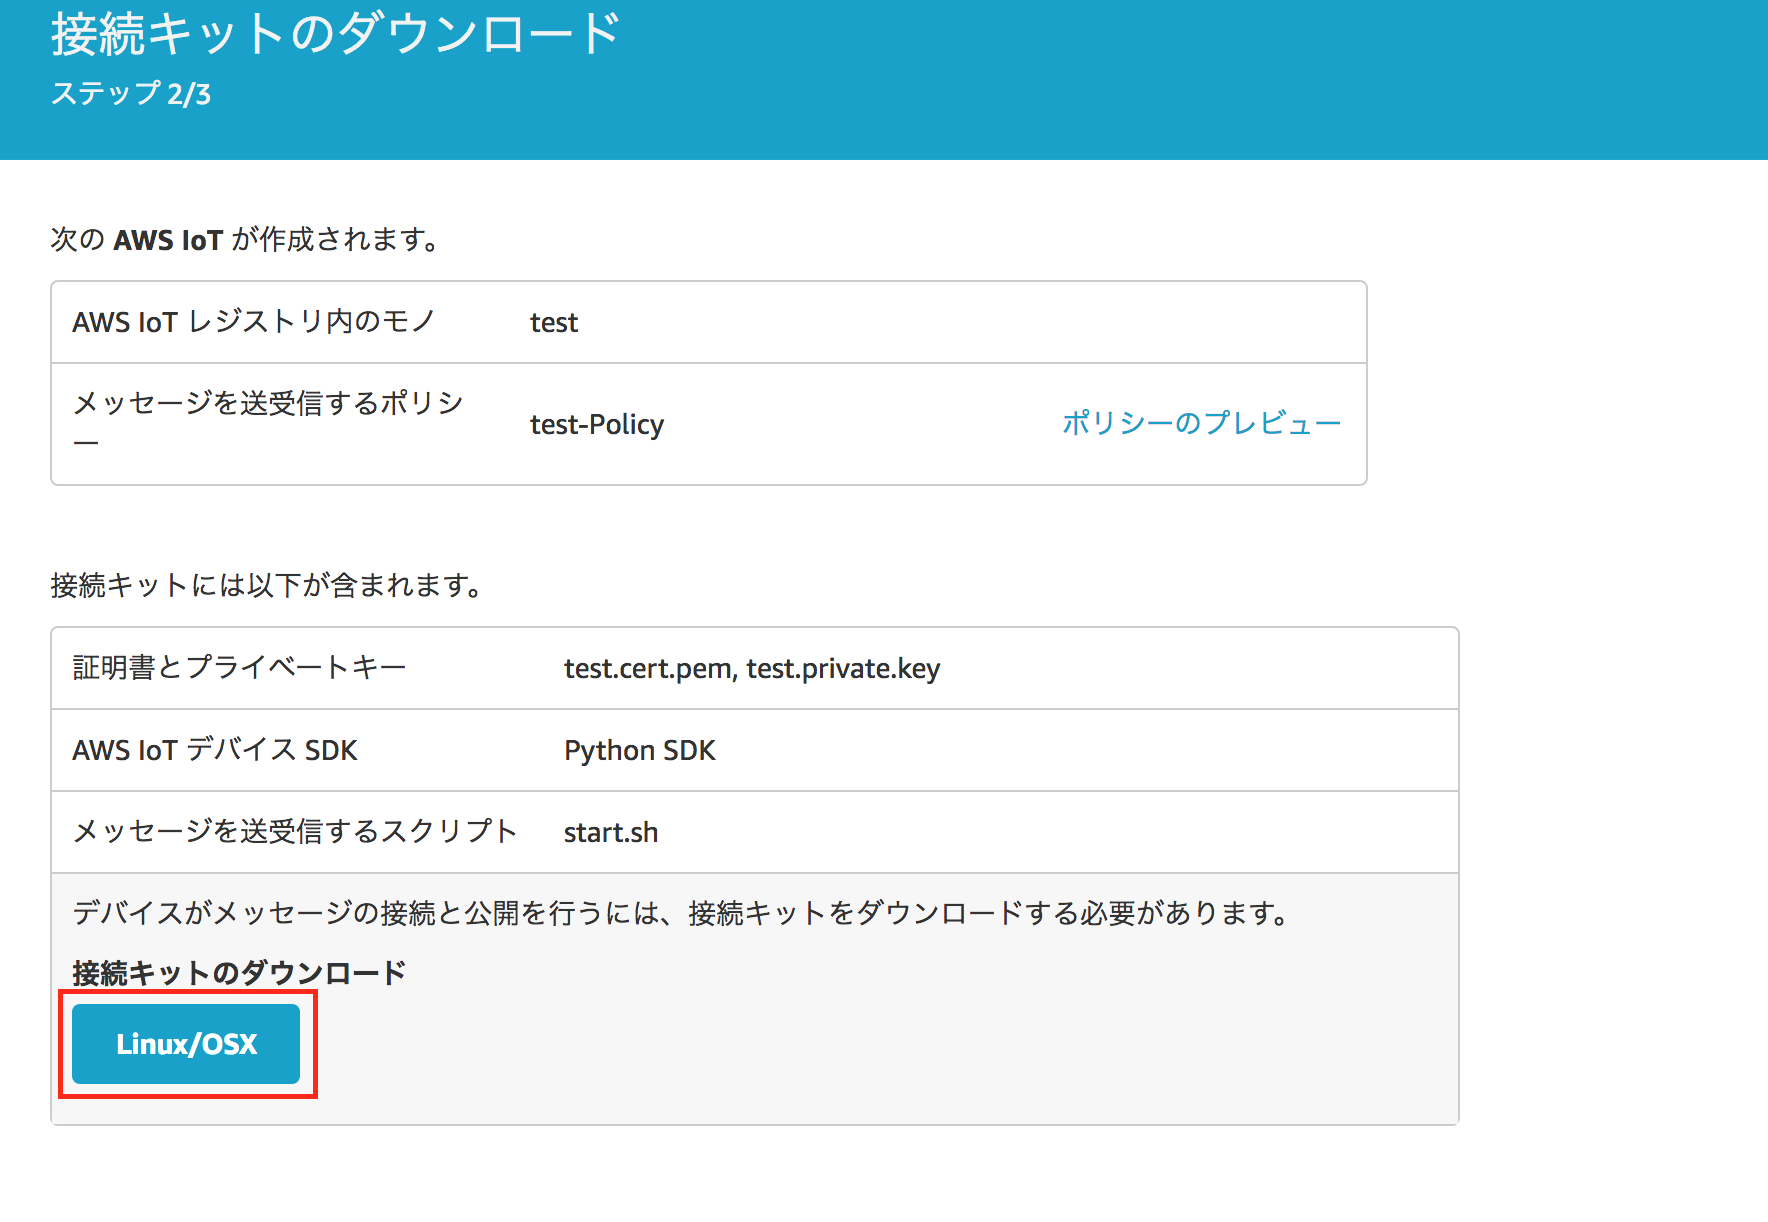
接続キットをダウンロードする
今回登録したモノ専用の証明書などが同梱されているので、取扱に気をつける。
画面のコマンドを実行する
以前の記事を参考にRaspberryPiのPython環境を整えてから、画面に表示されたコマンドを実行してみる。

$ ./start.sh

2017-09-10 14:30:53,709 - AWSIoTPythonSDK.core.protocol.mqttCore - DEBUG - Try to put a publish request 2 in the TCP stack.
2017-09-10 14:30:53,710 - AWSIoTPythonSDK.core.protocol.mqttCore - DEBUG - Publish request 2 succeeded.
Received a new message:
b'New Message 0'
from topic:
sdk/test/Python
--------------


2017-09-10 14:30:54,713 - AWSIoTPythonSDK.core.protocol.mqttCore - DEBUG - Try to put a publish request 3 in the TCP stack.
2017-09-10 14:30:54,714 - AWSIoTPythonSDK.core.protocol.mqttCore - DEBUG - Publish request 3 succeeded.
Received a new message:
b'New Message 1'
from topic:
sdk/test/Python
--------------


2017-09-10 14:30:55,717 - AWSIoTPythonSDK.core.protocol.mqttCore - DEBUG - Try to put a publish request 4 in the TCP stack.
2017-09-10 14:30:55,718 - AWSIoTPythonSDK.core.protocol.mqttCore - DEBUG - Publish request 4 succeeded.
Received a new message:
b'New Message 2'
from topic:
sdk/test/Python
--------------
上記のようなメッセージが流れ出したら成功。
送信内容を変更する
上記で実行したサンプルプログラムでは、永遠とNew Message Xというメッセージを送り続けているだけなので、これを温度/湿度センサ(DHT11)の出力に変える。
まずは先程ダウンロードしたconnect_device_packageの直下にhttps://github.com/szazo/DHT11_Python.gitをクローンする。
そして、./start.shで呼び出されているbasicPubSub.pyの中身を改変する。
'''
/*
 * Copyright 2010-2016 Amazon.com, Inc. or its affiliates. All Rights Reserved.
 *
 * Licensed under the Apache License, Version 2.0 (the "License").
 * You may not use this file except in compliance with the License.
 * A copy of the License is located at
 *
 *  http://aws.amazon.com/apache2.0
 *
 * or in the "license" file accompanying this file. This file is distributed
 * on an "AS IS" BASIS, WITHOUT WARRANTIES OR CONDITIONS OF ANY KIND, either
 * express or implied. See the License for the specific language governing
 * permissions and limitations under the License.
 */
 '''

from AWSIoTPythonSDK.MQTTLib import AWSIoTMQTTClient
from DHT11_Python import dht11
import RPi.GPIO as GPIO
import sys
import logging
import time
import argparse
import datetime
import json


# Custom MQTT message callback
def customCallback(client, userdata, message):
    print("Received a new message: ")
    print(message.payload)
    print("from topic: ")
    print(message.topic)
    print("--------------\n\n")

# Read in command-line parameters
parser = argparse.ArgumentParser()
parser.add_argument("-e", "--endpoint", action="store", required=True, dest="host", help="Your AWS IoT custom endpoint")
parser.add_argument("-r", "--rootCA", action="store", required=True, dest="rootCAPath", help="Root CA file path")
parser.add_argument("-c", "--cert", action="store", dest="certificatePath", help="Certificate file path")
parser.add_argument("-k", "--key", action="store", dest="privateKeyPath", help="Private key file path")
parser.add_argument("-w", "--websocket", action="store_true", dest="useWebsocket", default=False,
                    help="Use MQTT over WebSocket")
parser.add_argument("-id", "--clientId", action="store", dest="clientId", default="basicPubSub", help="Targeted client id")
parser.add_argument("-t", "--topic", action="store", dest="topic", default="sdk/test/Python", help="Targeted topic")

args = parser.parse_args()
host = args.host
rootCAPath = args.rootCAPath
certificatePath = args.certificatePath
privateKeyPath = args.privateKeyPath
useWebsocket = args.useWebsocket
clientId = args.clientId
topic = args.topic

if args.useWebsocket and args.certificatePath and args.privateKeyPath:
    parser.error("X.509 cert authentication and WebSocket are mutual exclusive. Please pick one.")
    exit(2)

if not args.useWebsocket and (not args.certificatePath or not args.privateKeyPath):
    parser.error("Missing credentials for authentication.")
    exit(2)

# Configure logging
logger = logging.getLogger("AWSIoTPythonSDK.core")
logger.setLevel(logging.DEBUG)
streamHandler = logging.StreamHandler()
formatter = logging.Formatter('%(asctime)s - %(name)s - %(levelname)s - %(message)s')
streamHandler.setFormatter(formatter)
logger.addHandler(streamHandler)

# Init AWSIoTMQTTClient
myAWSIoTMQTTClient = None
if useWebsocket:
    myAWSIoTMQTTClient = AWSIoTMQTTClient(clientId, useWebsocket=True)
    myAWSIoTMQTTClient.configureEndpoint(host, 443)
    myAWSIoTMQTTClient.configureCredentials(rootCAPath)
else:
    myAWSIoTMQTTClient = AWSIoTMQTTClient(clientId)
    myAWSIoTMQTTClient.configureEndpoint(host, 8883)
    myAWSIoTMQTTClient.configureCredentials(rootCAPath, privateKeyPath, certificatePath)

# AWSIoTMQTTClient connection configuration
myAWSIoTMQTTClient.configureAutoReconnectBackoffTime(1, 32, 20)
myAWSIoTMQTTClient.configureOfflinePublishQueueing(-1)  # Infinite offline Publish queueing
myAWSIoTMQTTClient.configureDrainingFrequency(2)  # Draining: 2 Hz
myAWSIoTMQTTClient.configureConnectDisconnectTimeout(10)  # 10 sec
myAWSIoTMQTTClient.configureMQTTOperationTimeout(5)  # 5 sec

# Connect and subscribe to AWS IoT
myAWSIoTMQTTClient.connect()
myAWSIoTMQTTClient.subscribe(topic, 1, customCallback)
time.sleep(2)

# initialize GPIO
GPIO.setwarnings(False)
GPIO.setmode(GPIO.BCM)
GPIO.cleanup()

# read data using pin 2
instance = dht11.DHT11(pin=2)

while True:
    result = instance.read()
    if result.is_valid():
        data = {'timestamp': str(datetime.datetime.now()),
                'clientId': clientId,
                'temperature': result.temperature,
                'humidity': result.humidity
                }
        myAWSIoTMQTTClient.publish(topic, json.dumps(data), 1)
        time.sleep(1)
DHT11の結果をディクショナリ形式で格納し、myAWSIoTMQTTClient.publish(topic, json.dumps(data), 1)でjson.dumpsしてパブリッシュする。
また、start.shも次の設定で扱いやすいように、
basicPubSub.pyの呼び出しオプションを追加する。
# stop script on error
set -e

# Check to see if root CA file exists, download if not
if [ ! -f ./root-CA.crt ]; then
  printf "\nDownloading AWS IoT Root CA certificate from Symantec...\n"
  curl https://www.symantec.com/content/en/us/enterprise/verisign/roots/VeriSign-Class%203-Public-Primary-Certification-Authority-G5.pem > root-CA.crt
fi

# install AWS Device SDK for Python if not already installed
if [ ! -d ./aws-iot-device-sdk-python ]; then
  printf "\nInstalling AWS SDK...\n"
  git clone https://github.com/aws/aws-iot-device-sdk-python.git
  pushd aws-iot-device-sdk-python
  python setup.py install
  popd
fi

# run pub/sub sample app using certificates downloaded in package
printf "\nRunning pub/sub sample application...\n"
python aws-iot-device-sdk-python/samples/basicPubSub/basicPubSub.py -e a33hl2ob9z80a1.iot.us-west-2.amazonaws.com -r root-CA.crt -c RaspberryPi01.cert.pem -k RaspberryPi01.private.key -t dht11
追加したのは-t dht11という部分で、
これはトピックの名前を設定する部分である。
この名前を設定しておくことで、受信したメッセージがどのトピックのものか判別がつき、
AWSIoT側で受信後の処理を振り分けることができる。
AWS IAMで必要な権限を持ったロールを作成しておく
本来は機能毎にロールを分けて必要以上に権限を持たせないのが良いが、
面倒くさいので今回は一つのロールに全て持たせる。
(どの権限が必要になるかわからなかったので、多めにアタッチした。
あとで勉強しておく必要あり。)
- CloudWatchFullAccess
- AmazonDynamoDBFullAccess
- AmazonDynamoDBFullAccesswithDataPipeline
- AWSLambdaDynamoDBExecutionRole
- AWSLambdaInvocation-DynamoDB
AWSIoTでルールを設定する
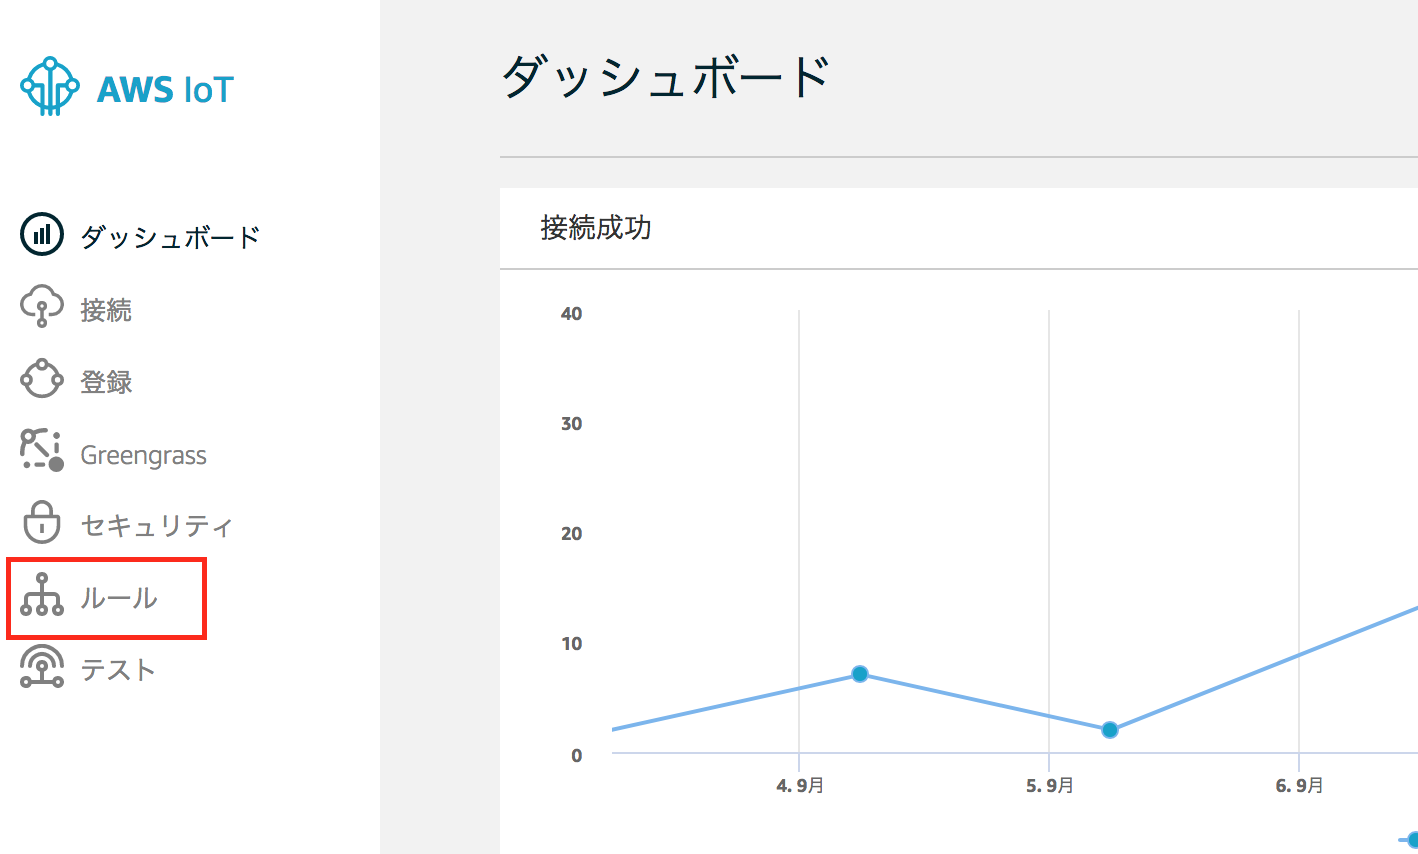
ルールをクリック
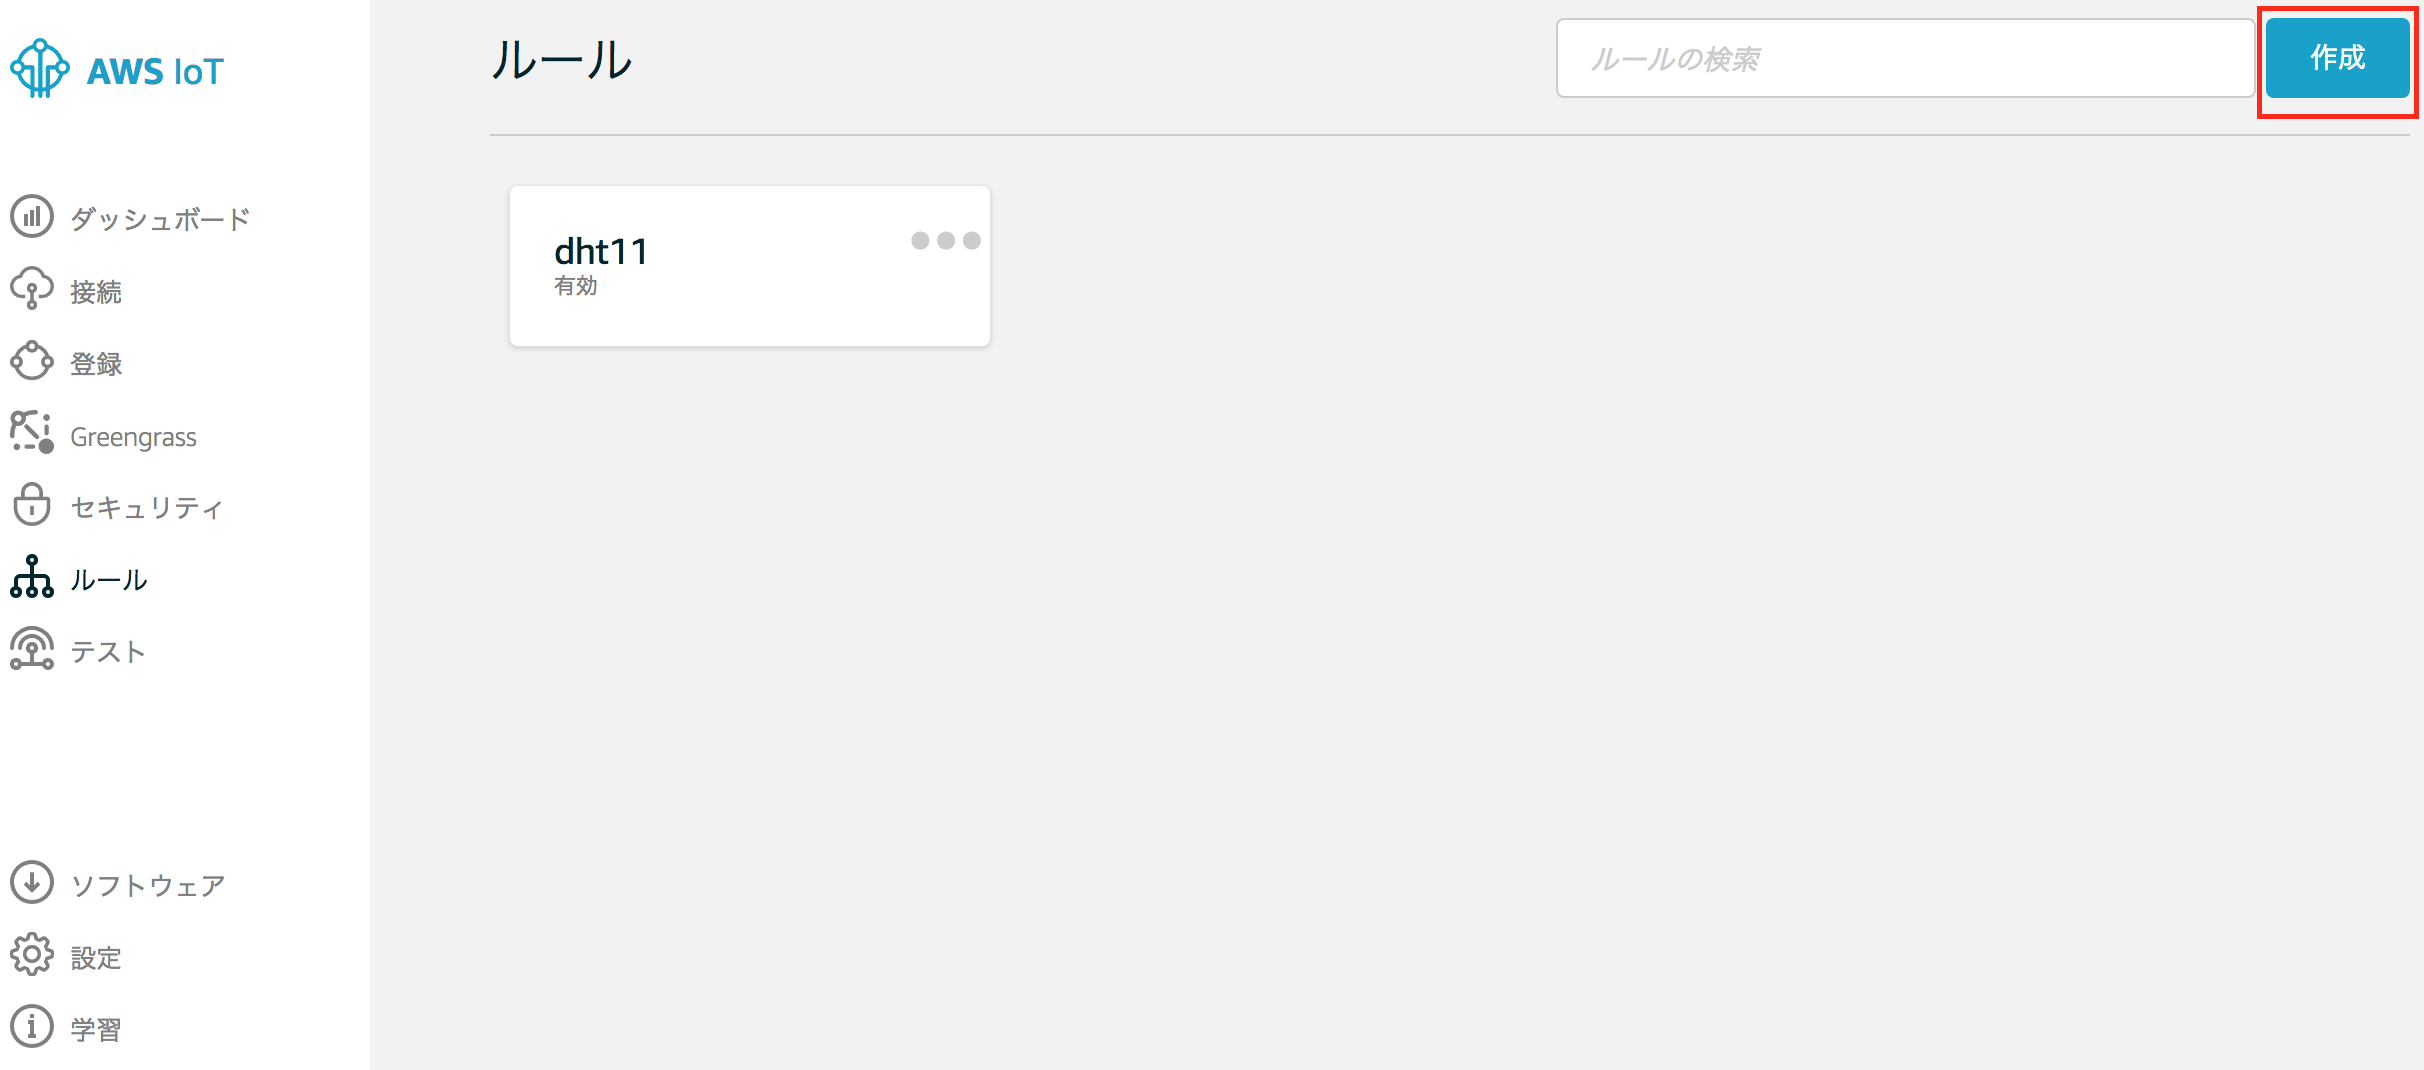
右上の作成ボタンをクリック
名前と説明を設定する

どのメッセージにルールを適用するかを設定する
属性は*、トピックフィルターは先程、basicPubSub.pyの呼び出しに追加した-tオプションの値を入力する。
こうすることで-tオプションで指定した名前と一致したもののみにこのルールを適用することができる。

メッセージに対してどのような処理を行うか決める。
今回はまず、AWS IoTで受信したメッセージをDynamoDBに送り込みたいので、そのように設定する。

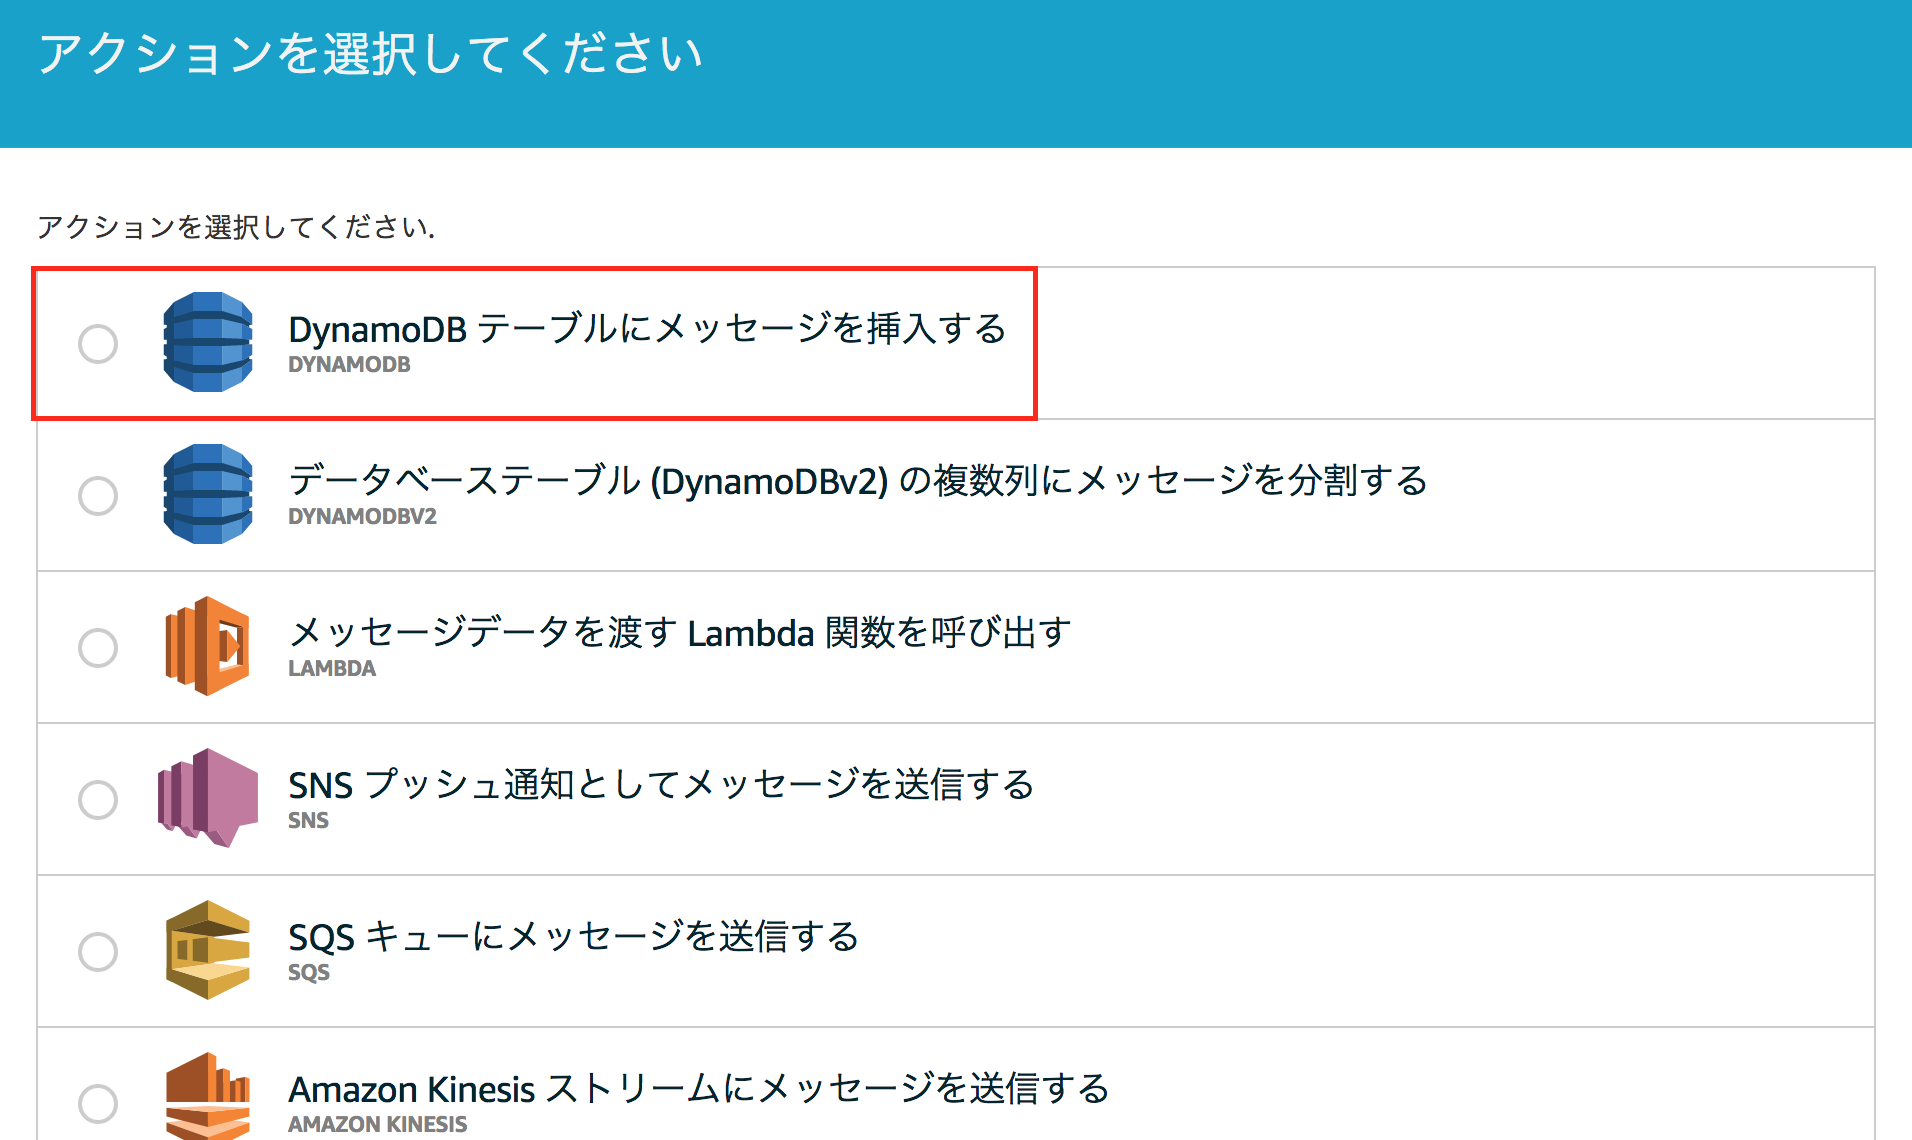
新しいリソースを作成するをクリック。

DHT11のデータを格納するテーブルを作成する


こんな感じに設定して、テーブルを作成する。
テーブルを選択する
もとの画面を戻りテーブルを選択する。
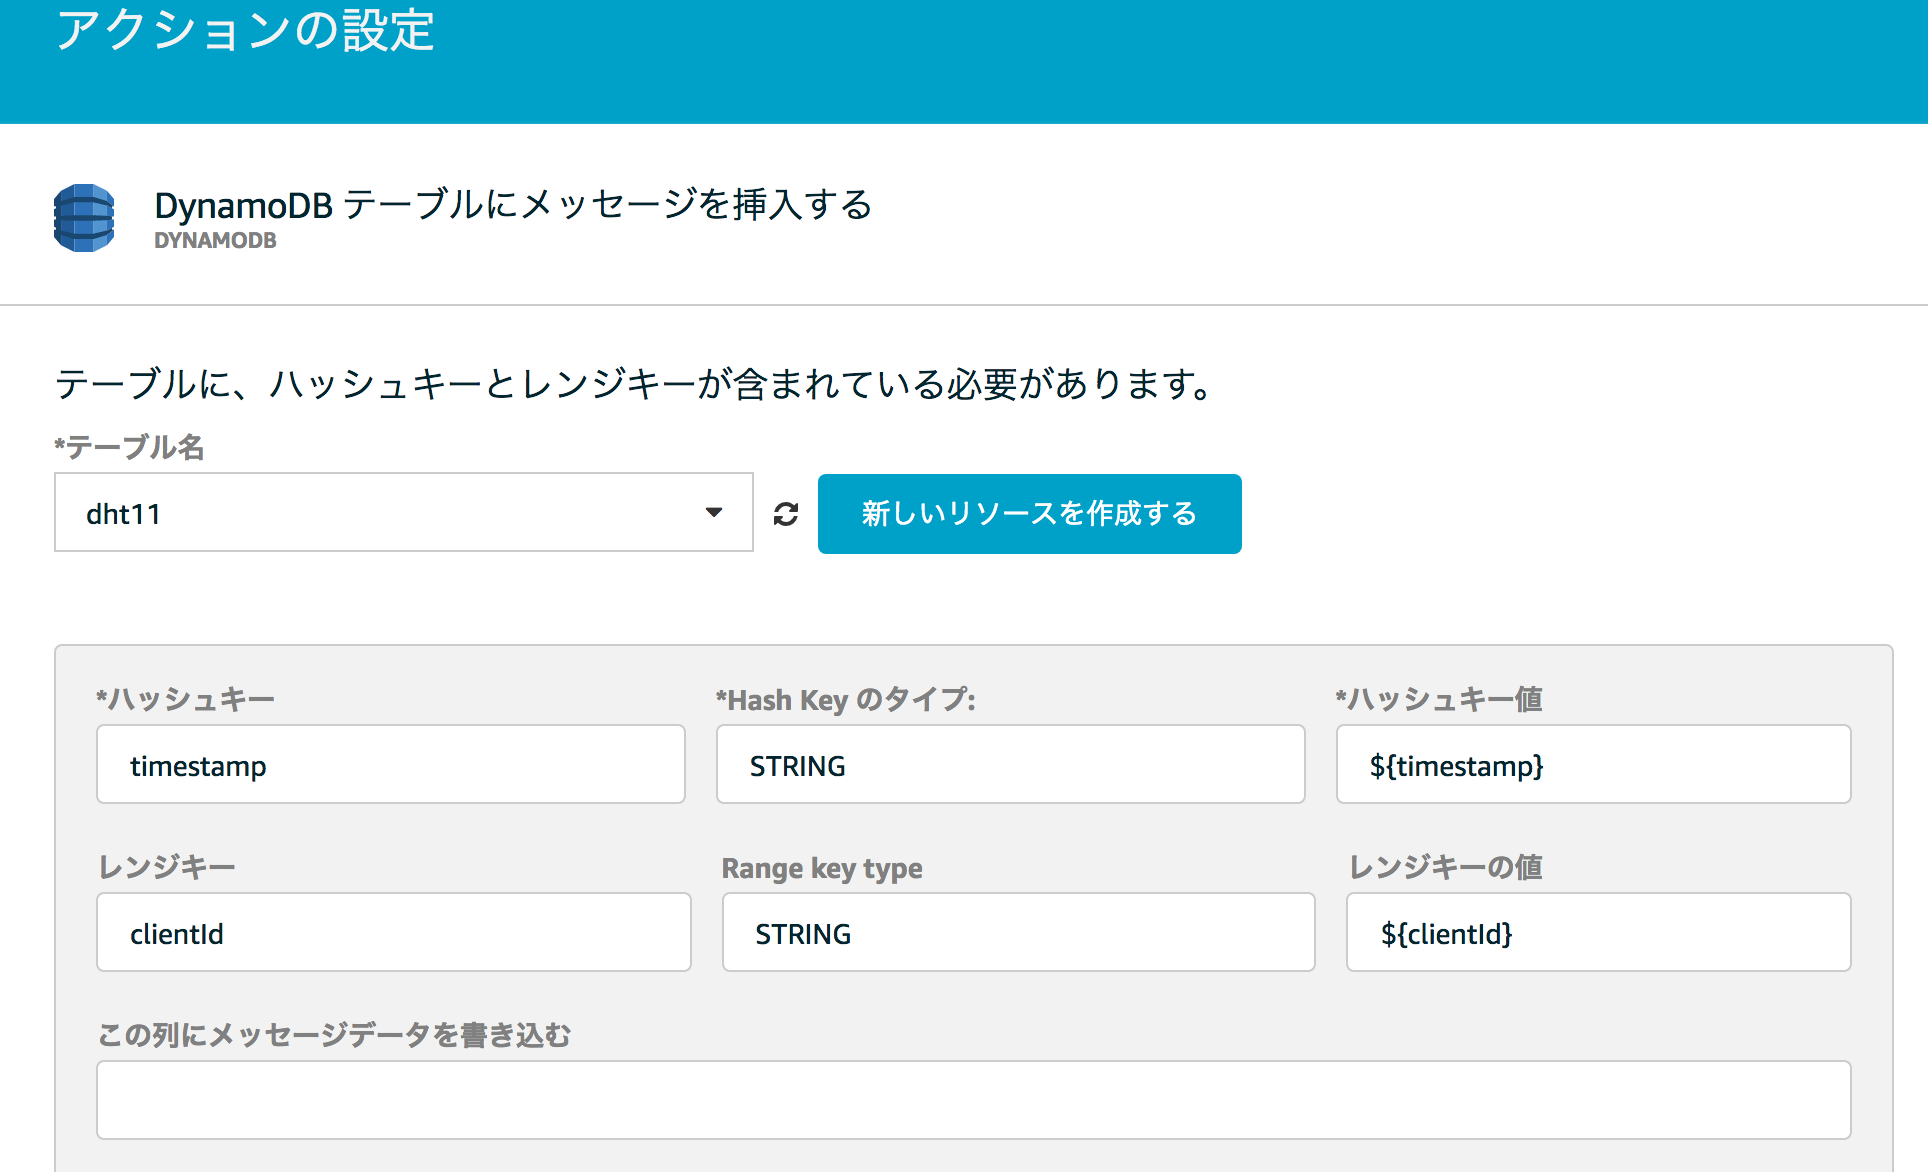
ハッシュキーの値とレンジキーの値が空欄になっているので、
そこには上記のように${timestamp}などを指定する。
なお、メッセージとして送信されるjsonの各メンバーには${member}という形でアクセスできる。
ロールを指定する

ここには前もって用意しておいたロールを指定する。
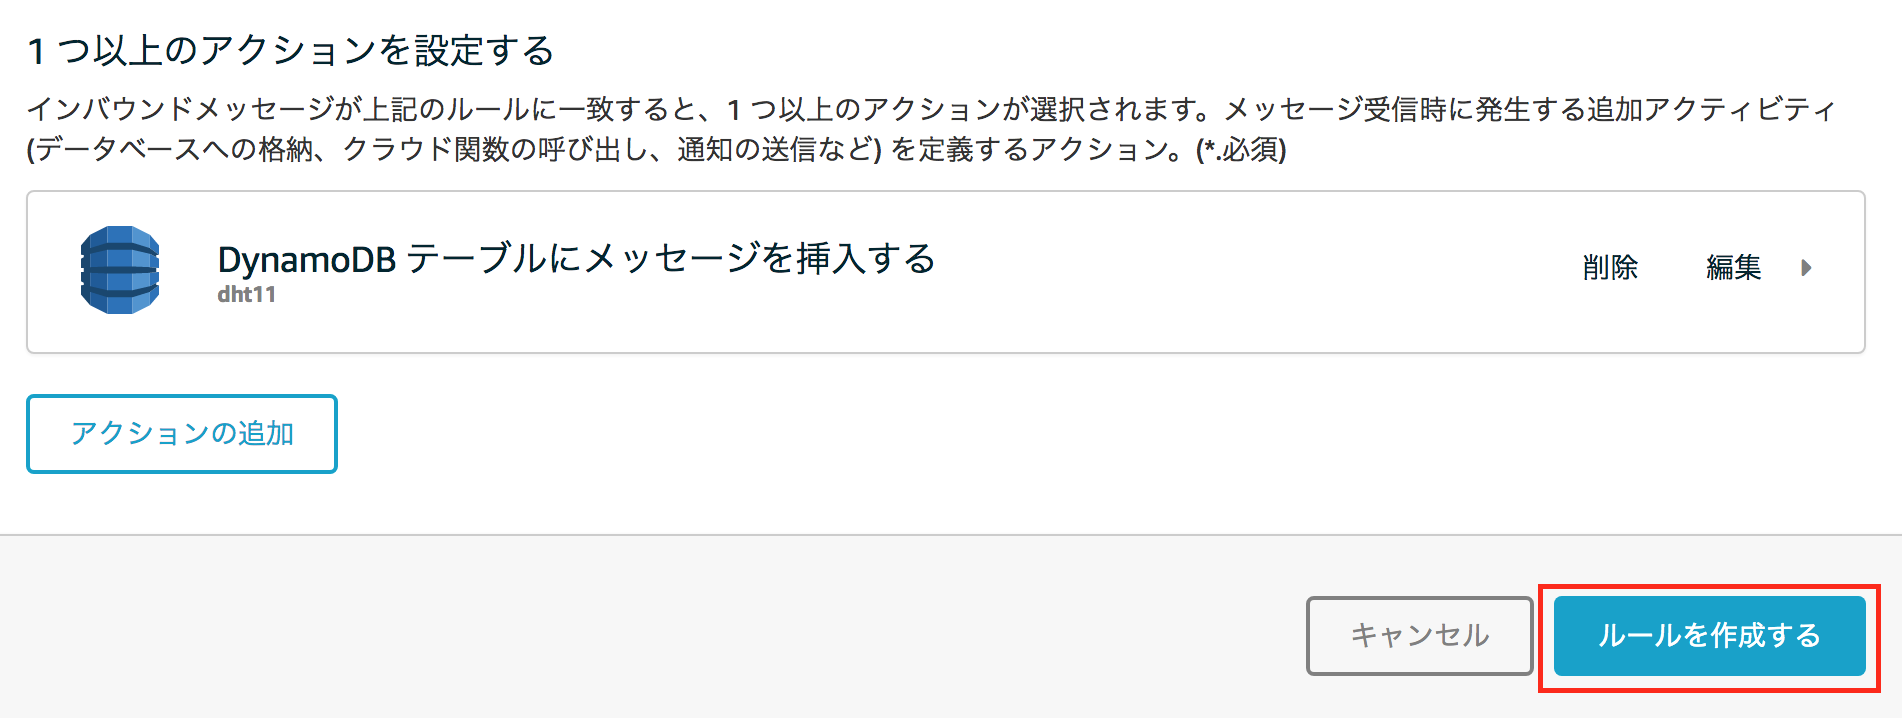
これでアクションが追加できたので、ルールを作成するをクリックしてルール作成は完了。
確認
実行してみて、DynamoDBにデータが入るか確認する。
$ ./start.sh
 .
 .
 .

2017-09-09 23:32:23,411 - AWSIoTPythonSDK.core.protocol.mqttCore - DEBUG - Try to put a publish request 1394 in the TCP stack.
2017-09-09 23:32:23,412 - AWSIoTPythonSDK.core.protocol.mqttCore - DEBUG - Publish request 1394 succeeded.
Received a new message:
b'{"timestamp": "2017-09-09 23:32:23.409885", "clientId": "basicPubSub", "temperature": 27, "humidity": 70}'
from topic:
dht11
--------------


2017-09-09 23:32:25,715 - AWSIoTPythonSDK.core.protocol.mqttCore - DEBUG - Try to put a publish request 1395 in the TCP stack.
2017-09-09 23:32:25,716 - AWSIoTPythonSDK.core.protocol.mqttCore - DEBUG - Publish request 1395 succeeded.
Received a new message:
b'{"timestamp": "2017-09-09 23:32:25.714083", "clientId": "basicPubSub", "temperature": 27, "humidity": 70}'
from topic:
dht11
--------------

うまくいってるようだ。
NとかSとかは、NumberとStringの略だそう。
最初NorthとSouthかと思ってなんのこっちゃってなったけど。
DynamoDBからCloudWatchにデータを流す
トリガーの作成
長いけどあと一息。
DynamoDBのテーブルの画面から、トリガー => トリガーの作成 => 新規関数と選択。


トリガーの設定
ステップ1でdynamodb-process-streamが選択された状態で、ステップ2から始まるが、ステップ1に一旦戻る。

今回はdynamodb-process-streamのPython3版を選択した。
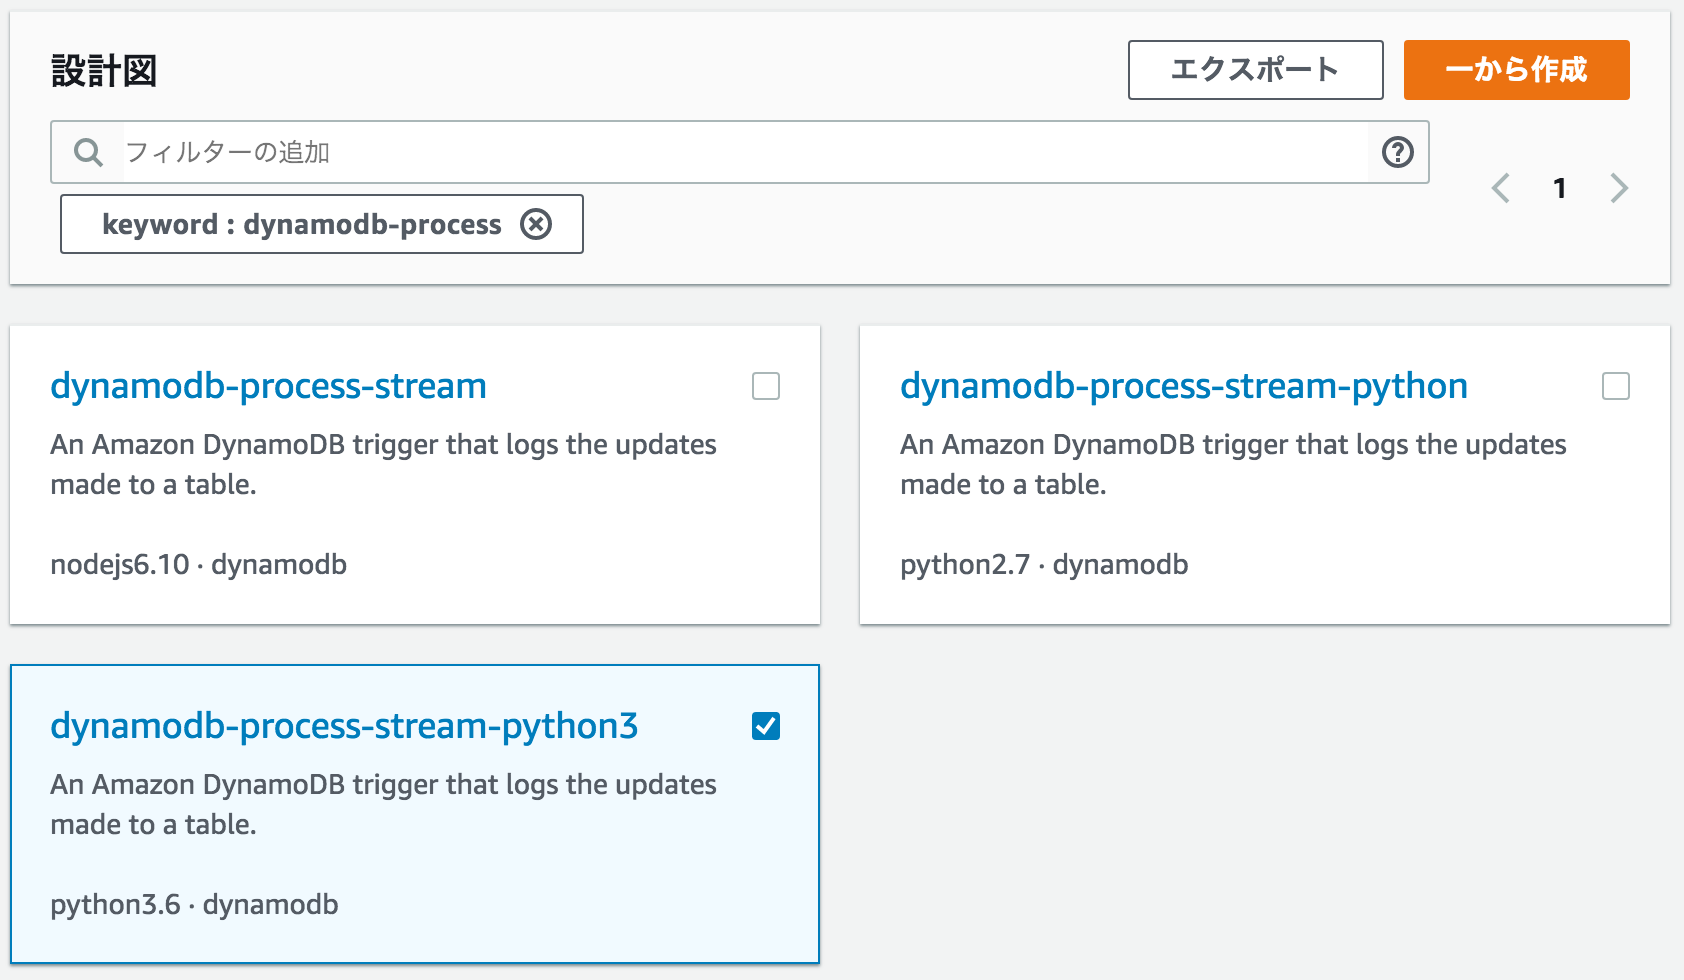
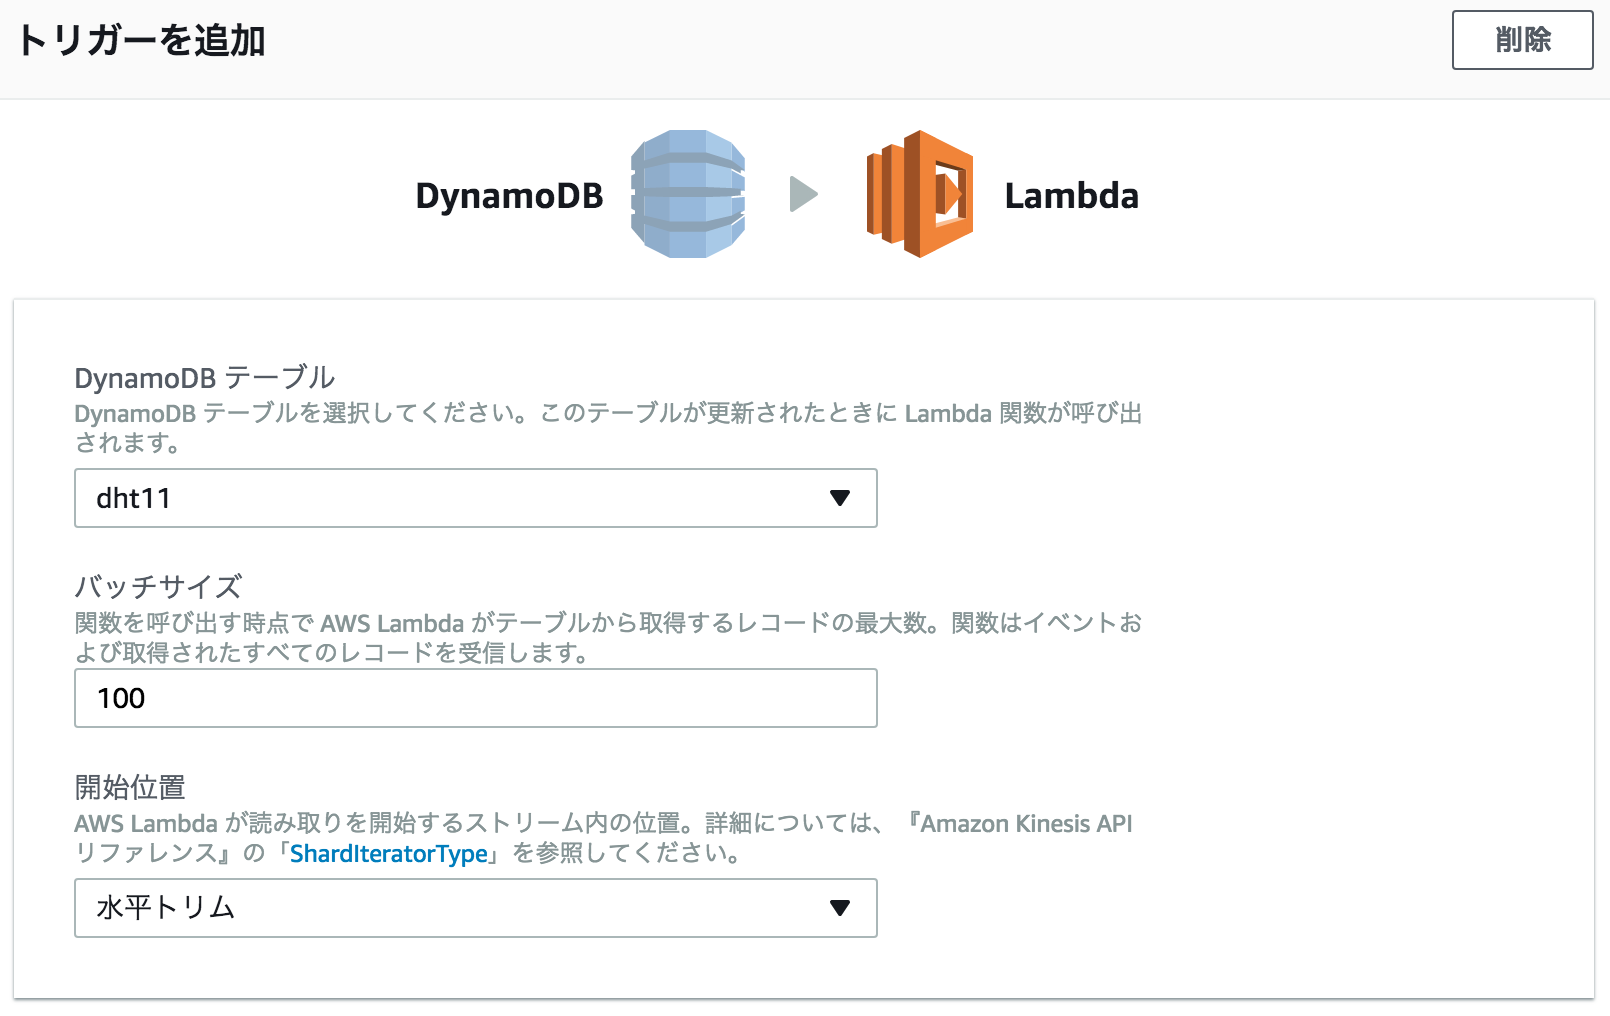
テーブルを指定し、開始位置は水平トリムにする。

トリガーの有効化は後でするので、チェックを入れずに次へ。
関数を定義する
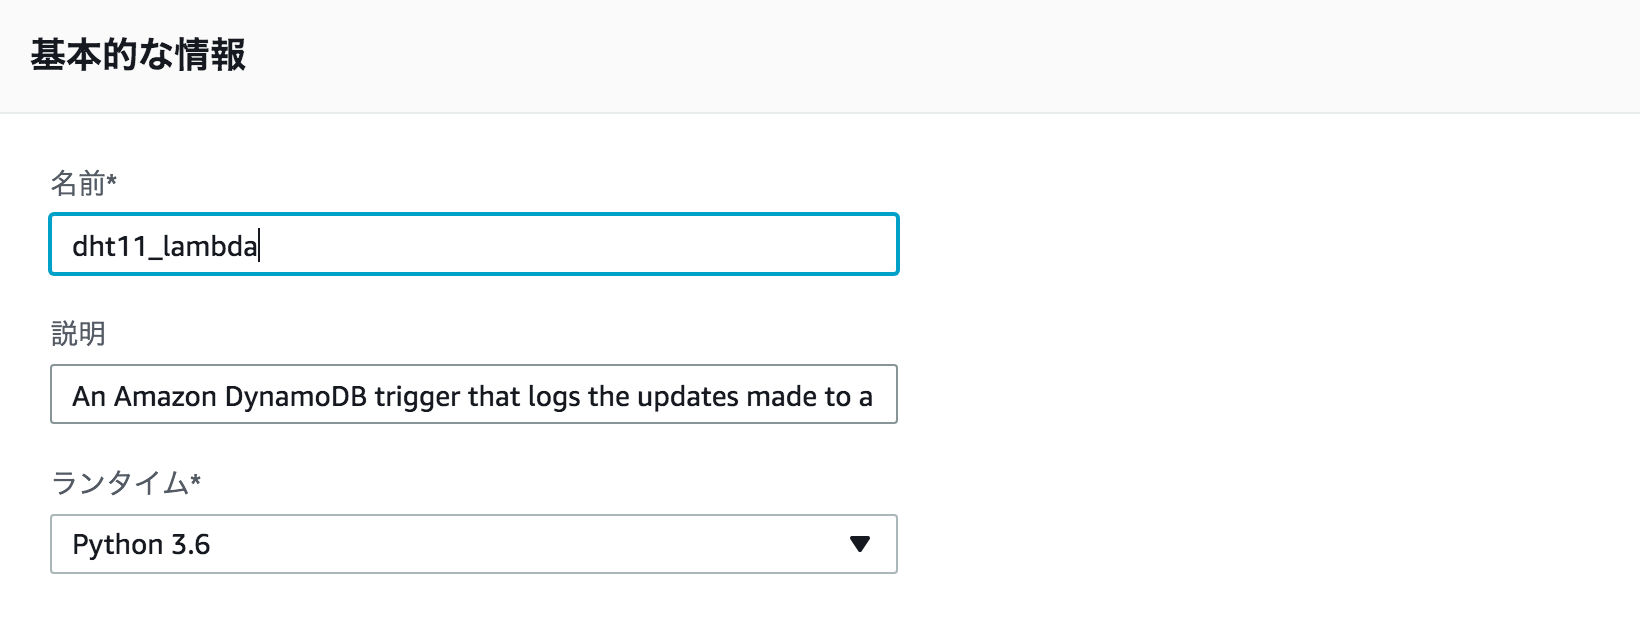
適当に基本情報を埋める。
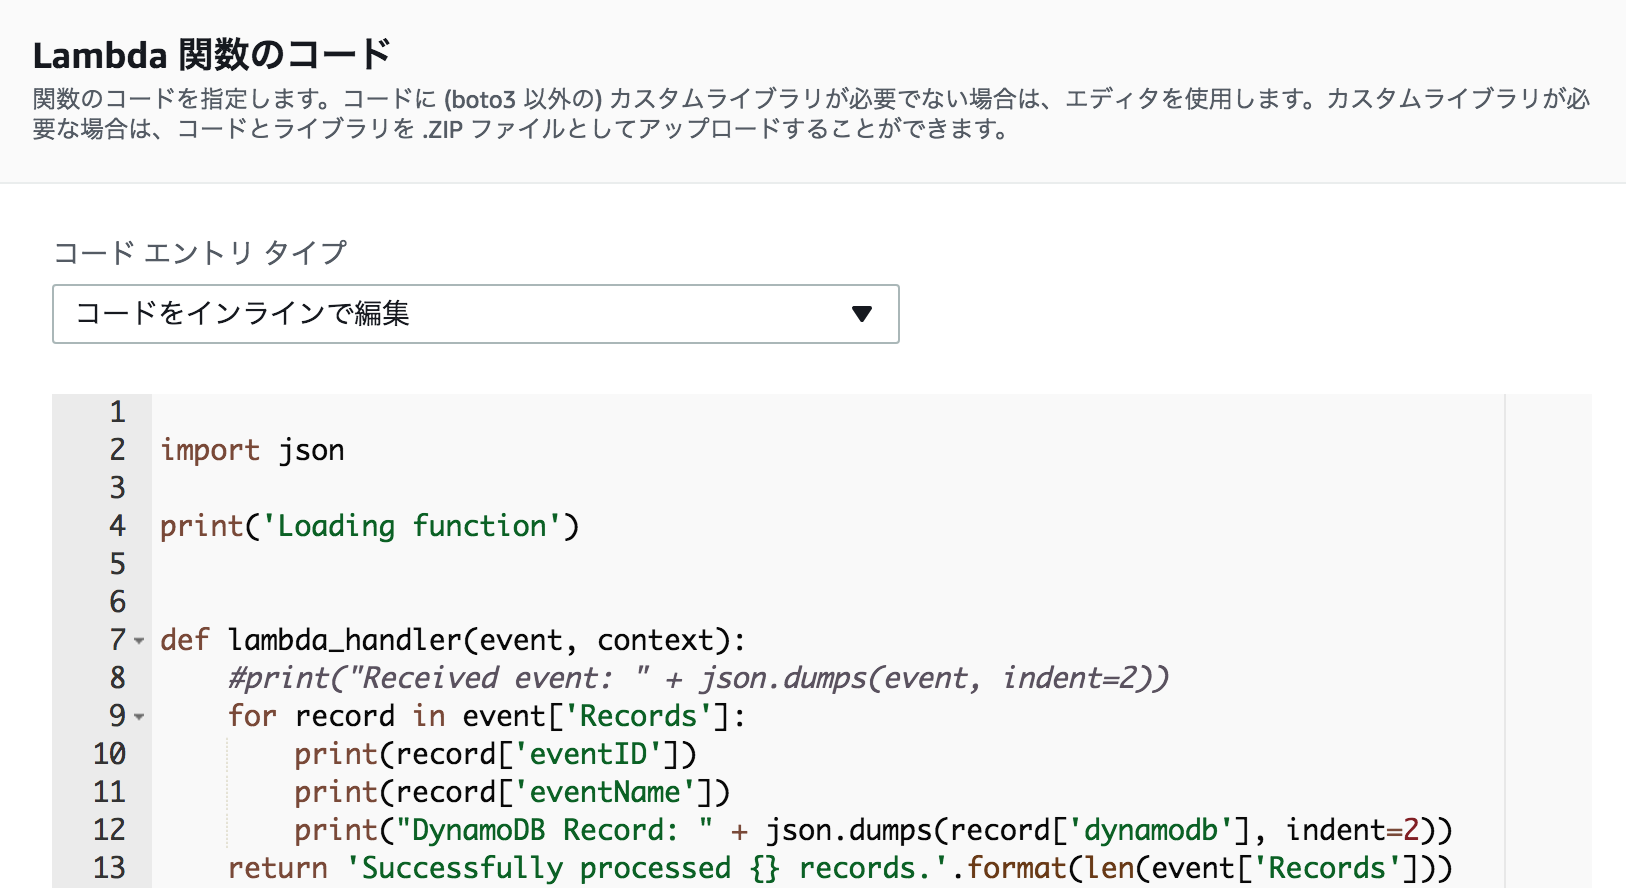
上図のように関数を定義できるので、以下のコードに変更する。
from __future__ import print_function

import json
import boto3
from decimal import Decimal

print('Loading function')


def lambda_handler(event, context):
    # print("Received event: " + json.dumps(event, indent=2))
    client = boto3.client('cloudwatch')
    for record in event['Records']:
        # print(record['eventID'])
        # print(record['eventName'])
        # print("DynamoDB Record: " + json.dumps(record['dynamodb'], indent=2))
        print(record['dynamodb']['NewImage'])
        print(record['dynamodb']['NewImage']['timestamp']['S'])
        response = client.put_metric_data(
            Namespace='dht11',
            MetricData=[
                {
                    'MetricName': 'temperature',
                    'Dimensions': [
                        {
                            'Name': 'clientId',
                            'Value': record['dynamodb']['NewImage']['payload']['M']['clientId']['S'],
                        },
                    ],
                    'Value': Decimal(record['dynamodb']['NewImage']['payload']['M']['temperature']['N']),
                    'Unit': 'None'
                },
            ]
        )
        response = client.put_metric_data(
            Namespace='dht11',
            MetricData=[
                {
                    'MetricName': 'humidity',
                    'Dimensions': [
                        {
                            'Name': 'clientId',
                            'Value': record['dynamodb']['NewImage']['payload']['M']['clientId']['S'],
                        },
                    ],
                    'Value': Decimal(record['dynamodb']['NewImage']['payload']['M']['humidity']['N']),
                    'Unit': 'Percent'
                },
            ]
        )
編集したら、確認をして関数を保存する。
トリガーの有効化
DynamoDBのトリガーの画面に戻ると、作成した関数が出現している。
作成した関数を選択肢してトリガーの編集ボタンをクリック。

トリガーを選択してトリガーを有効化する。

CloudWatchでモニタリングする
あとはCloudWatch側で表示の設定をすれば、温度や湿度の推移が見えるようになる。
ダッシュボード => ダッシュボードの作成でダッシュボードを作成した後、
ウィジェットの追加からtemperatureやhumidityを検索する。
Lambdaで作成されたメトリクスが出てくるので、それを選択すると・・・

無事、確認できる。
まとめ
-
AWSIoT => DynamoDB => Lambda => CloudWatchの連携で、DHT11センサの値をモニタリングすることができた。