Introduction
I mentioned the Sharperlight Form Designer briefly in a previous post 【Form Designer】Creating a simple web based solution with minimal effort.
Today, I look into the other functionalities that the Form Designer offers.
Template
I use one of the default templates provided by Sharperlight.
Open Form Designer from Sharperlight Application menu.
Click New to display a list of templates.

I choose Staff Expenses template.
The definition is loaded like this.

Click OK to close it for now.
Dashboard Page for the Form
One of functionalities I want to have a look is Dashboard Page.
We can see the current status of the form and manage the form entered here.
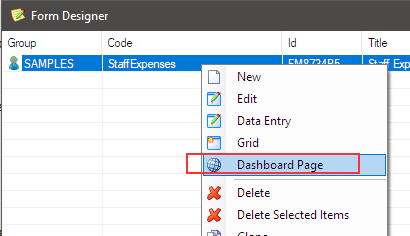
Select Dashboard Page from the right-click menu.

The dashboard page is now open. (Please make sure the Sharperlight Service is running)

There is no form entered currently so nothing is displayed here.

Scheduling the form
We can schedule the entry of the form.
Open the definition and set the schedule so that the form can be created every Friday starting from July 5, 2024.

Save the change and have a look the dashboard page.
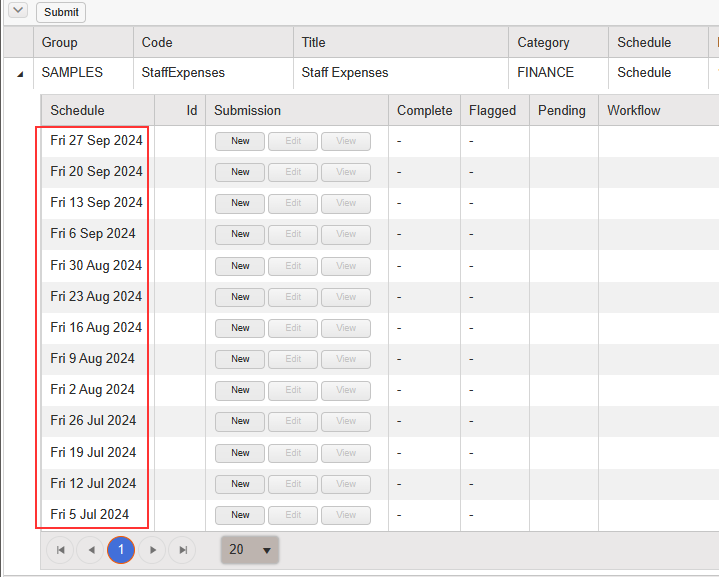
13 forms are now scheduled. (Today: 18/Sep/2024)

New Form
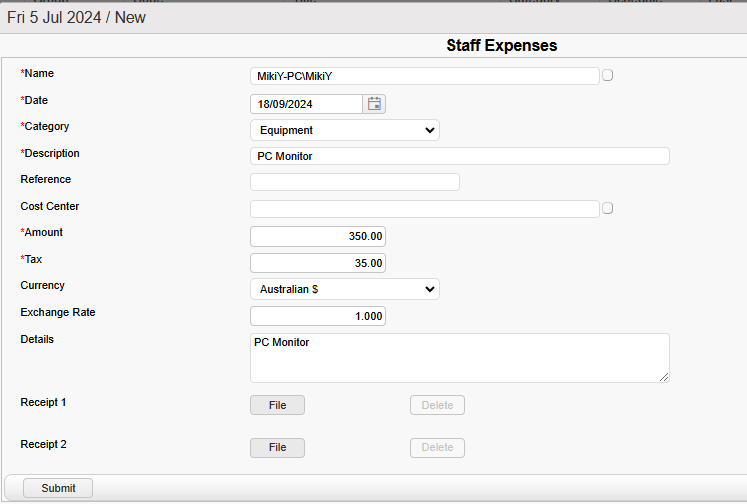
I create a new form for the scheduled date Fri 5 Jul 2024 to see what happens.
Click the New button on the row of Fri 5 Jul 2024.
Fill in the form like this, then submit it.

The dashboard page shows the update here.

Let's browse what it is showing.
Submission Column
There are three buttons New, Edit and View.
I can edit or view the entered form and it is read-only in View mode, and I can also create a new form for the scheduled date with the New button.
The Newbutton can be controlled with this option, also the number of forms per scheduled date can also be controlled with this option.

When I use the option and set 1 for it,

New button is disabled for the form scheduled on Fri 5 Jul 2024 as a form already exists.
However, New button for the form scheduled on Fri 12 Jul 2024 is enabled because there is no form created for the scheduled date yet.

Complete Column

It shows the number of fields that exist for the form and how many of those fields are filled in.
15/11 indicates that 11 out of 15 fields are filled in.
You may say there are 13 fields in the editor, but there are two hidden fields.
Let's have a look the definition. There are 15 fields defined.
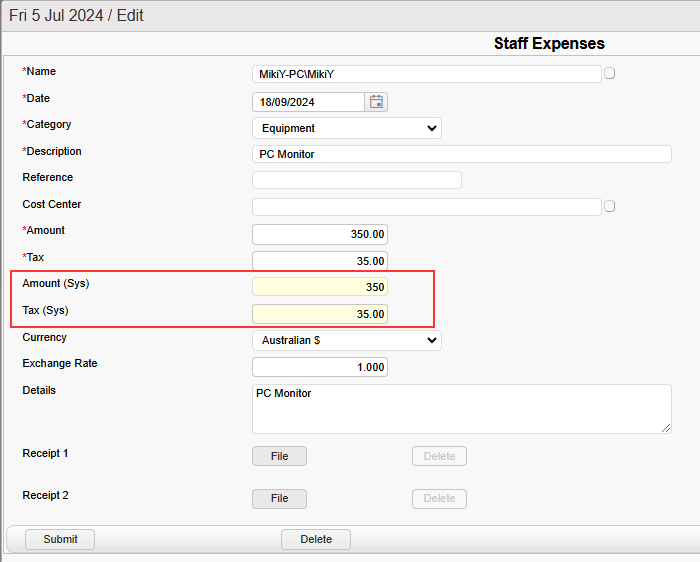
The 2 fields Amount(sys) and Tax(sys) are hidden with this Advanced Option.
They are calculated fields and they are not shown in the editor without selecting this checkbox.

I make change to show them like this.


I can now see all 15 fields.

If I want to exclude those two fields from the total field count, I can set a tag <ignore> to this option for those 2 fields.

It says 13/9 now.

Flagged Column
It currently shows 1, so let's check the reason why.
Open the definition and go to the Fields tab to check the options for each field one by one.
Please notice the Flagged option here.

There are 5 fields which have the Flagged condition.
I think the value in one of the fields does not meet the Flagged condition.
| Definition: Field | Condition | Value entered |
|---|---|---|
| Amount | <=0 | 99.0 |
| Tax | <=0 | 9.0 |
| Tax(Sys) | <=0 | 9.0 |
| Exchange Rate | <=0 | 1.000 |
| Receipt1 | 0 | no file attached |
As you can see, the condition for Receipt1 field says when no receipt is attached, make a flag.
This is the reason why the Flagged column shows 1.
If I attach a file for Receipt1, the column show 0. Then Receipt1 is also filled in now so the Complete column shows 13/10.

Pending Column
The column says Expired.
It is due to this option here.
Today (18 Sep 2024) is more the 60 days from the scheduled date i.e. Fri 5 Jul 2024, so it shows Expired.

If I create a new form for the scheduled date Fri 6 Sep 2024 today (18 Sep 2024), It shows Late.

The value shown is calculated based on this option with the scheduled date.

Conclusion
I looked at the dashboard page for the forms this time and found that it provides a clear view of the forms being processed. It is also a powerful tool for managing such processes within the organization.