Sharperlight basically extracts data from data sources (databases, Excel worksheets, API endpoints, etc.), but if you enable write-back settings, data can be written back to the data source . (this is called writeback in Sharperlight)
This time, I would like to use an Excel add-in to write the data on the sheet back to the database.
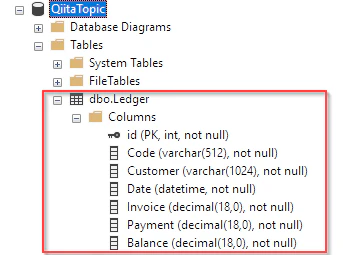
Database/Table Preparation
I created some kind of Ledger table in an existing test database. I would like to write data from an Excel worksheet to this table.
Preparing the Datamodel
First create a data model so that Sharperlight can interact with the data source.
I have already created a datamodel for this test database, so I would like to reflect only the information of the table added this time.
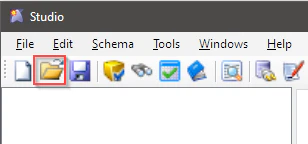
Launch Studio from the Sharperlight application menu.
Locate the target data model with the folder icon.
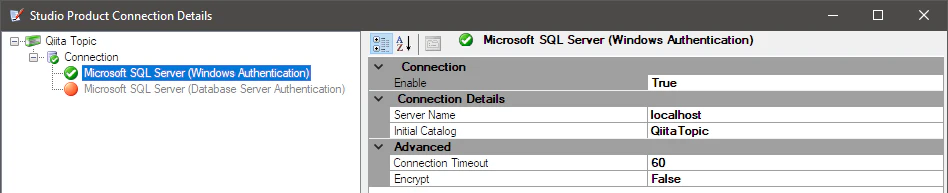
Select the Studio Connection sub-menu of the Tools menu and check if it is properly connected to the target database.

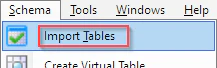
After checking, select the Import Tables menu from the Schema menu.
Clicking the Get Tables button will load the schema information from the connected database. Tables that have already been loaded into the data model are shown in red, new tables that have not yet been loaded are shown in black and ticked.
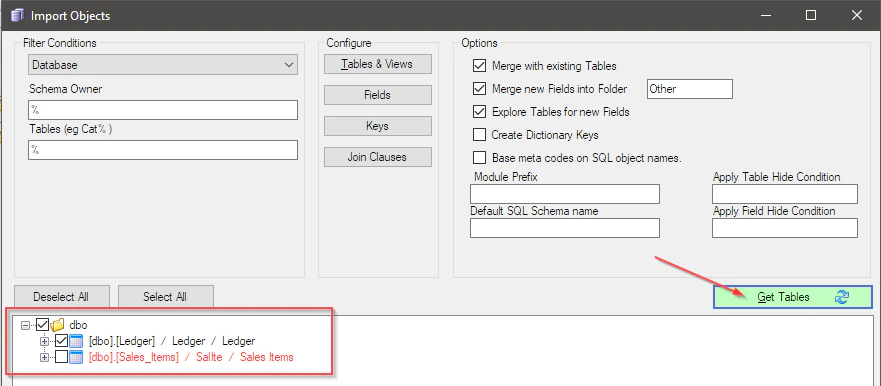
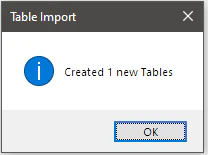
When you press the OK button, the ticked table information will be imported into the data model.
The newly imported table is displayed under the All Tables node.

In this state, the newly added table cannot be seen from the query builder etc. Move the new Ledger table to the Table Display node. You can move it by dragging and dropping.
If you select the Ledger table that has been moved to the Table Display node, the attribute list of the table will be displayed on the right side. Find the Allow Table Writeback attribute in it and set it to True.

You can now write data back to this table. This is simply a permission to write back to this table, and you can also set permission/non-permission on a user-by-user basis.
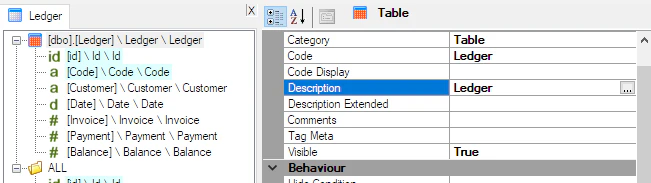
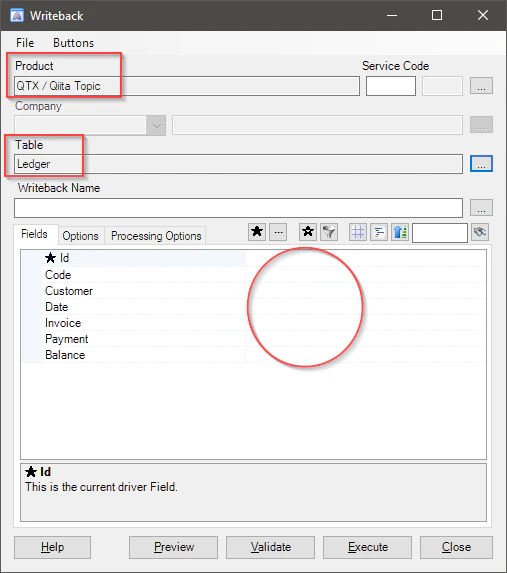
Now double-click on the Ledger table to display the field list in the center, and select that field to display its properties on the right.
Check the description is correct of those fields.
After all is done, save the data model with the OK button.
Data Preparation
Prepare such data on an Excel worksheet.

It's a good idea to match the column name with the field Description in the data model.
Create a Writeback Definition
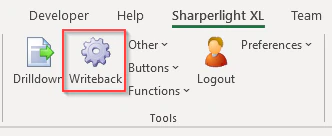
Now let's define writeback. Select Writeback from the Sharperlight Excel add-in ribbon.
The writeback definition dialog is displayed. Select the datamodel just editted for Product and the ledger table for Table.
The field list of the ledger table is displayed in the lower Fields tab. Here we will map the data and fields on the Excel sheet.
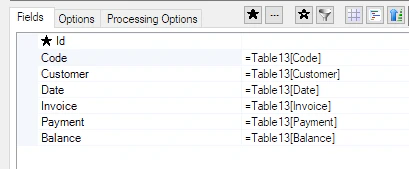
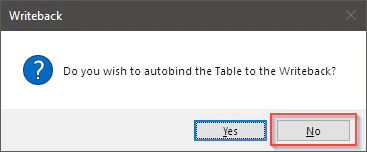
With the input text field of the Code field selected, double-click the column header of the table on the Excel sheet. Then the automatic mapping function will work and you will see a message like this. Select Yes to proceed.

Mapping is set only if the column name of the data table and the description of the data model match.
This time they all match.
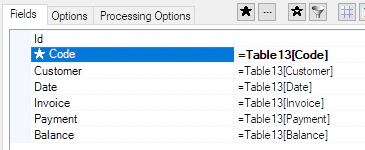
If there is a field that has no mapping set, with the input text field selected, double-click the header of the column you want to create a mapping on the Excel sheet. Then the same message as before will be displayed, so select the No button this time. That way you can map individual fields.
The Id field is an IDENTITY field, so the Id is automatically calculated by the database and no mapping is required.
There is a star to the left of the ID. This is because the Sharperlight engine uses the data in this column as a guide to check how many rows the table on the sheet has. However, this feature cannot be set for unmapped fields. So this time we set this function to the Code field.
Select the Code field and select Driver from the right-click menu.
Finally, enter Ledger for the writeback name. When you save the definition with the Close button, it will be saved with this name.

The definition is now complete.
Verification
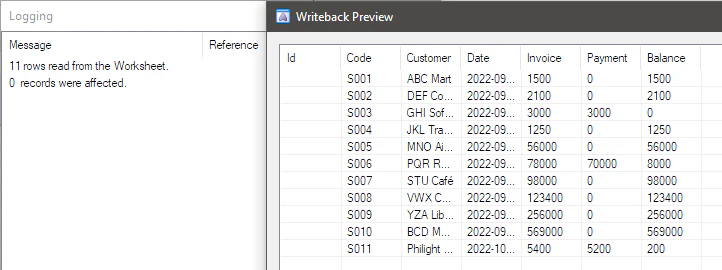
Press the Preview button to check if the engine is picking up the data correctly according to the mapping settings.

A preview and log are displayed. If you look at the log, you can see that no writes have been made. This function is only for checking whether the data is correctly picked up.
The Validate button is a data collection check without preview. Only logs are displayed.

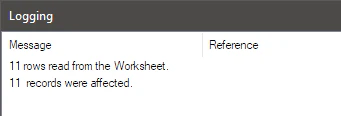
Since it was confirmed that the data was successfully picked up, execute the write back with the Execute button.

I could see the logs and it ran fine.
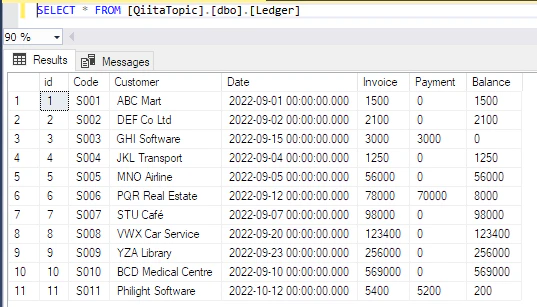
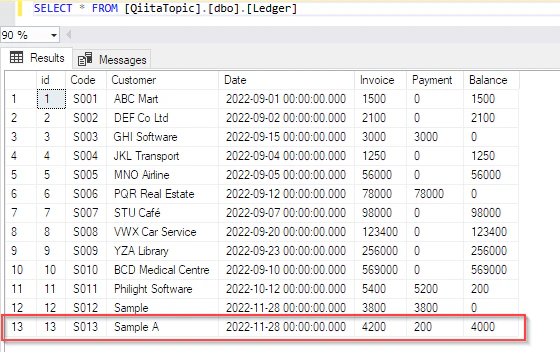
Let's check the database table. Writeback was done well. ![]()
Updating and Inserting Data
Update the data on the Excel sheet.
Add a new record with code S012 at the bottom line. Also update the Payment amount and Balance of the record with code S006.
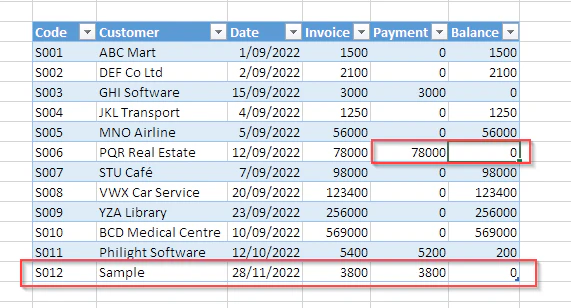
If you write back again in this state, new records will be added and changed records will be updated.


Creating Writeback Button
This time, instead of opening the writeback dialog and pressing the Execute button, we'll add a button to perform the writeback.
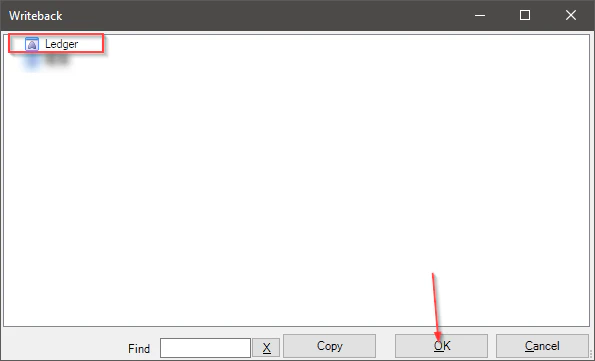
Select Buttons->Writeback->mdWriteBack on the Sharperlight Ribbon with the cell where you want to place the button selected.
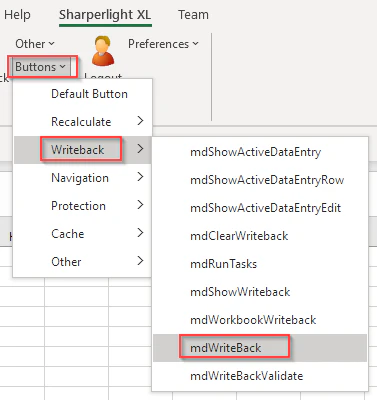
A list of writeback definitions will be displayed. Select the definition Ledger created this time, and press the OK button.
The writeback button was created.
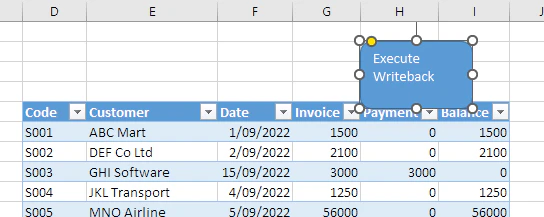
Add a new record at the bottom and press this button to perform a writeback.
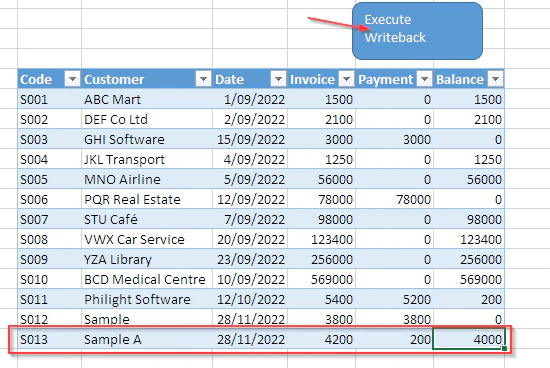

Checked the database immediately and saw it was updated correctly.
This concludes the brief explanation of the Sharperlight Writeback function.
Thank you for reading this article.