ご挨拶
AWS SAAを取得してから約5カ月経過しました。
また実務でもAWSの運用的な知識が必要になってきたので真面目にAWS SOAの学習を開始しました。
今回はSOAの学習の中で身になったCloudWatchについて記事にします。
CloudWatchとは
AWSリソースの状態を監視したりログを収集したりするモニタリングサービスです。
リソースの状態は視覚的に分かりやすくグラフで表示してくれます。
また、リソースに異常が発生した際にアラーム状態にすることができます。
Amazon SNSと組み合わせることでアラーム状態になったときにメール通知を行うことが可能になります。
私のプライベートアカウントでは月の料金が約5000円を超えた際にメール通知をしてくれる設定を行っています。
『AWS初学者向けハンズオン』 請求アラームの設定編
実際に使ってみる
今回はログの収集を行ってみようと思います。
収集するログはApacheのアクセスログにします。
環境
Ubuntu20.04
Apache2.4
設定の流れ
- 統合CloudWatchエージェントのインストール
- 収集するログの設定
- IAMロールの作成&EC2へアタッチ
- 確認
1. 統合CloudWatchエージェントのインストール
※今回はCloudWatchがメインなのでEC2インスタンスの起動や設定は省かせてもらいます。
CloudWatchエージェントは以下のOSでサポートされています。
参考ドキュメント
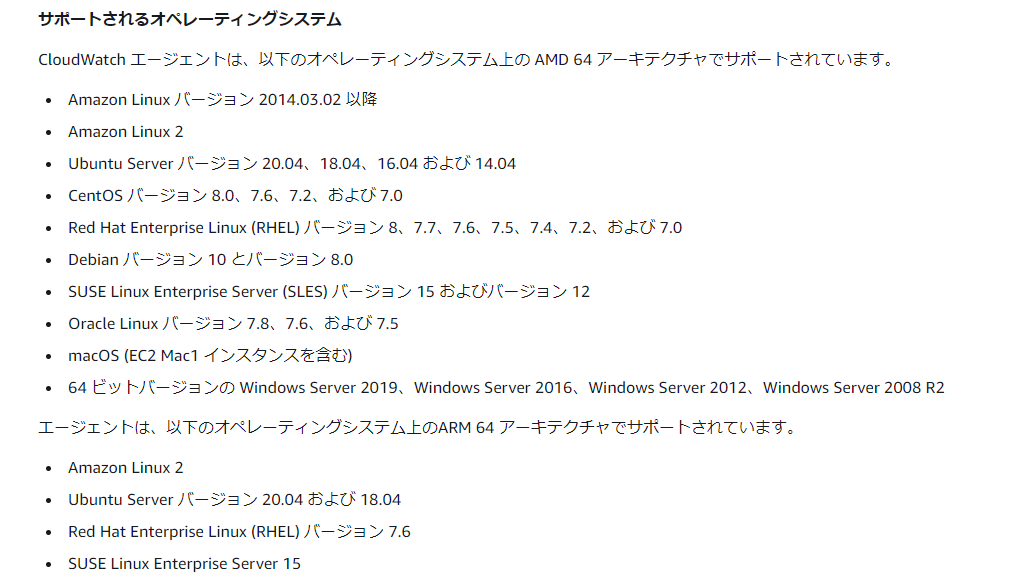
OSやバージョン、アーキテクチャを確認したら以下のコマンドを実行してください。
wget https://s3.ap-northeast-1.amazonaws.com/amazoncloudwatch-agent-ap-northeast-1/ubuntu/amd64/latest/amazon-cloudwatch-agent.deb
sudo dpkg -i -E ./amazon-cloudwatch-agent.deb
2. 収集するログの設定
今回はウィザードをしようしてログ出力設定を行います。
以下のコマンドを実行してください。
sudo /opt/aws/amazon-cloudwatch-agent/bin/amazon-cloudwatch-agent-config-wizard
実行後、何を収集するか聞かれるウィザードが起動します。
質問の内容に回答していきます。
On which OS are you planning to use the agent?
1. linux
2. windows
3. darwin
default choice: [1]:
1

Trying to fetch the default region based on ec2 metadata...
Are you using EC2 or On-Premises hosts?
1. EC2
2. On-Premises
default choice: [1]:
1

Which user are you planning to run the agent?
1. root
2. cwagent
3. others
default choice: [1]:
1

Do you want to turn on StatsD daemon?
1. yes
2. no
default choice: [1]:
2

Do you want to monitor metrics from CollectD?
1. yes
2. no
default choice: [1]:
2

Do you want to monitor any host metrics? e.g. CPU, memory, etc.
1. yes
2. no
default choice: [1]:
2

Do you have any existing CloudWatch Log Agent (http://docs.aws.amazon.com/AmazonCloudWatch/latest/logs/AgentReference.html) configuration file to import for migration?
1. yes
2. no
default choice: [2]:
2

Do you want to monitor any log files?
1. yes
2. no
default choice: [1]:
1

Log file path:
/var/log/apache2/access.log

Log group name:
default choice: [access.log]

Log stream name:
default choice: [{instance_id}]

Do you want to specify any additional log files to monitor?
1. yes
2. no
default choice: [1]:
2

Saved config file to /opt/aws/amazon-cloudwatch-agent/bin/config.json successfully.
Current config as follows:
{
        "agent": {
                "run_as_user": "root"
        },
        "logs": {
                "logs_collected": {
                        "files": {
                                "collect_list": [
                                        {
                                                "file_path": "/var/log/apache2/access.log",
                                                "log_group_name": "access.log",
                                                "log_stream_name": "{instance_id}"
                                        }
                                ]
                        }
                }
        }
}
Please check the above content of the config.
The config file is also located at /opt/aws/amazon-cloudwatch-agent/bin/config.json.
Edit it manually if needed.
Do you want to store the config in the SSM parameter store?
1. yes
2. no
default choice: [1]:
1

What parameter store name do you want to use to store your config? (Use 'AmazonCloudWatch-' prefix if you use our managed AWS policy)
default choice: [AmazonCloudWatch-linux]

Trying to fetch the default region based on ec2 metadata...
Which region do you want to store the config in the parameter store?
default choice: [ap-northeast-1]

Please provide credentials to upload the json config file to parameter store.
AWS Access Key:
アクセスキーを入力してください
AWS Secret Key:
シークレットアクセスキーを入力してください
Successfully put config to parameter store AmazonCloudWatch-linux.
Program exits now.
上から解説していきます。
-
On which OS are you planning to use the agent?
こちらは使用しているOSについて聞いています。
今回はUbuntuですので1を選択します。 -
Trying to fetch the default region based on ec2 metadata...
Are you using EC2 or On-Premises hosts?
こちらはどこでホストしているか聞いています。
今回はEC2なので1を選択します。 -
Which user are you planning to run the agent?
エージェントを実行するユーザについて聞かれています。
私はrootで実行するように1を選択しました。 -
Do you want to turn on StatsD daemon?
カスタムアプリケーションからカスタムメトリクスを取得する際に使用するツールのようです。
今回は必要ないので2を選択しました。
参考ドキュメント -
Do you want to monitor metrics from CollectD?
こちらも同じようにカスタムメトリクスを取得する際に使用するツールのようです。
今回は必要ないので2を選択しました。
参考ドキュメント -
Do you want to monitor any host metrics? e.g. CPU, memory, etc.
こちらはメモリやCPUのメトリクスを取得するか聞かれています。
今回は必要ないので2を選択しました。 -
Do you have any existing CloudWatch Log Agent (http://docs.aws.amazon.com/AmazonCloudWatch/latest/logs/AgentReference.html) configuration file to import for migration?
既存のCloudWatch Log Agentの設定ファイルがあるか聞かれています。
無いので2を選択しました。 -
Do you want to monitor any log files?
ここでようやくログに関する質問が来ました。
これはログを収集するか聞かれています。
収集するので1を選択しました。 -
Log file path:
ログのパスを聞かれています。
Apacheのデフォルトのアクセスログは/etc/apache2/envvarsを確認するとexport APACHE_LOG_DIR=/var/log/apache2$SUFFIXのように記載されています。
なので/var/log/apache2/access.logと入力します。 -
Log group name:
ログのグループネームについて聞かれています。
デフォルトのaccess.logでいいのでそのままエンターを押下します。 -
Log stream name:
こちらはログストリームネームについて聞かれています。
デフォルトのinstance_idでいいのでそのままエンターを押下します。 -
Do you want to specify any additional log files to monitor?
他にも出力したいログはあるか聞かれています。
無いので2を選択しました。 -
Saved config file to /opt/aws/amazon-cloudwatch-agent/bin/config.json successfully.
Current config as follows:
ここでは出来上がった設定ファイルの確認が行われます。 -
Do you want to store the config in the SSM parameter store?
ここではSSMパラメータストアに保存するか聞かれています。
保存するので1を選択します。 -
What parameter store name do you want to use to store your config? (Use 'AmazonCloudWatch-' prefix if you use our managed AWS policy)
ここではパラメータストアの名前を聞かれています。
指定はないのでデフォルトのままエンターを押下します。 -
Which region do you want to store the config in the parameter store?
パラメータストアのリージョンについて聞かれています。
東京リージョンを使用するのでap-northeast-1のままエンターを押下します。 -
Please provide credentials to upload the json config file to parameter store.
パラメータストアにjsonをアップロードするための認証情報を聞かれています。
アクセスキーとシークレットアクセスキーを入力してください。 -
Successfully put config to parameter store AmazonCloudWatch-linux.
Program exits now.
こちらが出力されたら終了です。
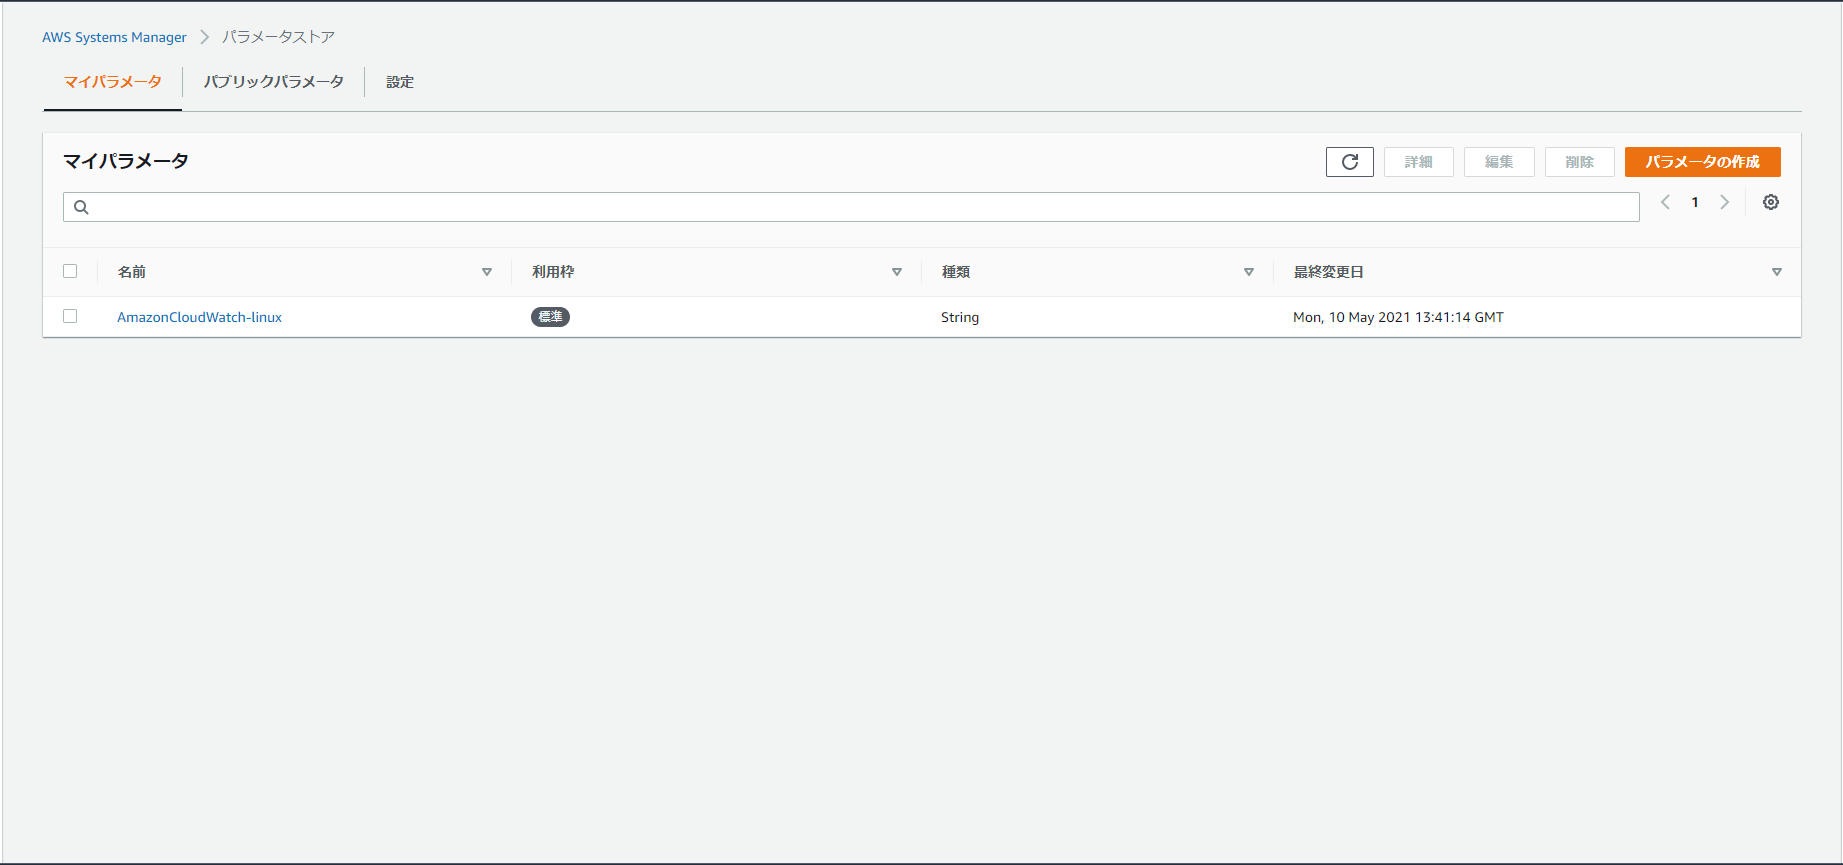
AWS Systems Managerのパラメータストアで設定した内容で保存されていることが確認できます。
3. IAMロールの作成&EC2へアタッチ
参考ドキュメント
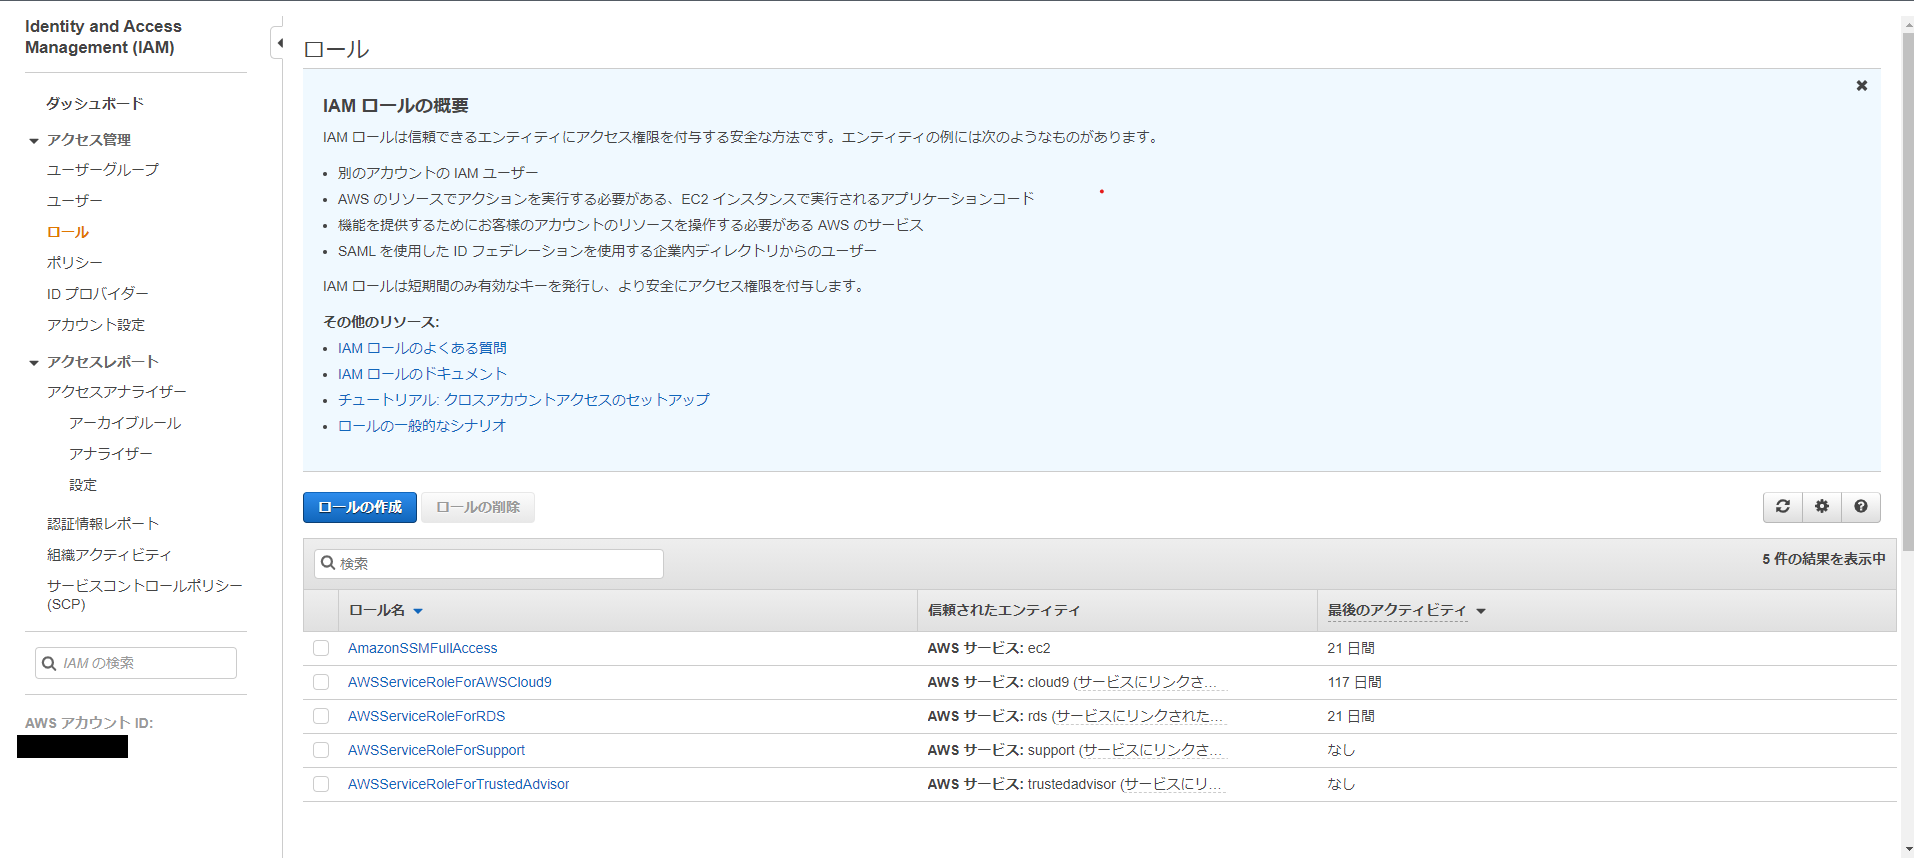
IAMダッシュボードからIAMロールを作成します。
以下の画面の「ロールの作成」をクリックします。
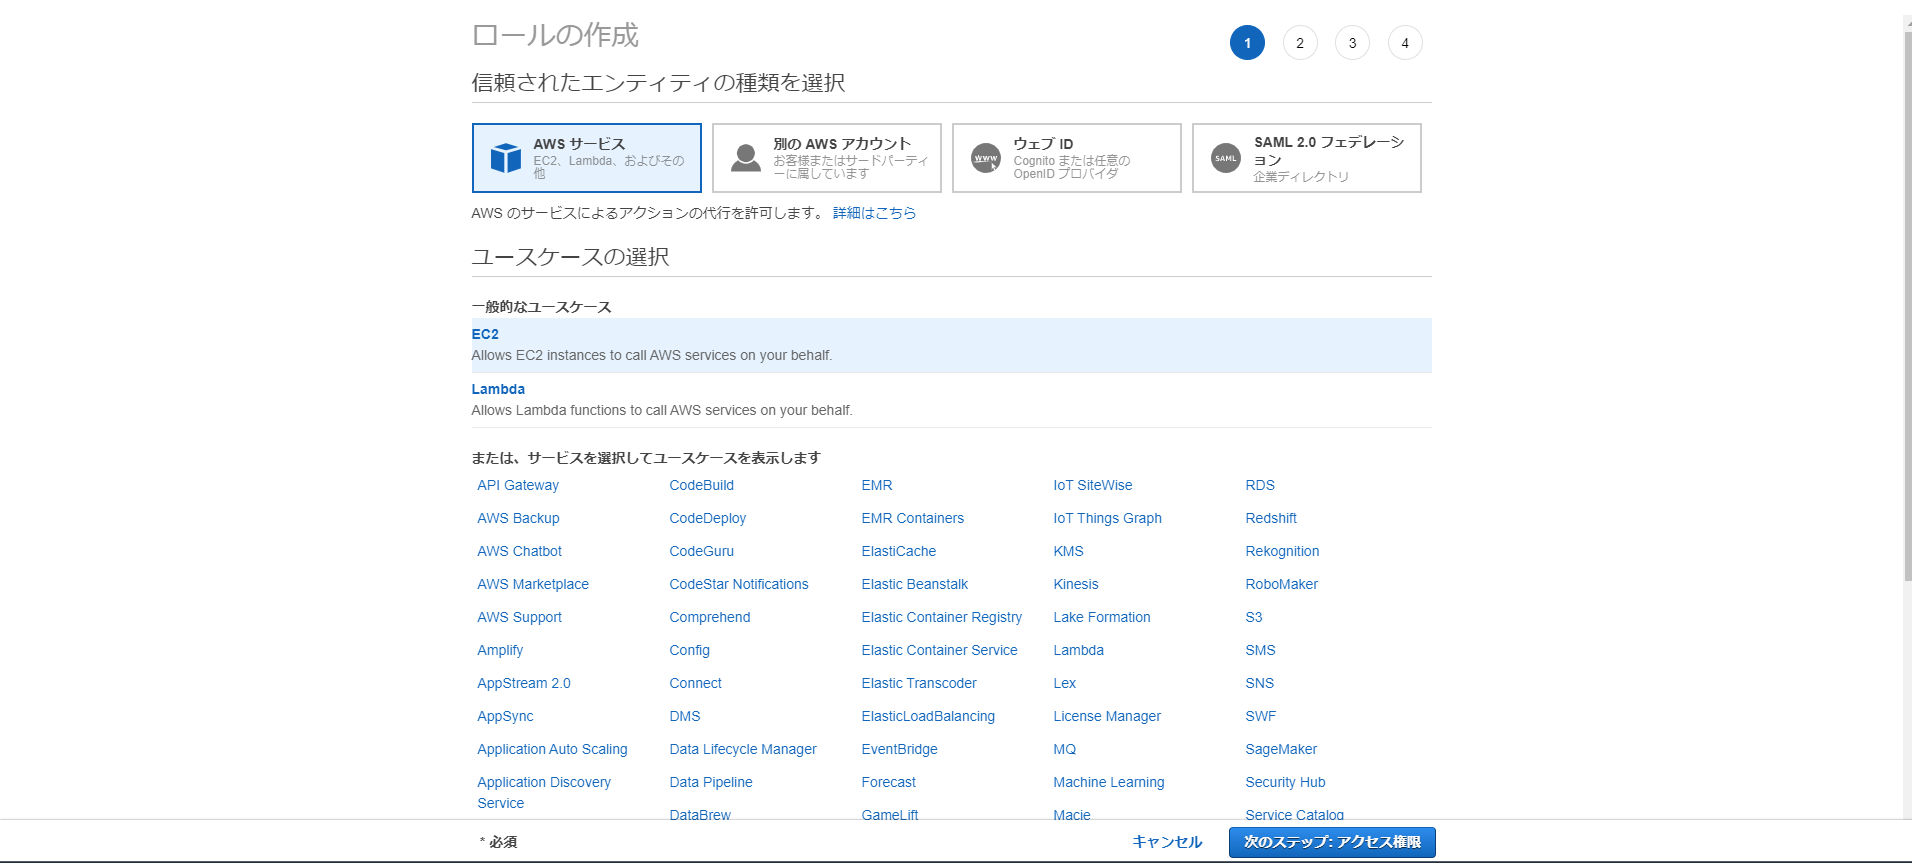
「信頼されたエンティティの種類を選択」で「AWSサービス」を選択
「一般的なユースケース」でEC2を選択
選択したら「次のステップ:アクセス権限」をクリックします。
CloudWatchAgentServerPolicyとAmazonSSMManagedInstanceCoreをチェックします。
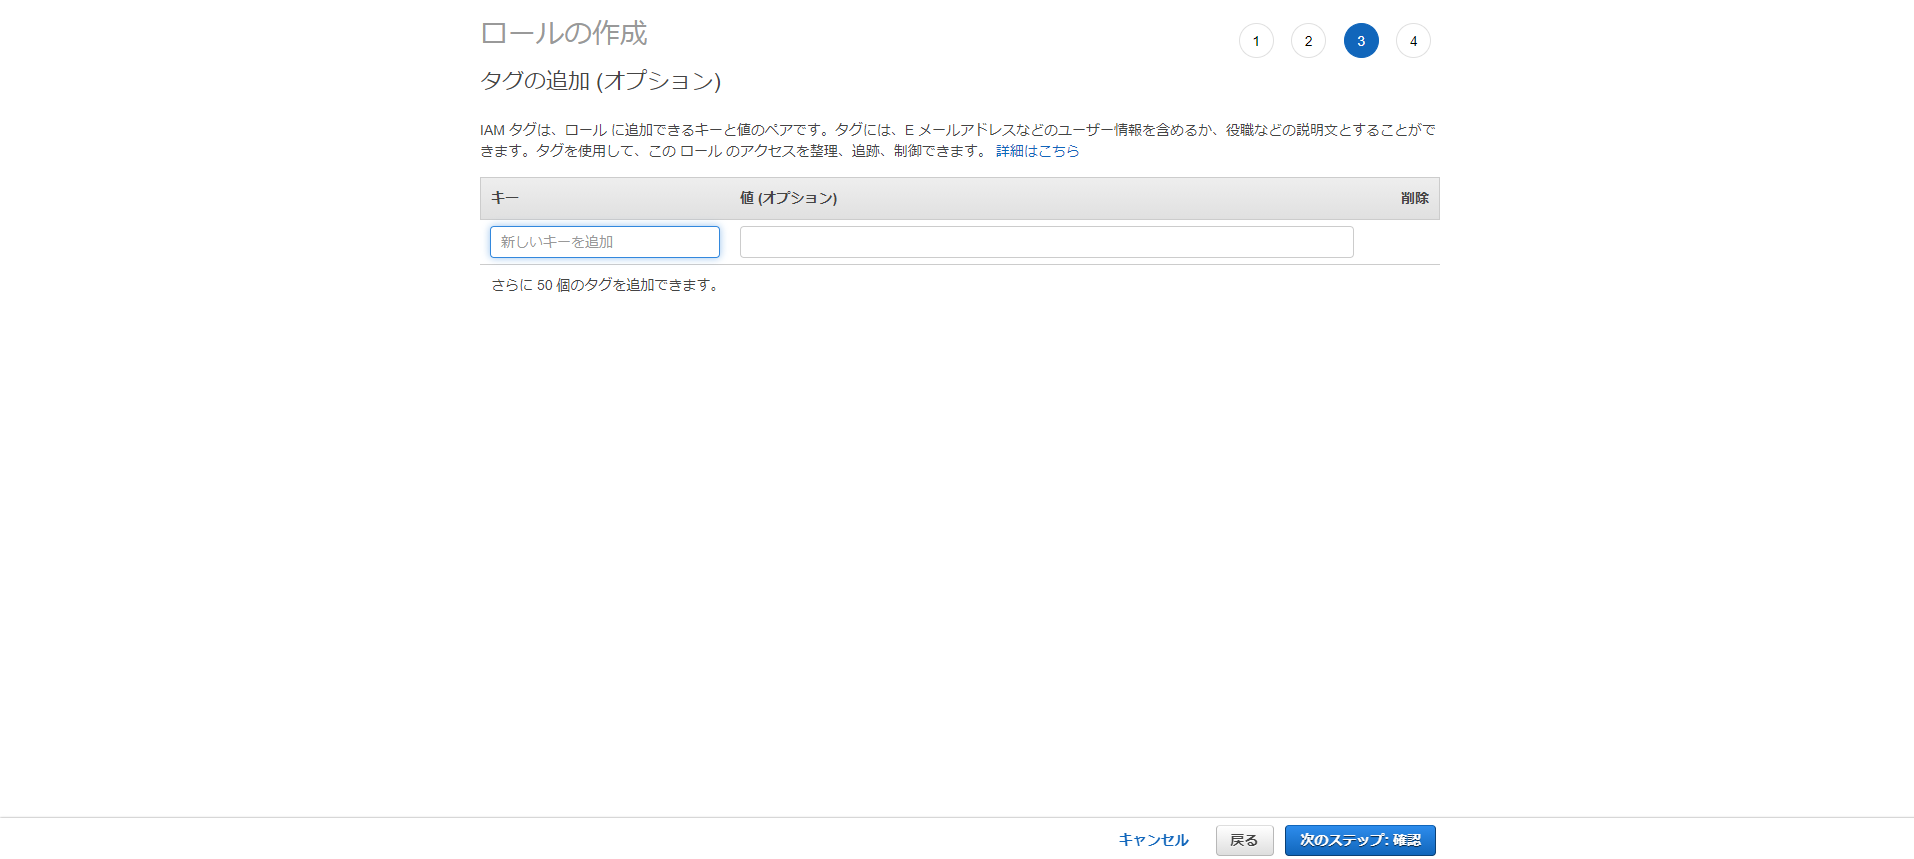
チェックしたら「次のステップ:タグ」をクリックします。
タグが必要な場合は設定してください。
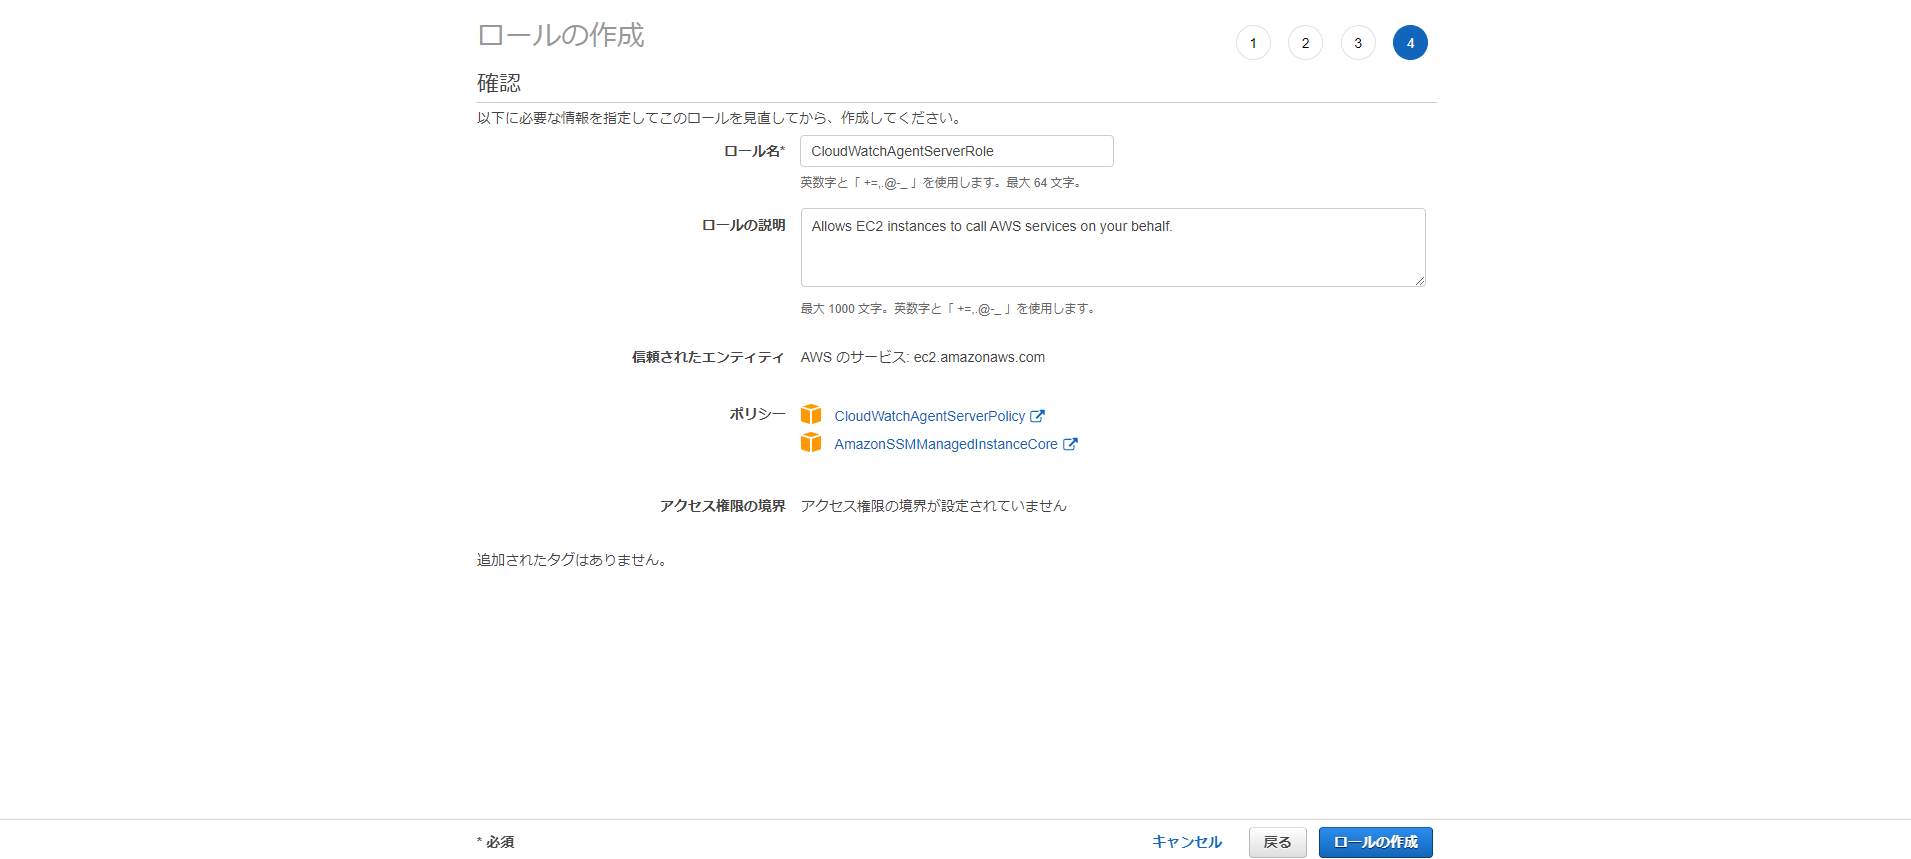
設定ができたら、「次のステップ:確認」をクリックします。
ロール名は任意のものを入力してください。
分かりやすいものをお勧めします。
設定に問題が無いか確認出来たら「ロールの作成」をクリックします。
次はEC2ダッシュボードへ移動してIAMロールを設定するEC2インスタンスを選択してください。
選択したら「アクション」→「セキュリティ」→「IAMロールを変更」をクリックします。
クリックしたらIAMロールの部分で上記で作成したIAMロールを選択して「保存」をクリックします。
Systems Manager Run Commandを使用してCloudWatch エージェントを開始する
参考ドキュメント
Systems Manager Run Commandへ移動します。
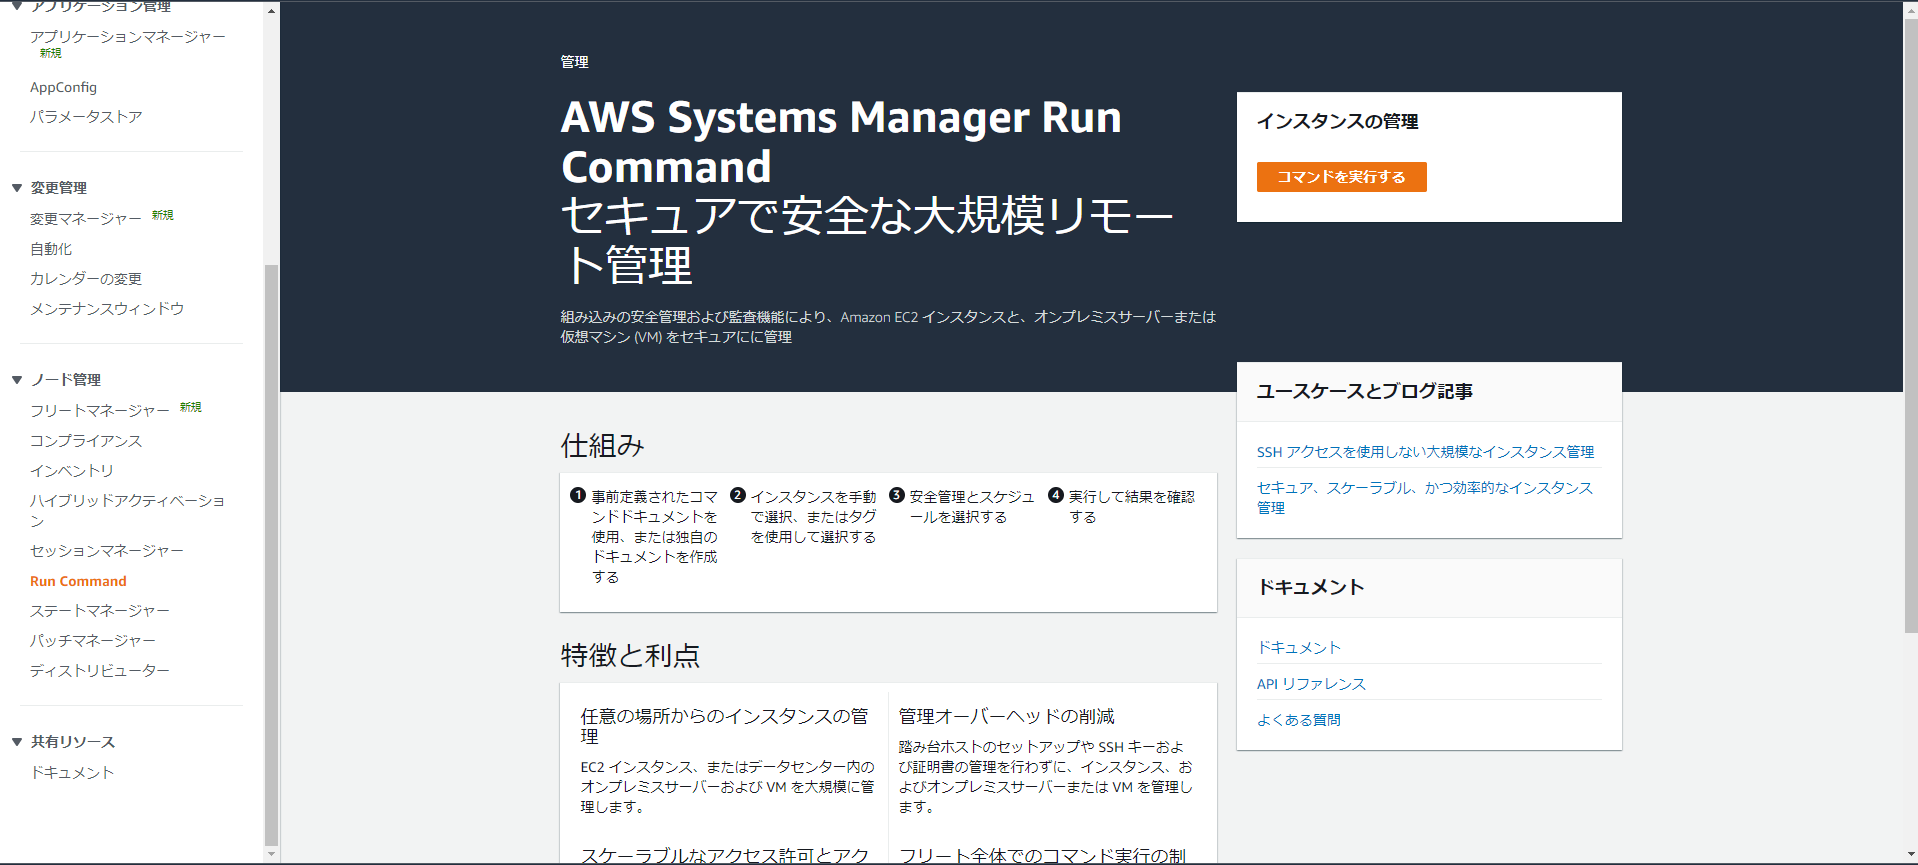
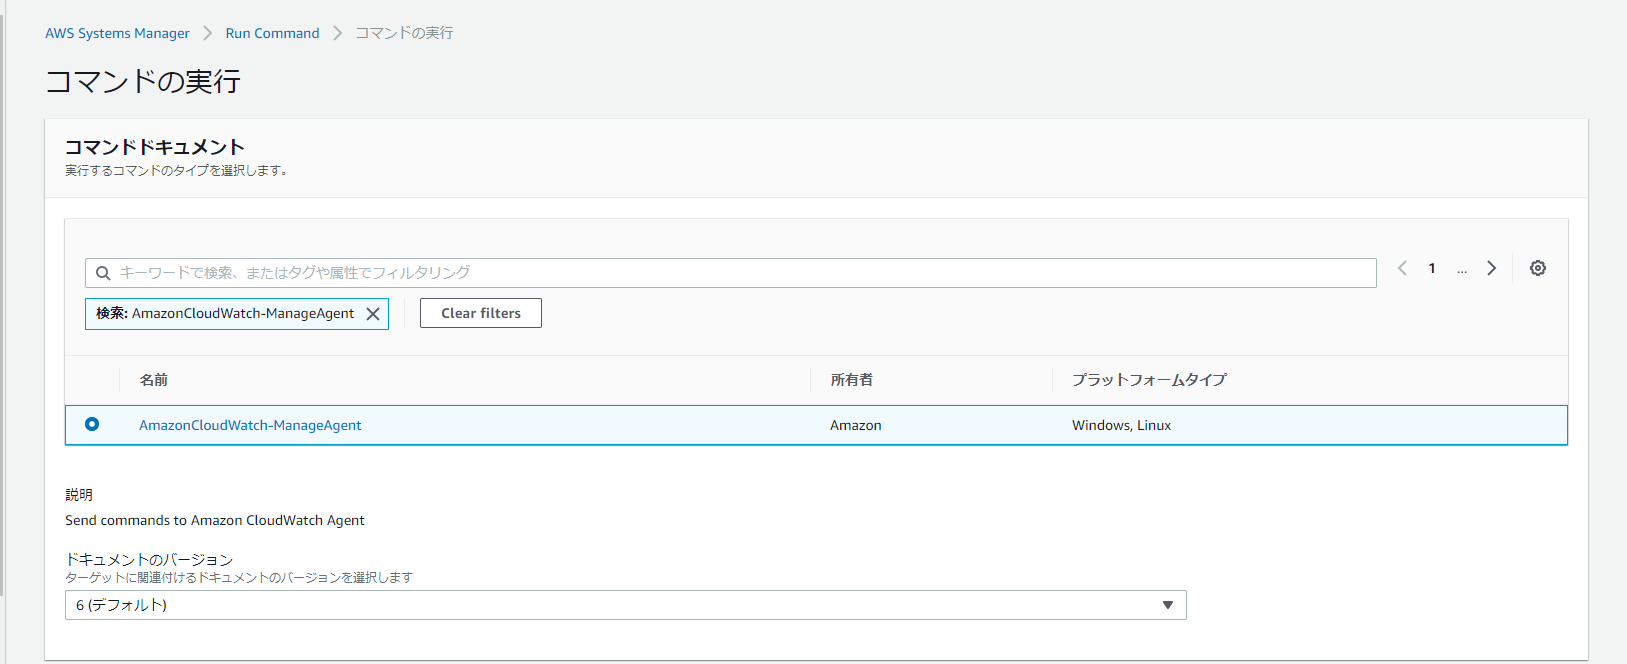
「コマンドを実行する」をクリックします。
「コマンドドキュメント」で「AmazonCloudWatch-ManageAgent」を選択します。
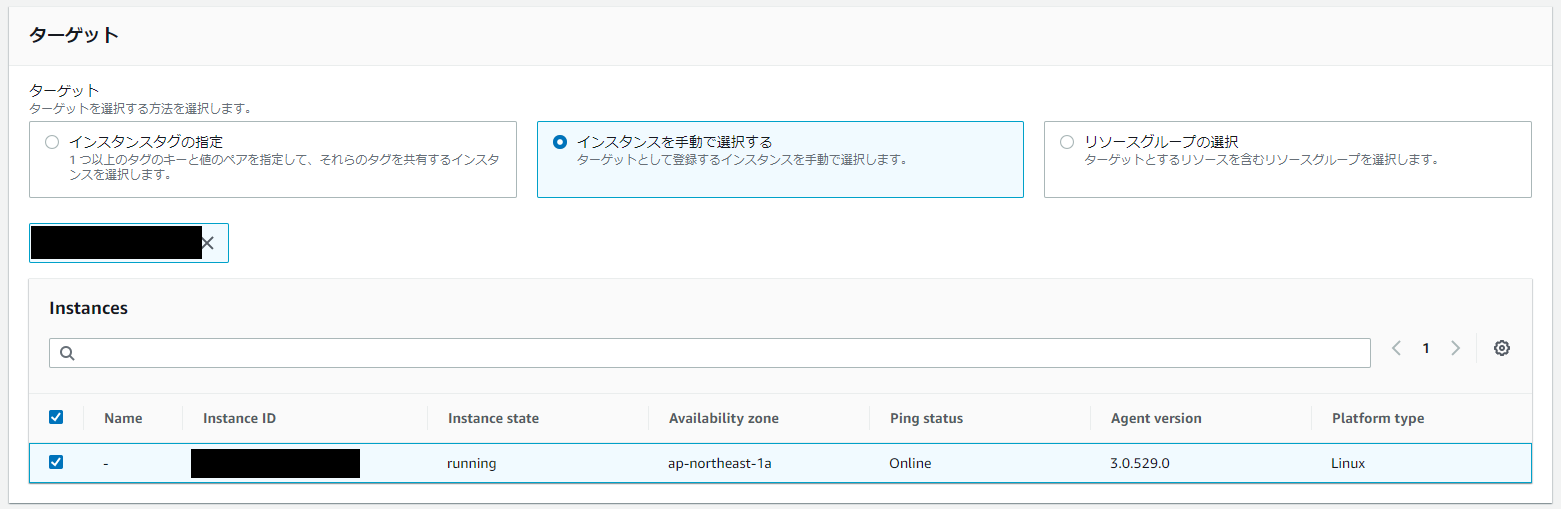
「ターゲット」でエージェントを起動するEC2インスタンスを選択します。
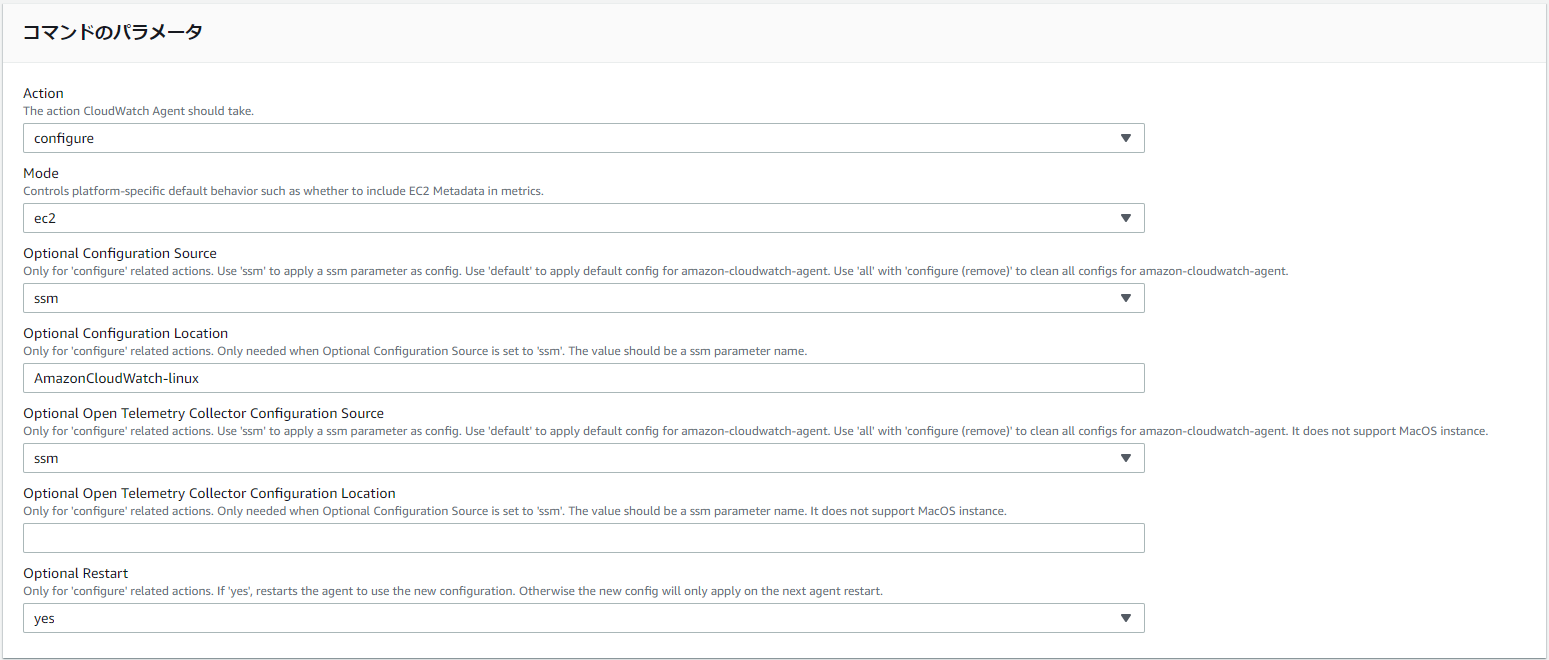
「コマンドのパラメータ」→「Action」で「configure」を選択します。
「Optional Configuration Source」で「ssm」を選択します。
「Optional Configuration Location」でパラメータストアに保存されたパラメータ名を入力します。
「Optional Restart」で「yes」を選択します。
最終的な画面は以下のようになると思います。
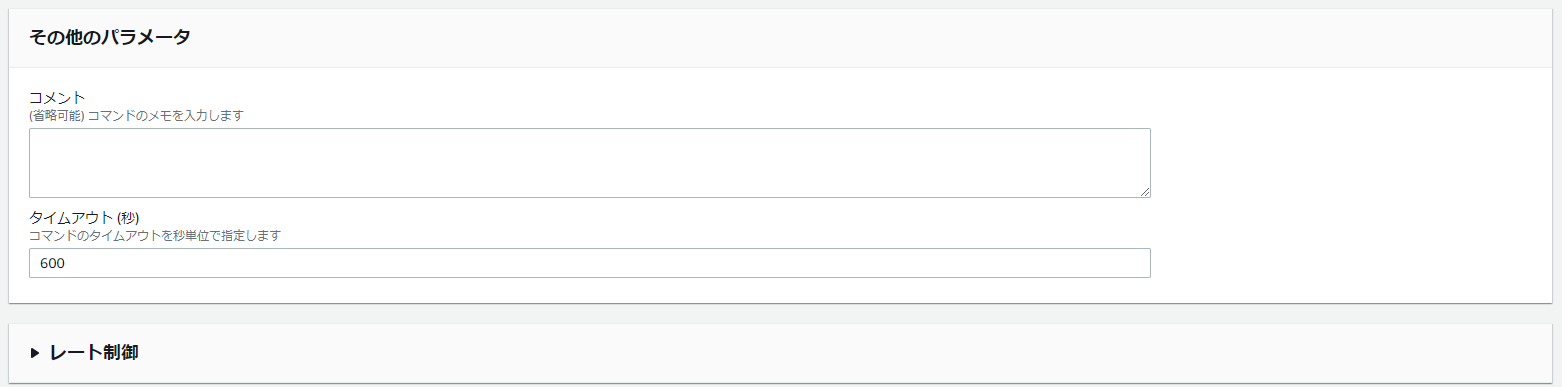
確認が完了したら「実行」をクリックします。

次の画面で以下の結果がでたら成功です。

4. 確認
CloudWatchのロググループにaccess.logが出力されていることが確認できました。

締めのご挨拶
今回はログの収集に関する設定を行ってみました。
AWSの公式ドキュメントを参照しながら簡単に設定することができました。
またAWS Systems Managerでパラメータの管理やエージェントの起動、インストールができることを知れたのは大きい収穫だと思います。