今回の資料
今回は、サーバレスなWebシステムを開発したい場合の御話です。
Visual Studio Code から、直接プログラムをデプロイします。
SQLサーバの利用やシングルサインオン的なEntraIDの扱いは、以前、試してみました。
この技術を参考に、AppServiceでWebシステムを試してみましょう。
環境構築(App Service)
まず、サーバレスの Webプロセス を登録しましょう。

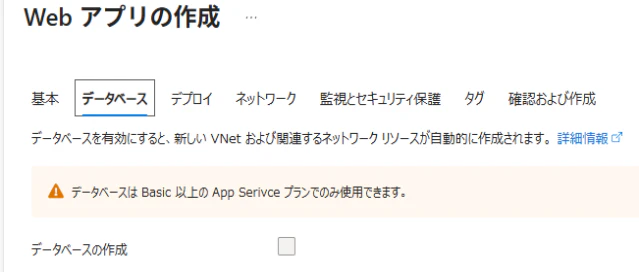
名前を入力し、Blazorを動作させる為、手堅く「.net8」の LTS を選択します。

とりあえず、試行という事で、コストを掛けたくなければ、無料枠です。

データベースは作成済なので、作らずに進めましょう。
開発環境として、Git が使えるようであれば、使うのでしょうね。

御試しという事で、パブリックにします。

御試しで重要なのは、コストを掛けないっと。
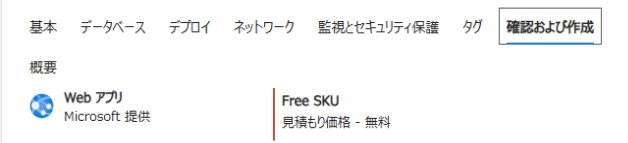
一連の作業で、AppServicesが登録され、URLが生成されWebサービスが開始されます。
SQLサーバへ接続するための設定として、「設定」→「ID」より、システム割当をオンにします。

環境構築(Visual Studio Code)
以前作成した Blazor を、App Service へ、デプロイしましょう。
VSCのターミナルより、プロジェクトを発行しておきます。
dotnet publish -c Release -o ./publish
拡張機能から、Azure Tools を Install します。

完了すると、左端列のアイコンが増えます。

Azure のアイコンをクリックし、登録した AppService を右クリックし、「Deploy to Web App...」を選択し、「Browse...」から、publishフォルダを選択し、デプロイを進めます。

デプロイが終了したら、App Services 概要の「既定のドメイン」よりWebサイトを確認しましょう。

認証機能の再構築(Microsoft Entra ID)
Azure の「Microsoft Entra ID」を選択し、「管理」→「アプリの登録」→「すべてのアプリケーション」より、前回登録したアプリを選択します。
リダイレクトURIが違っているので、設定の追加(リダイレクトURIを追加)を行います。

メニューの「管理」→「認証」より、「URIの追加」をクリックし、AppServicesのURLを追加します。

AppServicesのURLからBlazorをアクセスし、認証が得られることを確認しましょう。

SQLサーバの準備(データベースの設定)
クエリーエディタから以下の SQL を実行します。
CREATE USER [AppServiceの名前] FROM EXTERNAL PROVIDER;
ALTER ROLE db_datareader ADD MEMBER [AppServiceの名前];
今回の Blazor は、Selectの読み出しのみです。
書き込みをする場合は、以下も実行しましょう。
ALTER ROLE db_datawriter ADD MEMBER [AppServiceの名前];
プログラムの修正(VSC)
データベースへの接続文字列<ConnectionStrings>が必要です。
{
  "AzureAd": {
    "Instance": "https://login.microsoftonline.com/",
    "TenantId": "■ テナントID ■",
    "ClientId": "■ クライアントID ■",
    "ClientSecret": "■ クライアントシークレットの値 ■",
    "ResponseType": "code"
  },
  "ConnectionStrings": {
    "DefaultConnection": "Server=tcp:■SQLサーバ名■.database.windows.net,1433;Initial Catalog=■データベース名■;Authentication=Active Directory Managed Identity;Encrypt=True;TrustServerCertificate=False;"
  },  "Logging": {
    "LogLevel": {
      "Default": "Information",
      "Microsoft.AspNetCore": "Warning"
    }
  },
  "AllowedHosts": "*"
}
SQLクライアント等のパッケージ<Microsoft.Data.SqlClient>追加が必要です。
<Project Sdk="Microsoft.NET.Sdk.Web">
  <PropertyGroup>
    <TargetFramework>net8.0</TargetFramework>
    <Nullable>enable</Nullable>
    <ImplicitUsings>enable</ImplicitUsings>
  </PropertyGroup>
  <ItemGroup>
    <PackageReference Include="Microsoft.EntityFrameworkCore.SqlServer" Version="9.0.9" />
    <PackageReference Include="Microsoft.EntityFrameworkCore.Tools" Version="9.0.9">
      <IncludeAssets>runtime; build; native; contentfiles; analyzers; buildtransitive</IncludeAssets>
      <PrivateAssets>all</PrivateAssets>
    </PackageReference>
    <PackageReference Include="Microsoft.Identity.Web" Version="3.14.1" />
    <PackageReference Include="Microsoft.Identity.Web.UI" Version="3.14.1" />
    <PackageReference Include="Microsoft.Data.SqlClient" Version="5.1.6" />
  </ItemGroup>
</Project>
SQLに関する接続定義<DefaultConnection>が必要となります。
using ■プロジェクト名■.Components;
using Microsoft.AspNetCore.Authentication.OpenIdConnect;
using Microsoft.Identity.Web;
using Microsoft.Identity.Web.UI;
using Microsoft.EntityFrameworkCore;
using ■プロジェクト名■.Data;
var builder = WebApplication.CreateBuilder(args);
// Azure AD を使った認証設定
builder.Services.AddAuthentication(OpenIdConnectDefaults.AuthenticationScheme).AddMicrosoftIdentityWebApp(builder.Configuration.GetSection("AzureAd"));
// ログイン・ログアウトなどの認証関連ページを提供する Microsoft Identity UI を追加
builder.Services.AddRazorPages().AddMicrosoftIdentityUI();
// Blazor Server 機能を追加
builder.Services.AddRazorComponents().AddInteractiveServerComponents();
builder.Services.AddDbContext<AppDbContext>(options => options.UseSqlServer(builder.Configuration.GetConnectionString("DefaultConnection")));
var app = builder.Build();
// エラー処理やセキュリティ設定
if (!app.Environment.IsDevelopment()) {
    app.UseExceptionHandler("/Error", createScopeForErrors: true);
    app.UseHsts();
}
// ミドルウェア設定
app.UseHttpsRedirection();
app.UseStaticFiles();
app.UseAntiforgery();
// ルーティング
app.MapRazorComponents<App>().AddInteractiveServerRenderMode();
app.MapControllers();
app.Run();
テーブル構造の定義を行います。
using System.ComponentModel.DataAnnotations;
using System.ComponentModel.DataAnnotations.Schema;
namespace ■プロジェクト名■.Models {
    [Table("tUser")] // テーブル名が "tUser" であることを指定
    public class tUser {
        [Key]
        public string UserId { get; set; } // 主キー
        public required string FirstName { get; set; } // ユーザー名
        public required string LastName { get; set; } // ユーザー名
        public required string Email { get; set; } // Mail
    }
}
テーブル構造の利用定義を行います。
using Microsoft.EntityFrameworkCore;
using ■プロジェクト名■.Models;
namespace ■プロジェクト名■.Data {
    public class AppDbContext : DbContext {
        public AppDbContext(DbContextOptions<AppDbContext> options)
            : base(options) { }
        // TUser テーブルに対応する DbSet
        public DbSet<tUser> tUsers { get; set; }
    }
}
テーブルリストを呼び出すリンクを追加します。
<div class="top-row ps-3 navbar navbar-dark">
    <div class="container-fluid">
        <a class="navbar-brand" href="">Home</a>
    </div>
</div>
<input type="checkbox" title="Navigation menu" class="navbar-toggler" />
<div class="nav-scrollable" onclick="document.querySelector('.navbar-toggler').click()">
    <nav class="flex-column">
      ・・・・・・・・・・・・・・・
        @*EntraIDログイン*@
        <div class="nav-item px-3">
            <a href="MicrosoftIdentity/Account/SignIn" class="nav-link">ログイン</a>
        </div>
        @*EntraIDログアウト*@
        <div class="nav-item px-3">
            <a href="MicrosoftIdentity/Account/SignOut" class="nav-link">ログアウト</a>
        </div>
        @*SQLサーバ連携*@
        <div class="nav-item px-3">
            <NavLink class="nav-link" href="users">
                <span class="bi bi-plus-square-fill-nav-menu" aria-hidden="true"></span> Users
            </NavLink>
        </div>
    </nav>
</div>
テーブルリストの表示プログラムです。
@page "/users"
@using ■プロジェクト名■.Data
@using ■プロジェクト名■.Models
@using Microsoft.EntityFrameworkCore
@inject AppDbContext DbContext
<PageTitle>User List</PageTitle>
<h1>ユーザー一覧</h1>
@if (users == null) {
    <p><em>読み込み中...</em></p>
} else if (users.Count == 0) {
    <p>ユーザーが見つかりませんでした。</p>
} else {
    <table class="table">
        <thead><tr>
            <th>ID</th><th>姓</th><th>名</th><th>メール</th>
        </tr></thead>
        <tbody>
            @foreach (var user in users) {
                <tr>
                    <td>@user.UserId</td><td>@user.FirstName</td>
                    <td>@user.LastName</td><td>@user.Email</td>
                </tr>
            }
        </tbody>
    </table>
}
@code {
    private List<tUser>? users;
    protected override async Task OnInitializedAsync() {
        users = await DbContext.tUsers.ToListAsync();
    }
}
最後に
サーバを用意すると、IISやApache等のWebサーバをセットアップして、データベース用意して、稼働制御やバックアップのシェルやバッチを用意するはずです。
クラウドのPaaSの利用により、それらのセットアップが軽減されます(設定項目の意味等、覚える事は多い気もしますが…?)
DBサーバとAPサーバ複数台の構成を考えると、PaaSの方が、サーバ毎の作業が不要になりますし、節約も可能ですし便利な気もします。
サーバ1台に全て積み込むような、小規模なシステムであれば、PaaSのメリットは微妙な感じですかね。。。
以上、お疲れさまでした~。