「Mapを表示するぞ!!」
…と、何だかんだiOSアプリを本格的に作成していくためのスタートラインとして、まずはAPIの使い方を学習していきました。
Maps SDK for iOSのチュートリアルは多く存在しますが、右も左も分からない初心者にはあまり丁寧な記事が見つからなかったので、作成がてらアウトプットも兼ねて順を追って紹介していきます。
※開発環境
Xcode 12
Swift 5.3
APIって?
APIとはApplication Programming Interface(アプリケーション・プログラミング・インターフェイス)略称です。APIとは、あるコンピュータプログラム(ソフトウェア)の機能や管理するデータなどを、外部の他のプログラムから呼び出して利用するための手順やデータ形式などを定めた規約のこと。
(なるほど、分からん…!)
概要を端的にすると、ソフトウェア同士のやりとりの橋渡しの機能がAPIとなります。
(決まった方法でアクセスをすれば決まった結果を返してくれる橋渡し機能)
GoogleやTwitterなど、多くの会社はAPIを提供しています。その使いたい対象の機能(サービス)を他のプログラムから呼び出してもらうための命令や関数のことをAPIといいます。
Google Mapを使えるように設定
GoogleのMap API(iOS)を使いたいので、設定を行います。
Google Maps Platformに飛び
画面右上のConsoleに移動します。
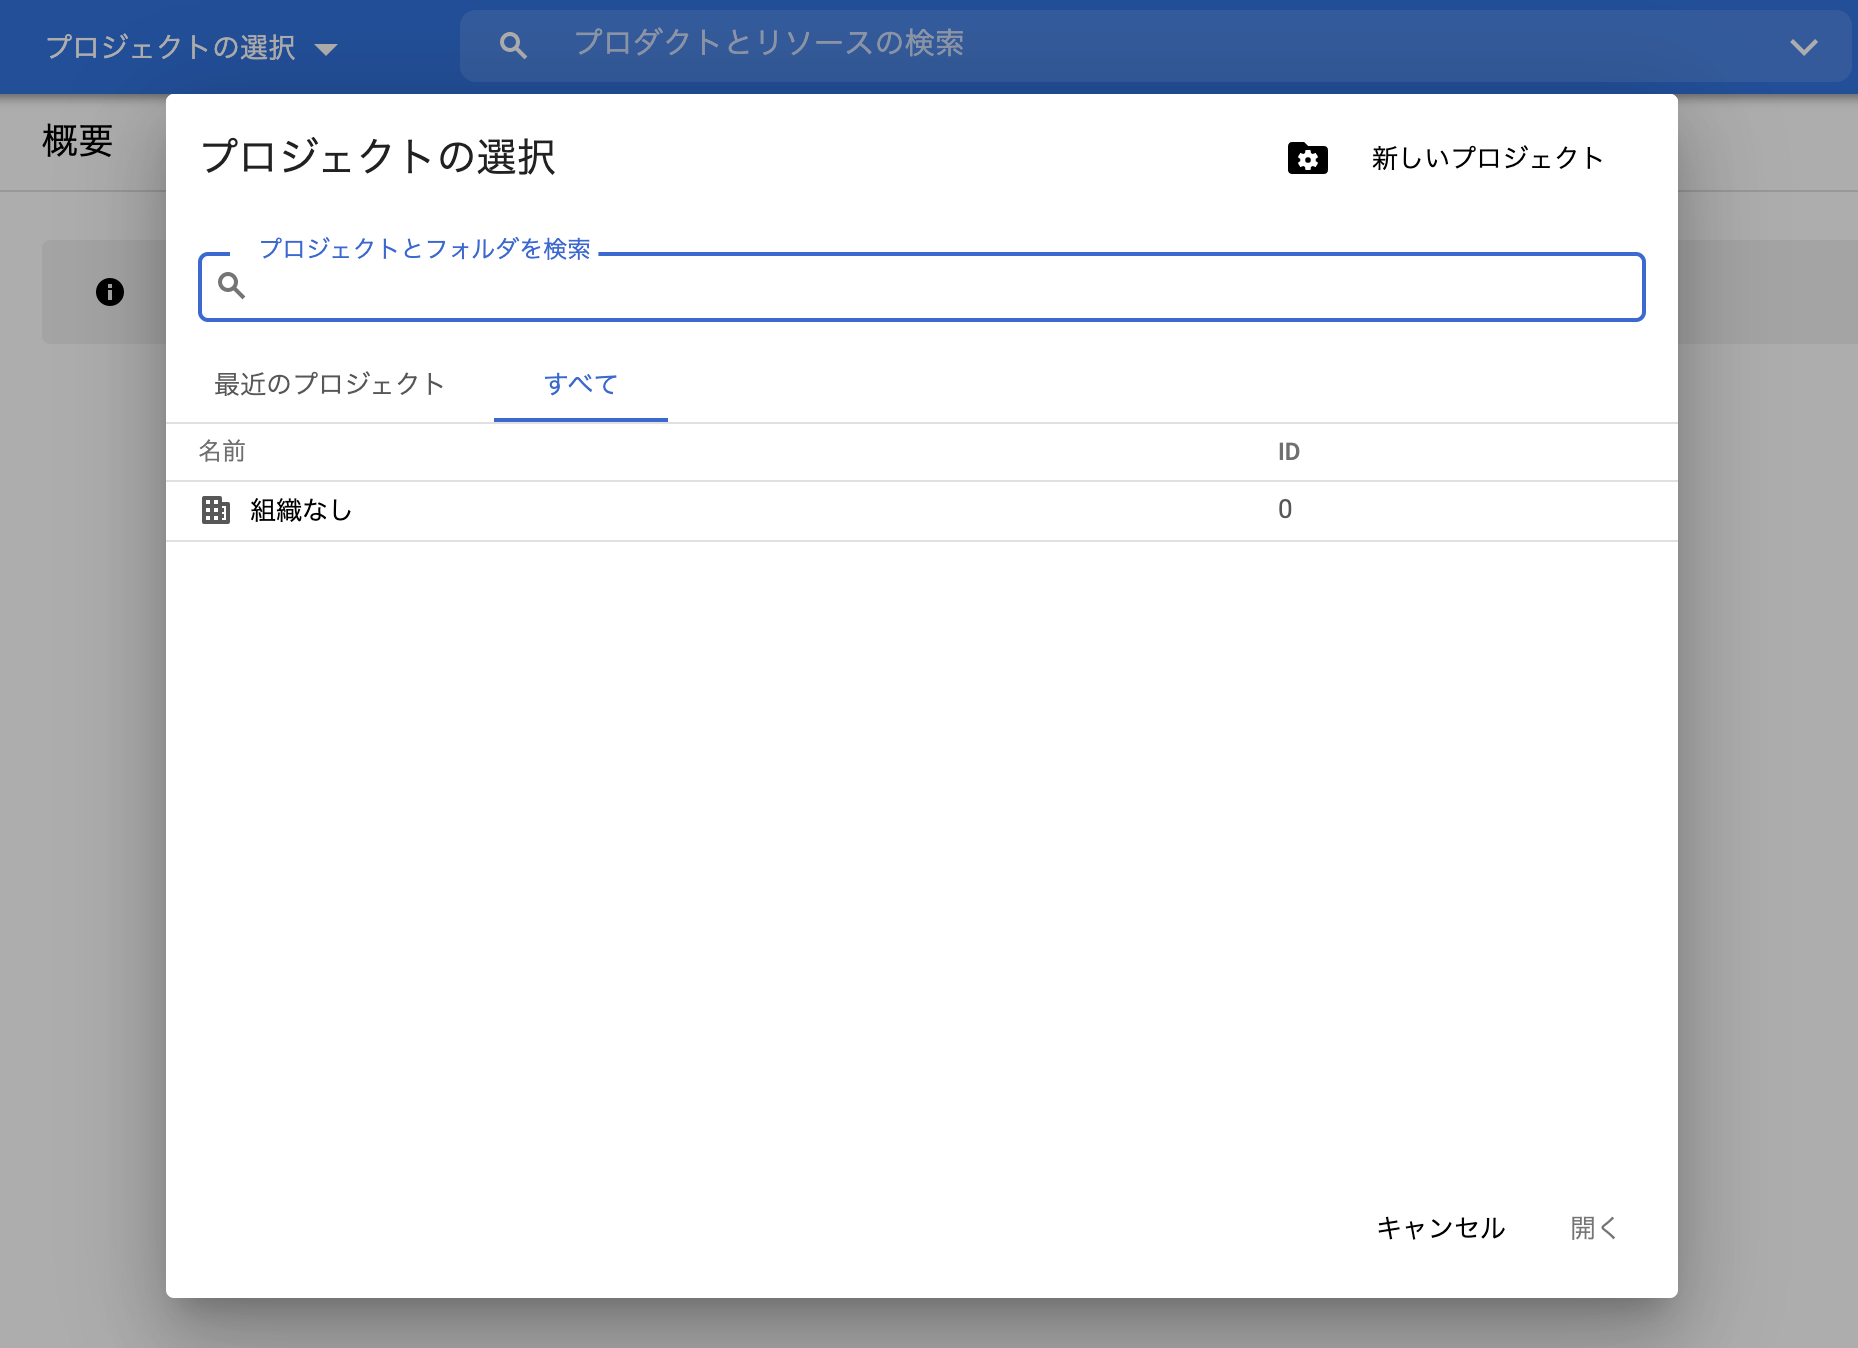
「プロジェクトの選択」をクリックし、新しいプロジェクトを作成します。
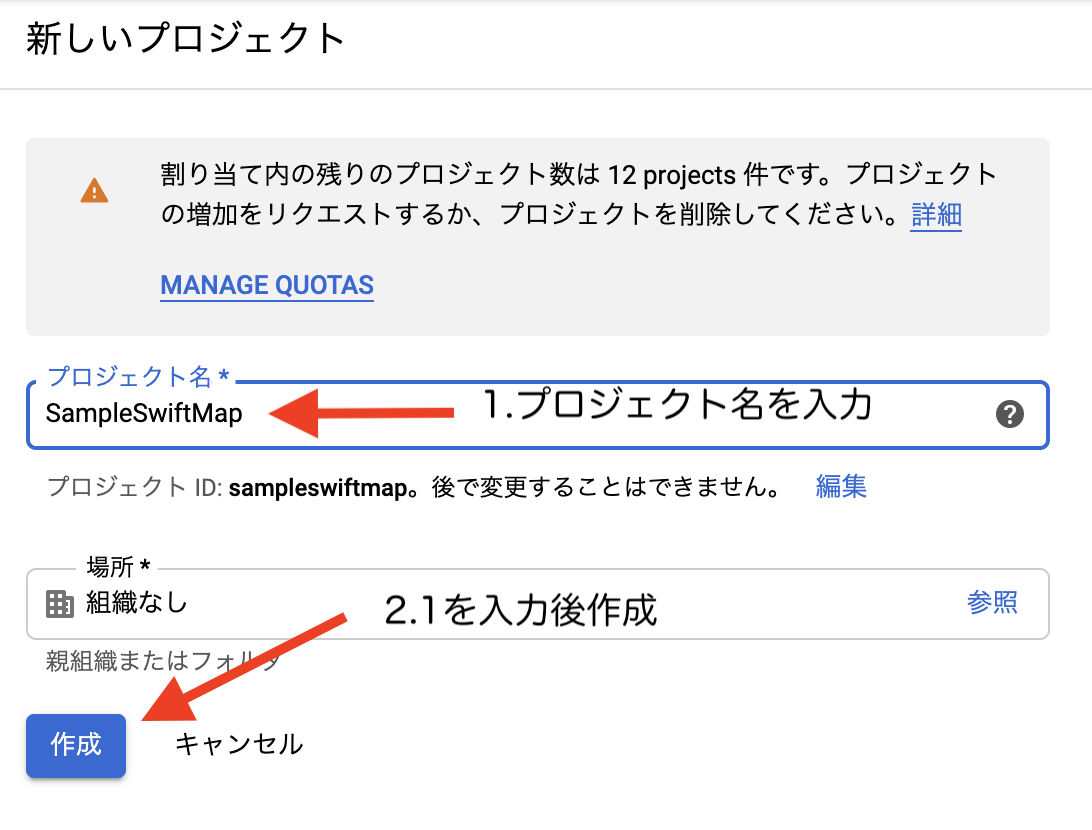
プロジェクト名を入力後、作成ボタンを押します。
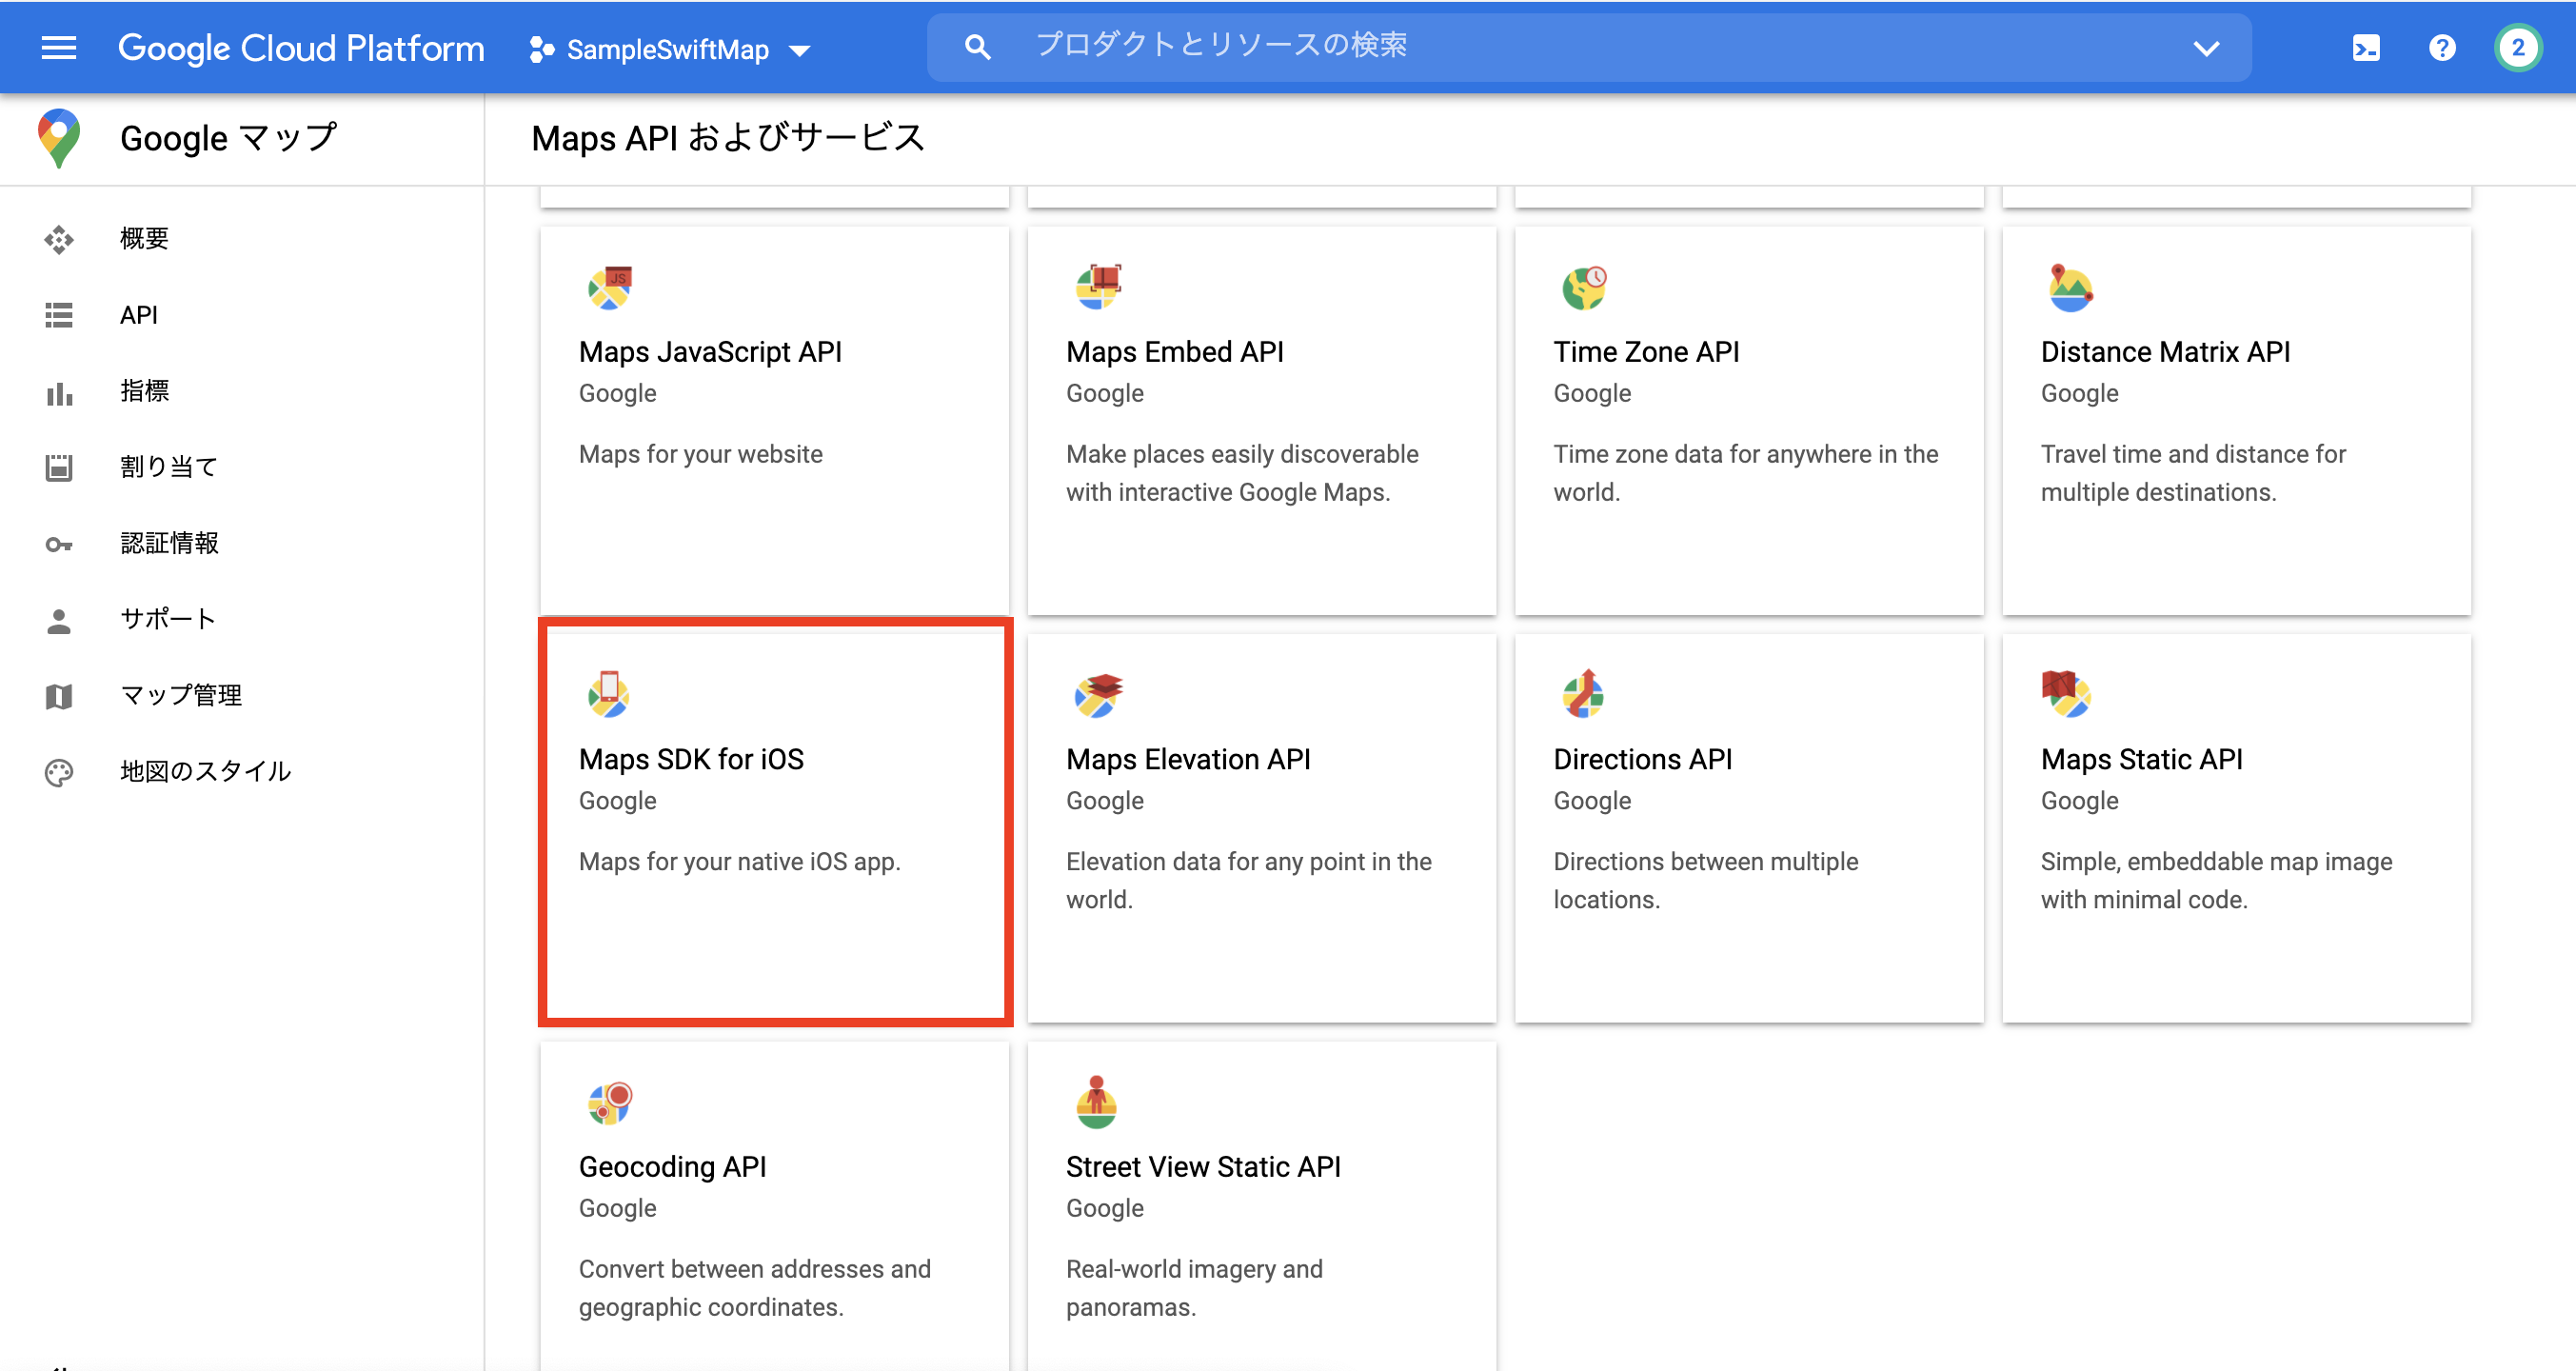
プロジェクトが開くと思うので、APIからMaps SDK for iOSを選択
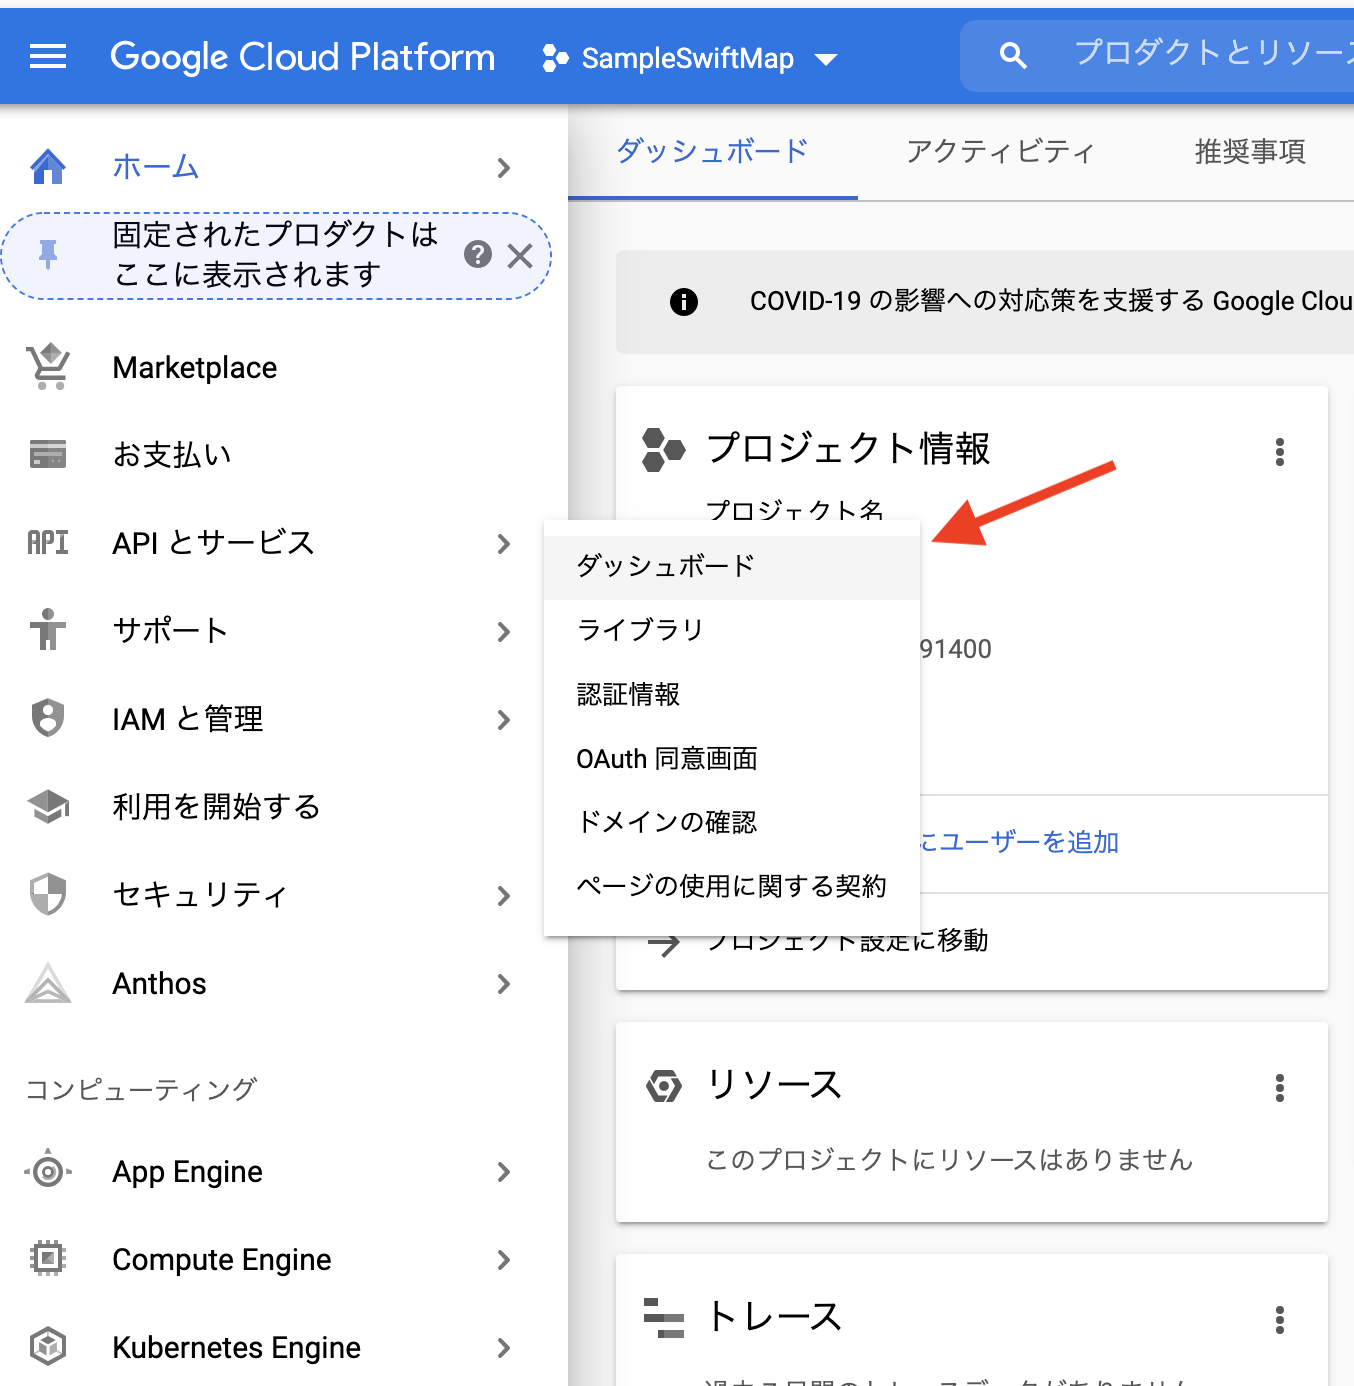
※ホームに遷移していた場合
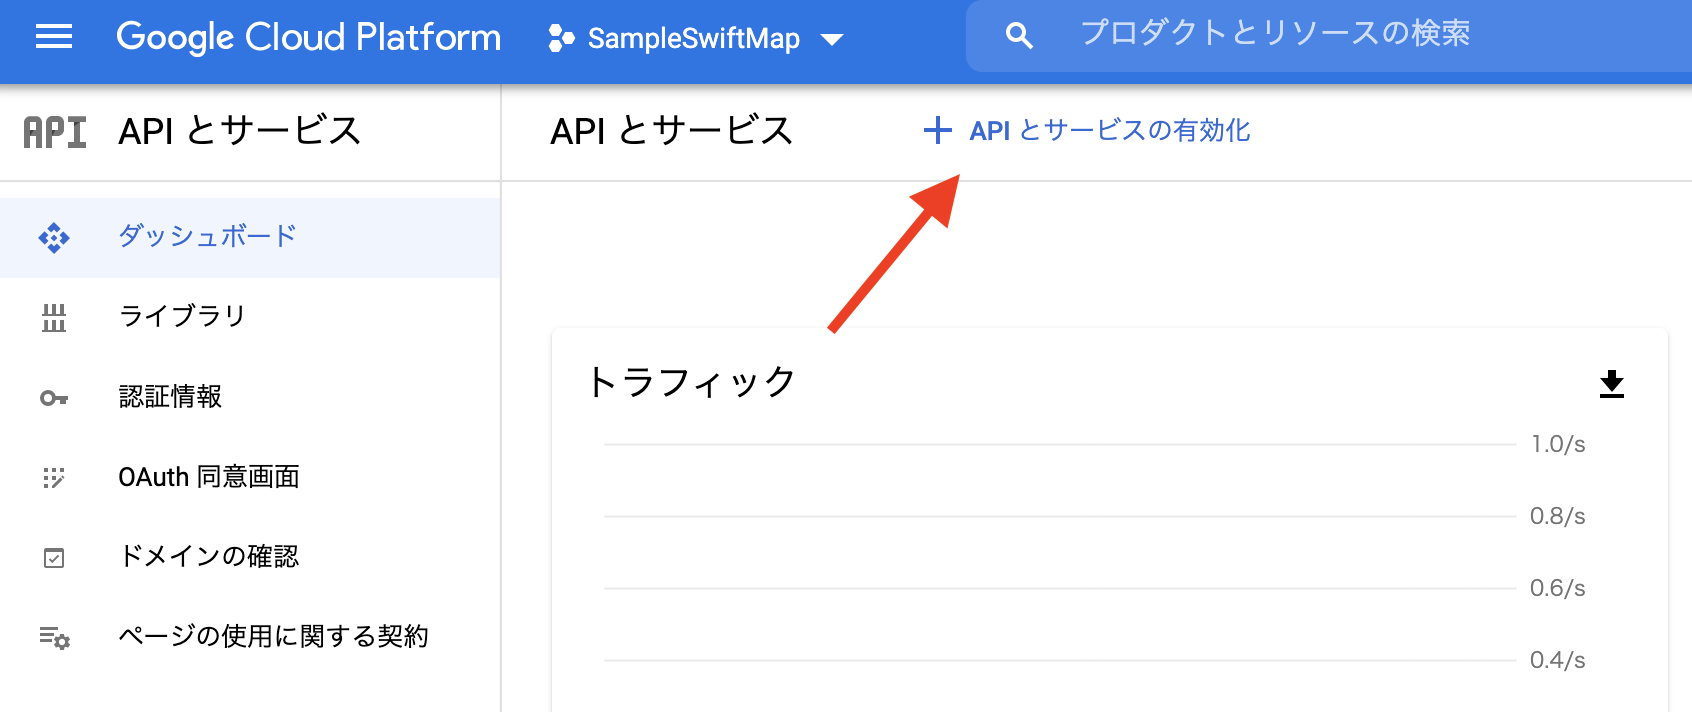
APIとサービス → ダッシューボードを選択
APIとサービスの有効化をクリック
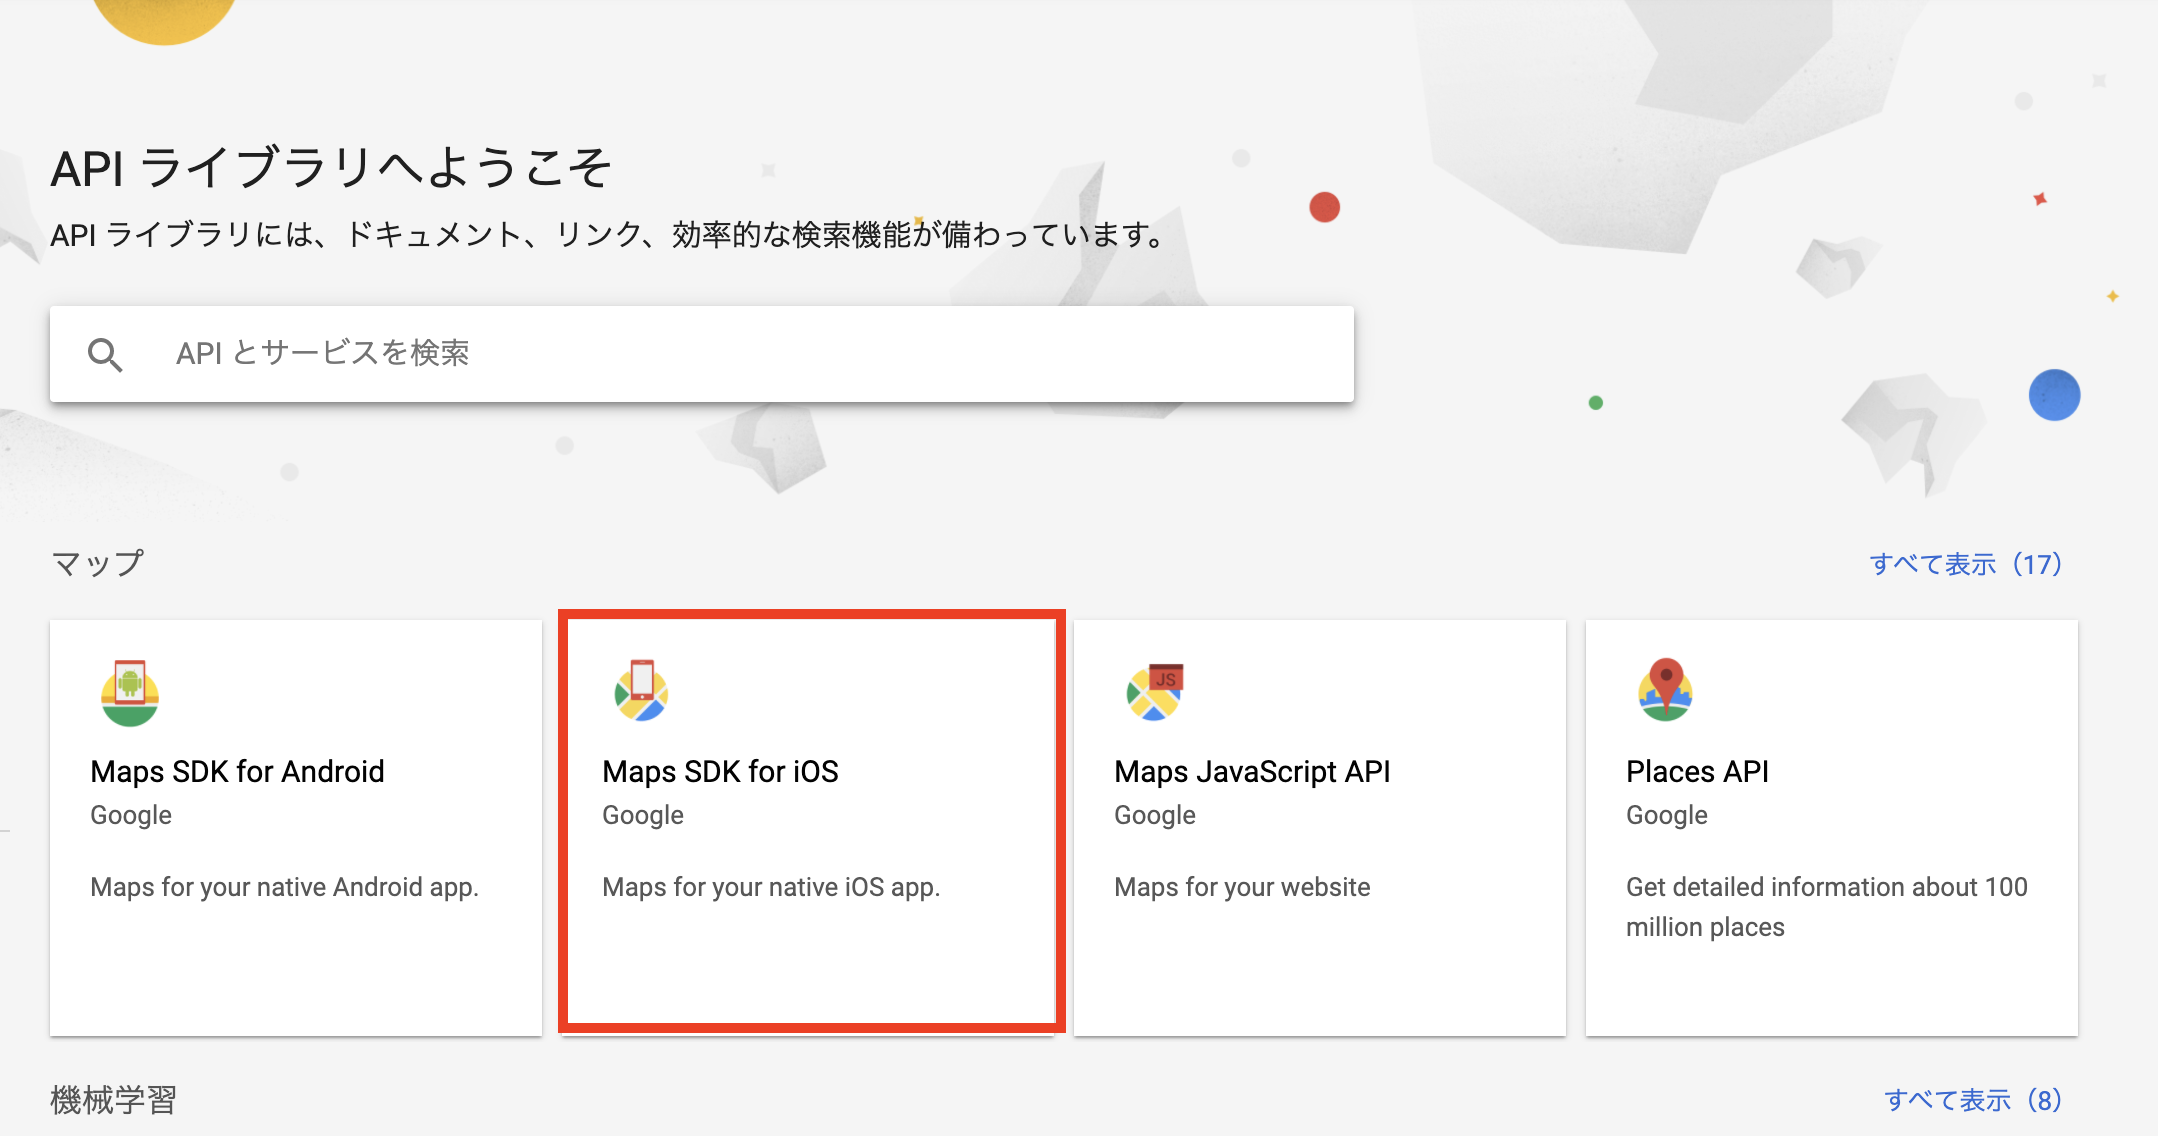
APIライブラリの画面が出てきますので、Maps SDK for iOSを選択してください。
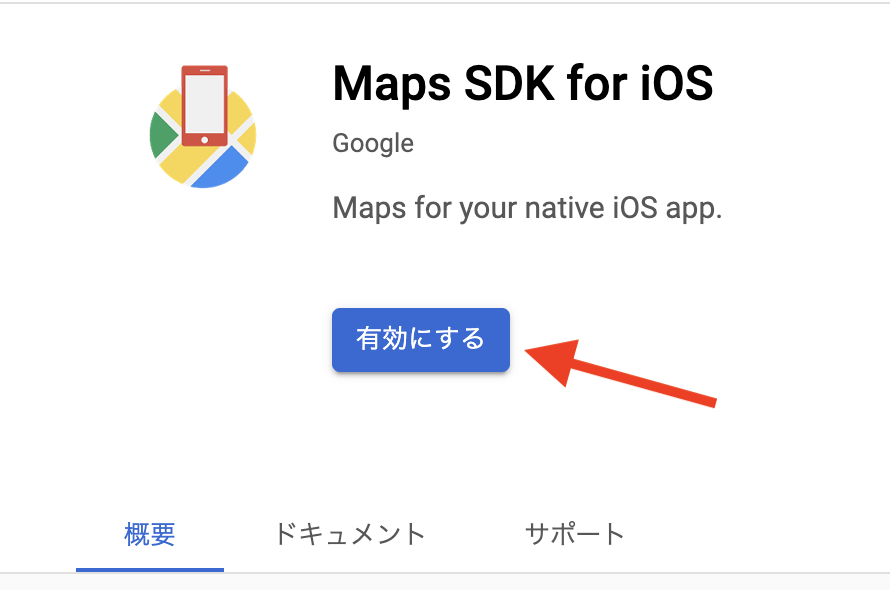
有効にするをクリックします。
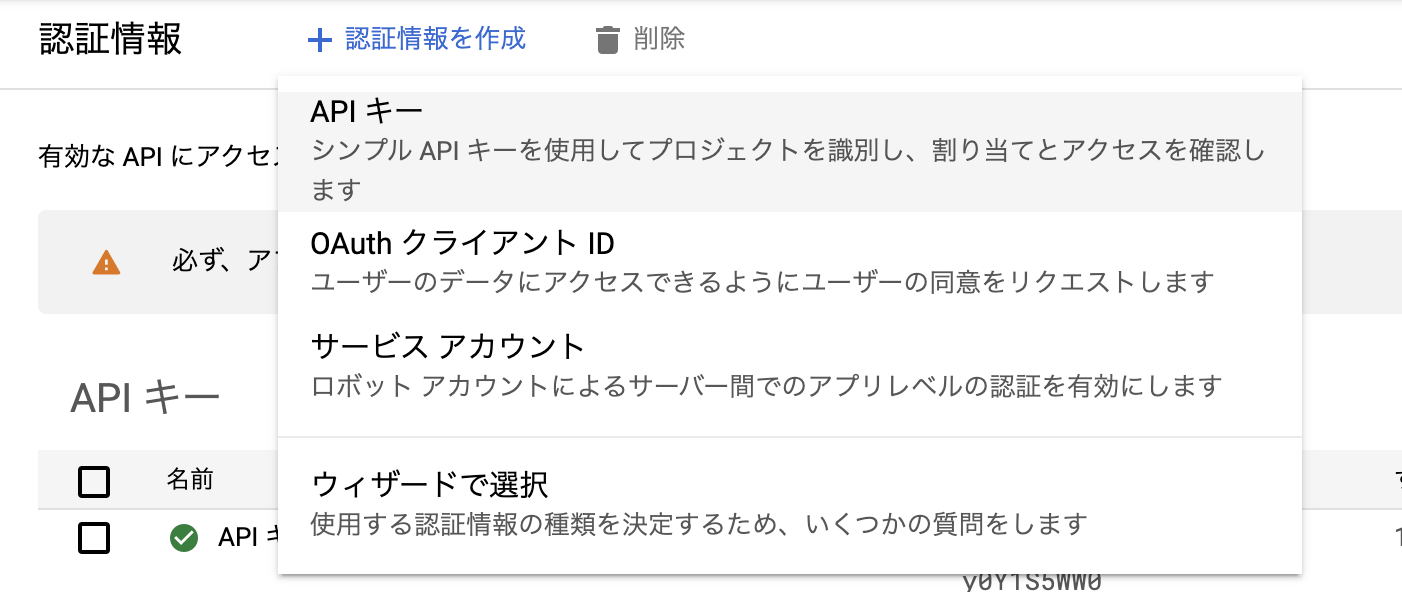
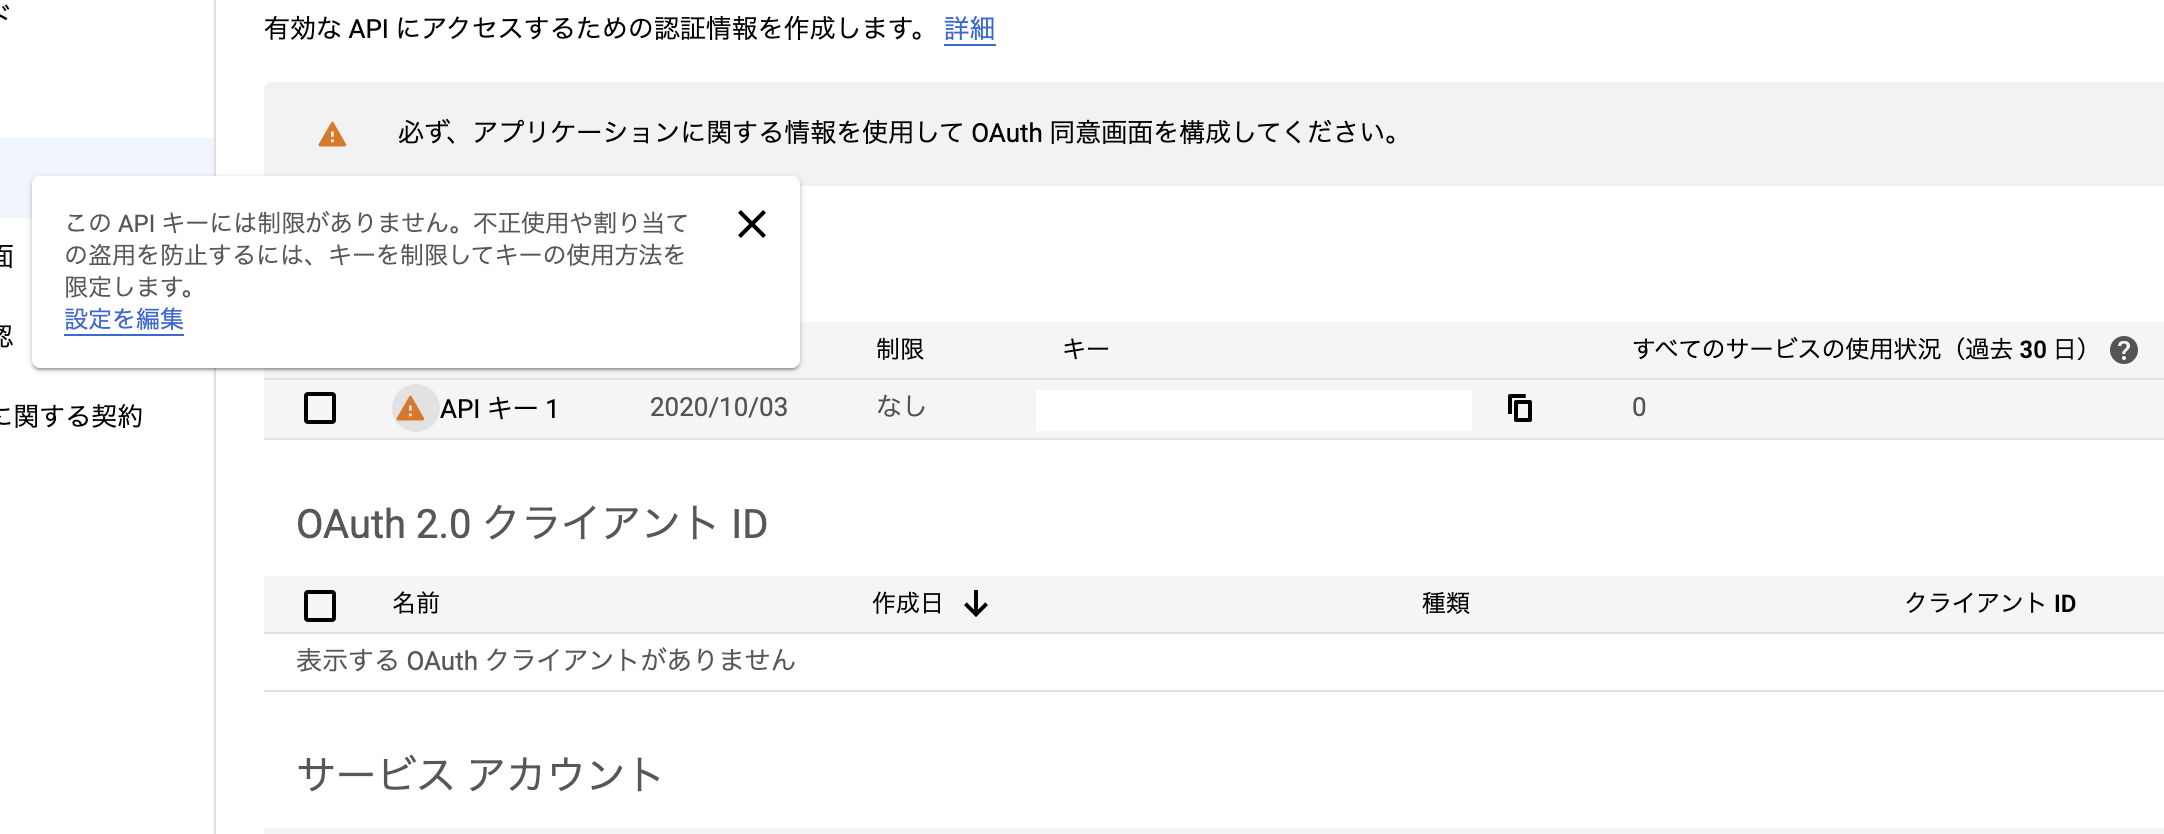
管理画面が出てきますので、認証情報からに「認証情報を作成」を押して「APIキー」を選択します。
これでAPIキーが作成されました。
しかし、まだ設定は終わっていません。キーに制限がないとの注意が出ますので、制限を有効していきます。対象となるAPIキーを選択して設定していきます。
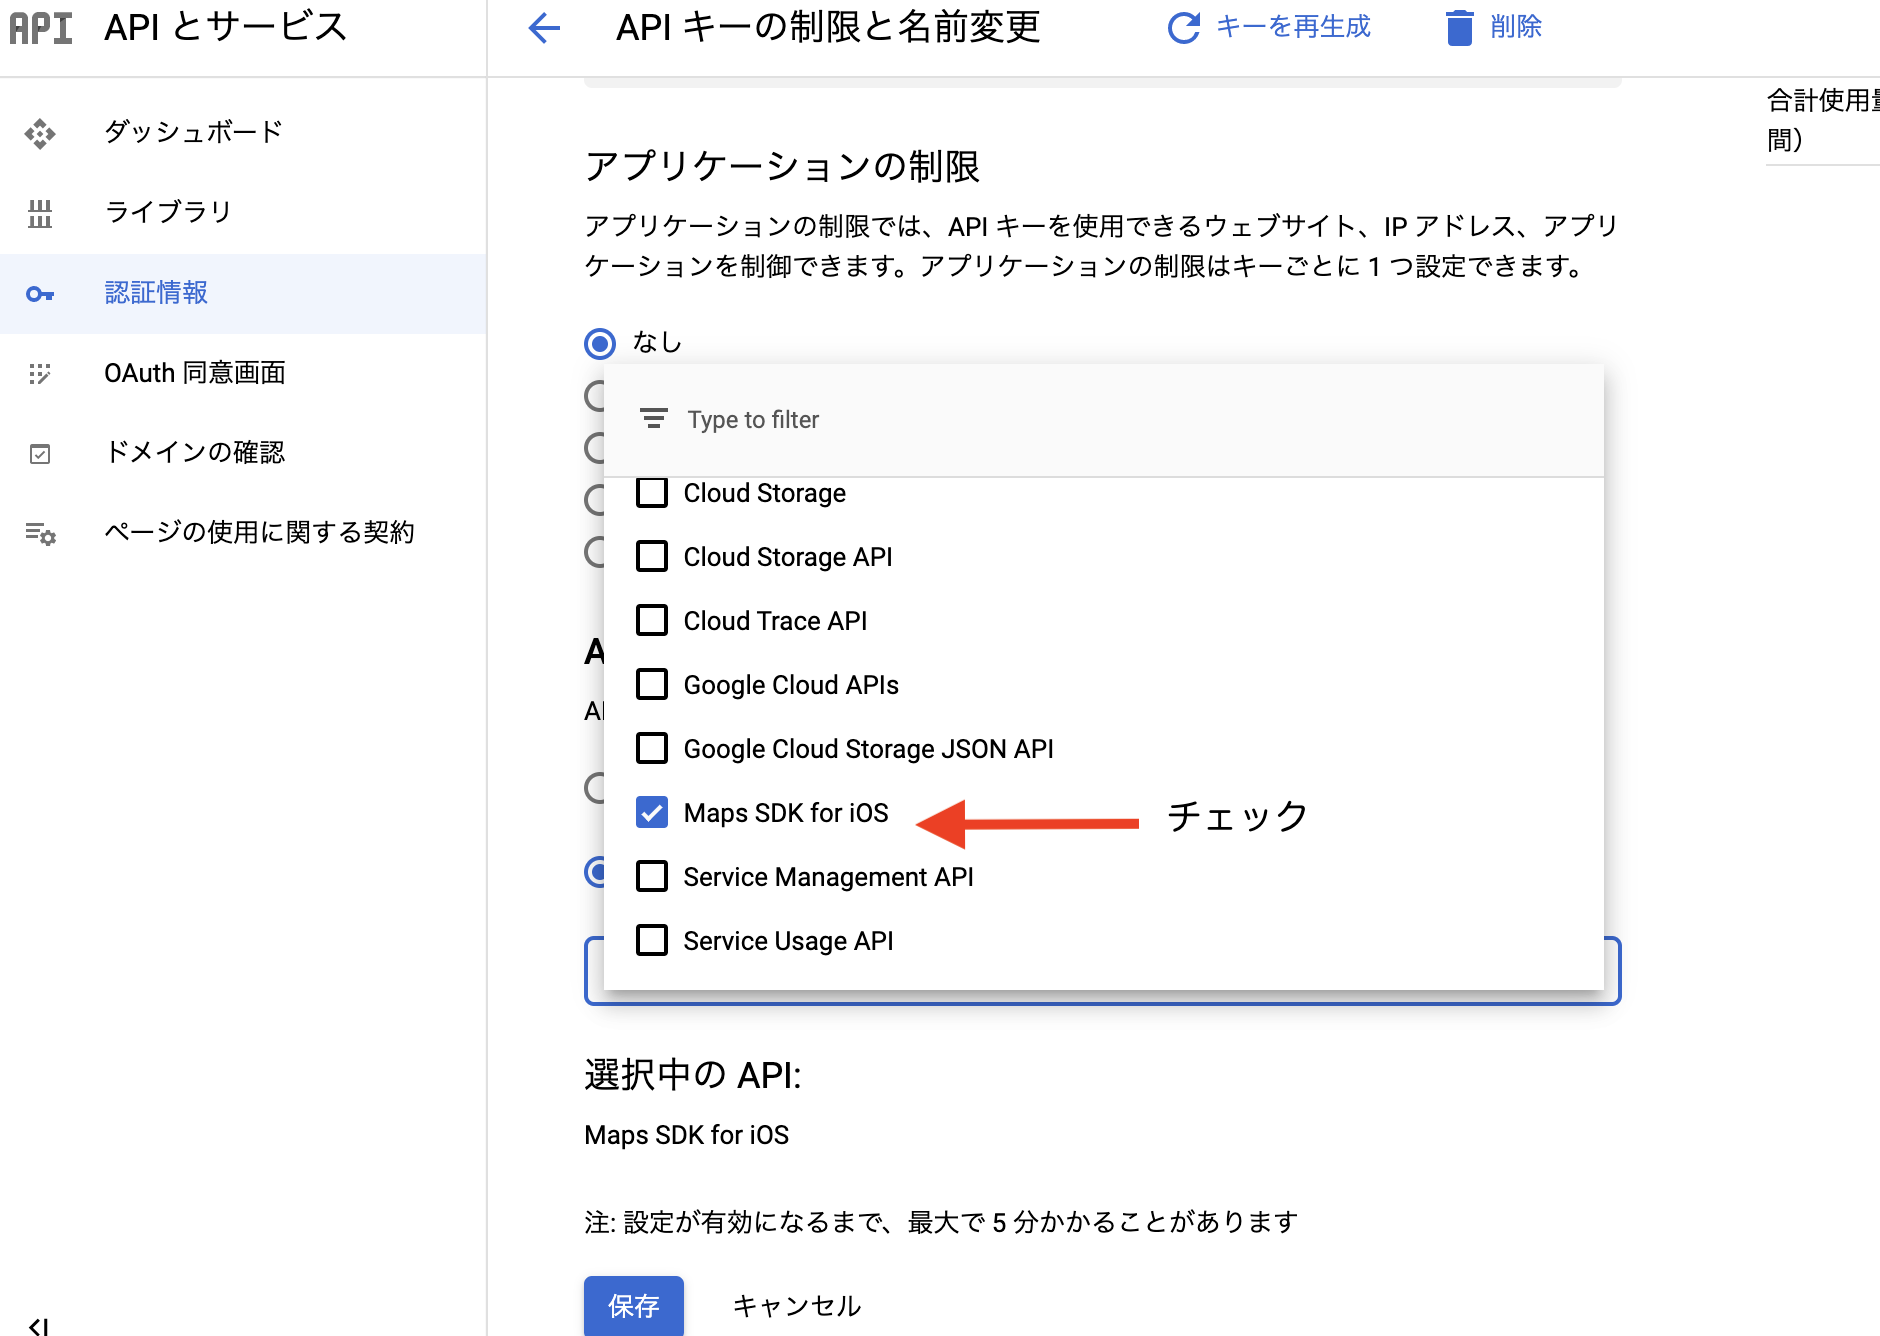
APIキーの制限と名前変更から今回使用したいMaps SDK for iOSを選択チェックして保存します。
これでGoogle MapsのAPIを使用する設定が終わりました。
APIKeyを使う
Xcodeからプロジェクトを作成し、Podfileに以下を記載しpod installします。
target 'プロジェクト名' do
  # Comment the next line if you don't want to use dynamic frameworks
  use_frameworks!
  source 'https://github.com/CocoaPods/Specs.git' #追加
  pod 'GoogleMaps' #追加
  pod 'GooglePlaces' #追加
  # Pods for プロジェクト名

end
次にAppDelegateにAPIKeyを設定していきます。
AppDelegate.swiftを開いて、import GoogleMapsを追加します。
※1didFinishLaunchingWithOptionsのメソッド部分に以下を追記します。
※1はアプリ起動後にAppDelegateのdidFinishLaunchingWithOptionsが呼ばれ、この部分で全体的な機能の初期化処理を行います。
func application(_ application: UIApplication, didFinishLaunchingWithOptions launchOptions: [UIApplication.LaunchOptionsKey: Any]?) -> Bool {
        // Override point for customization after application launch.

        #発行したAPIキーを設定
        GMSServices.provideAPIKey("発行したAPIキーをここに記載")

        return true
    }
次にInfo.plistに移動し、Information Property ListにArrayにgooglechromesとcomgooglemapsを追加しましょう。

ViewController.swiftを開きimportを追加しましょう。
import GoogleMaps import CoreLocation
viewDidLoadの中に以下のコードを書いていきます。
 override func viewDidLoad() {
        super.viewDidLoad()
        #表示するマップの座標位置と表示されるサイズを生成
        let camera = GMSCameraPosition.camera(withLatitude: 34.6862,
                                                                                  longitude: 135.5196, zoom: 6.0)
        let mapView = GMSMapView.map(withFrame: CGRect.zero, camera: camera)
        mapView.isMyLocationEnabled = true #現在地情報を有効にする
        view = mapView #UIViewのインスタンス

        #指定箇所にピンを立てる
        let marker = GMSMarker()
        marker.position = CLLocationCoordinate2D(latitude: 34.6862,
                                                                                    longitude: 135.5196)#緯度、軽度を設定
        marker.title = "Osaka"
        marker.snippet = "Japan"
        marker.map = mapView
    }
起動
ビルド&ランをしましょう。
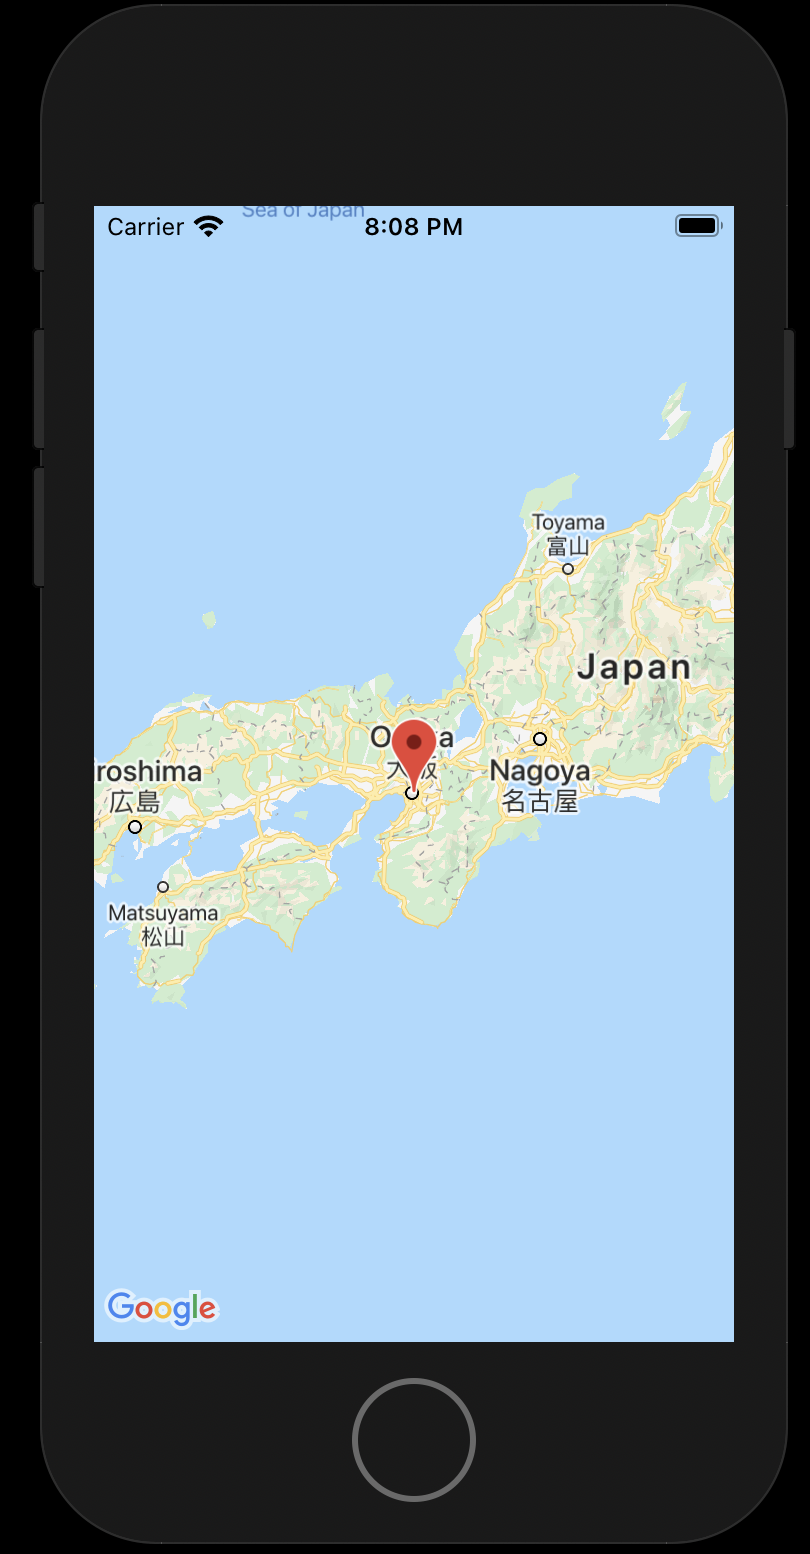
実行後、選択したロケーションにピンが立っているかと思います。
以上、Google Maps APIの使い方でした。
