CNCFがプロジェクトをホストする Harbor v2.0 をパソコン上の仮想サーバー上で起動して試した。その過程では、ホームページのクイックインストールに沿って実行したが、ファイルが欠如しているために、最後までインストールが実行されないなど、幾つかの課題があった。対策を行い無事にHarborを利用できるようになったので、ポイントだけを記述した忘備録として書き残しておく。
参考にしたHarborのドキュメントページは、Deploy Harbor with the Quick Installation Scriptである。
インストールスクリプトのダウンロードと編集
Docker-CEを導入した Ubuntu1 8.04 の仮想マシンに、インストールスクリプトをダウンロードする。このスクリプトを実行すると、動作可能なDocker-CEのバージョンへアップするなど、Harborの実行環境を整えるところから実行してくれる。
curl -O -L https://gist.githubusercontent.com/kacole2/95e83ac84fec950b1a70b0853d6594dc/raw/ad6d65d66134b3f40900fa30f5a884879c5ca5f9/harbor.sh
筆者は vagrant + virtualbox の環境で実施したが、harbor.shを無修正で実行するとネットワークのインタフェースが適切ではなく、外部からアクセスできなかった。そこで、下記の注釈のした箇所を変更することで対策した。 1の場合はコントロール用のIPアドレスを掴んでしまう。それではブラウズからアクセスできないので、3に変更して対応した。自身の環境に合わせて 2または3とする。
# !/bin/bash

# Harbor on Ubuntu 18.04

# Prompt for the user to ask if the install should use the IP Address or Fully Qualified Domain Name of the Harbor Server
PS3='Would you like to install Harbor based on IP or FQDN? '
select option in IP FQDN
do
    case $option in
        IP)
            IPorFQDN=$(hostname -I|cut -d" " -f 1)  # <-- この番号を3に変更
            break;;
        FQDN)
            IPorFQDN=$(hostname -f)
            break;;
インストールスクリプトの実行
実行権を付与して、シェルを実行する。注釈の部分 no config file: /harbor/harbor/harbor.ymlの理由で、インストールが中断してしまう。以降に,
これに対する対処法を記述する。
root@harbor:/harbor# chmod +x harbor.sh
root@harbor:/harbor# ./harbor.sh
1) IP
2) FQDN
Would you like to install Harbor based on IP or FQDN? 1

Docker Compose Installation done
harbor/prepare
harbor/LICENSE
harbor/install.sh
harbor/common.sh
harbor/harbor.yml.tmpl
sed: can't read harbor.yml: No such file or directory

[Step 0]: checking if docker is installed ...

Note: docker version: 19.03.12

[Step 1]: checking docker-compose is installed ...

Note: docker-compose version: 1.26.2


[Step 2]: preparing environment ...

[Step 3]: preparing harbor configs ...
prepare base dir is set to /harbor/harbor
no config file: /harbor/harbor/harbor.yml   ### <<--- ファイルが無いとしてインストールされてない
Harbor Installation Complete

Please log out and log in or run the command 'newgrp docker' to use Docker without sudo

Login to your harbor instance:
 docker login -u admin -p Harbor12345 192.168.1.71
harbor.ymlの編集
以下が、自身の環境に合わせて編集した結果だ。ポイントになる部分に注釈を入れるので参考にしてもらいたい。サーバー証明書と鍵の作成方法は、ここでは書かないが、インストールのシェルを実行する前までに、証明書と鍵を作成してパスを設定しておく。
hostname: harbor.labs.local  # ホスト名の変更は必須
http:
  port: 80
https:
  port: 443
  certificate: /harbor/cert/harbor.labs.local.crt  # サーバー証明書と鍵のパスを設定
  private_key: /harbor/cert/harbor.labs.local.key
harbor_admin_password: Harbor12345
database:
  password: root123
  max_idle_conns: 50
  max_open_conns: 1000
data_volume: /harbor       # 40GB 以上あるファイルシステムへパスを設定する
clair:
  updaters_interval: 12
trivy:
  ignore_unfixed: false
  skip_update: false
  insecure: false
jobservice:
  max_job_workers: 10
notification:
  webhook_job_max_retry: 10
chart:
  absolute_url: disabled
log:
  level: info
  local:
    rotate_count: 50
    rotate_size: 200M
    location: /var/log/harbor
_version: 2.0.0
proxy:
  http_proxy:
  https_proxy:
  no_proxy:
  components:
    - core
    - jobservice
    - clair
    - trivy
インストールの再実行
最初のエラー no config file: /harbor/harbor/harbor.yml のパスの処に harbor.ymlを置いて、同ディレクトリのインストールシェルにオプションを付与して実行する。設定が適切であれば、以下のようにHarborが起動する。
root@harbor:/harbor/harbor# ./install.sh --with-notary --with-clair --with-chartmuseum --with-trivy

<中略>

Creating harbor-log ... done
Creating registry      ... done
Creating harbor-portal ... done
Creating redis         ... done
Creating harbor-db     ... done
Creating chartmuseum   ... done
Creating registryctl   ... done
Creating clair         ... done
Creating notary-signer ... done
Creating harbor-core   ... done
Creating trivy-adapter ... done
Creating notary-server     ... done
Creating clair-adapter     ... done
Creating nginx             ... done
Creating harbor-jobservice ... done
✔ ----Harbor has been installed and started successfully.----
Harborは、以下のように複数のコンテナからなるアプリケーションで、redis、postgres(harbor-db)なども含まれ、本格的な運用を考慮する場合は、正式な手順に従って、時間をかけてインストールするなど丁寧な対応が必要だ。
root@harbor:/harbor/harbor# docker ps
CONTAINER ID        IMAGE                                  PORTS                         NAMES
be4a65bb7ce9        goharbor/harbor-jobservice:v2.0.2                                    harbor-jobservice
e90bd3899e10        goharbor/nginx-photon:v2.0.2           0.0.0.0:4443->4443/tcp,
                                                           0.0.0.0:80->8080/tcp,
                                                           0.0.0.0:443->8443/tcp         nginx
0c87634fbb07        goharbor/clair-adapter-photon:v2.0.2   8080/tcp                      clair-adapter
39d0c64e49f0        goharbor/notary-server-photon:v2.0.2                                 notary-server
9c8c6d8b4abd        goharbor/harbor-core:v2.0.2                                          harbor-core
76e19cab085f        goharbor/trivy-adapter-photon:v2.0.2   8080/tcp                      trivy-adapter
105e06f45747        goharbor/clair-photon:v2.0.2           6060-6061/tcp                 clair
5e820ac64f43        goharbor/notary-signer-photon:v2.0.2                                 notary-signer
5537afc3251c        goharbor/harbor-registryctl:v2.0.2                                   registryctl
994d5dc6bb55        goharbor/redis-photon:v2.0.2           6379/tcp                      redis
9987d9425bb3        goharbor/harbor-db:v2.0.2              5432/tcp                      harbor-db
c536d0f24a71        goharbor/chartmuseum-photon:v2.0.2     9999/tcp                      chartmuseum
7fd46e973e6b        goharbor/harbor-portal:v2.0.2          8080/tcp                      harbor-portal
09b800e29485        goharbor/registry-photon:v2.0.2        5000/tcp                      registry
6e629aee3bf5        goharbor/harbor-log:v2.0.2             127.0.0.1:1514->10514/tcp     harbor-log
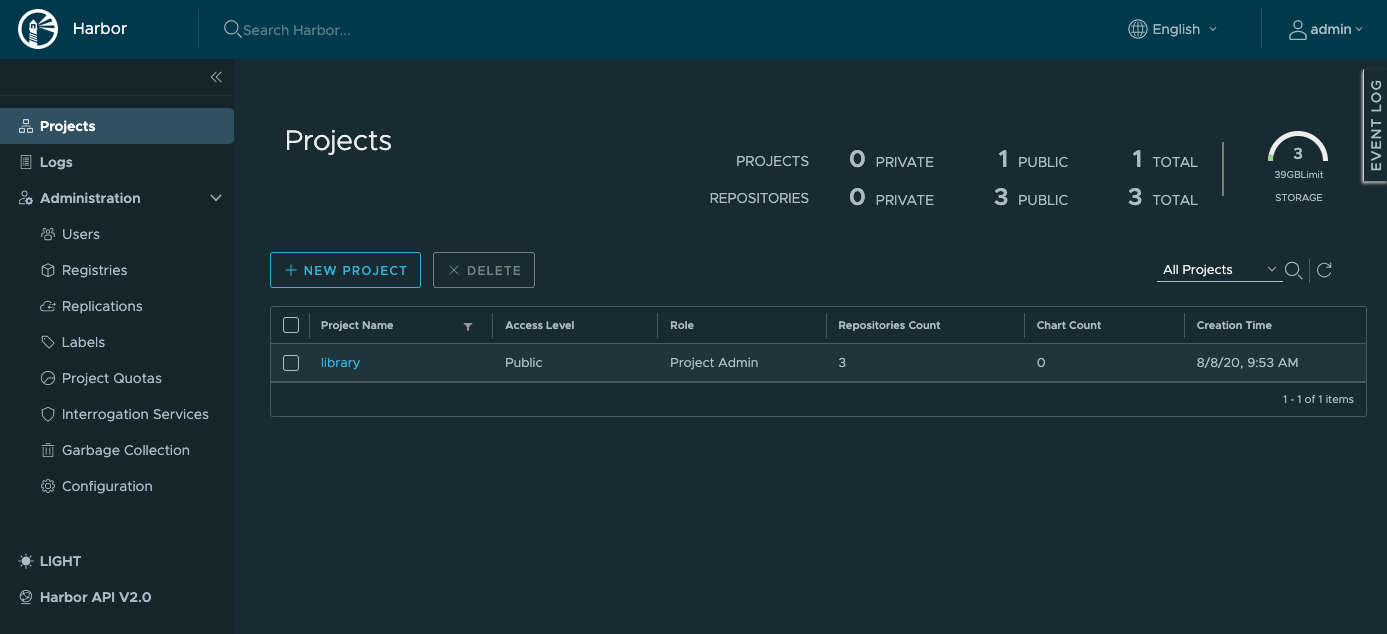
トップ画面
これで harbor.yamlにセットしたパスワードでログインすることができる。次のスクリーンショットは、ログイン直後の画面だ。
Dockerエンジンへ証明書の登録
dockerコマンドでイメージが登録できるようにするために、以下でセットした鍵と認証局の証明書を Docker エンジンに登録する必要がある。
hostname: harbor.labs.local  # ホスト名の変更は必須
http:
  port: 80
https:
  port: 443
  certificate: /harbor/cert/harbor.labs.local.crt  # サーバー証明書と鍵のパスを設定
  private_key: /harbor/cert/harbor.labs.local.key
Linuxの場合には、docker push を実行する側のDockerデーモンに以下のように登録する。
mkdir -p /etc/docker/certs.d/harbor.labs.local
cp harbor.labs.local.cert /etc/docker/certs.d/harbor.labs.local
cp harbor.labs.local.key /etc/docker/certs.d/harbor.labs.local
cp ca.crt /etc/docker/certs.d/harbor.labs.local
systemctl restart docker
docker login harbor.labs.local
macOSの場合は、以下のコマンドでキーチェーンに登録する。そのあと、Docker Desktop を再起動すると、証明書が読み込まれ docker loginが成功するようになる。
$ security add-trusted-cert -d -r trustRoot -k ~/Library/Keychains/login.keychain ./ca.crt
WindowsOSについては、試していないので、将来書き加えたい。
※ 証明書は、FQDNに対して署名されているので、アクセスにあたっては、IPアドレスでは受け入れられない。そのため、/etc/hostsに登録するか、ローカルのDNSサーバーに登録が必要となる。
レジストリへのイメージ登録
Harborのレジストリサーバーに登録する際は、tag にサーバー名、プロジェクト名またはユーザー名を付与する必要がある。多くのコンテナ・レジストリーサービスと同じようにtagを付与する。
# docker tag nginx:latest harbor.labs.local/library/nginx:latest
# docker images
REPOSITORY                        TAG                 IMAGE ID            CREATED             SIZE
nginx                             latest              08393e824c32        3 days ago          132MB
harbor.labs.local/library/nginx   latest              08393e824c32        3 days ago          132MB
レジストリサービスにログインする。 失敗する場合は、証明書が正しいか、IPアドレスはhostsに登録されているか、Dockerデーモンが再起動したかなどを確認する。
# docker login harbor.labs.local
Username: admin
Password:
WARNING! Your password will be stored unencrypted in /home/vagrant/.docker/config.json.
Configure a credential helper to remove this warning. See
https://docs.docker.com/engine/reference/commandline/login/#credentials-store

Login Succeeded
タグを指定してプッシュする。これで、Harborのウェブ管理画面でも表示される。
# docker push harbor.labs.local/library/nginx
The push refers to repository [harbor.labs.local/library/nginx]
ac078d8f08c6: Pushed
6d196faff4ee: Pushed
ed39597d1556: Pushed
ff73b8119c50: Pushed
d0f104dc0a1f: Pushed
latest: digest: sha256:a5a1e8e5148de5ebc9697b64e4edb2296b5aac1f05def82efdc00ccb7b457171 size: 1362
まとめ
Harborなどコンテナレジストリは、DevOps環境を構築する上で、コンテナ開発とサービス運用を繋ぐ、重要な基盤の一つである。クラウドのレジストリサービスを使用することが適さないケースにおいて、Harborは有用なソリューションとなる。それから、OpenShiftでは、内部にレジストリサービスを持っている。これは OpenShift内部で完結してDevOps環境を運用するためには手軽に利用できて大変有用である。しかし、複数のKubernetes / OpenShiftクラスタを運用する本格的なシステムの場合には、クラスタ外部の安定的な基盤の上に、Harborを構築して、複数のクラスタ間、そして、コンテナ開発するワークステーション間で共有することも、有用なソリューションになると思う。