AR FoundationをRuntime NavMeshと組み合せた例をなかなか見つけることができず、自分でやってみると少し引っかかる点があったため共有します。
なお、今回のプロジェクトはMITライセンスで公開しています。
https://github.com/Machikof/ARNavMeshSample
概要
AR Foudationで検知した平面をタップすると、その上にオブジェクト(エージェント)が生成され、自分(端末)を追いかけるようになります。

追いかける先は自分でなくともいいので、ARコンテンツを開発する上でかなり応用の効く技術だと思います。
環境
- Unity 2019.4.8(2020.3でも動作確認済)
- AR Foundation 4.1.1
- ARKit XR Plugin 4.1.1
- ARCore XR Plugin 4.1.1
- AR Foundation Editor Remote 4.11.0(※今回はデバッグ用に用意しましたが、なくても大丈夫です)
実装
1. AR Sessionを構築する
下の記事を参考にしながら構築していきます。
画像のように、シーン上にAR SessionとAR Default PlaneとAR Session Origin、そしてその子にAR Cameraを追加します。


AR Session OriginにAR Plane ManagerとAR Raycast Managerを追加し、AR Plane ManagerのDetection ModeをHorizontalにします。
2. NavMeshComponentsを構築
UnityTechnologiesから提供されているNavMeshComponentsを入れます。
プロジェクトを落としたら、NavMeshComponents-master/Assetsの中のGizmosとNavMeshComponentsをコピーし、自分のプロジェクトのAssets直下に置きます。
シーン上に「NavMeshSurface」というオブジェクトを設置し、同名のコンポーネントを追加します。
インスペクタの値はそのままで構いません。

次に、実行中にNavMeshをベイクするスクリプトを用意します。
using System.Collections;
using UnityEngine;
using UnityEngine.AI;

[RequireComponent(typeof(NavMeshSurface))]
public class BuildNavMesh : MonoBehaviour
{
    [Header("ベイク更新時間"), SerializeField] float bakeUpdateTime;
    private NavMeshSurface _surface;

    void Start()
    {
        _surface = GetComponent<NavMeshSurface>();
        StartCoroutine(BakeUpdate());
    }

    IEnumerator BakeUpdate()
    {
        while(true)
        {
            _surface.BuildNavMesh();

            yield return new WaitForSeconds(bakeUpdateTime);
        }
    }
}
今回は簡単のためにコルーチンを使いましたが、負荷が気になる場合はベイクを一度きりにした方がいいでしょう。
このスクリプトをNavMeshSurfeceにアタッチし、bakeUpdateTimeには3や5など適当な値を入れます。
3. エージェントを用意する
いよいよ端末を追いかけるエージェントを作っていきます。
以下がエージェント側のスクリプトです。
using System.Collections;
using System.Collections.Generic;
using UnityEngine;
using UnityEngine.AI;

public class MoveAgent : MonoBehaviour
{
    [Header("ARカメラ"), SerializeField] GameObject camera;
    NavMeshAgent agent;
    Vector3 targetPos;

    void Start()
    {
        agent = GetComponent<NavMeshAgent>();
        targetPos = new Vector3(camera.transform.position.x, transform.position.y, camera.transform.position.z);
    }

    void Update()
    {
        ApproachToCamera();
    }

    void ApproachToCamera()
    {
        if (agent.pathStatus != NavMeshPathStatus.PathInvalid)
        {
            Debug.Log("NavMesh is ready");
            agent.destination = targetPos;
        }
        else Debug.Log("NavMesh is not ready");
    }
}
targetPosにはXZ平面上に射影したカメラ位置を入れ、ApproachToCamera()で目的地に設定します。
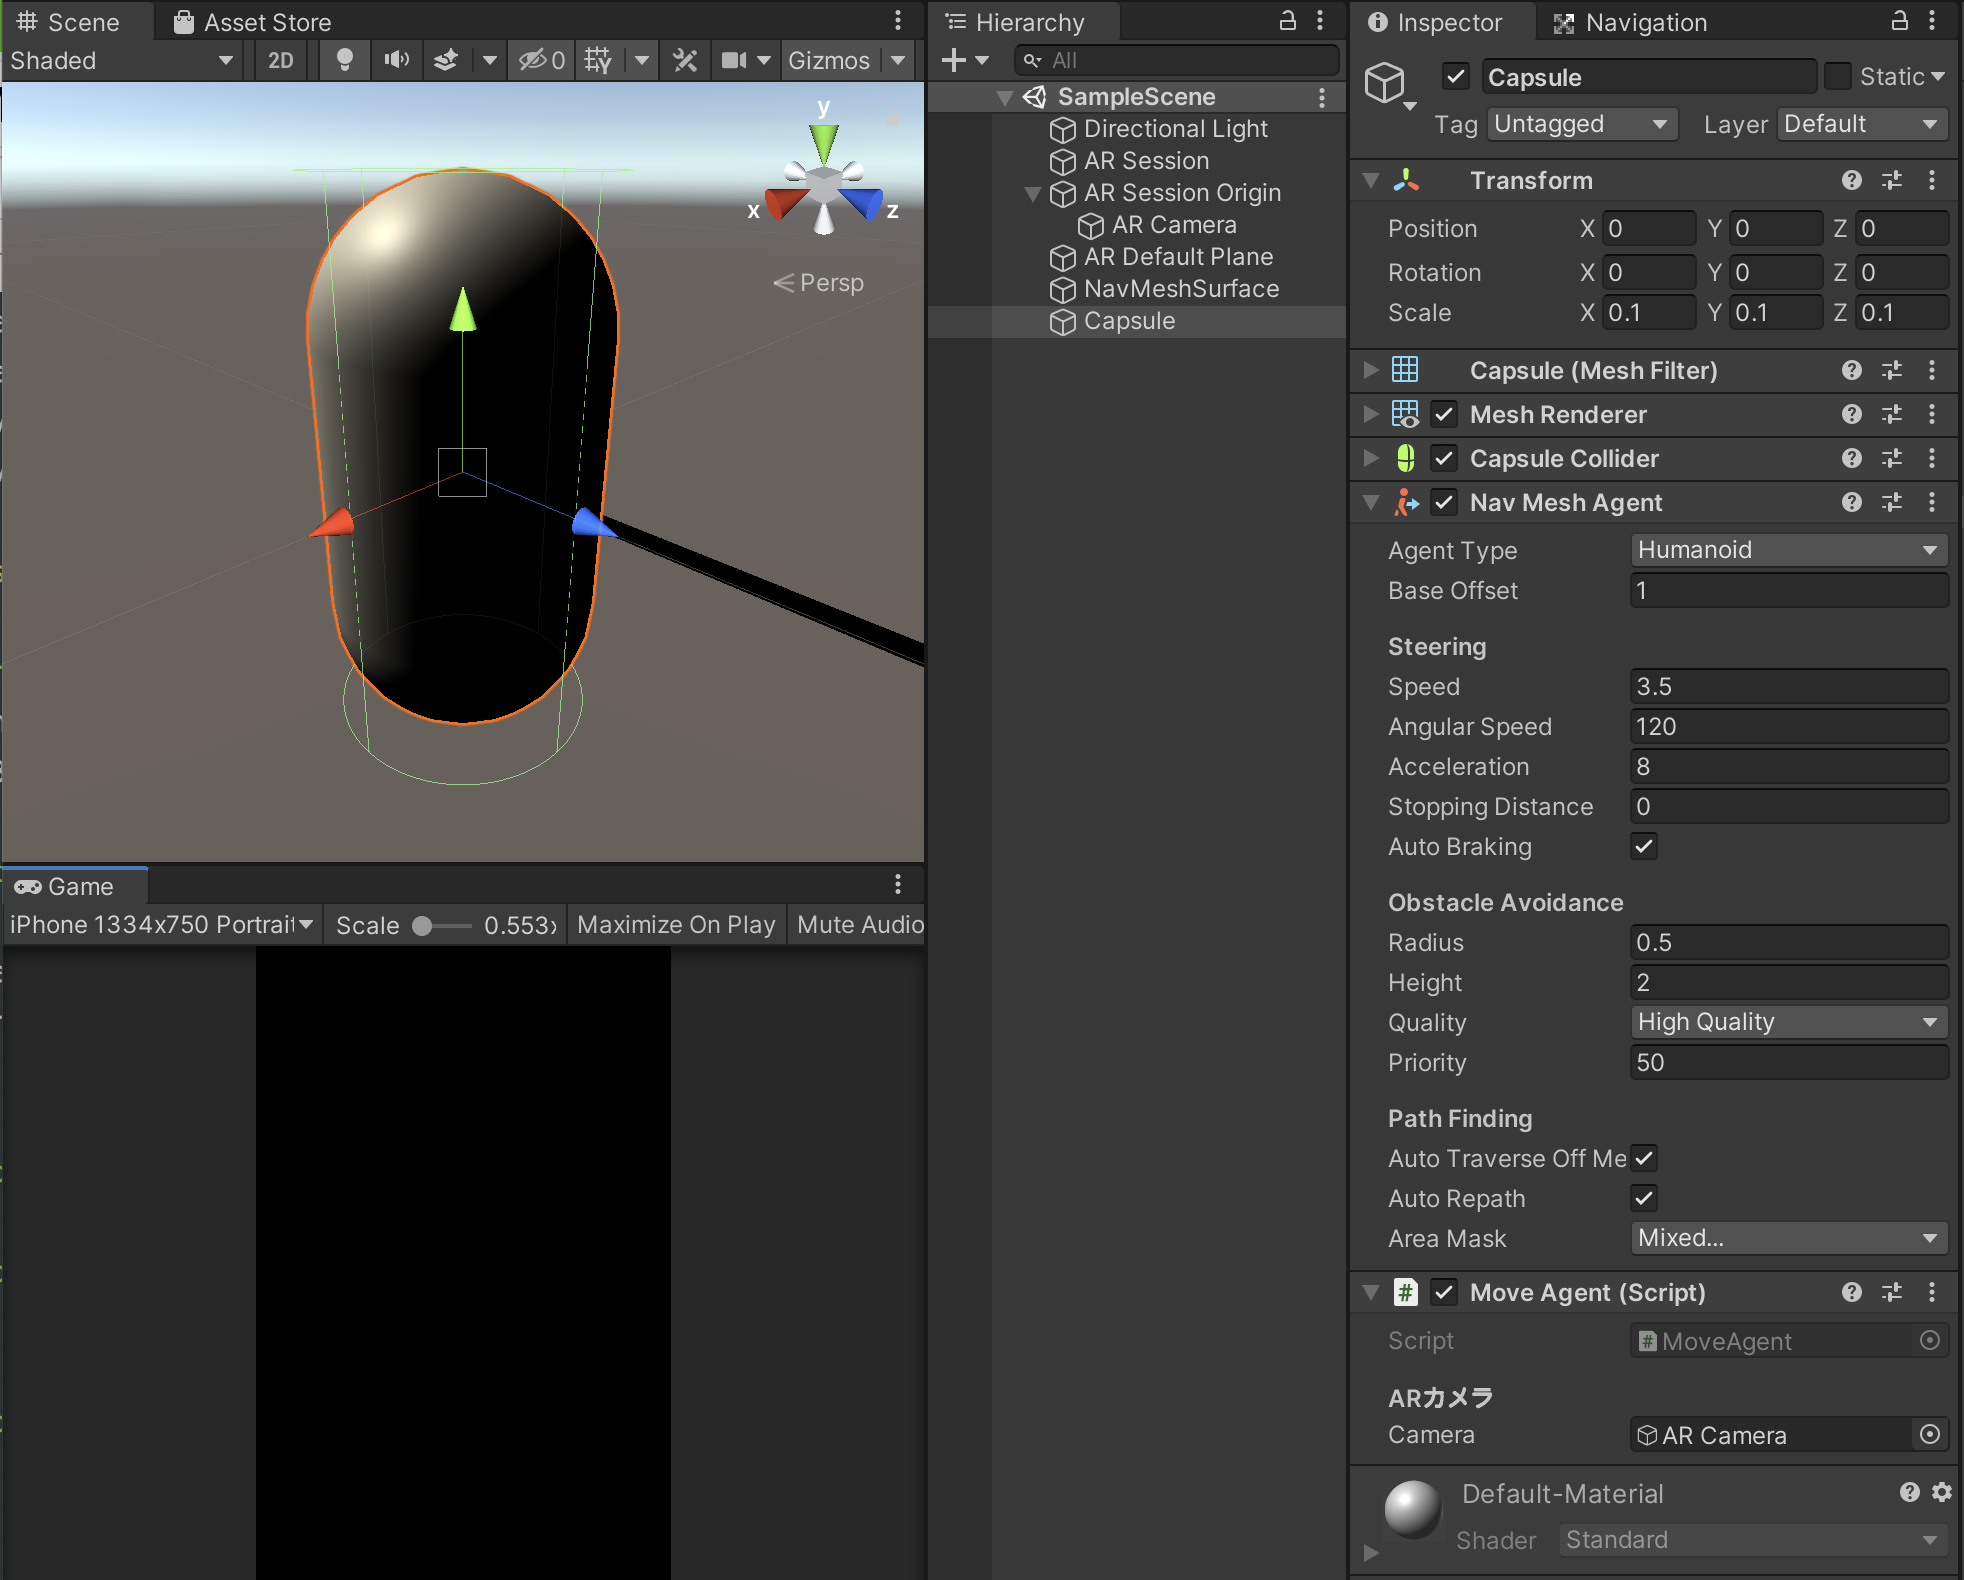
今回はCapsuleを使いますが、任意のキャラクターアセットを使っても問題ありません。
卓上で動かすことを想定しているので、Scaleは0.1倍です。
NavMeshAgentと上のスクリプトを追加し、インスペクタのARカメラにはシーン上のAR Cameraをアタッチします。

ここで、動かす環境(机の上など)によってはNavMeshの精度が足りない場合があります(自分はここで引っかかりました)。
その場合、以下のようにRadiusを小さくするといいでしょう。
4. 実行中にエージェントを生成する
あとは画面をタップした位置にエージェントを生成するスクリプトを書きます。
ググればすぐに出てきますが、こちらも一応載せておきます。
using System.Collections.Generic;
using UnityEngine;
using UnityEngine.XR.ARFoundation;
using UnityEngine.XR.ARSubsystems;

[RequireComponent(typeof(ARRaycastManager))]
public class CreateAgent : MonoBehaviour
{
    [Header("出現させるオブジェクト"), SerializeField] GameObject objectPrefab;
    ARRaycastManager raycastManager;
    List<ARRaycastHit> hitResults = new List<ARRaycastHit>();
    bool isSet = false;

    void Start()
    {
        raycastManager = GetComponent<ARRaycastManager>();
    }

    void Update()
    {
        // エディタ上
# if UNITY_EDITOR
        if (Input.GetMouseButtonDown(0))
        {
            // レイと平面が交差時
            if (raycastManager.Raycast(Input.GetTouch(0).position, hitResults, TrackableType.All))
            {
                SetObject(hitResults[0].pose.position);
            }

        }
        // 端末上での動作
# else
        if(Input.touchCount > 0)
        {
            var touch = Input.GetTouch(0);
            if(touch.phase == TouchPhase.Began)
            {
                // レイと平面が交差時
                if (raycastManager.Raycast(Input.GetTouch(0).position, hitResults, TrackableType.All))
                {
                    SetObject(hitResults[0].pose.position);
                }
            }
        }

# endif
    }

    void SetObject(Vector3 position)
    {
        if (!isSet)
        {
            Instantiate(objectPrefab, position, Quaternion.identity);
            isSet = true;
        }
        else
        {
            Debug.Log("Object is here now");
        }
    }
}
ARFoundation Remoteでのデバッグを円滑にするため、エディタと端末で処理を分けています。
書き方はステップアップUnityのモバイルARの章を参考にしています。
ARは特に動作確認のためにビルドする手間がかかるため、こうした一手間で作業がグッと楽になります。
参考資料
サイト
書籍
ステップアップUnity
https://www.amazon.co.jp/dp/B08W8L2LGJ/ref=dp-kindle-redirect?_encoding=UTF8&btkr=1

