概要
BurpSuiteでWebアプリケーションやAPIの脆弱性診断を行う際に、パラメータを引き継ぎたい場面があります。
基本的にはBurpSuiteにもともと備わっているMacrosと、Session handling rulesを使用することで引き継ぎ可能ですが、引き継ぎたいパラメータがJSON形式の場合、この機能だけでは引き継ぎができません。
BurpSuiteの拡張機能「Python Scripter」を使用すればこれが実現できるので、本記事ではその拡張機能の使い方を記載します。
※Pythonを書かずにGUIの画面操作だけで完結したい場合は、【BurpSuite】JSONパラメータの引き継ぎ方法を参照ください。
※HTMLフォーム送信におけるパラメータを引き継ぎたい場合は、【BurpSuite】パラメータの引き継ぎ方法を参照ください。
目的
- BurpSuiteのRepeaterでリクエストBを送信した際に、リクエストAで得たJSONパラメータを、リクエストBに引き継ぐ
前提
デモとして下記仕様とします。
- エンドポイントBで正常なレスポンスを得たい場合、エンドポイントAで返却された文字列が必要である
- 正常な文字列でエンドポイントBを叩くと、200OKとなる
- 不正な文字列でエンドポイントBを叩くと、400エラーでNGとなる
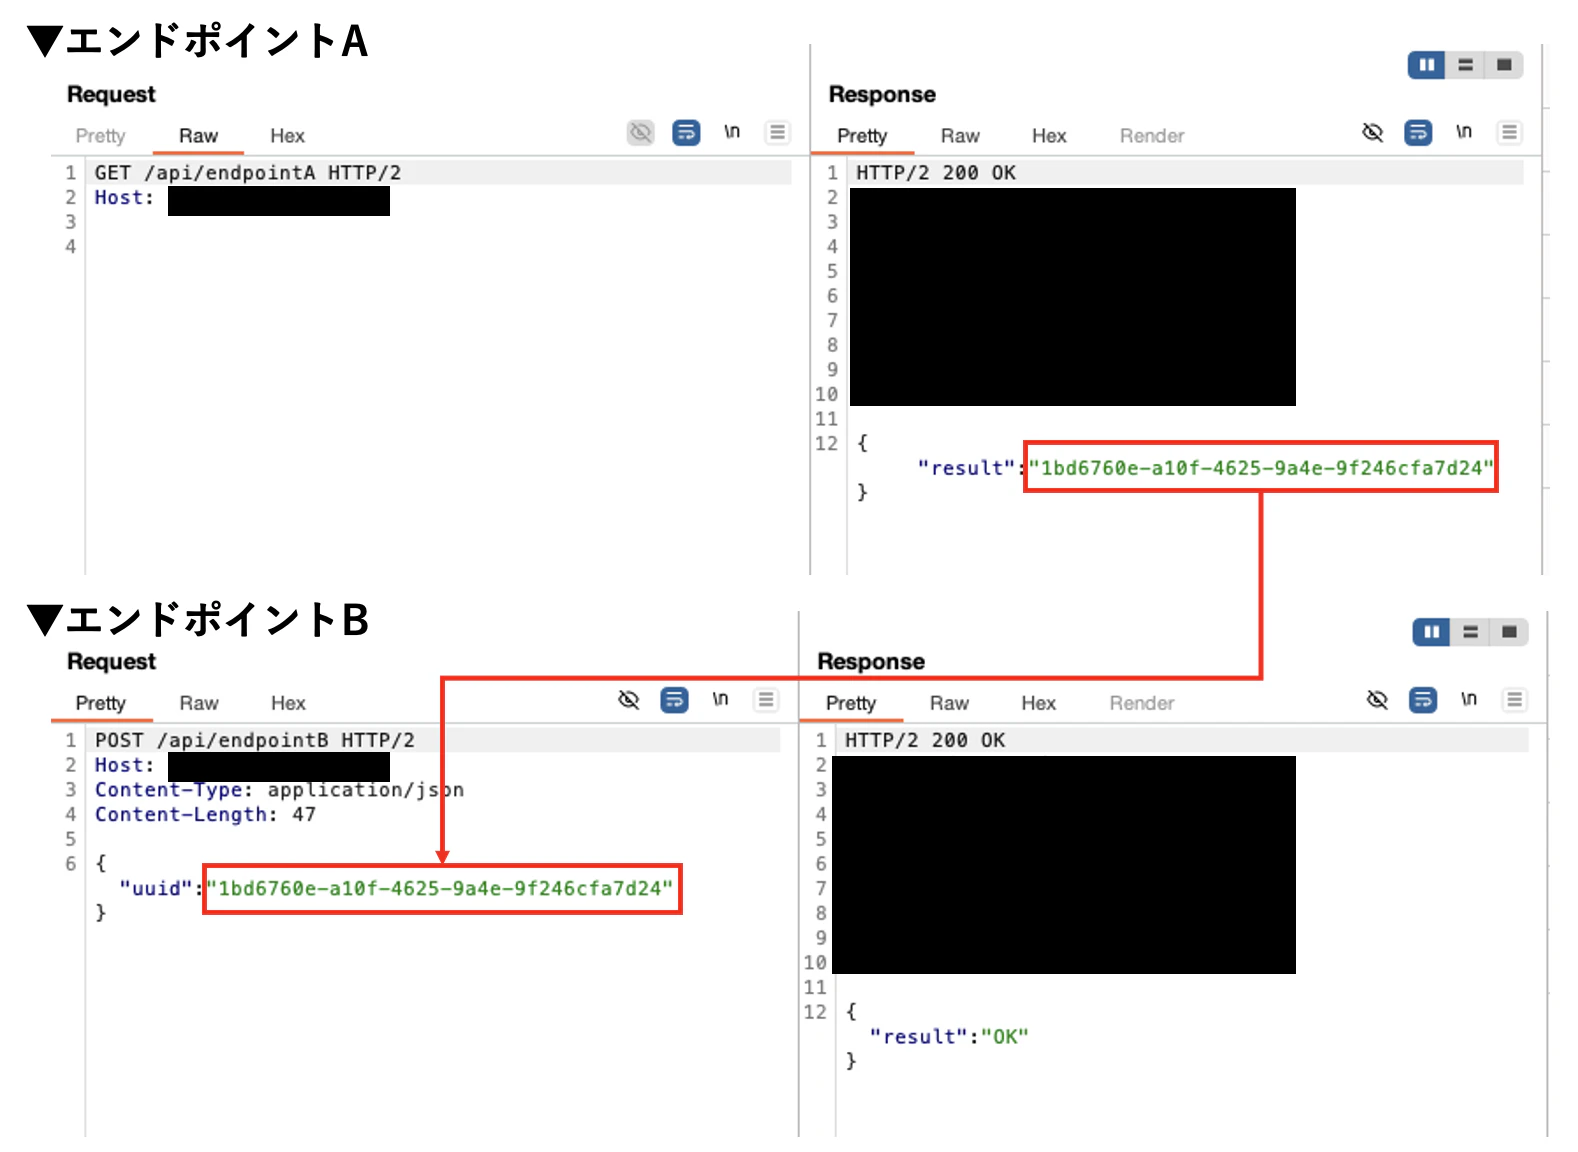
【正常】エンドポイントAで取得した文字列を、エンドポイントBに引き継ぐ
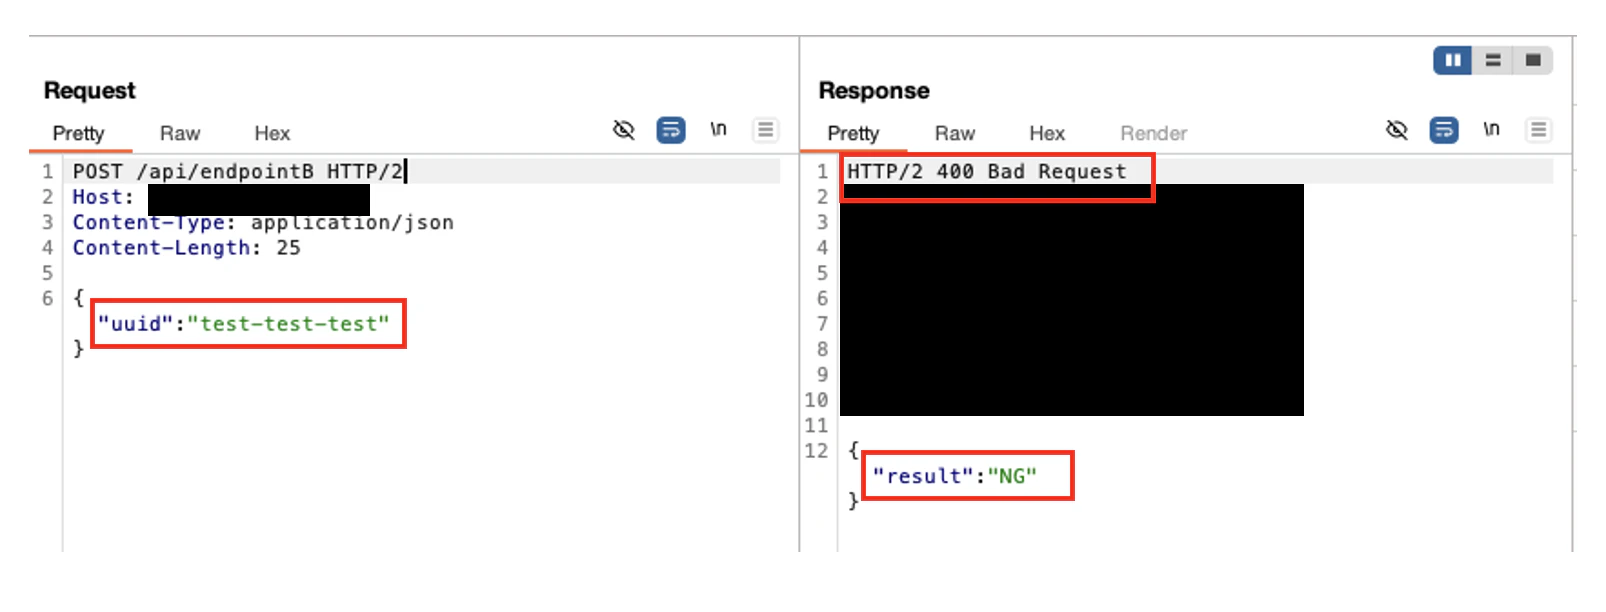
【不正】不正な文字列でエンドポイントBを叩くと、400エラーでNGと返却される
手順
拡張機能「Python Scripter」をインストール
BApp Storeで「Python Scripter」と検索し、installボタンを押下してください。Installedタブでチェックがはいった状態になっていればOKです。
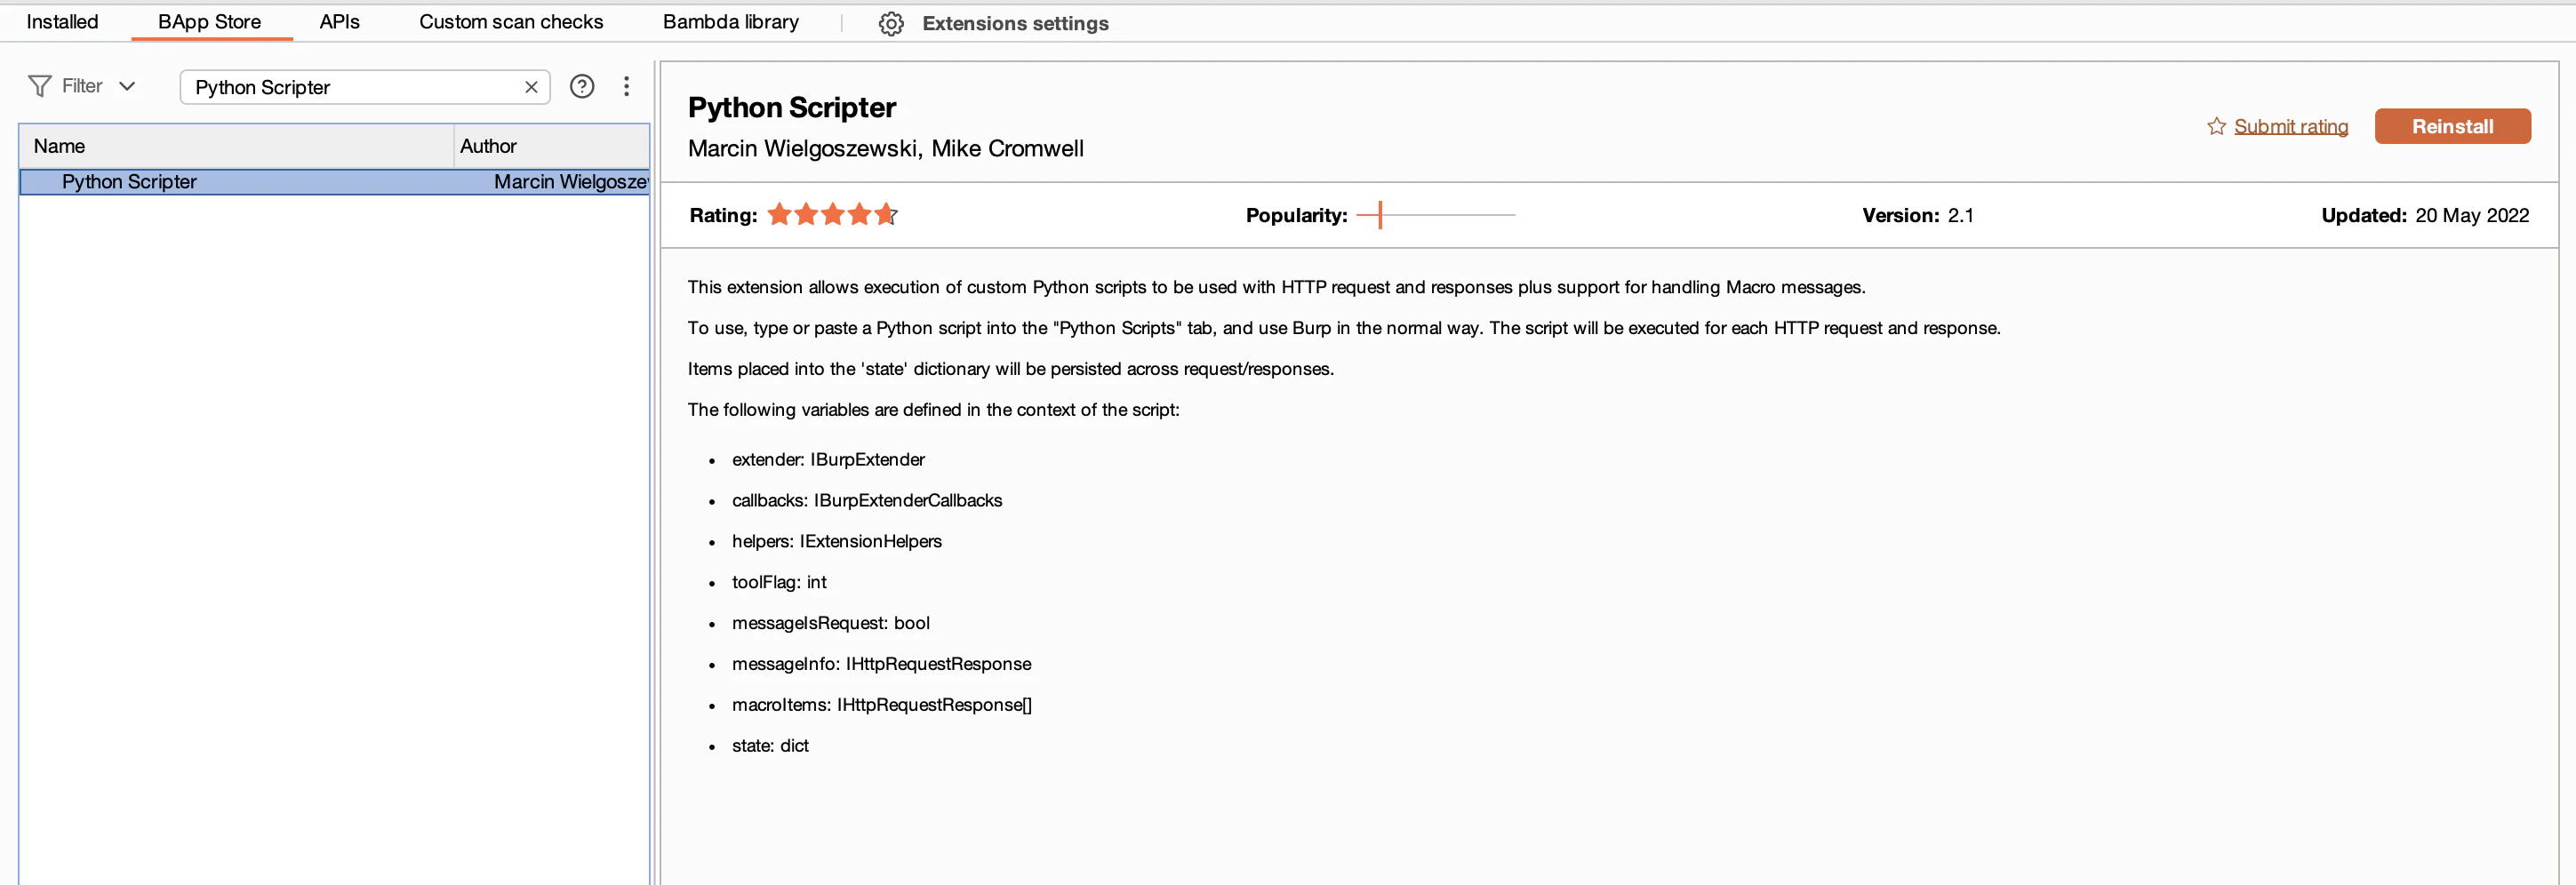
「Python Scripter」をインストールする

「Python Scripter」を有効化する
jython の設定
Python Scripterの動作には、jythonが必要です。
https://www.jython.org/download.html から「jython-standalone-x.x.x.jar」をダウンロードします。
settingで「jython」と検索し、ダウンロードしたファイルを設定します。
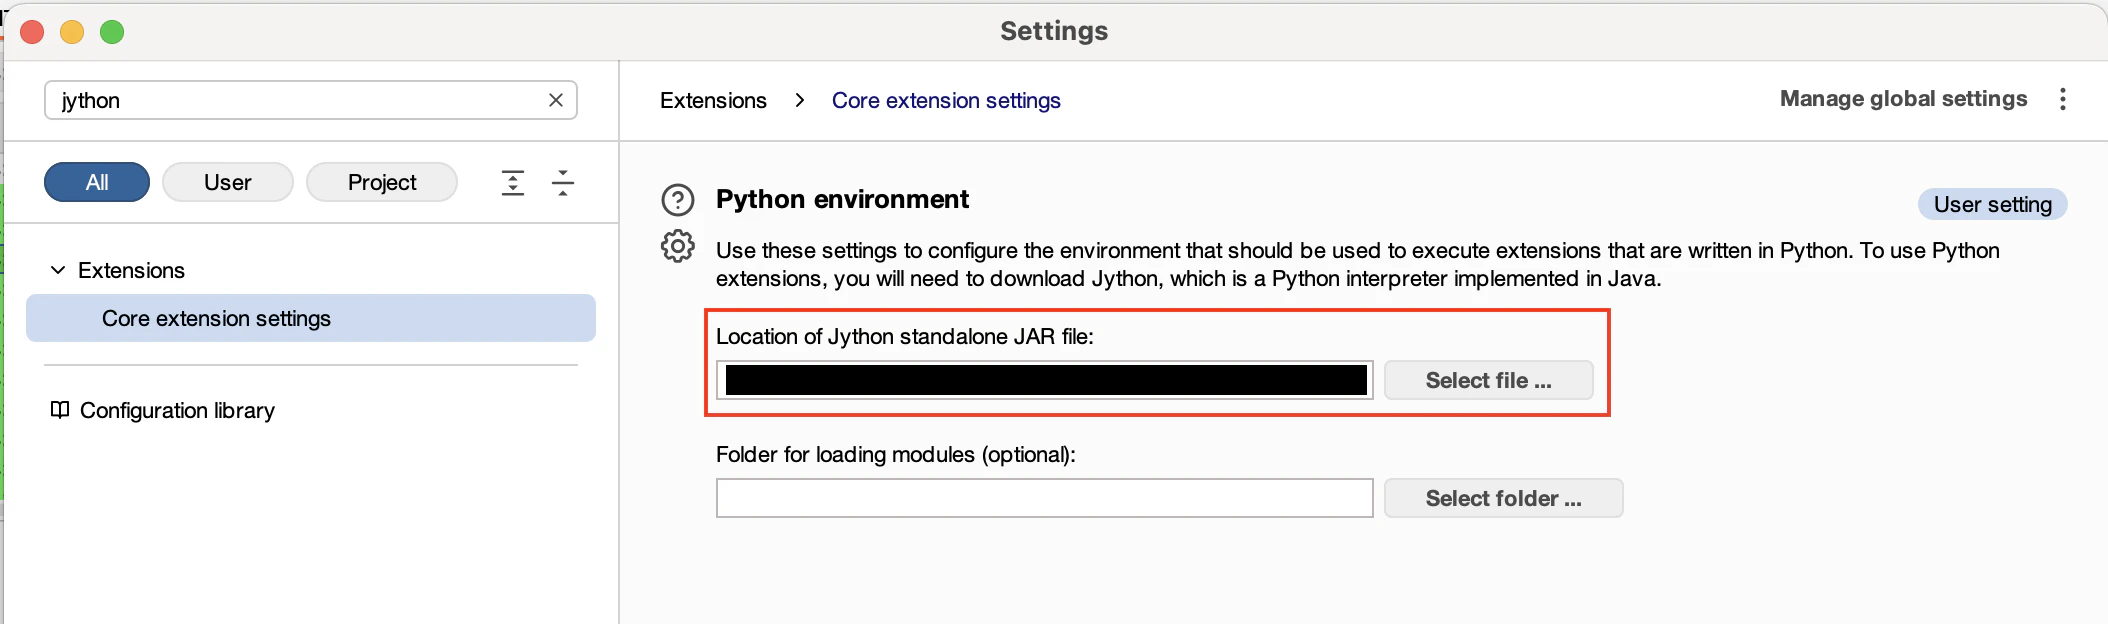
jythonの設定
これで準備は整いました。
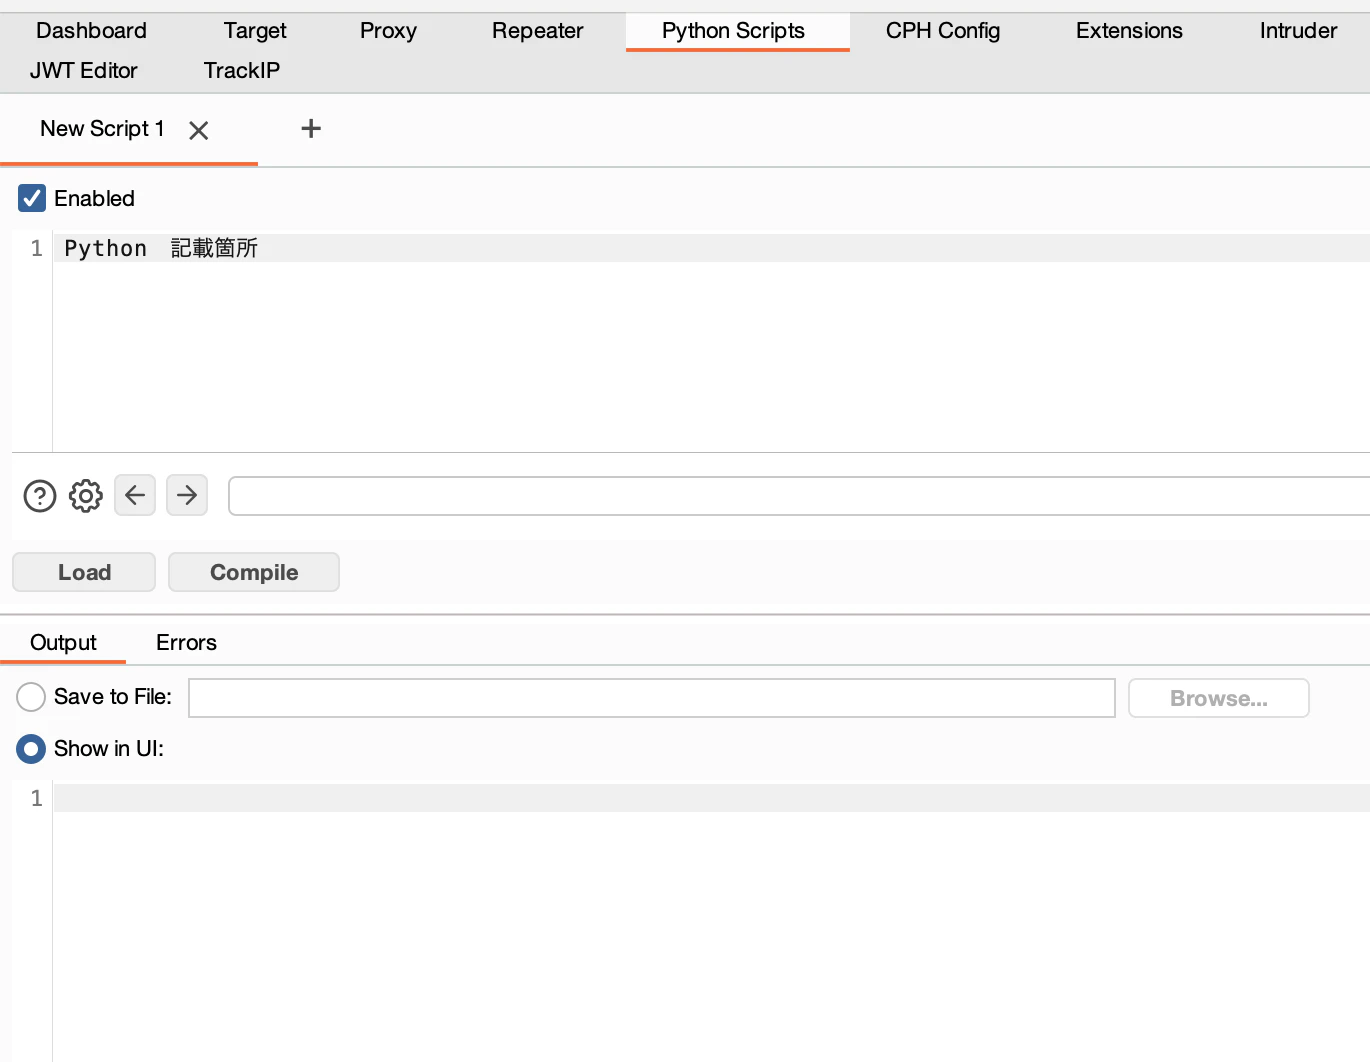
Python Scriptsタブを開きます。
Python記載箇所にスクリプトを記載していきます。
本スクリプトを有効化したいときは、「Enabled」にチェックします。
新しいスクリプトを記載したら、「Compile」が反映には必須です。
Python Script
今回のスクリプトの仕様は以下とします。
- エンドポイントBをRepeater、Intruder、Scannerで送信したときに発火させる
- RepeaterなどでエンドポイントBへ送信されたときに、スクリプトでエンドポイントAに送信し、そこで得られた文字列をエンドポイントBに渡す
以下スクリプトで、デモが動作します。
使用する際は、定数らをよしなに書き換えてください。
import sys,re,datetime,locale
from burp import IBurpExtenderCallbacks

"""
診断対象であるエンドポイントB(target)で200OKを得るには、エンドポイントA(pre)で返却される文字列が必要である。
エンドポイントBをリピーターなどで送信した際に、エンドポイントAを送信して得られた文字列をエンドポイントBに与えるスクリプト
"""

TARGET_PASS = '/api/endpointB'
PRE_REQUEST_CONTENTS = (
    "GET /api/endpointA HTTP/2\r\n"
    "Host: example.com\r\n\r\n"
)
PRE_RESPONSE_BODY_REGEX = '"result":"([0-9a-z-]*)"'
TARGET_REQUEST_REPLACE_VALUE = '{"uuid":"%s"}'

if toolFlag & (
    IBurpExtenderCallbacks.TOOL_REPEATER |
    IBurpExtenderCallbacks.TOOL_INTRUDER |
    IBurpExtenderCallbacks.TOOL_SCANNER
):
    if messageIsRequest:

        try:
            service = messageInfo.getHttpService()
            request = messageInfo.getRequest()
            requestInfo = helpers.analyzeRequest(service, request)
            headers = requestInfo.getHeaders()
            requestUrl = requestInfo.getUrl().toString()

            if TARGET_PASS in requestUrl:
                print "## Get target request"

                pre = callbacks.makeHttpRequest(service, PRE_REQUEST_CONTENTS)
                print "## Send pre request"

                preResponseBytes = pre.getResponse()
                preResponseInfo = helpers.analyzeResponse(preResponseBytes)
                preResponseBody = preResponseBytes[preResponseInfo.getBodyOffset():]
                preResponseBodyStr = helpers.bytesToString(preResponseBody)

                preResponseMessage = re.search(PRE_RESPONSE_BODY_REGEX, preResponseBodyStr)
                targetValue = preResponseMessage.group(1)

                targetBody = TARGET_REQUEST_REPLACE_VALUE % targetValue
                targetHeaders = []
                for h in headers:
                    if not h.lower().startswith("Content-Length"):
                        targetHeaders.append(h)

                target = helpers.buildHttpMessage(targetHeaders, targetBody)
                messageInfo.setRequest(target)

                print "## FINNISH\r\n"

        except Exception as e:
            print "ERROR:", e
解説
1
from burp import IBurpExtenderCallbacks
Burpが提供しているインターフェイスを使用できるようにします。
Repeater、Intruder、Scannerで送信したかを条件にいれるために使用しています。
2
if messageIsRequest:
今フックしている通信がリクエストかどうかを見ています。
これを記載しないと、おそらく無限ループになります。
3
service = messageInfo.getHttpService()
request = messageInfo.getRequest()
requestInfo = helpers.analyzeRequest(service, request)
これでフックしたリクエストを取得しています。
メソッドでリクエスト情報を色々取得できます。
例)
- ヘッダー取得:
- requestInfo.getHeaders()
- メソッド取得:
- requestInfo.getMethod()
- URLを文字列で取得:
- requestInfo.getUrl()
- パラメータ一覧取得:
- requestInfo.getParameters
- HTTPプロトコル取得:
- requestInfo.getHttpVersion()
4
pre = callbacks.makeHttpRequest(service, PRE_REQUEST_CONTENTS)
Pythonスクリプトで通信を発生させています。
今回はエンドポイントAに送信してリクエストを得る必要があったので、スクリプト上で通信を発生させています。上記は新しい通信を発生させていますが、一方で下記は新しい通信は発生させていません。
target = helpers.buildHttpMessage(targetHeaders, targetBody)
messageInfo.setRequest(target)
ここでは、フックしたリクエストを書き換えて送信しています。
5
preResponseMessage = re.search(PRE_RESPONSE_BODY_REGEX, preResponseBodyStr)
targetValue = preResponseMessage.group(1)
ここでは、エンドポイントAで取得したレスポンスボディを、正規表現で取得したい文字列だけ抜き出しています。
PRE_RESPONSE_BODY_REGEX = '"result":"([0-9a-z-]*)"'
定数で正規表現を定義しています。この正規表現で抜き出したい文字列の部分にかっこ()をいれることで、preResponseMessage.group(1) で抜き出せます。
6
TARGET_REQUEST_REPLACE_VALUE = '{"uuid":"%s"}'
targetBody = TARGET_REQUEST_REPLACE_VALUE % targetValue
ここで、抜き出した文字列をセットしてます。
7
targetHeaders = []
for h in headers:
    if not h.lower().startswith("Content-Length"):
        targetHeaders.append(h)
これはHTTPヘッダのContent-Lengthを削除するための処理です。
既存ヘッダから Content-Length ヘッダだけ除外しています。
Content-Length が無ければ自動で正しい値を付与してくれます。
参考文献
Python Scripter - PortSwigger
GitHub - PortSwigger/python-scripter