【前提】
- 以降にあるスクリプトの記述の先頭には、下記の記述が入っているとする。
# 現在実行中の Windows デスクトップ全体を操作の対象として扱うためのクラスをインポートする
from pywinauto import Desktop

# UIAバックエンドを使用する
app = Desktop(backend="uia")
- 用語解説
- 要素 (Element / Control):
- 説明:画面を構成する部品のこと。
- 例:「ボタン」「入力欄」「ラベル」「チェックボックス」など
- 属性 (Attribute / Property):
- 説明:要素を特定するための「目印」のこと。
- 例:
title,control_type,auto_idなど。
- 要素 (Element / Control):
【操作対象の要素を指定する】
要素の確認方法
◆ Powershellで取得
■ すべてのトップレベルウィンドウ情報を取得する
以下のpythonスクリプトを実行する。
from pywinauto import Desktop

desktop = Desktop(backend="uia")
all_windows = desktop.windows()

for w in all_windows:
    print(f"Title: {w.window_text()}")
■ 特定ウィンドウの要素を確認
以下のpythonスクリプトを実行する。
※例として対象ウインドウを「クロック」アプリとする。
from pywinauto import Desktop

target_win = Desktop(backend="uia").window(title="クロック", control_type="Window")
target_win.set_focus()
target_win.print_control_identifiers()
◆ Accessibility Insightsで取得
- Accessibility Insightsを起動する。
- "Live Inspect"状態にする。
- 対象ウインドウをクリックする。
- 他の要素が選択されないように、Accessibility Insightsで"Pause"ボタンをクリックする。
- Accessibility Insightsで"ウインドウ 〇〇"をクリック。
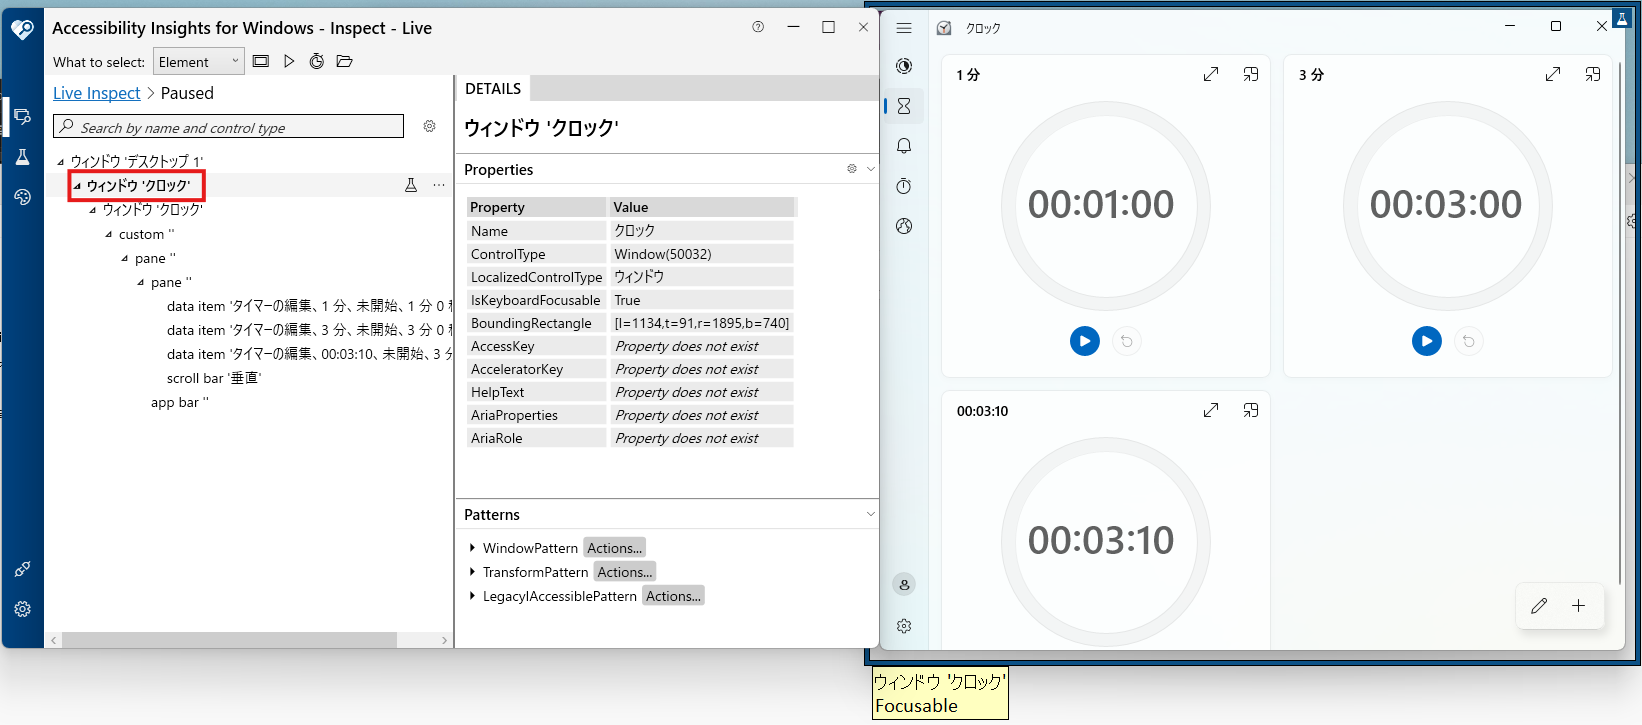
- Accessibility Insightsの"Name"項目は、スクリプト内の"title"に該当する。
- 公式ページでAccessibility Insightsアプリを取得する。
■ Accessibility Insightsで表示する要素を変更
下の画像のマーク部から取得する要素を変更できる。
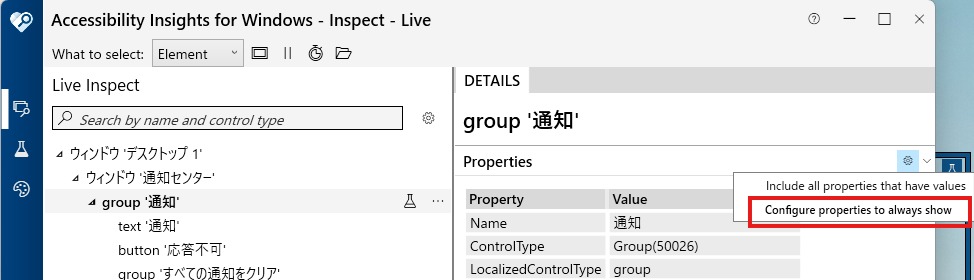
- 「AutomationId」を追加することを推奨する。
- Accessibility Insightsの"AutomationId"項目は、スクリプト内の"auto_id"に該当する。
同じ属性を持つ複数要素からの指定
◆ 目的
同じウインドウに同じ属性を持つ要素が複数ある時に、その中の一つの要素を指定して操作する。
◆方法①「親要素を経由する」
親要素を経由して目的の要素を特定する。
親要素を指定して、その中から目的の要素を指定する。
■ 例
日本語とスペイン語の「・・・」は、どちらも「Title = "その他のオプション"」である。
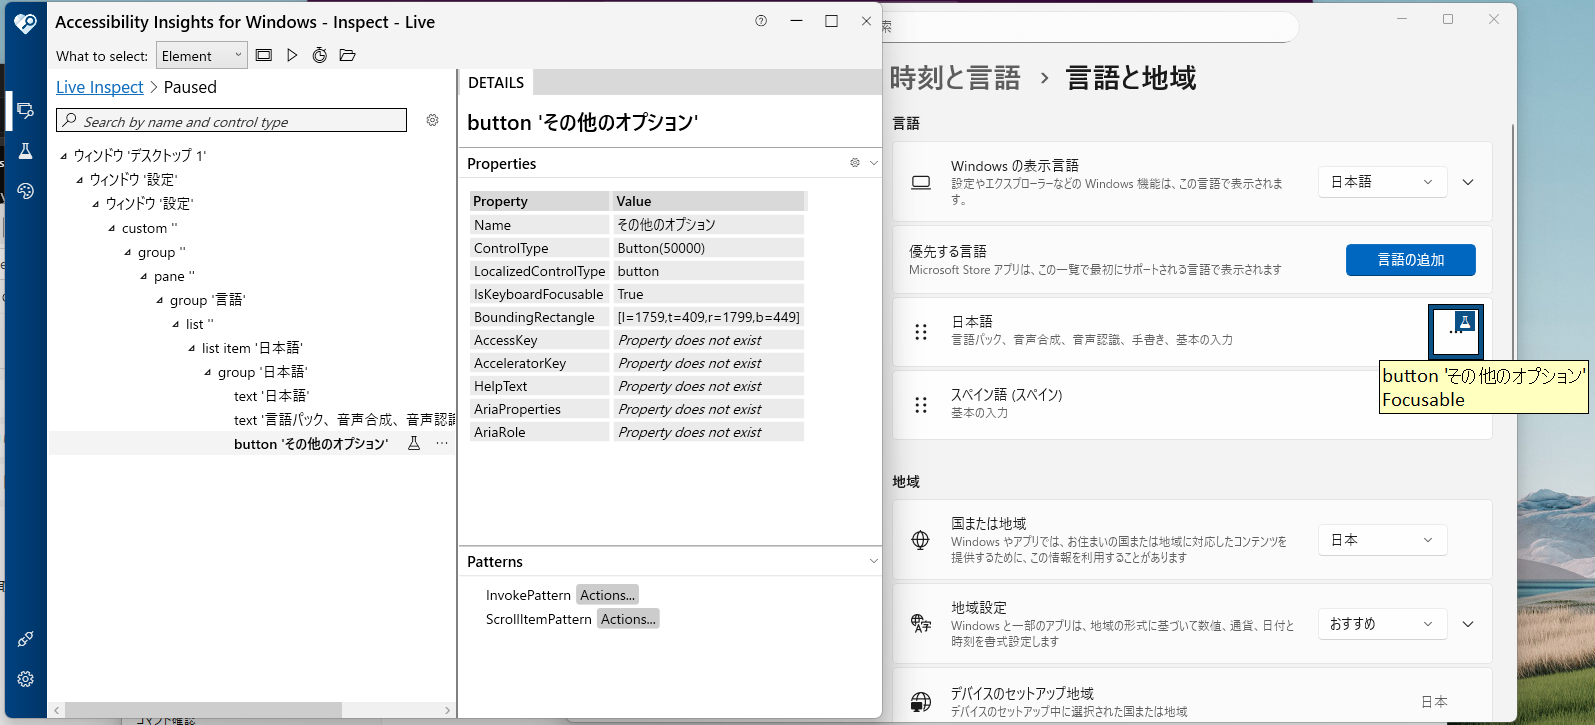
■ 階層構造の理解
---- 設定ウィンドウ (Window) ----
- 日本語語グループ (Group)
- その他のオプション (Button) ← これではない
- その他の要素...
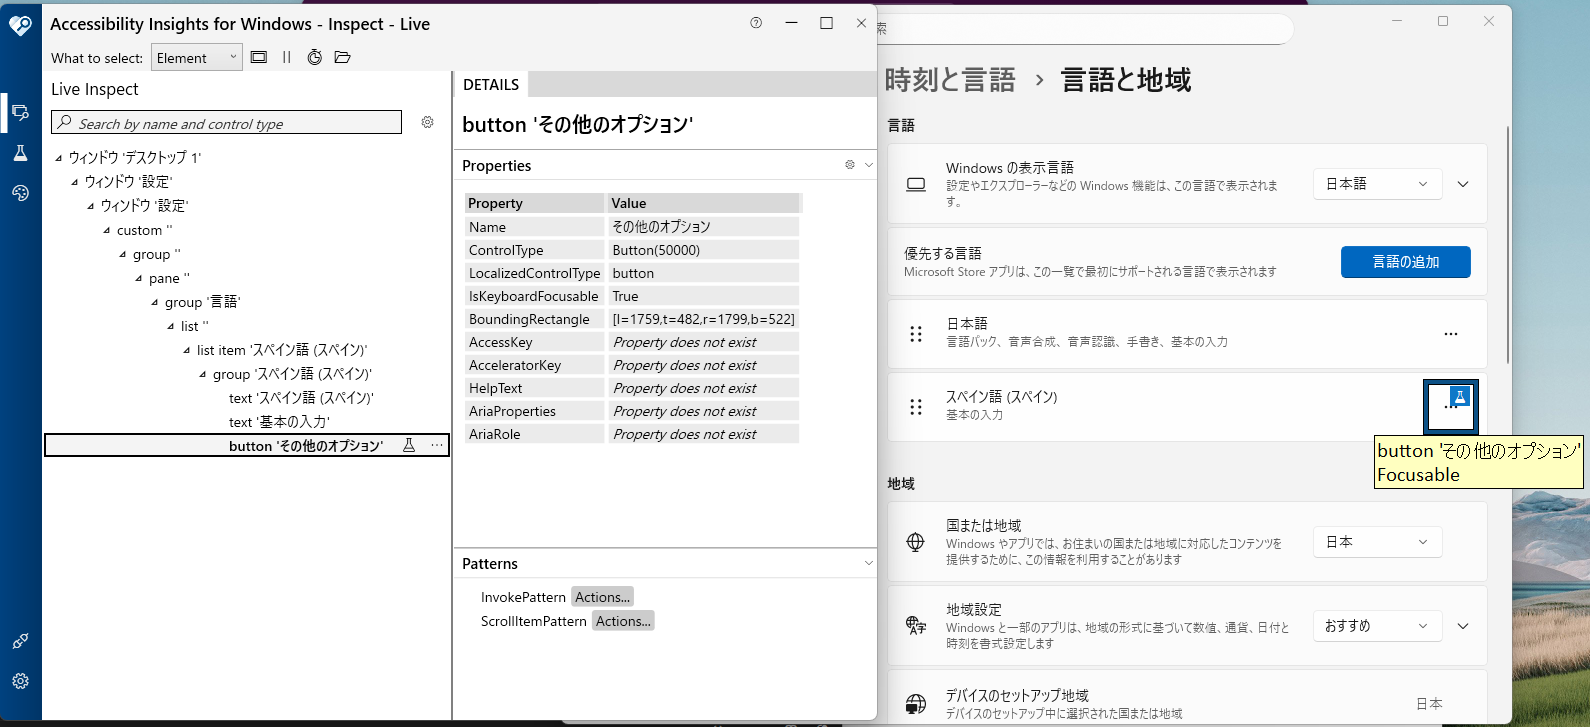
- スペイン語グループ (Group)
- その他のオプション (Button) ← これを選択したい
- その他の要素...
■ スクリプトの書き方
以下は、スペイン語の方を選択する場合のスクリプト。
#~~~~~ (前略) ~~~~~~
target_area = target_win.child_window(title="スペイン語 (スペイン)", control_type="Group")
target_item = target_area.child_window(title="その他のオプション", control_type="Button")
item_to_do = target_item.wrapper_object()
item_to_do.click()
◆方法②「何番目の要素か指定する」
found_index は、pywinauto ライブラリでUI要素を特定する際に使用されるパラメータで、同じ属性を持つ複数の要素が見つかった場合に、その何番目の要素を使いたいかを指定する。
- found_index は、検索条件に合致した要素のリストにおけるゼロベースのインデックス(0から始まる番号)です。
-
found_index=0:検索条件に合致した最初の要素 -
found_index=1:検索条件に合致した2番目の要素
-
target_item = target_area.child_window(title="その他のオプション", control_type="Button", found_index=1)
【要素操作メソッド】
クリック
クリックのメソッドは、click()とclick_input()がある。
#~~~~~ (前略) ~~~~~~
target_button = target_win.child_window(auto_id="xxxxxx", control_type="button")
target_button.wrapper_object()
# 対象をクリック
target_button.click()
◆使い分け
-
click()-
buttonクリックするのに使う。
-
-
click_input()-
button以外のcontrol_typeをクリックするのに使う。 - クリックの精度が低いので、下記のパターンに対応する処理を入れる必要がある。
- 違う要素をクリックしたとき
- クリックできなかったとき
-
◆比較表
| メソッド | 説明 | 対象"control_type" | 成功確率 |
|---|---|---|---|
| click() | 対象をクリックする。 | button | 100% |
| click_input() | 対象をクリックする。 | すべて | 約50%? |
ラジオボタンを選択
#~~~~~ (前略) ~~~~~~
target_radio = target_win.child_window(title="xxxxxxx", control_type="RadioButton")
target_radio_click = target_radio.wrapper_object()
# "RadioButton"を選択
target_radio_click.select()
プルダウンで選択されている値を取得
#~~~~~ (前略) ~~~~~~
target_combo = target_win.child_window(auto_id="xxxxxx", control_type="ComboBox")
target_combo.wrapper_object()
# 選択されたテキストを表示する
selected_item = target_combo.selected_text()
print(f"{selected_item}")
プルダウンなど(ListItemを選択)
◆ control_type="Combobox"からListItemを選択
#~~~~~ (前略) ~~~~~~
# "ComboBox"を指定
list_box = target_win.child_window(title="xxxxxx", control_type="ComboBox")
list_box.wrapper_object()
# 展開して中身が見える状態にする
list_box.expand()
# "ListItem"を指定
list_item = list_box.child_window(title_re="xxxxxx", control_type="ListItem", visible_only=False)
list_item.wrapper_object()
# "ListItem"を選択
list_item.select()
◆ control_type="List"からListItemを選択
#~~~~~ (前略) ~~~~~~
# "List"を指定
list_box = target_win.child_window(auto_id="xxxxxx", control_type="List")
list_box.wrapper_object()
# "ListItem"を指定
list_item = list_box.child_window(title_re="xxxxxx", control_type="ListItem", visible_only=False)
list_item.wrapper_object()
# `ListItem`を選択
list_item.select()
スクロール
#~~~~~ (前略) ~~~~~~
from pywinauto.keyboard import send_keys
#~~~~~ 中略 ~~~~~~

# "Pane"(余白)を指定
main_pane = target_win.child_window(control_type="Pane", found_index=1)
main_pane.wrapper_object()
main_pane.set_focus()
# 一度対象をクリックする
main_pane.click_input()
# キー操作する
send_keys("{PGDN}")
チェックボックス
#~~~~~ (前略) ~~~~~~

# チェックボックスの現在の状態を取得する。
# チェックボックスがONならOFFにする。
checkbox = target_win.child_window(auto_id="xxxxxxx", control_type="CheckBox")
checkbox.wrapper_object()
if checkbox.get_toggle_state() == 1:
    # 要素の状態を反転させる。
    checkbox.toggle()
リンク
target_link.invoke()