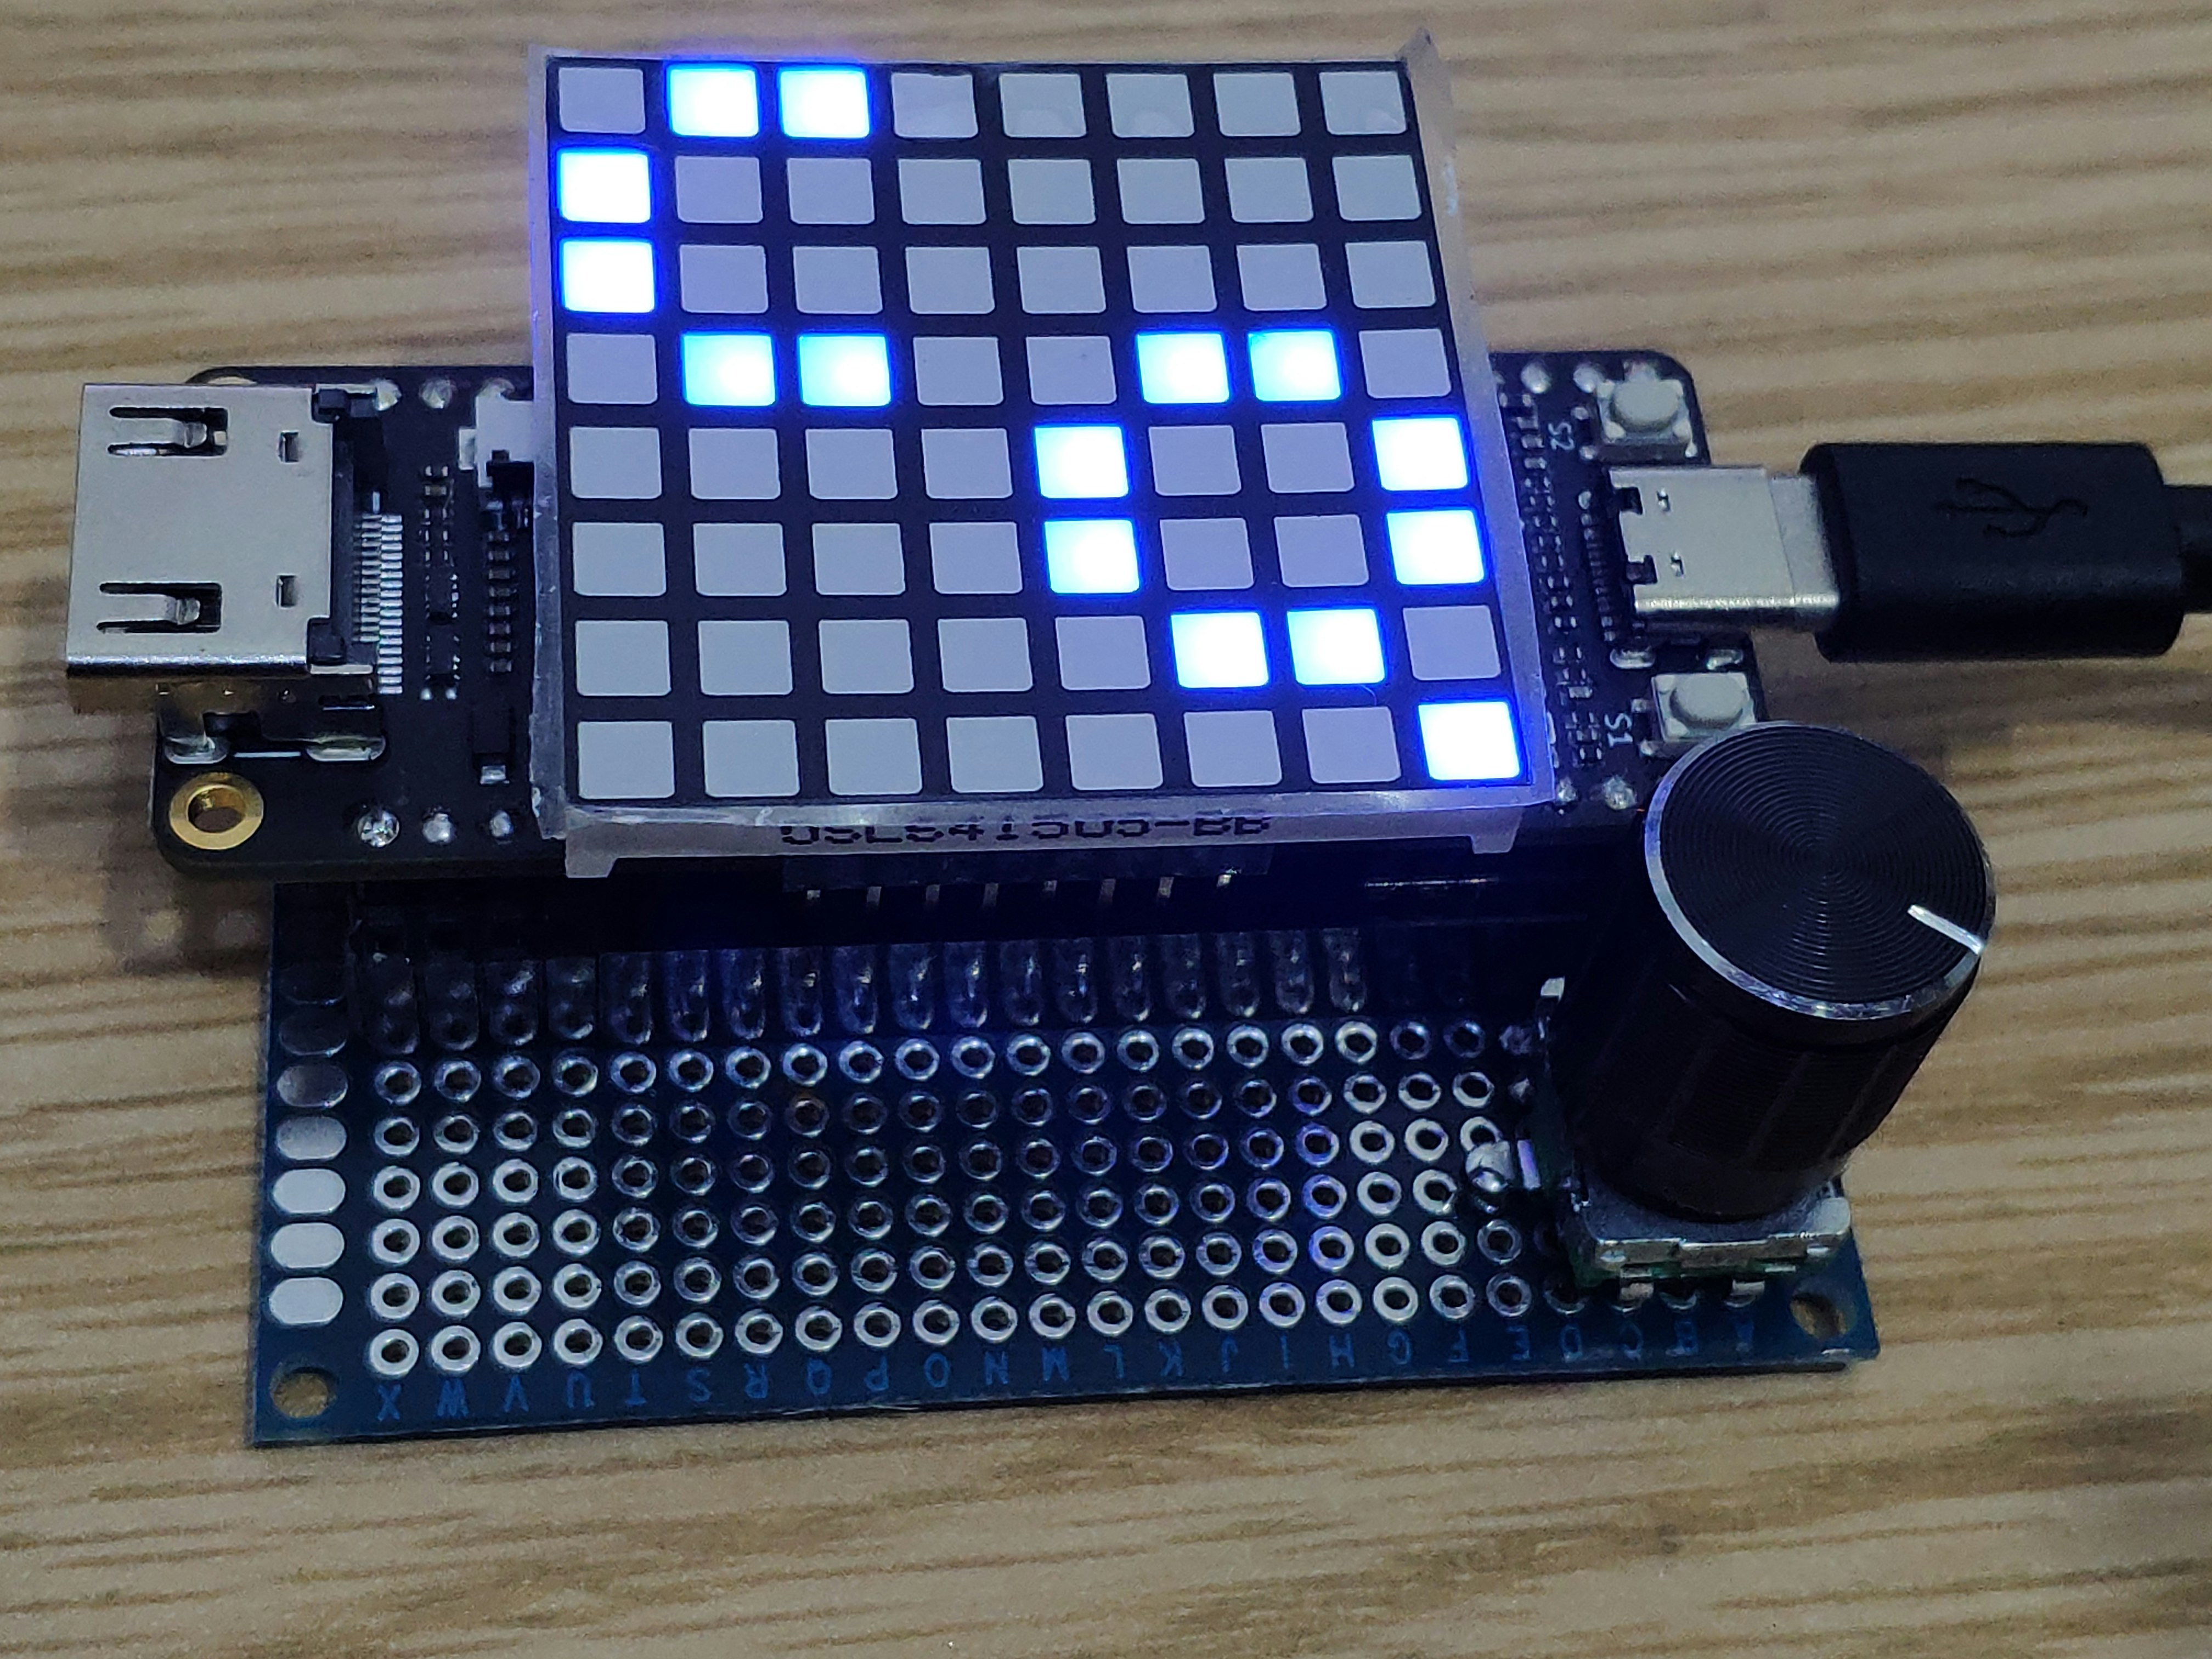
GowinのFPGAが載ったTang Nano 9K(Sipeed)でマトリクスLEDを使ってみる.
雑誌(Interface誌2022年12月号)の記事とSystemVerilogコードを参考に,ユニバーサル基板にコンパクトに実装してみた.
材料
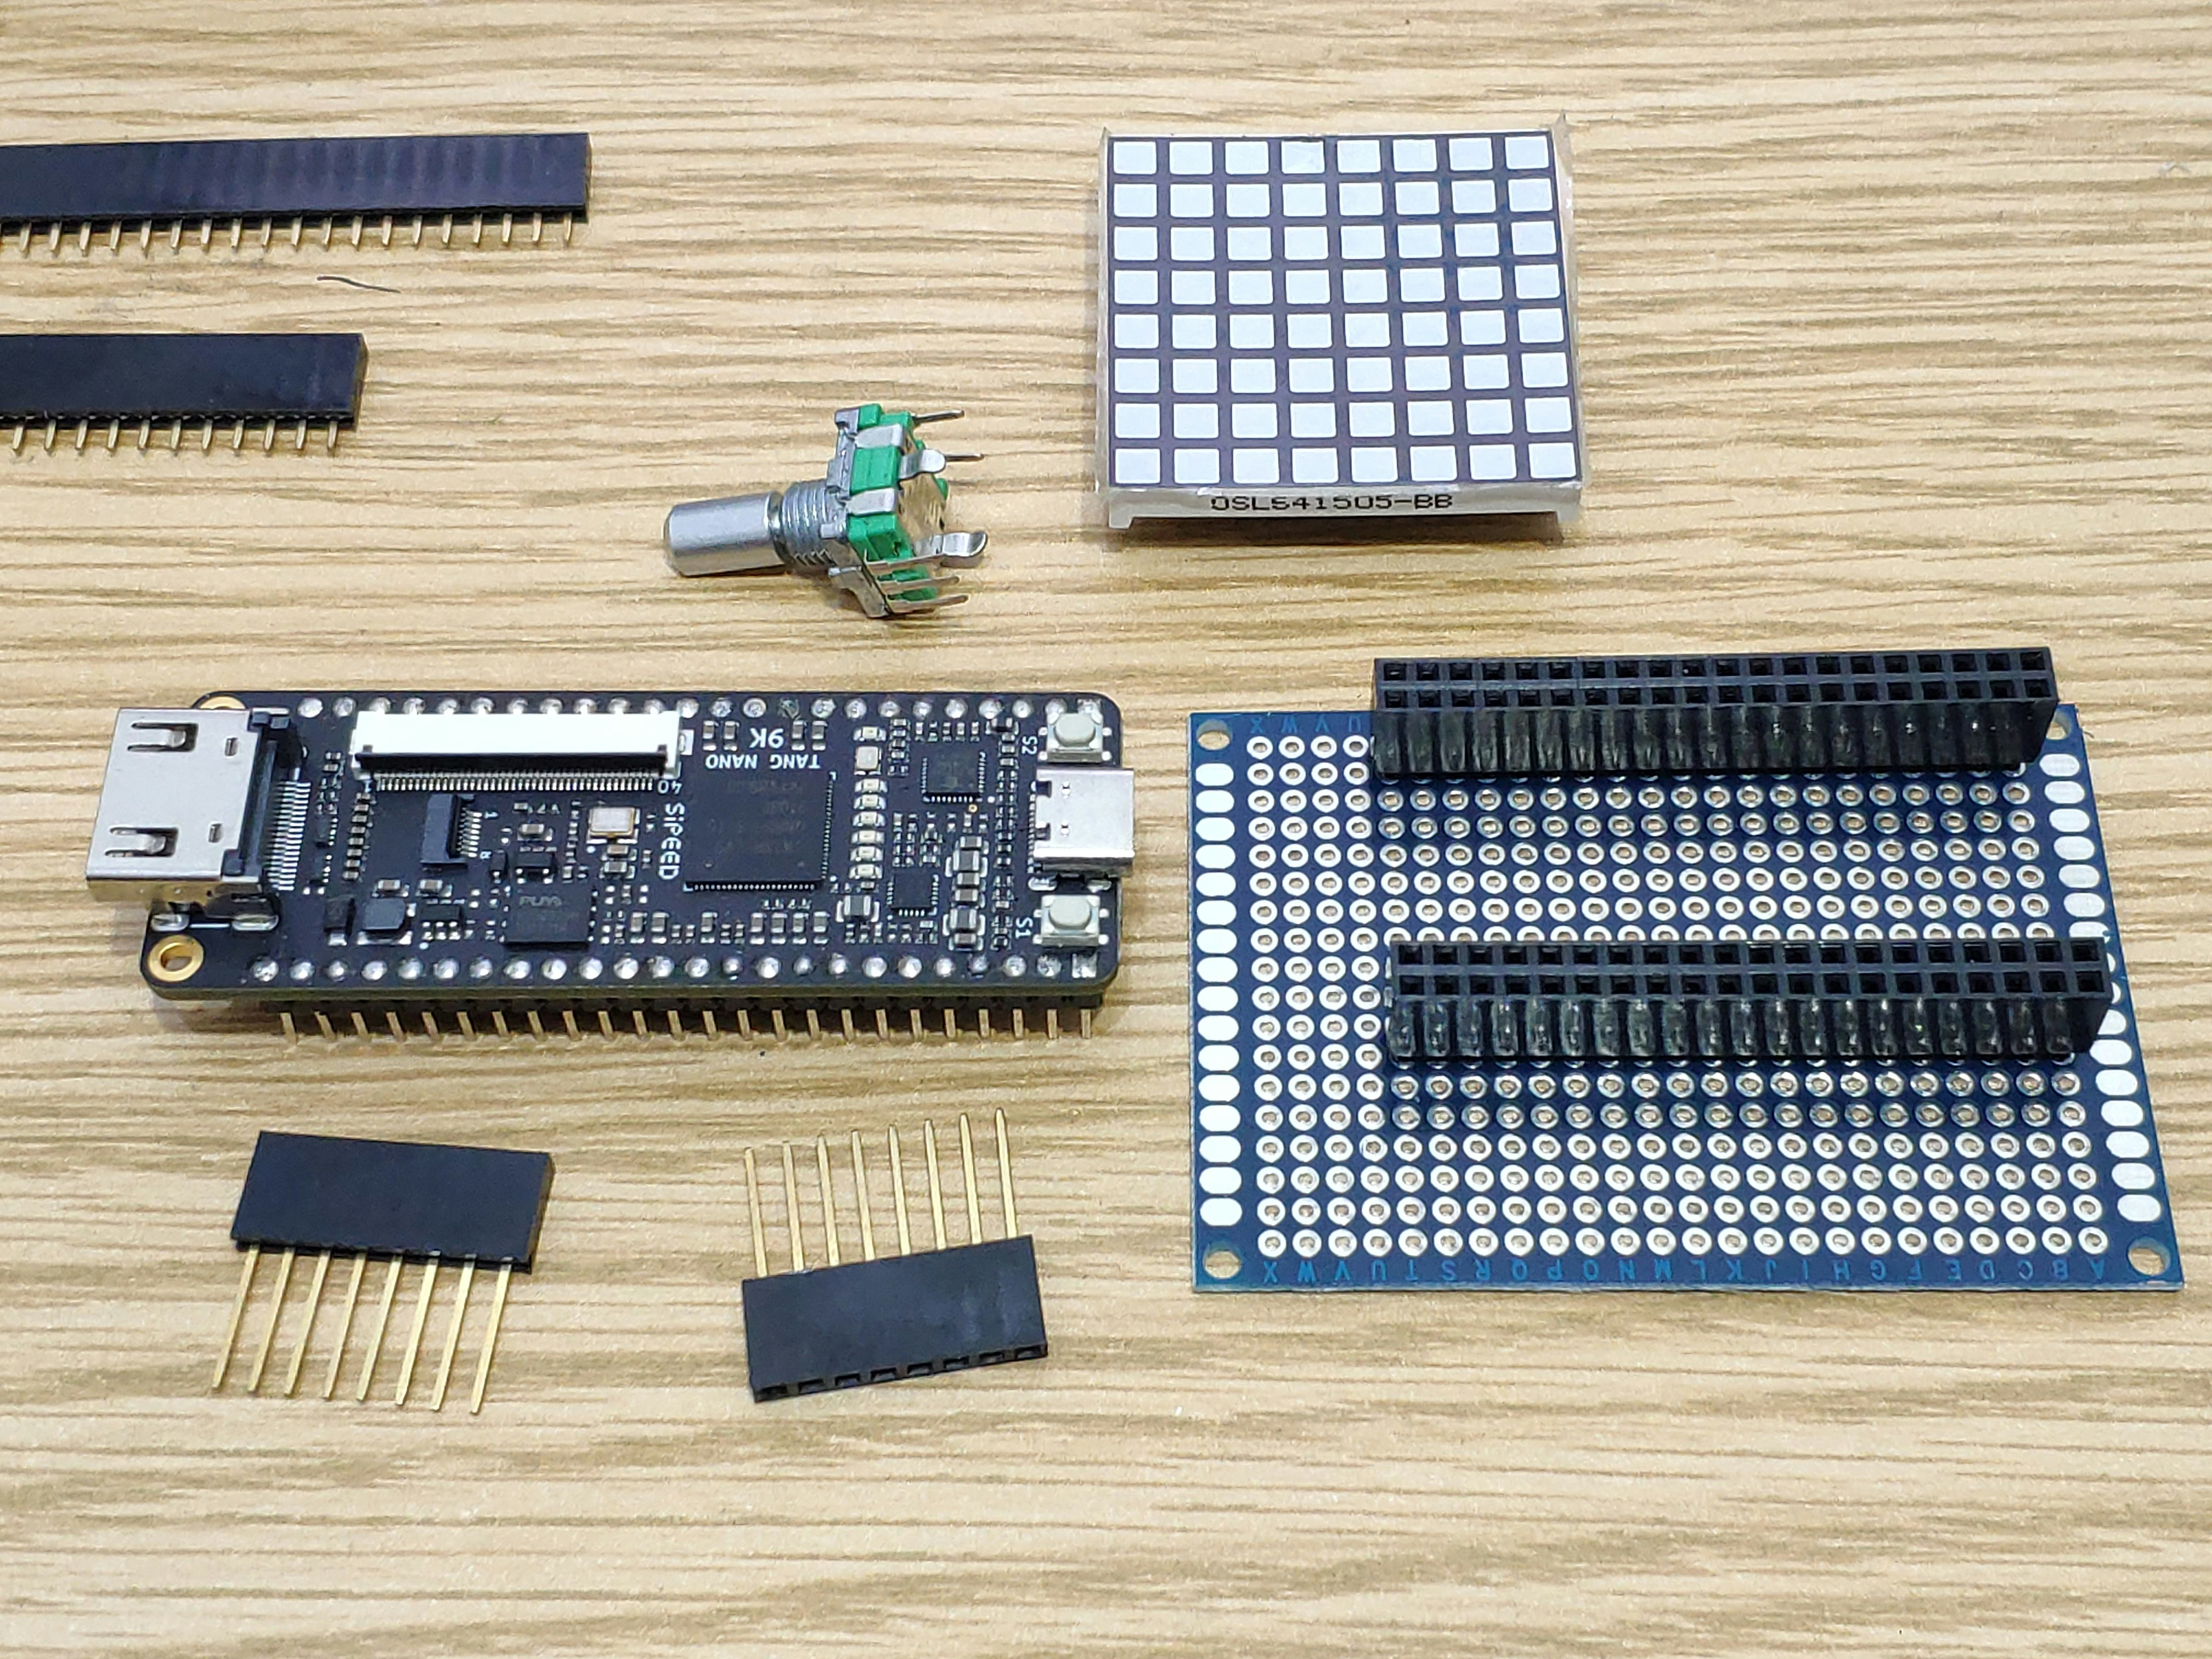
- Aliexpressで買った安いユニバーサル基板
- ダブルのピンソケット
- ロングのピンソケット
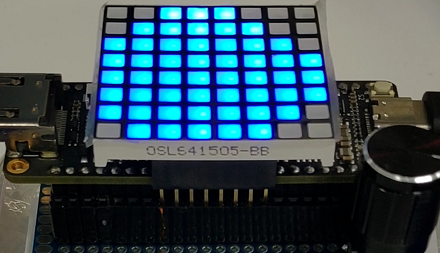
- マトリクスLED OSL641505-BB
- ロータリ・エンコーダ
- Tang Nano 9K
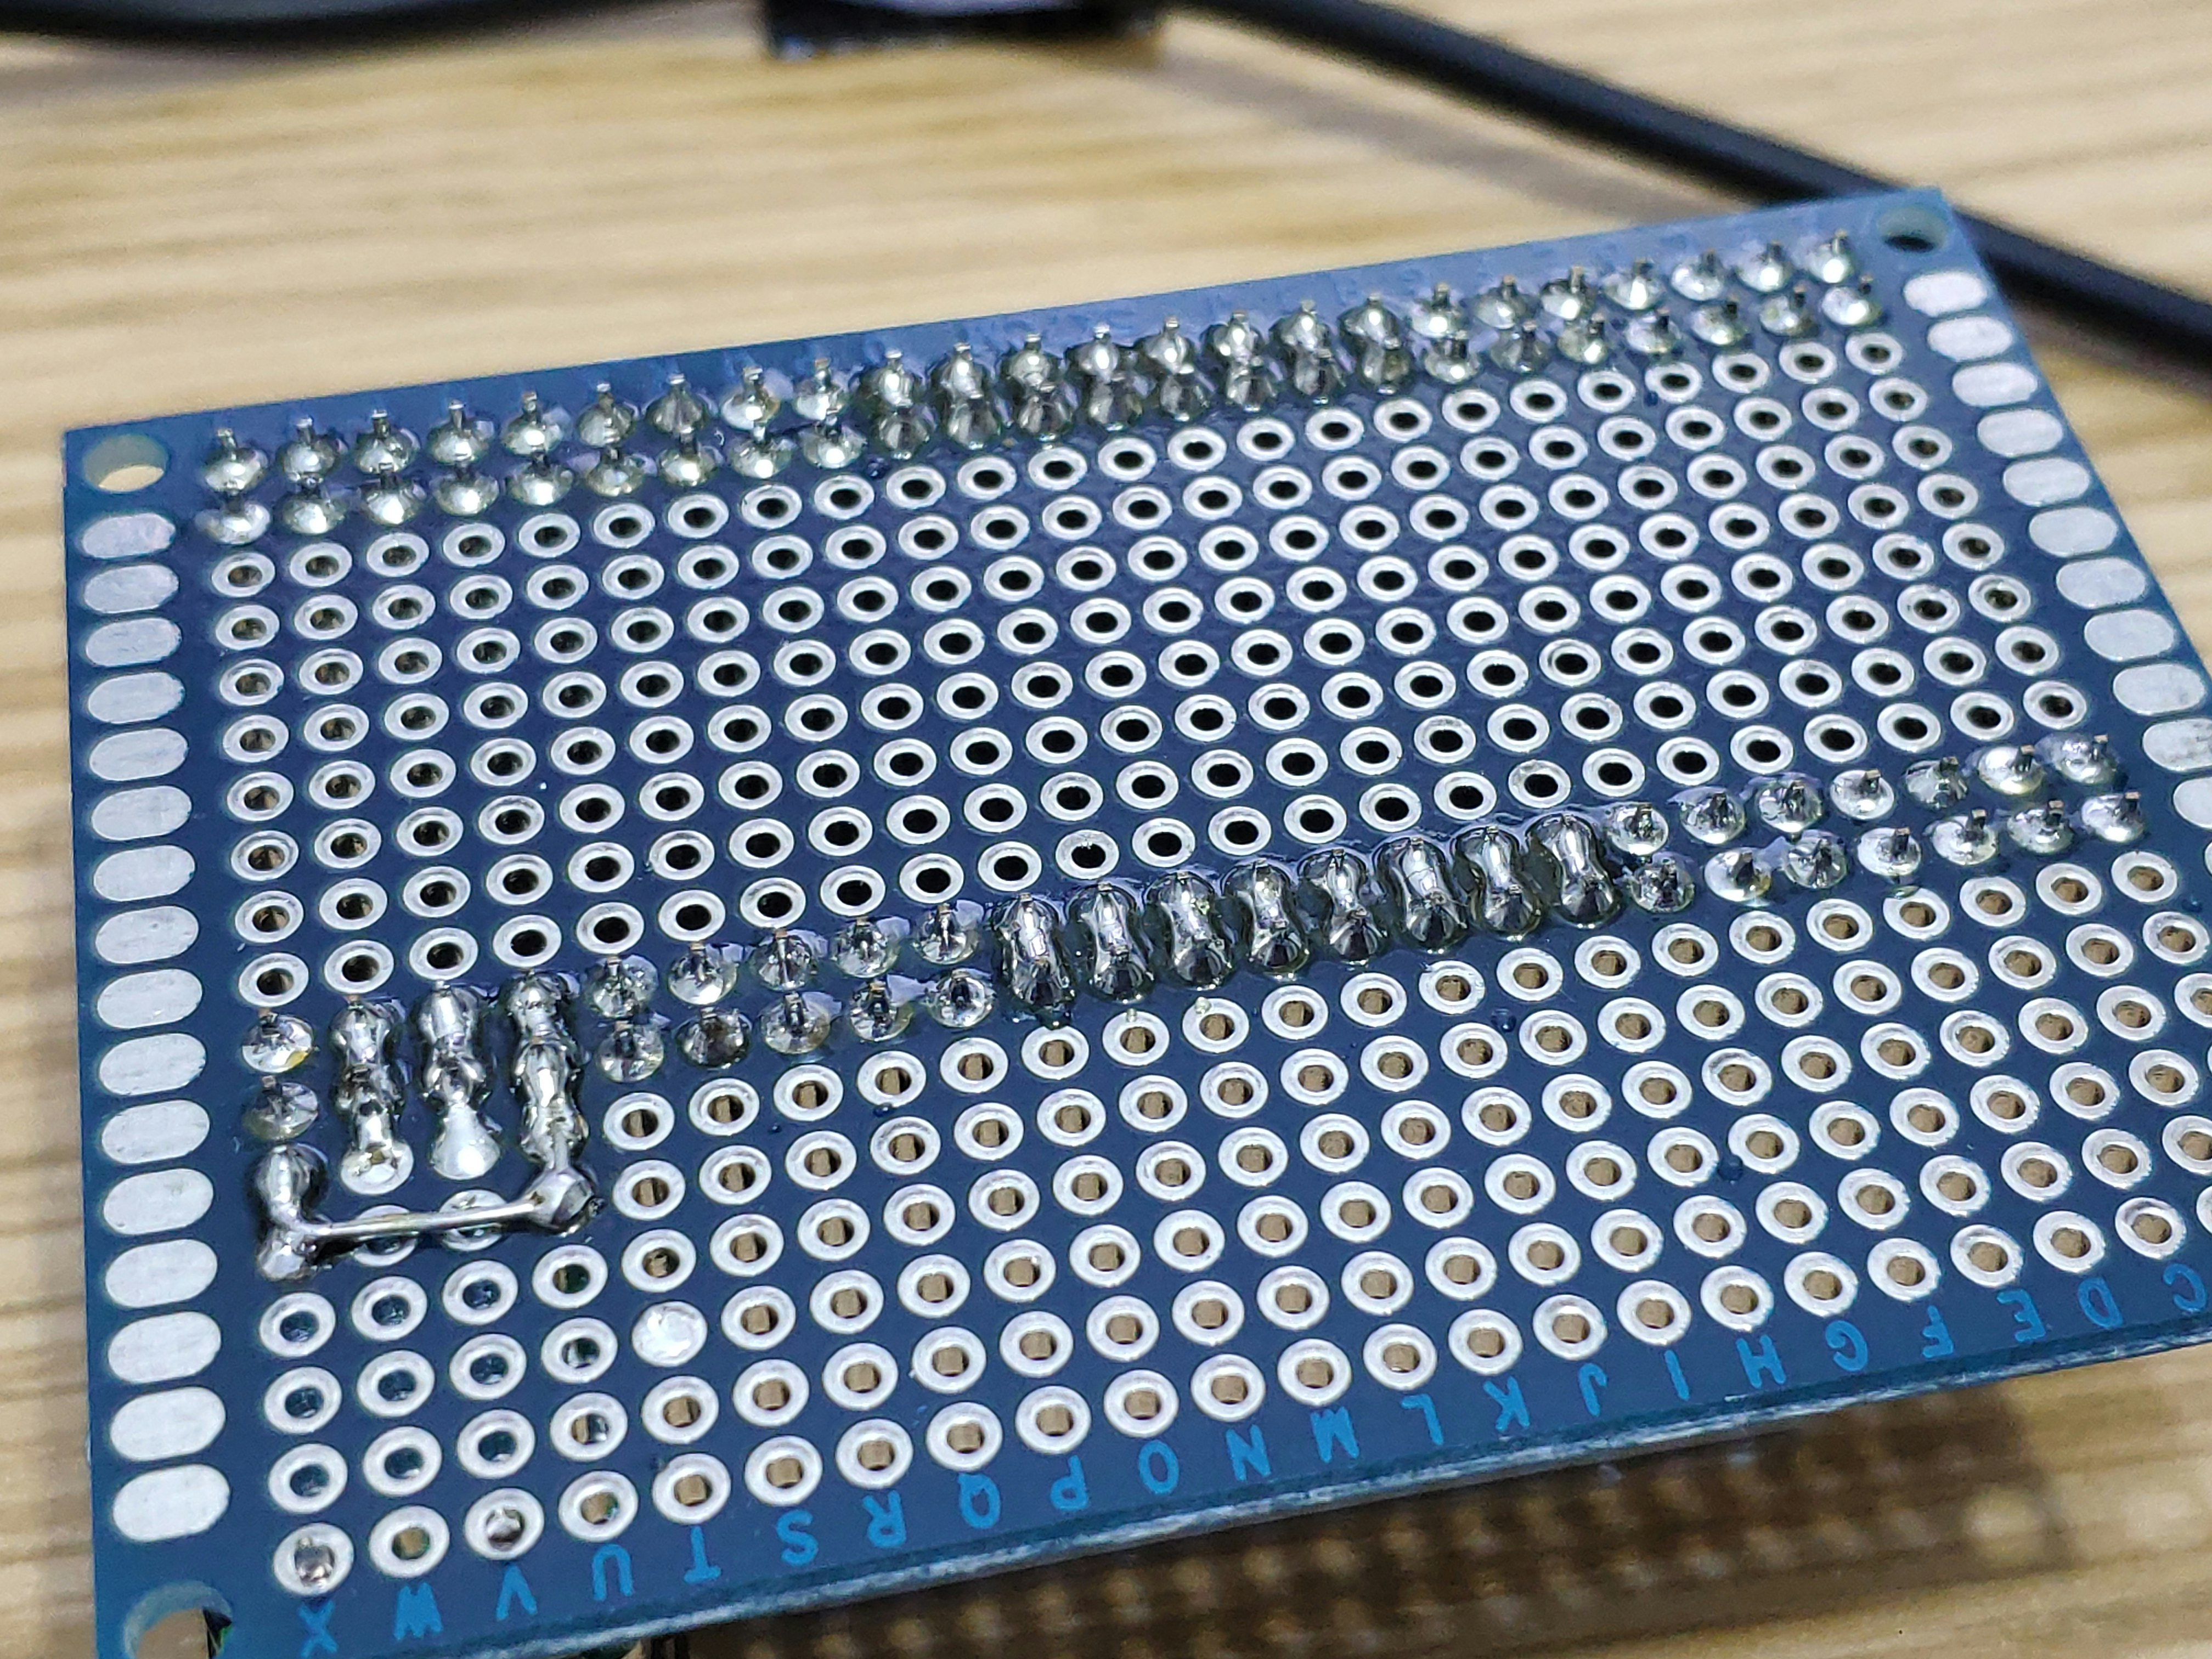
はんだ付け
ユニバーサル基板にはダブルのピンソケットを実装した.
それぞれ隣のピンを短絡してあるので,Tang Nano 9Kを載せた状態で,全ピンをとなり(外側)のピンソケットから引き出せる.
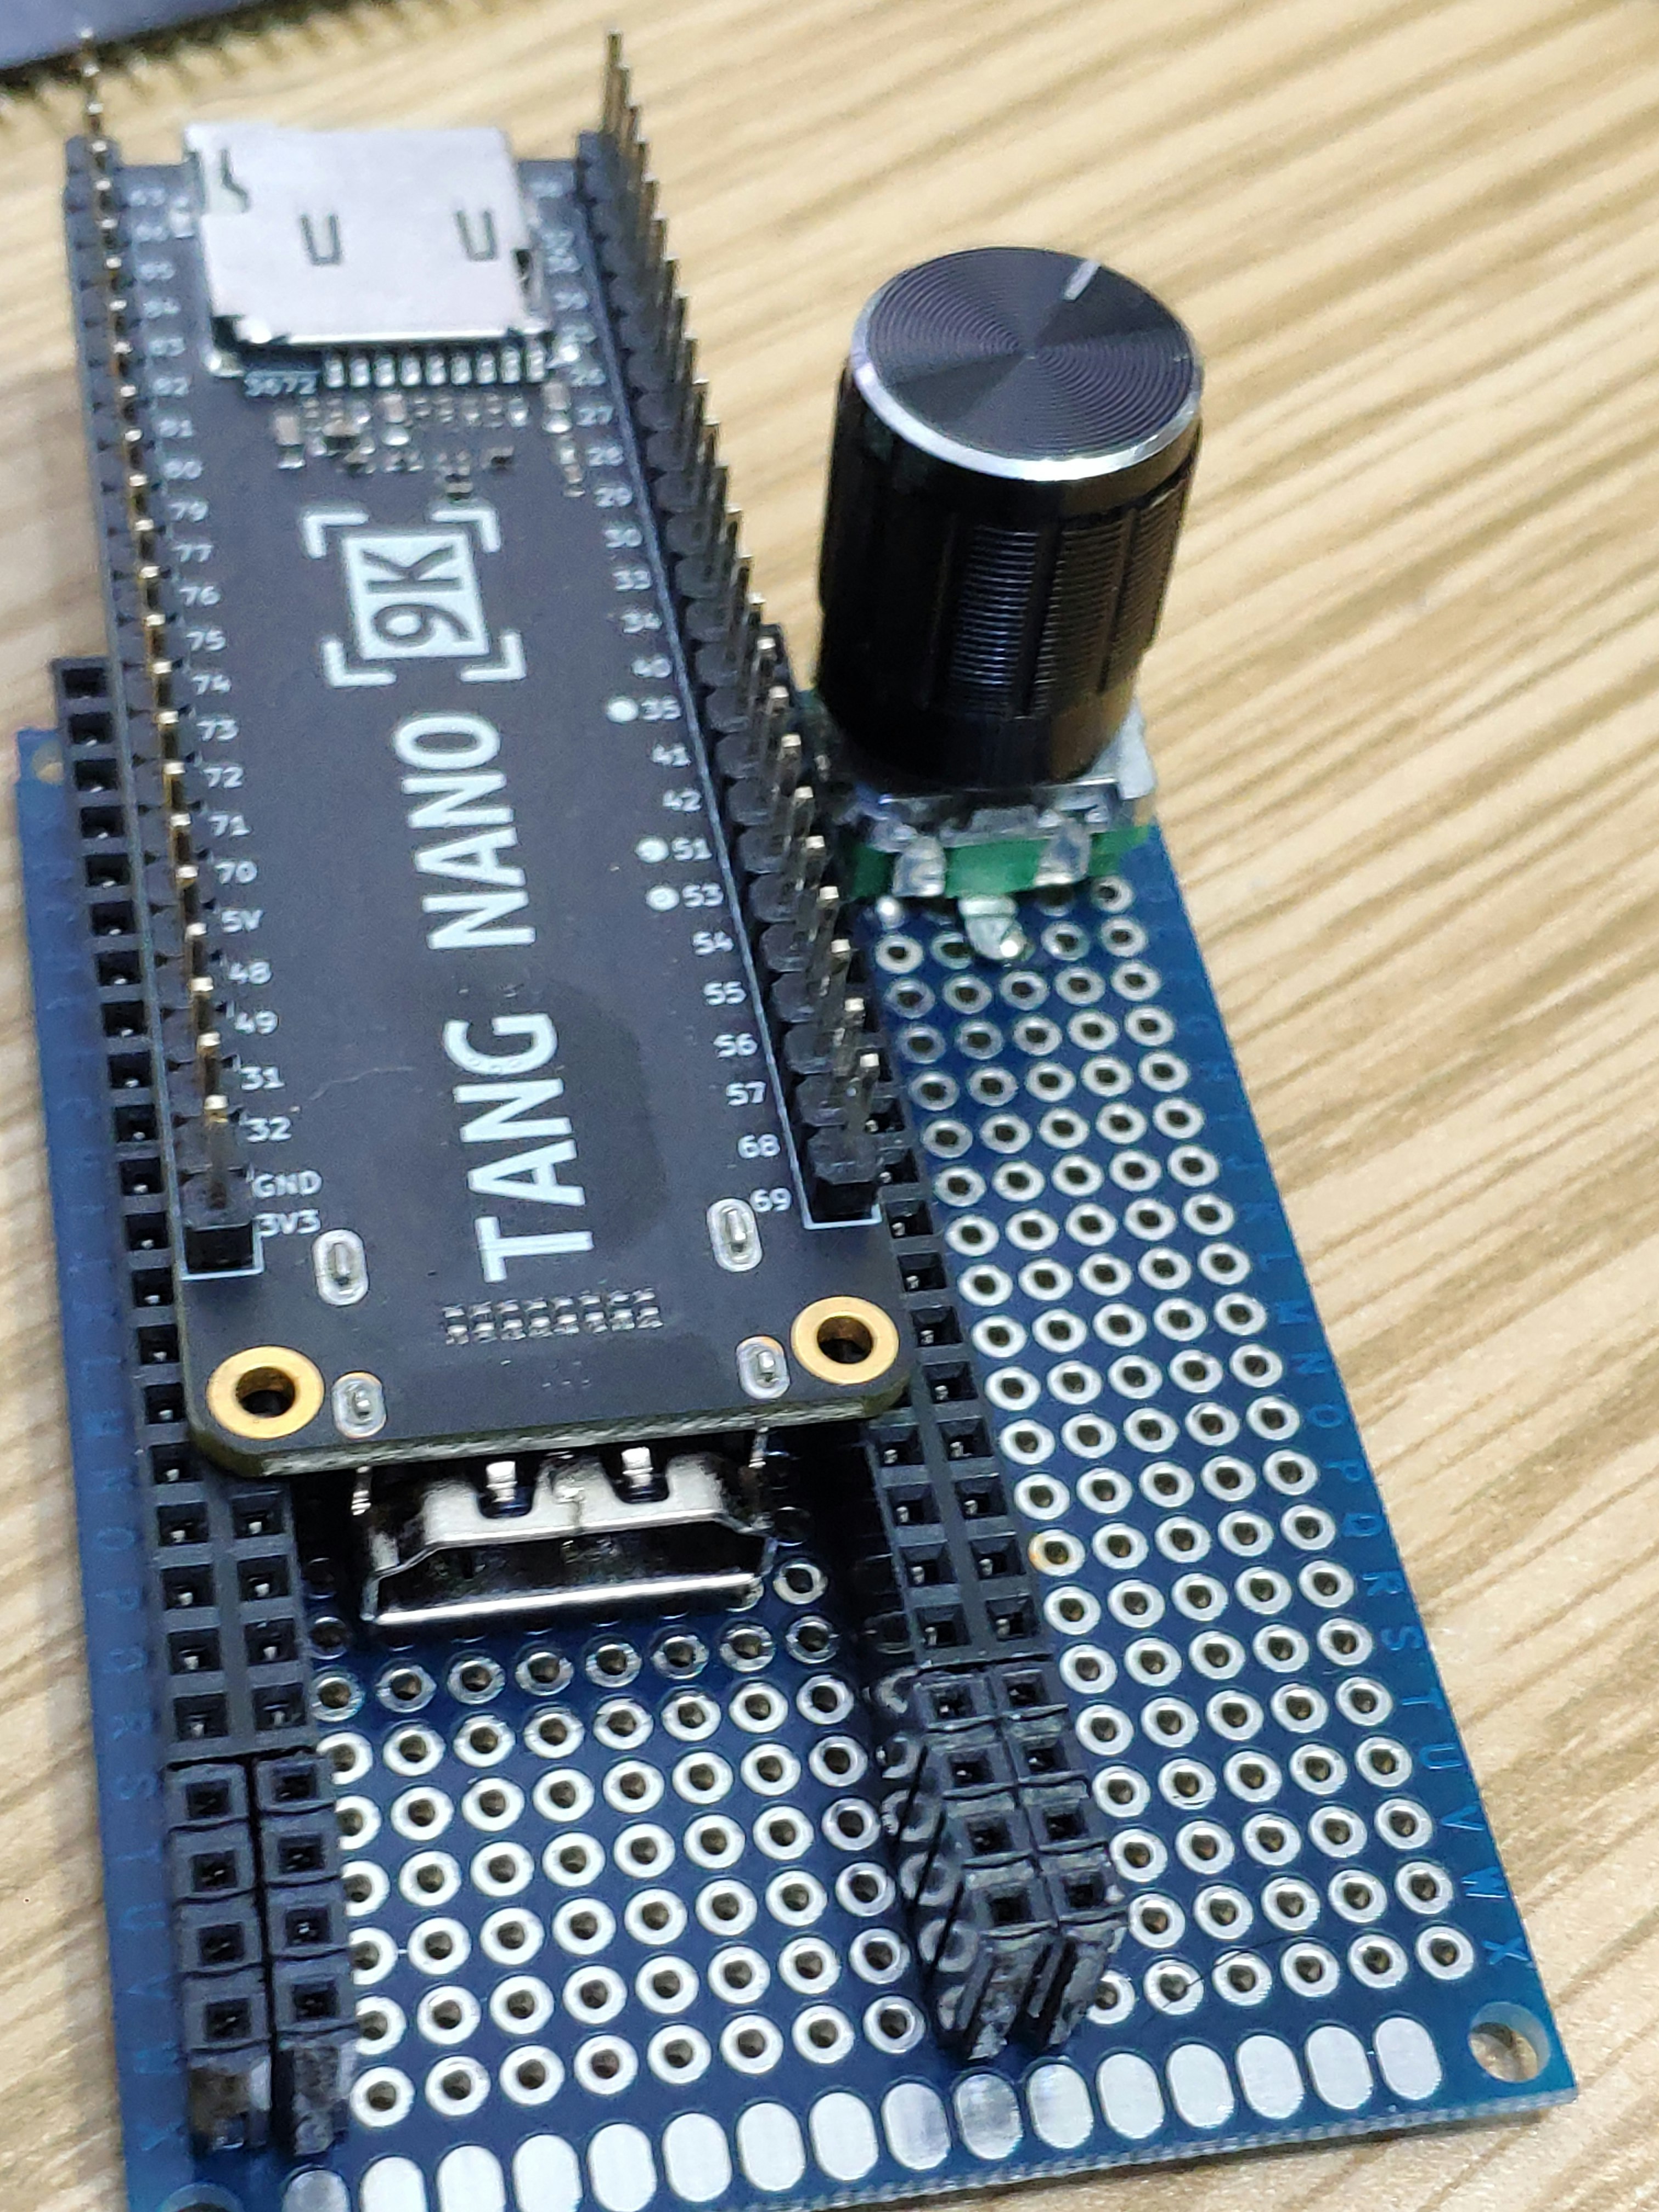
左下はロータリ・エンコーダの配線
マトリクスLEDは2階建て
マトリクスLEDは,ロングのピンソケットを下駄にしてTang Nano 9Kの上部に配置した.
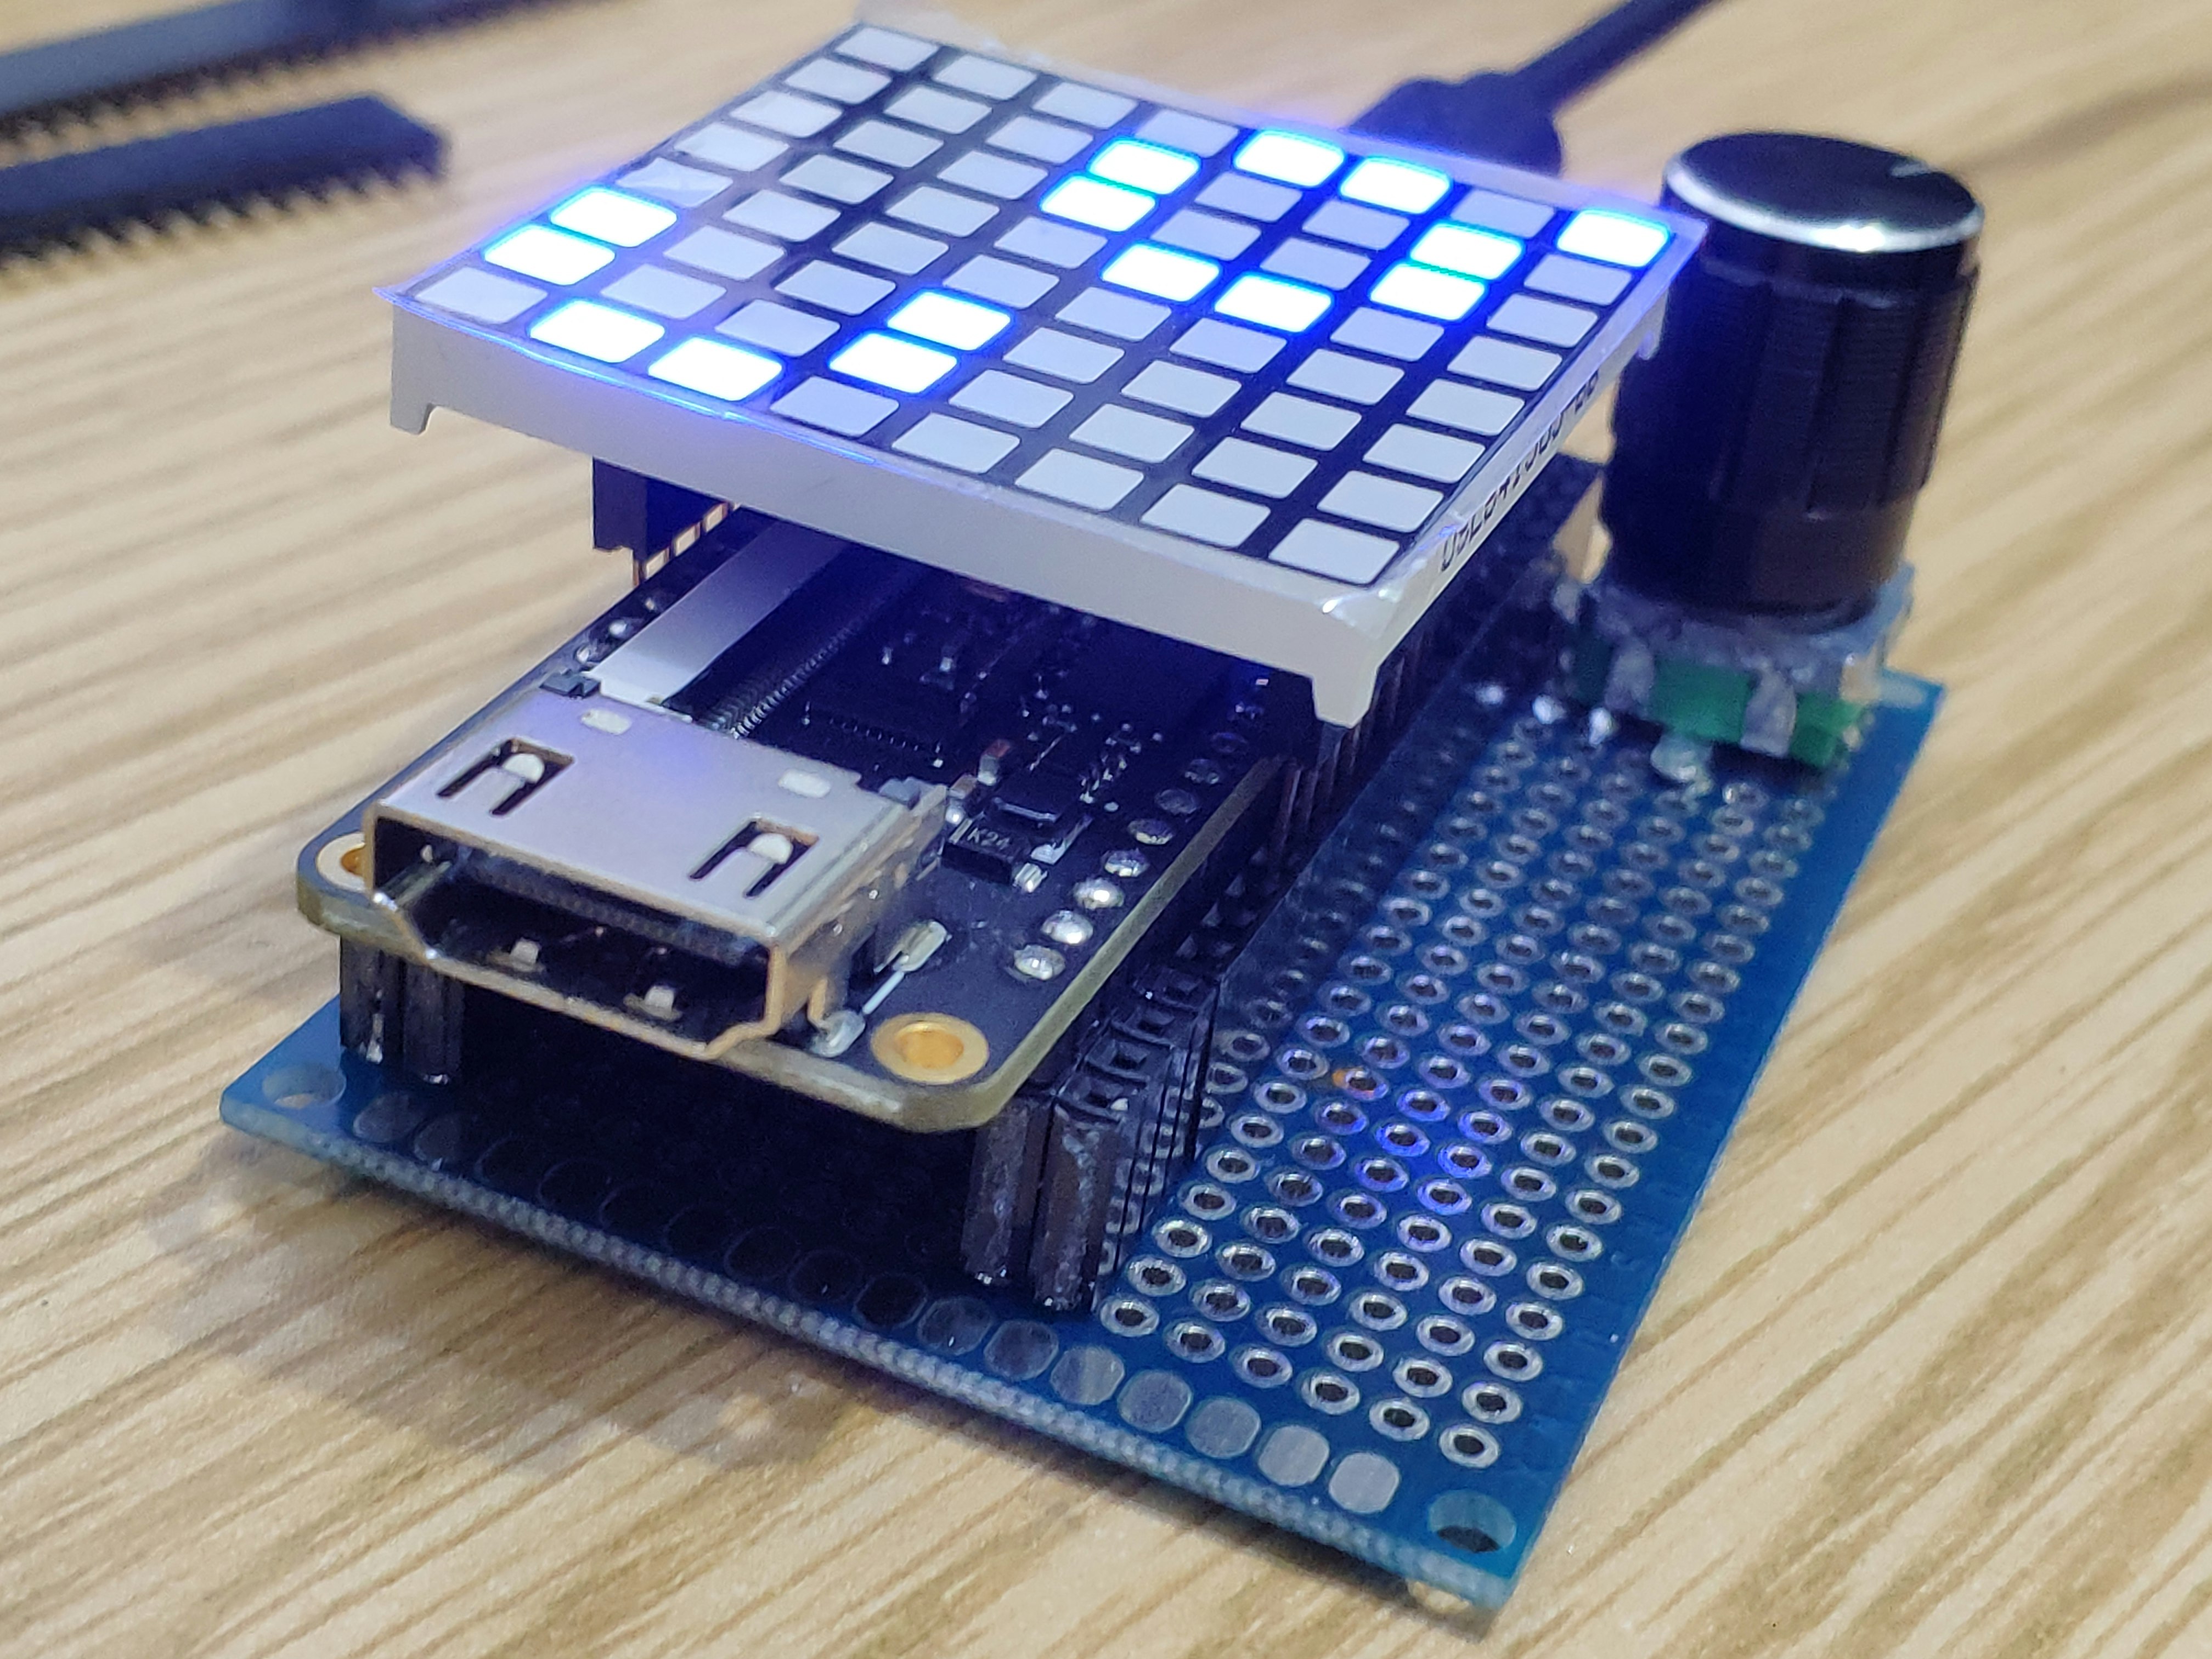
ロータリ・エンコーダも そのうち何かに使おう…
マトリクスLEDに加えて,ステッピング・モータ駆動回路も追加した
物理制約ファイル
IO_LOC "anode[0]" 35;
IO_PORT "anode[0]" IO_TYPE=LVCMOS33 PULL_MODE=UP DRIVE=16;
IO_LOC "anode[1]" 72;
IO_PORT "anode[1]" IO_TYPE=LVCMOS33 PULL_MODE=UP DRIVE=16;
IO_LOC "anode[2]" 73;
IO_PORT "anode[2]" IO_TYPE=LVCMOS33 PULL_MODE=UP DRIVE=16;
IO_LOC "anode[3]" 33;
IO_PORT "anode[3]" IO_TYPE=LVCMOS33 PULL_MODE=UP DRIVE=16;
IO_LOC "anode[4]" 75;
IO_PORT "anode[4]" IO_TYPE=LVCMOS33 PULL_MODE=UP DRIVE=16;
IO_LOC "anode[5]" 34;
IO_PORT "anode[5]" IO_TYPE=LVCMOS33 PULL_MODE=UP DRIVE=16;
IO_LOC "anode[6]" 42;
IO_PORT "anode[6]" IO_TYPE=LVCMOS33 PULL_MODE=UP DRIVE=16;
IO_LOC "anode[7]" 51;
IO_PORT "anode[7]" IO_TYPE=LVCMOS33 PULL_MODE=UP DRIVE=16;

IO_LOC "cathode[0]" 30;
IO_PORT "cathode[0]" IO_TYPE=LVCMOS33 PULL_MODE=UP DRIVE=16;
IO_LOC "cathode[1]" 41;
IO_PORT "cathode[1]" IO_TYPE=LVCMOS33 PULL_MODE=UP DRIVE=16;
IO_LOC "cathode[2]" 77;
IO_PORT "cathode[2]" IO_TYPE=LVCMOS33 PULL_MODE=UP DRIVE=16;
IO_LOC "cathode[3]" 40;
IO_PORT "cathode[3]" IO_TYPE=LVCMOS33 PULL_MODE=UP DRIVE=16;
IO_LOC "cathode[4]" 70;
IO_PORT "cathode[4]" IO_TYPE=LVCMOS33 PULL_MODE=UP DRIVE=16;
IO_LOC "cathode[5]" 76;
IO_PORT "cathode[5]" IO_TYPE=LVCMOS33 PULL_MODE=UP DRIVE=16;
IO_LOC "cathode[6]" 71;
IO_PORT "cathode[6]" IO_TYPE=LVCMOS33 PULL_MODE=UP DRIVE=16;
IO_LOC "cathode[7]" 74;
IO_PORT "cathode[7]" IO_TYPE=LVCMOS33 PULL_MODE=UP DRIVE=16;

IO_LOC "clk" 52;
IO_PORT "clk" IO_TYPE=LVCMOS33 PULL_MODE=UP;
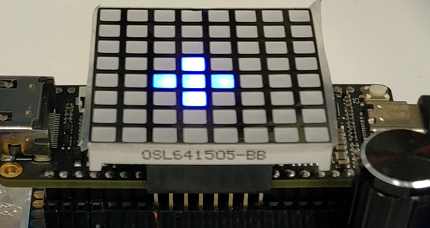
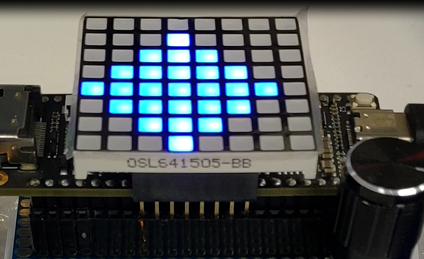
シェーダーも書いたよ
ダイナミック・ドライブでLEDを駆動しているので,それに合わせて1行(8ドット)ごとに,シェーダーによって1行分の絵(点灯画素)を決めています.従って,バッファを持つ必要がありません.
時間で,ひし形の大きさを変更しています.
省略

  assign col = row_data;
  reg [2:0] diameter;

  function shader(input [4:0] x, input [4:0] y);
    if(x > 3) x = x - 3;
    else x = 3 - x;
    if(y > 3) y = y - 3;
    else y = 3 - y;
    if((x + y) >= (diameter + 'd1)) shader = 0;
    else shader = 1;
  endfunction

  // Increment row_cnt @ overflow.
  reg [7:0] i;
  reg [7:0] row_data;
  reg [8:0] next_pattern;

  always_ff @ (posedge clk) begin
    if (overflow) begin
      row_cnt <= row_cnt + 'd1;
      for(i=0; i<8; i++)begin
        row_data[i] = shader(i, row_cnt);
      end
      if(row_cnt == 'd7) begin
        next_pattern <= next_pattern + 'd1;
        if(next_pattern == 0) begin
          if(diameter == 5) begin
            diameter <= 0;
          end else begin
            diameter <= diameter + 'd1;
          end
        end
      end
    end
  end

省略
ロータリ・エンコーダも使ったよ
別冊付録のP15のコードをベースに,LEDマトリクスに ひし形を表示しました.ロータリ・エンコーダを回すと ひし形の大きさが変わります.
This is rotary encoder exercise.
If you rotate rotary encoder, size of diamond shape will be changed.
module top (
  input wire clk,
  input wire sw1,
  input wire rotary_a,
  input wire rotary_b,
  input wire rotary_sw,
  output wire [7:0] anode,
  output wire [7:0] cathode
);

省略

  reg [3:0] diameter;
  wire debounced_rotary_a;
  wire debounced_rotary_b;
  logic overflow; // top モジュールへ移した

  matrix_led_driver inst_0 (
    .clk  (clk),
    .sw1  (sw1),
    .row  (row),
    .col  (col),
    .diameter (diameter),
    .overflow (overflow)
  );

//rotary encoderのチャタリング除去 ;debounce for rotary encoder
  sw_debounce deb_rotary_a(.clock_in(overflow), .sw_in(rotary_a), .sw_out(debounced_rotary_a));
  sw_debounce deb_rotary_b(.clock_in(overflow), .sw_in(rotary_b), .sw_out(debounced_rotary_b));

//rotaty encoder cw/ccw
  always @(negedge debounced_rotary_a)begin
    if(debounced_rotary_b)begin
      diameter <= diameter - 'd1;
    end else begin
      diameter <= diameter + 'd1;
    end
  end

// こちらのClockは topモジュールに移した
  timer #(
    .COUNT_MAX (3000)
  ) inst_1
省略
endmodule

module matrix_led_driver (
  input  wire       clk,
  input  wire sw1,
  output wire [7:0] row,
  output wire [7:0] col,
  input  wire [3:0] diameter,
  input  wire overflow
);

省略

  wire debounced_sw1;

  reg [1:0] dimming_counter;
  reg [1:0] light_level;
  reg light_pulse;
  wire dim_clk;

  assign row = ('b00000001 << row_cnt) * light_pulse;

// ボード上のSw1 チャタリング除去 ; debounce for SW1
  sw_debounce deb_sw1(.clock_in(clk), .sw_in(sw1), .sw_out(debounced_sw1));

// SW1押すとLEDの明るさ変更 ;when sw1 was pushed, tone of LED will be changed
  always @(posedge debounced_sw1) begin
    light_level <= light_level + 2'd1;
  end

  assign col = row_data;

  function shader(input [4:0] x, input [4:0] y);
    if(x > 3) x = x - 3;
    else x = 3 - x;
    if(y > 3) y = y - 3;
    else y = 3 - y;
    if((x + y) >= (diameter + 'd1)) shader = 0;
    else shader = 1;
  endfunction

  reg [3:0] i;
  reg [7:0] row_data;

  always @(posedge dim_clk)begin
    dimming_counter <= dimming_counter + 'd1;
    if (dimming_counter <= light_level) begin
      light_pulse <= 1'b1;
    end else begin
      light_pulse <= 1'b0;
    end
  end

  always_ff @ (posedge clk) begin
    if (overflow) begin
      row_cnt <= row_cnt + 'd1;

      for(i=0; i<8; i++)begin
        row_data[i] = shader(i, row_cnt);
      end
    end
  end

// LED4階調制御用のclock追加  ;add clock for controling LED tone.
  timer #(
    .COUNT_MAX (250)
  ) dim_clock (
    .clk      (clk),
    .overflow (dim_clk)
  );

省略

endmodule
ライフゲームも
基本は普通のライフゲームに準じています.
独自ルールはライフを4段階にしたところです.
ただし,周囲8マスが全て埋まった場合は,即死にしています.
隣接3で誕生,4以上でライフ-1,2未満でライフ-1,8で即死です.
フィールドの大きさは,ハードコートされていて16×8になっています.
判定上,上と下,右と左はつながっています.
カーネル
  reg [1:0] [15:0] [7:0] [1:0] frame_buffer;  // 表・裏バッファ, 横16マス, 縦8マス, ライフ4段階
  reg current_frame;

省略

  task life();
    reg [4:0] x;
    reg [3:0] y;

    for(x=0; x < 16; x++)begin
      for(y=0; y < 8; y++)begin
        automatic reg [3:0] around=0;
        if(frame_buffer[current_frame][x[3:0]-4'd1][y[2:0]-3'd1] !=0) around = around + 'd1;
        if(frame_buffer[current_frame][x[3:0]-4'd1][y]           !=0) around = around + 'd1;
        if(frame_buffer[current_frame][x[3:0]-4'd1][y[2:0]+3'd1] !=0) around = around + 'd1;
        if(frame_buffer[current_frame][x]          [y[2:0]-3'd1] !=0) around = around + 'd1;
        if(frame_buffer[current_frame][x]          [y[2:0]+3'd1] !=0) around = around + 'd1;
        if(frame_buffer[current_frame][x[3:0]+4'd1][y[2:0]-3'd1] !=0) around = around + 'd1;
        if(frame_buffer[current_frame][x[3:0]+4'd1][y]           !=0) around = around + 'd1;
        if(frame_buffer[current_frame][x[3:0]+4'd1][y[2:0]+3'd1] !=0) around = around + 'd1;

        if(frame_buffer[current_frame][x][y] != 0)begin
          if(around > 7)begin
            frame_buffer[current_frame + 1'd1][x][y] = 2'd0;
          end else if(around > 3 || around < 2)begin
            frame_buffer[current_frame + 1'd1][x][y] = frame_buffer[current_frame][x][y] - 2'd1;
          end else begin
            frame_buffer[current_frame + 1'd1][x][y] = frame_buffer[current_frame][x][y];
          end
        end else begin
          if(around == 3)begin
            frame_buffer[current_frame + 1'd1][x][y] = 2'd3;
          end else begin
            frame_buffer[current_frame + 1'd1][x][y] = 2'd0;
          end
        end
      end
    end
    current_frame = current_frame + 'd1;
  endtask
省略