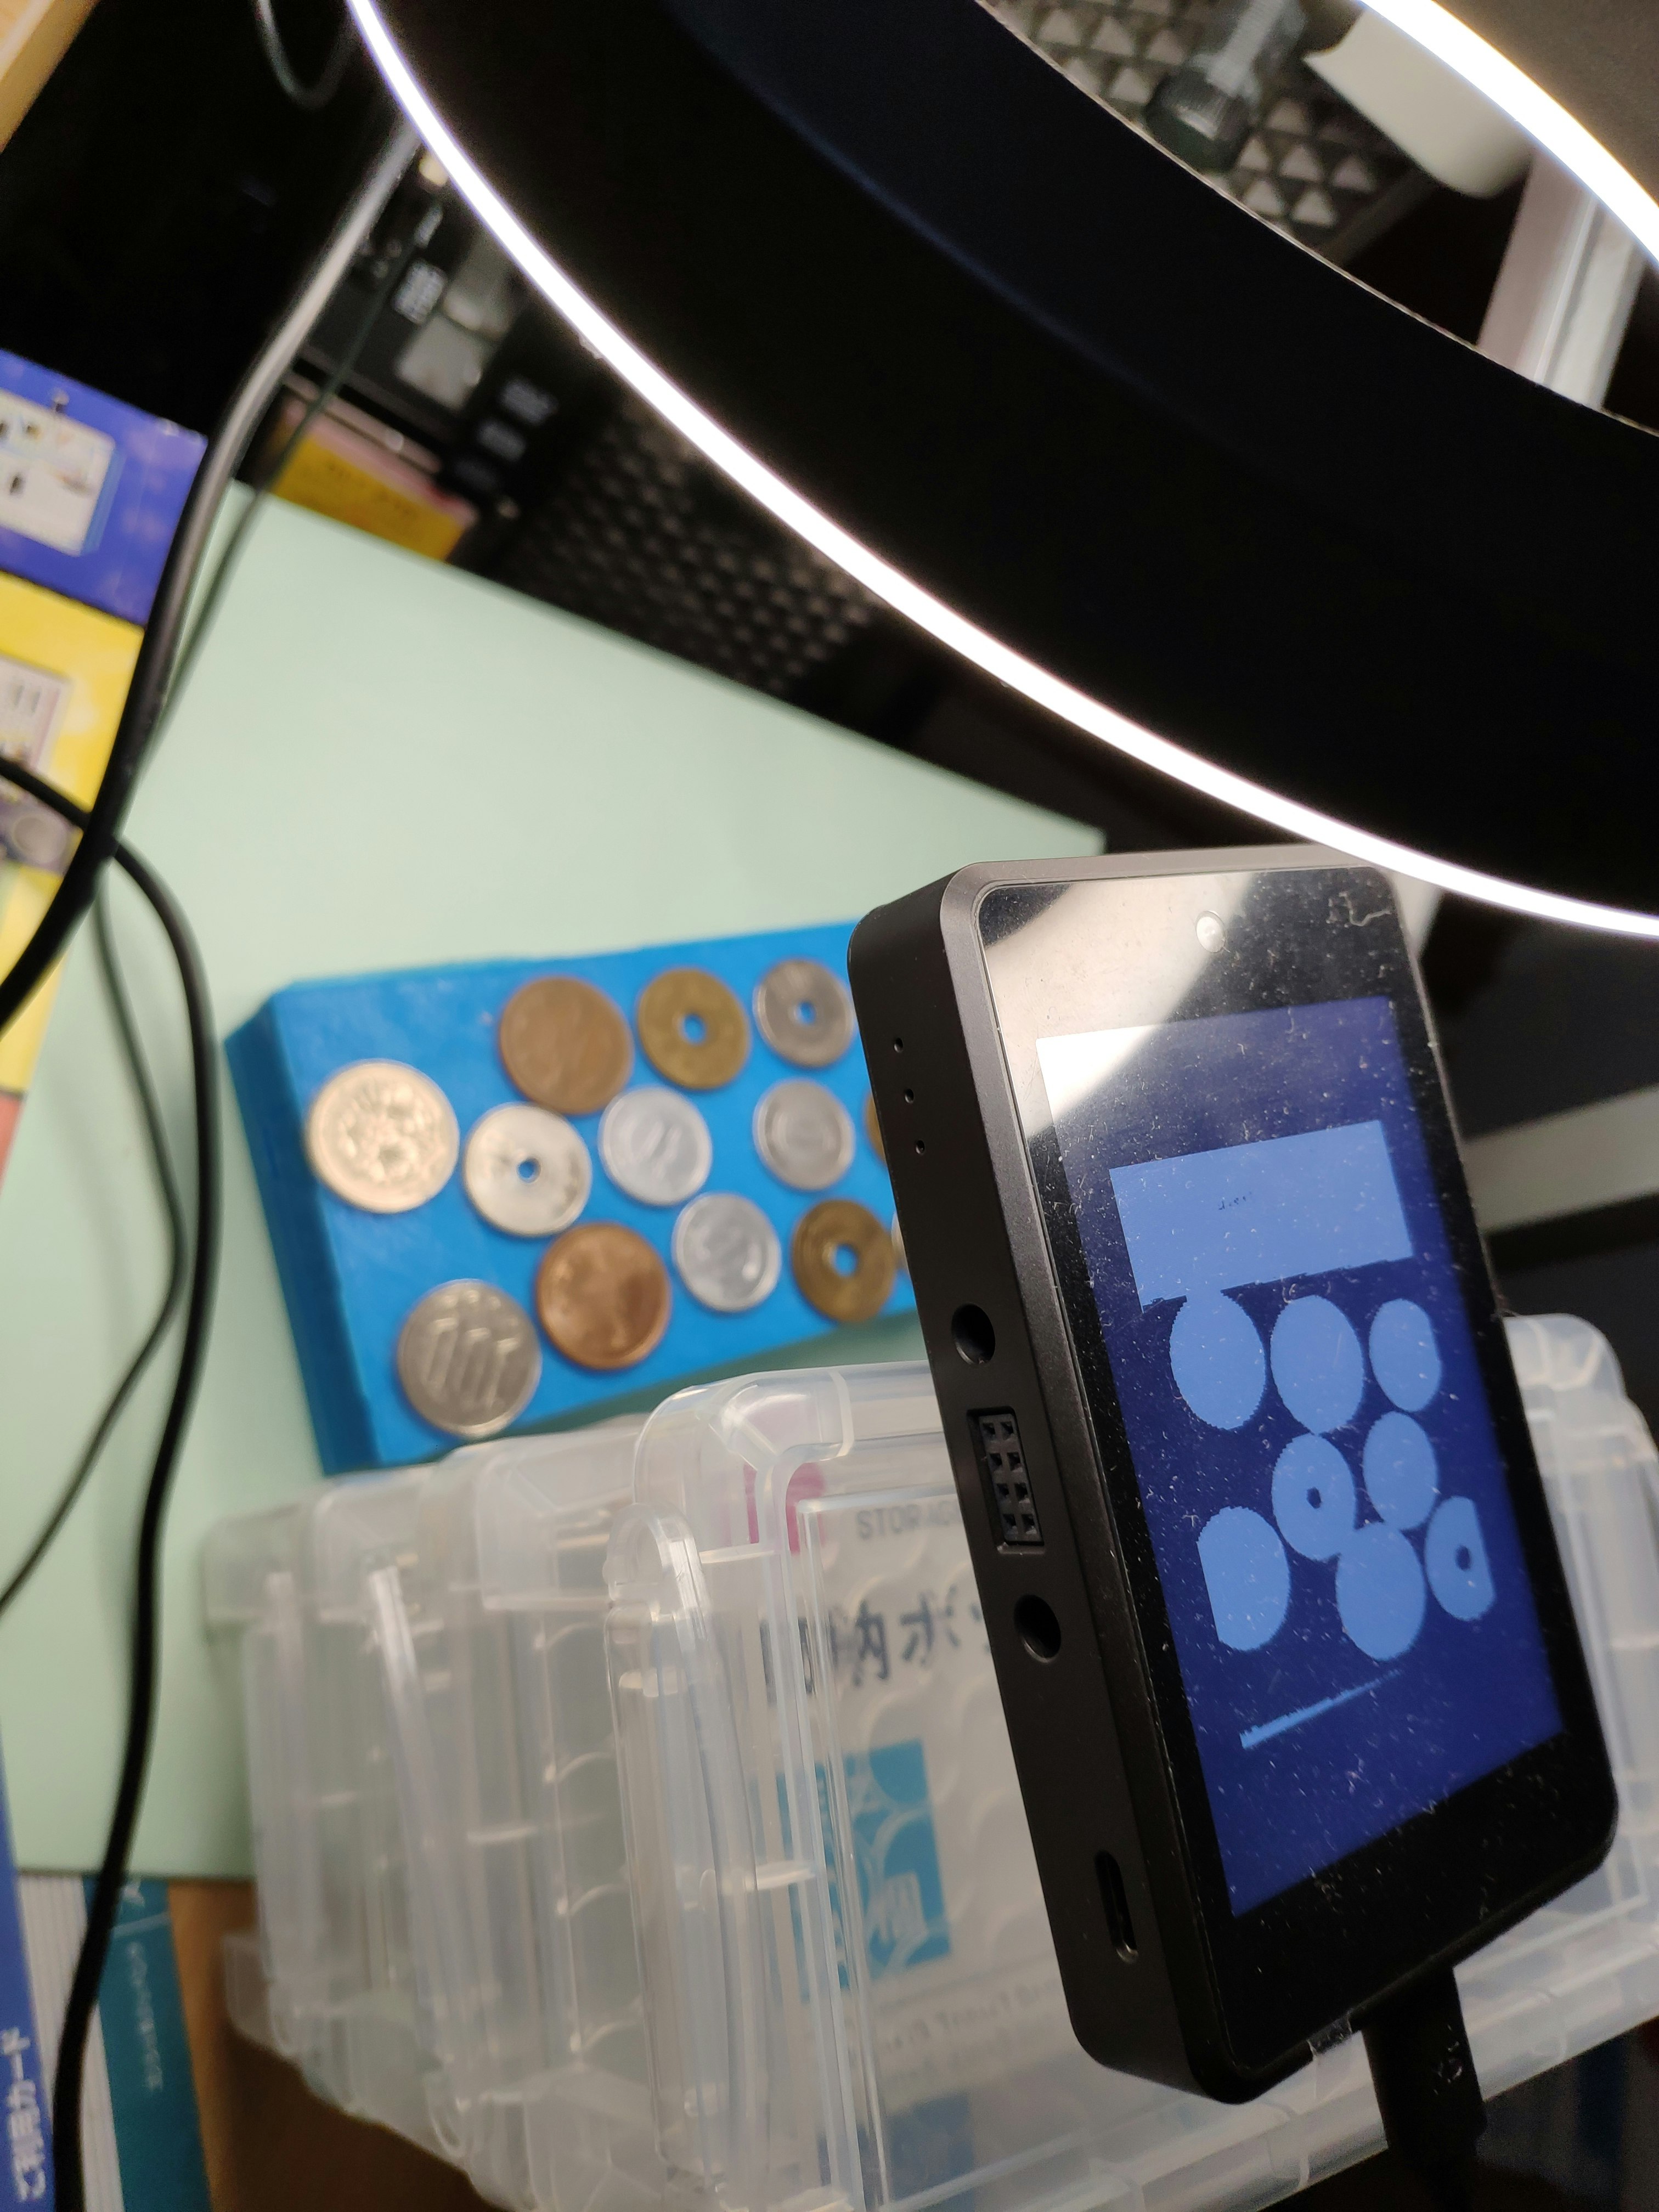
micropython画像処理でお金の検出
当初1円玉~500円玉まで処理しようと思っていましたが,年末進行で時間が無く...とりあえず,1円,5円,10円,50円,100円玉に対応しました.
現状QVGAで2.5FPSくらい,VGAで0.4FPSくらいで動いています(VGAはmicropythonのリビルド必要).
・QVGA
画像処理する場合にインフラで対応したほうがよい部分も多い
技術屋さんはなんでも技術で対応しようとする傾向がありますが,周辺環境側で対応したほうがシステムとして効率の良い場合もあります.画像処理のソフトウェア側で対処できることが多いと思いますが(そして技術としては面白い),画像処理の負荷が軽くなれば,同じハードウェア・リソースの場合に,リソースを他の部分に回すことができます.量産案件であれば,処理を減らすことでハードウェアにかかるコストを落とすことも考えられます.
今回の場合,具体的には背景と硬貨の分離について検討した結果,いわゆるクロマキーを使うことにしました.
当初は,木目の机の上に硬貨を並べており,「多分できるだろう」と簡単に考えていましたが,micropythonではヒープ領域の関係でQVGAまでしか使えない(VGAだとフィルタ処理で落ちる)こともあり,いろいろなフィルタを使って頑張りましたが,最終的には単色の背景を使うという方法に逃げることにしました(のちにVGA化しています).
硬貨の計算の場合,実際の運用などを考えると決まった背景でも問題なさそうなので,結果的によかったと思います.
カメラから硬貨を広げる面までの距離も固定にすることで,硬貨径による硬貨の種類の判別をシンプルに記述できるようにしています.
処理1:クロマキー兼 2値可
クロマキー処理には,2値可するメソッドのimage.binary()を使っています.背景の色に合わせてパラメータを調整します(LABで指定する).
今回は青なので,mask = tmpImg.binary([(0,50,-10,40,-120,-10)],invert=True)としています.
クロマキー用パラメータの決め方
MAIXPY IDEの右上にあるフレームバッファ画像上で確認したい領域をドラッグします.すると,下の3つのグラフがドラッグした領域のヒストグラムに更新されます.グラフの下部,左側に最小値,最大値が表示されているので,何か所かドラッグしてパラメータを決めます.L,A,Bそれぞれについて行います.
今回は青の背景のみが選択されるように,パラメータを調整しました.最後の引数invertにTrueを指定しているので,maskに渡されるのは,青い領域以外が1のバイナリ画像となります(maskで受けているが,tmpImg自体も変更されている).
2値化した画像を以下に示します.

処理2:硬貨の検出
find_circles()を使います.このメソッドは,画像を走査し,検出した円のリストを返します.
今回は,2値化した画像に対してfind_circles()を使いました.
返り値
検出した円のリストを返す.
foundCircle = mask.find_circles()
| 変数 | 意味 |
|---|---|
| foundCircle[0][0] | 検出された1つめの円の中心のX座標 |
| foundCircle[0][1] | 検出された1つめの円の中心のY座標 |
| foundCircle[0][2] | 検出された1つめの円の半径 |
| foundCircle[0][3] | 検出された1つめの円のmagnitude |
| foundCircle[1][0] | 検出された2つめの円の中心のX座標 |
| 後同じ |
find_circles()について詳しくは
https://qiita.com/Lathe/items/0f0c9b75928d52a7d502#%E7%94%BB%E5%83%8F%E3%81%AE%E4%B8%AD%E3%81%8B%E3%82%89%E5%86%86%E3%82%92%E6%8E%A2%E3%81%99
処理3:硬貨種の判別
穴付きかどうかの判別
穴付きの判別は,検出された円の中心付近の色(RGB)で行います.まず中心ピクセル+4か所の計5か所のピクセルの平均値を算出します(のちに中心ピクセルは外して4か所とした).青っぽい色であれば穴付き(5円or50円玉)と判定します.
判定結果をフラグに入れておきます.
当然ライティングによって最適なパラメータがまったく変わってしまいます.この手の処理を行うときは,照明を含めて最初に条件を決めてしまった方がよさそうです.
条件を再現できるように,スタンドなどの照明用治具があると良いです.
硬貨の色合いを取得
検出された円の中心付近の色(RGB)で行います.
とりあえず,中心と,28ピクセルづつ上下左右にずらした位置の計5か所(のちに4か所にした)のピクセルを取得し,その平均値を出して,(r, g ,b)に格納しています.
5円,50円の判定
先ほど取得した平均値で5円かどうかを判定します.5円は黄色っぽいので判定しやすいです.rgb値で判定していますが,色の差分で判定してもよいかもしれません(最終的にr値とg値の差にした).
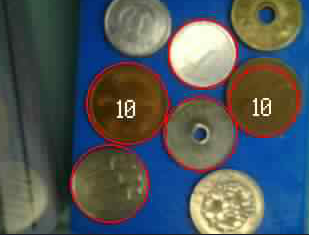
1円,10円,100円の判定
まず10円を判別します.他と全然色合いが違い,10円玉だけ赤っぽいので,ピクセルのr値とb値の差が大きければ10円玉だと判定しています.
1円と100円は検出円の半径で判定します.
課題として,少し画面から見切れた100円が1円と判定されることがあります.どうしよう...
プログラム
import sensor, image, time, gc, math,lcd
from Maix import GPIO
from fpioa_manager import fm
import Maix

def calcAveragePixel(posX, posY, stride):
    rgb1 = img.get_pixel(posX - stride, posY)
    rgb2 = img.get_pixel(posX, posY)
    rgb3 = img.get_pixel(posX + stride, posY)
    rgb4 = img.get_pixel(posX, posY - stride)
    rgb5 = img.get_pixel(posX, posY + stride)
    r = (rgb1[0] + rgb2[0] + rgb3[0] + rgb4[0] + rgb5[0]) / 5
    g = (rgb1[1] + rgb2[1] + rgb3[1] + rgb4[1] + rgb5[1]) / 5
    b = (rgb1[2] + rgb2[2] + rgb3[2] + rgb4[2] + rgb5[2]) / 5
    return (r,g,b)

print("0")
gc.collect()
sensor.reset()
sensor.set_vflip(True)
sensor.set_pixformat(sensor.RGB565)
sensor.set_framesize(sensor.QVGA)
# sensor.set_windowing((128,120))
sensor.skip_frames(time = 1000)


print("1")

lcd.init(freq=15000000)
clock = time.clock();

while(True):
    clock.tick()
    img = sensor.snapshot()
    tmpImg = img.copy()

#    img.binary([(25,60,-8,23,-65,-5)], invert=True) #for all coins
    #img.binary([(15,50,-13,25,10,50)]) #only 10 and 5
    mask = tmpImg.binary([(0,50,-10,40,-120,-10)],invert=True) #only 1

#    img.find_edges(1, threshold=(5,200))

    foundCircles = mask.find_circles(x_stride=1, y_stride=1, threshold=5400)
    coins = []
    for index, item in enumerate(foundCircles):
        if item[2] > 30 and item[2] < 45:
            coins.append(item)
            img.draw_circle(item[0], item[1], item[2], color=(255,0,0), thickness=2)
            print("X: " + str(item[0]) + ",    Y: " + str(item[1]))
    for index, item in enumerate(coins):
        # for distinguish which is there hole
        r, g, b = calcAveragePixel(item[0], item[1], 2)
        coin5 = False
        if r <70 and g > 45 and g < 120 and b > 80 and b < 200:
            coin5 = True
        # for distinguish coin color
        r, g, b = calcAveragePixel(item[0], item[1], 28)
        #print("r", r, "g", g, "b", b)
        if coin5:  # to distinguish coin5 or coin50
            if r > 100 and r < 164 and g > 80 and g < 150 and b > 20 and b < 80:  # coin5
                img.draw_string(item[0]-10, item[1]-5, "5", (0,0,255), scale=2)
            else:
                img.draw_string(item[0]-10, item[1]-5, "50", (0,0,255), scale=2)  # coin50
        else:  # to distinguish coin1 or coin 10 or coin100
            if (r - b) > 70:  # coint10
                img.draw_string(item[0]-10, item[1]-5, "10", (255,255,255), scale=2)
            elif r > 90 and g > 90 and b > 50:
                if item[2] > 35:
                    img.draw_string(item[0]-10, item[1]-5, "100", (0,0,255), scale=2)
                else:
                    img.draw_string(item[0]-10, item[1]-5, "1", (0,0,255), scale=2)

    lcd.display(mask)
    #sensor.snapshot()
    print(clock.fps())
ヒープを増やしてVGA化
micropythonのモジュールをギリギリまで削ってリビルドし,gc.heapを1500000に設定すると,VGAでもギリギリ処理できるようになります(前述のプログラムで0.4FPSくらいで動く).
ただなんかimage.binary()の挙動がおかしく,引数で指定しているLABでうまく処理されなくなる...なんで?
なんとなく,Maixpy IDEの画像処理ツールがバグっている気がする.表示されるLAB値がおかしい...
micropythonリビルド後,以下のプログラムでコンソール出力を見ながら,heapサイズの調整をします.
gc_heapをうまく調整しないと,メモリ不足でエラーになります.少ないとgc_heapが足らず,多くとり過ぎるとsystem_heapが足りなくなります.
micropythonを小さくすると,2つのheapを合わせて4MBくらい使えるようです.K210のRAMは6MBなので,micropython自体が2MBくらい使っているのでしょうか...
VGA化のテストプログラム(micropythonリビルド必要)
import sensor, image, gc
from Maix import utils
import KPU

utils.gc_heap_size(1500000)

print(KPU.memtest())  #heapをチェック
gc.collect()
sensor.reset()
sensor.set_pixformat(sensor.RGB565)
sensor.set_framesize(sensor.VGA)  #VGAで動く
# sensor.set_windowing((640,320))
sensor.skip_frames(time = 1000)

while(True):
    img = sensor.snapshot()
    print(KPU.memtest())
    tmpImg = img.copy()
    print("2")
    print(KPU.memtest())
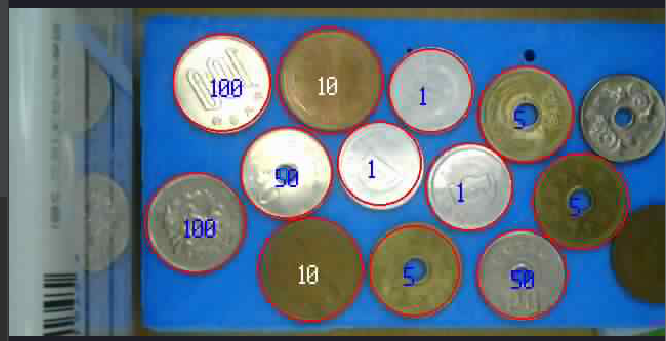
最終的には次のようなコードとなりました.解像度640×320で0.4~0.5FPSで動いています.
640×320版プログラム(micropythonリビルド必要)
import sensor, image, time, gc, lcd
from Maix import GPIO
from fpioa_manager import fm
from Maix import utils
import KPU

def calcAveragePixel(posX, posY, stride):
    rgb1 = img.get_pixel(posX - stride, posY)
    rgb3 = img.get_pixel(posX + stride, posY)
    rgb4 = img.get_pixel(posX, posY - stride)
    rgb5 = img.get_pixel(posX, posY + stride)
    r = (rgb1[0] +  rgb3[0] + rgb4[0] + rgb5[0]) / 4
    g = (rgb1[1] +  rgb3[1] + rgb4[1] + rgb5[1]) / 4
    b = (rgb1[2] +  rgb3[2] + rgb4[2] + rgb5[2]) / 4
    return (r,g,b)

utils.gc_heap_size(1500000)

print(KPU.memtest())
gc.collect()
sensor.reset()
sensor.set_vflip(True)
sensor.set_pixformat(sensor.RGB565)
sensor.set_framesize(sensor.VGA)
sensor.set_windowing((640,320))
sensor.skip_frames(time = 1000)

# lcd.init(freq=15000000)
clock = time.clock();

while(True):
    clock.tick()
    img = sensor.snapshot()
    print(KPU.memtest())
    tmpImg = img.copy()
    print("2")
    print(KPU.memtest())

    mask = tmpImg.binary([(20,64,-15,55,-80,-15)],invert=True)

    foundCircles = mask.find_circles(x_stride=1, y_stride=1, threshold=6000)
    coins = []
    for index, item in enumerate(foundCircles):
        if item[2] > 30 and item[2] < 52:
            coins.append(item)
            img.draw_circle(item[0], item[1], item[2], color=(255,0,0), thickness=2)
            print("X: " + str(item[0]) + ",    Y: " + str(item[1]))
    for index, item in enumerate(coins):
        # for distinguish which is there hole
        r, g, b = calcAveragePixel(item[0], item[1], 1)
        coin5 = False
        if r <75 and g > 45 and g < 120 and b > 80 and b < 255:
            coin5 = True
        # for distinguish coin color
        r, g, b = calcAveragePixel(item[0], item[1], 28)
        #print("r", r, "g", g, "b", b)
        if coin5:  # to distinguish coin5 or coin50
            if (r - b) > 25:
                img.draw_string(item[0]-10, item[1]-5, "5", (0,0,255), scale=2)
            else:
                img.draw_string(item[0]-10, item[1]-5, "50", (0,0,255), scale=2)  # coin50
        else:  # to distinguish coin1 or coin 10 or coin100
            if (r - b) > 60:  # coint10
                img.draw_string(item[0]-10, item[1]-5, "10", (255,255,255), scale=2)
            elif r > 90 and g > 90 and b > 50:
                if item[2] > 45:
                    img.draw_string(item[0]-10, item[1]-5, "100", (0,0,255), scale=2)
                else:
                    img.draw_string(item[0]-10, item[1]-5, "1", (0,0,255), scale=2)

    #lcd.display(mask)
    #sensor.snapshot()
    print(clock.fps())
おまけ
宿題(合計値の表示)
他の種類の硬貨も検出できるようにして,最後に検出された硬貨の金額を足し合わせて,それをシリアルターミナルに表示したいですね.
課題は,外貨などが混ざった場合の処理です.そこまでやるなら機械学習になるかもしれませんね.
苦労ポイント
・照明は重要です.ブロックノイズが多い条件だと,円の検出も難しくなります
・照明は重要です.被写体が金属なので反射して白くなると処理が難しくなります
・照明は重要です.設置位置,角度によっても結果が全く変わります.
・当初グレースケール化して試していたがうまくいかなかった
裏技
実は開発にはMaixAmigo(Sipeed)を使いました.MAIXPY IDEの画面でフレームバッファを確認すると同時に,AmigoのLCDで別なバッファ(作業用のマスク画とか)を確認できてとても便利でした.LCD小さいけどM5StickVでも同じことができますね.