0
0

Delete article

Deleted articles cannot be recovered.

Draft of this article would be also deleted.

Are you sure you want to delete this article?

More than 3 years have passed since last update.

【Mac】XAMPP & Eclipse & XDebugにてPHPをデバッグ実行する方法

Posted at

#前書き
Mac OS Catalinaにアップデート後、ずっと使用していた古いXAMPPが起動しなくなったのでこの機会にXAMPPを最新化しました。 筆者はXAMPP & Eclipseで開発をしているため、ついでにEclipseでデバッグする方法についても記載しています。

※ WindowsだとEclipseの中にXAMPP入ってたはずですが、Macだと別々なので少しややこしいですね

#本記事を作成した際の環境
OS : mac OS Catalina Version 10.15.6
XAMPP : Version 7.2.32
Eclipse : Version 4.7 Oxygen
XDebug : Version 2.9.6

#やること一覧
###① XAMPPのインストール
###② Eclipseのインストール
###③ Xdebugのインストール
###④ XAMPPのPHP環境にXdebugを設定
###⑤ Eclipseのデバッグ構成を設定

#① XAMPPのインストール
下記のサイトからMac版で最新のXAMPPをダウンロード&インストールする
https://www.apachefriends.org/download.html
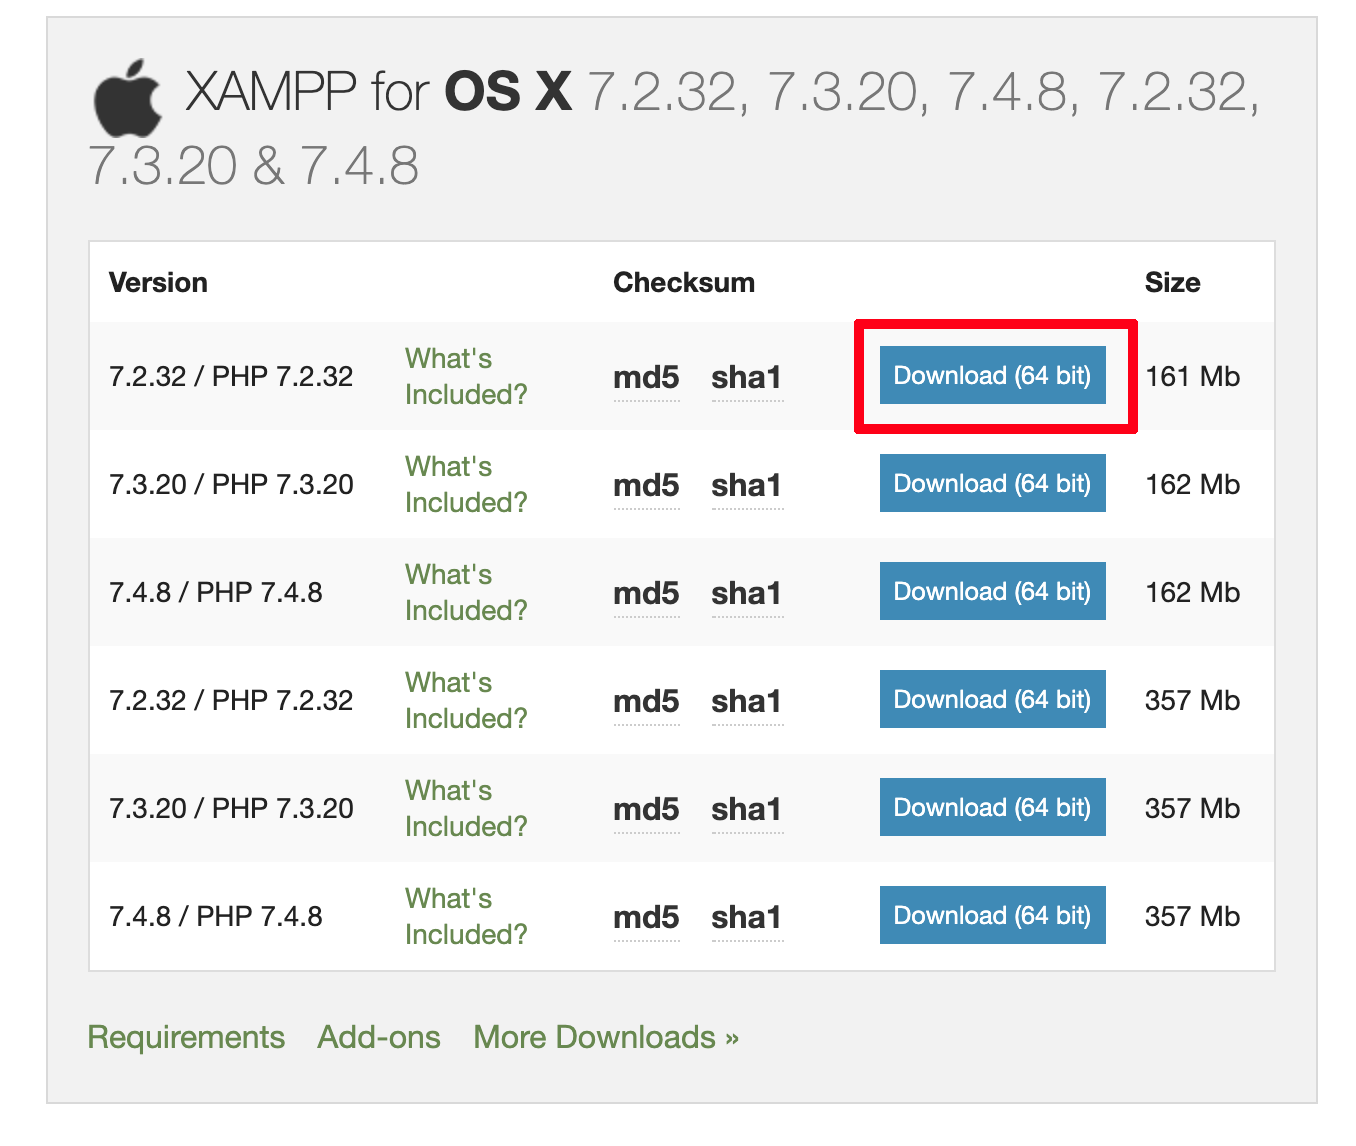
1.png

#② Eclipseのインストール

  1. 下記のサイトから最新版のEclipseを選択
    https://mergedoc.osdn.jp/
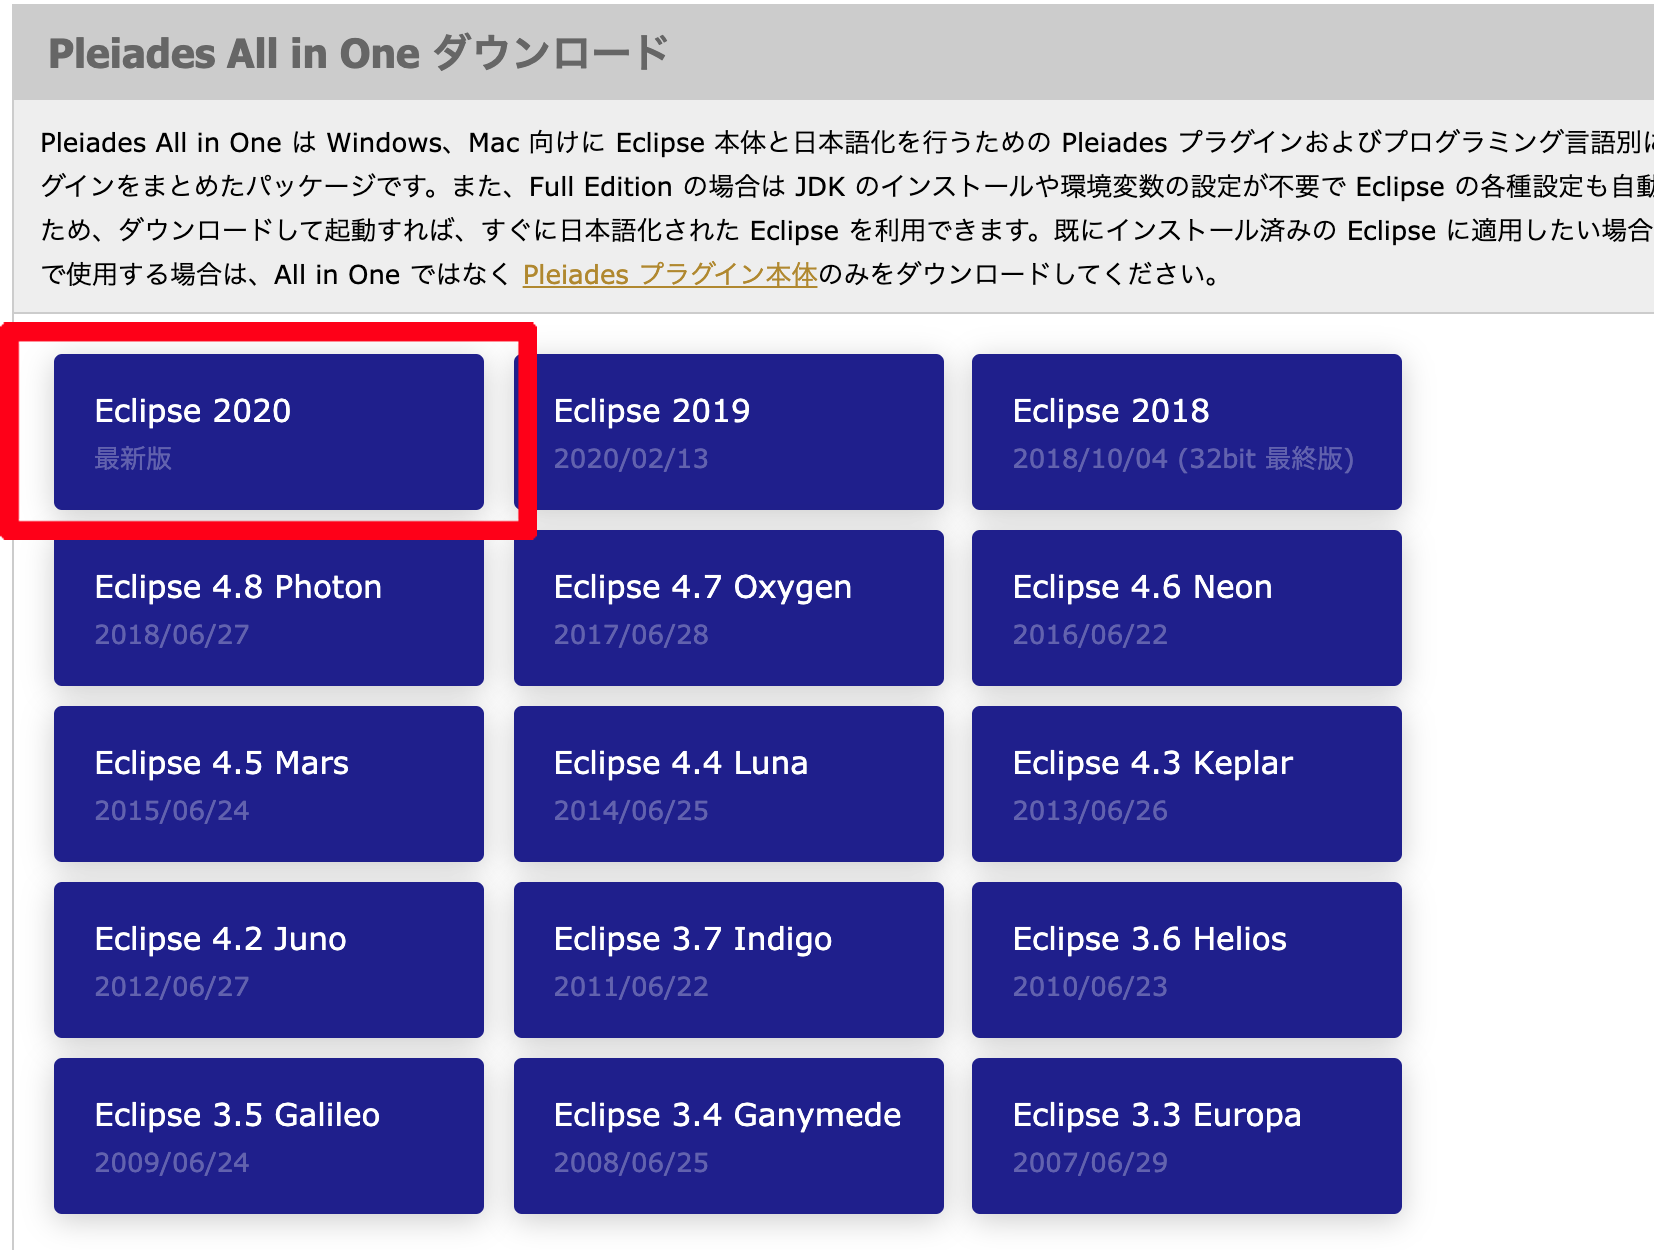
    2.png

  2. PHPMac 64bitからFull Editionをダウンロード&インストール
    3.png

#③ Xdebugのインストール

  1. 下記のサイトから最新のXdebugをインストールする
    4.png

  2. ダウンロードしたXdebugファイルを解凍して、解凍したフォルダに移動

$ tar -xvzf xdebug-2.9.6.tgz
$ cd xdebug-2.9.6

 
3. xdebug-2.9.6をコンパイル

$ phpize

 
4. コンパイルに成功するとconfigureフォルダが作成されるので下記のコマンドを実行

$ ./configure
$ make

 
5. moduleディレクトリに、xdebug.soファイルが作成されるので、下記のディレクトリにxdebug.soをコピーする
/Applications/XAMPP/xamppfiles/lib/php/extensions

#④ XAMPPのPHP環境にXdebugを設定

  1. php.iniに下記の記述を追加

    ちなみにphp.iniのパスはこちら → /Applications/XAMPP/xamppfiles/etc/php.ini
[xdebug]
zend_extension=/Applications/XAMPP/xamppfiles/lib/php/extensions/xdebug.so
xdebug.default_enable=1
xdebug.remote_autostart=1
xdebug.remote_enable=On
xdebug.remote_handler=dbgp
xdebug.remote_mode=req
xdebug.remote_host=localhost
xdebug.remote_port=9000
xdebug.idekey=
xdebug.profiler_enable=On

 
2. Apatchを再起動してphpinfo.phpを確認すると、Xdebugが追加されています
5.png

#⑤ Eclipseのデバッグ構成を設定

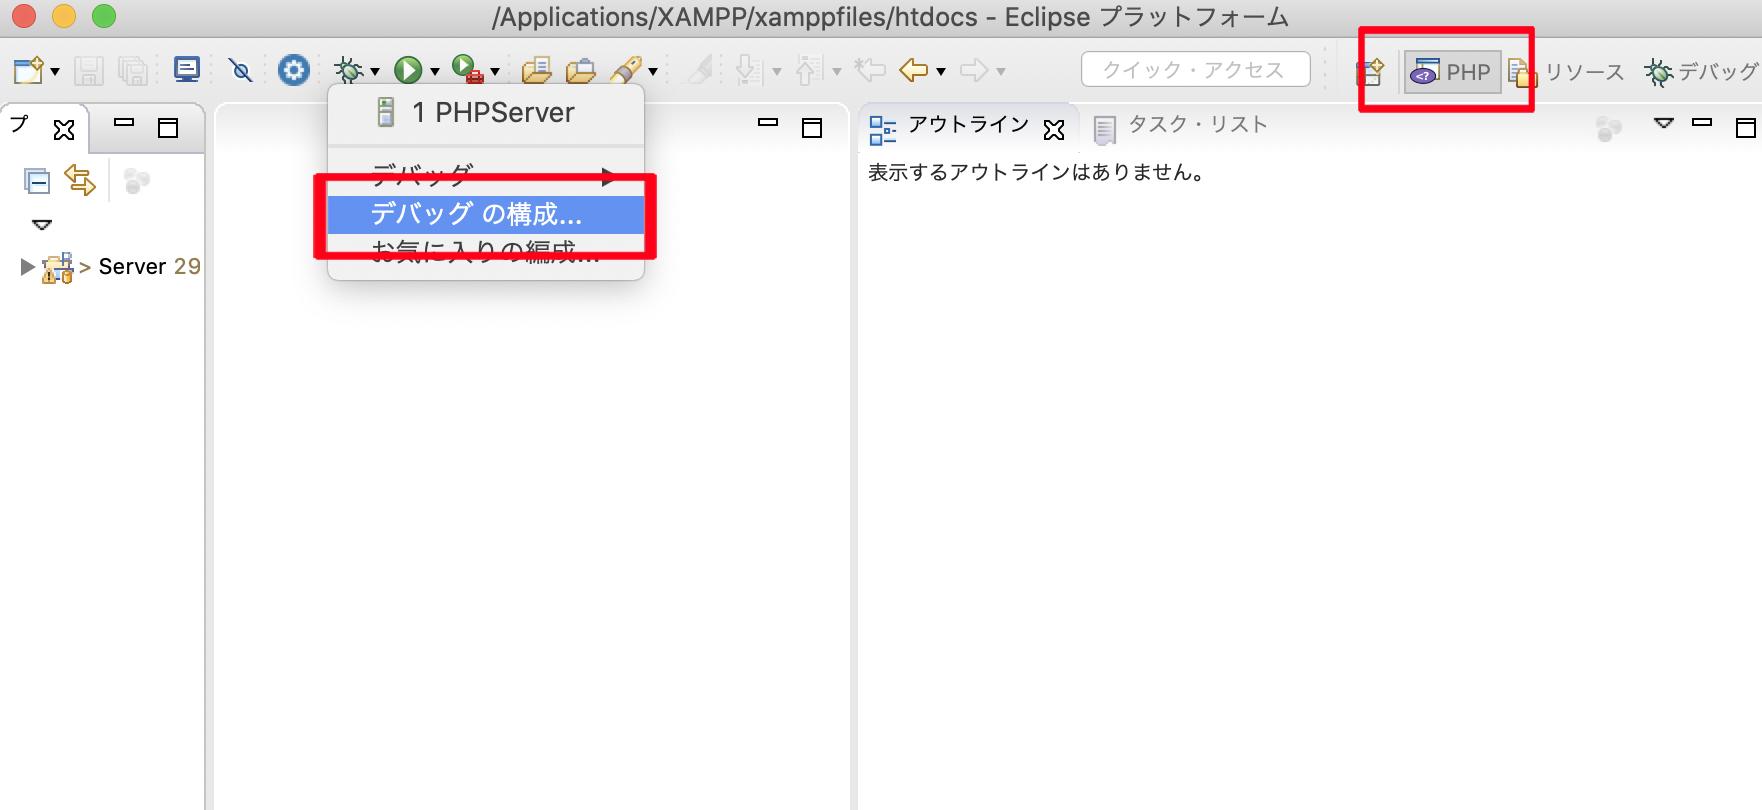
  1. パースペクティブにてPHPを選択、デバッグからデバッグの構成を選択
    6.png

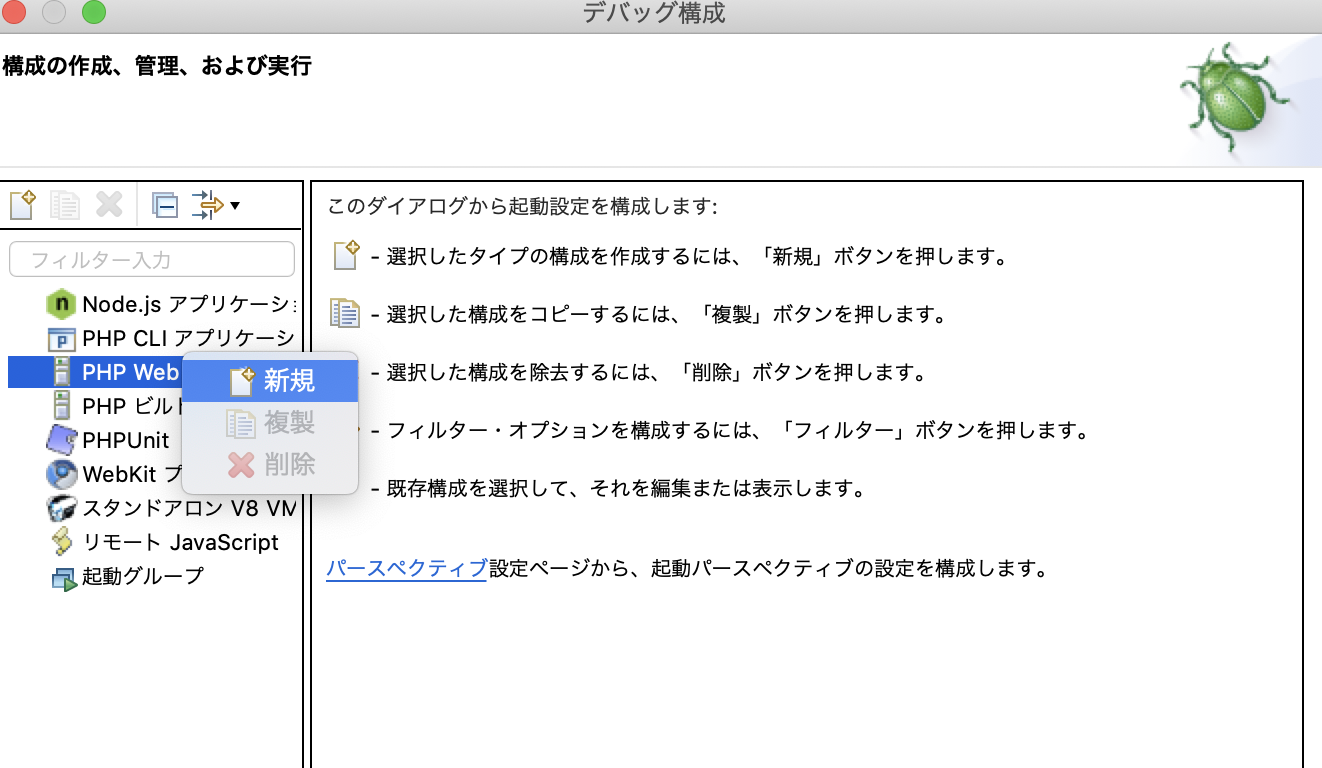
  2. PHP Webアプリケーションを右クリックして、新規を選択
    7.png

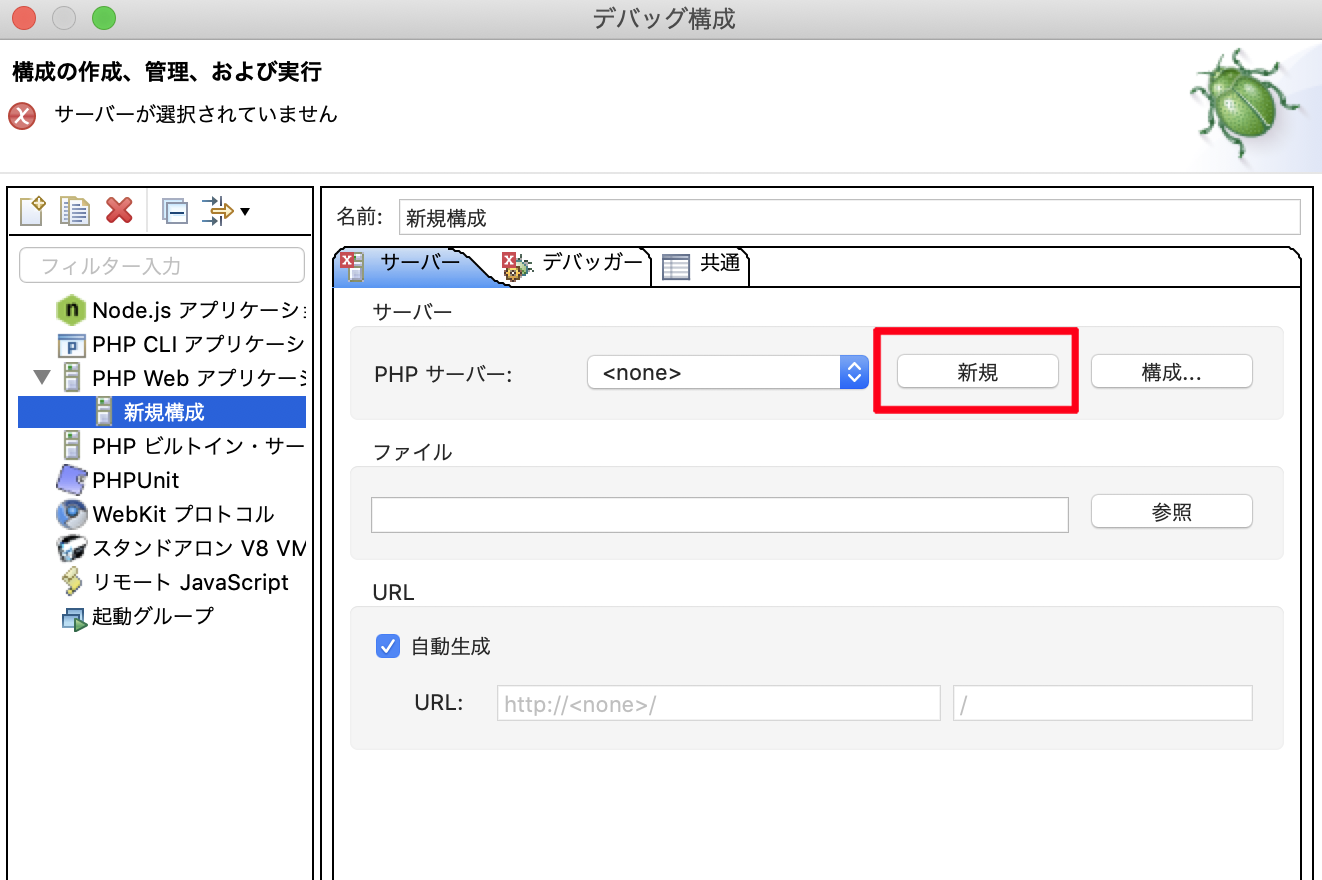
  3. サーバーから新規を選択
    8.png

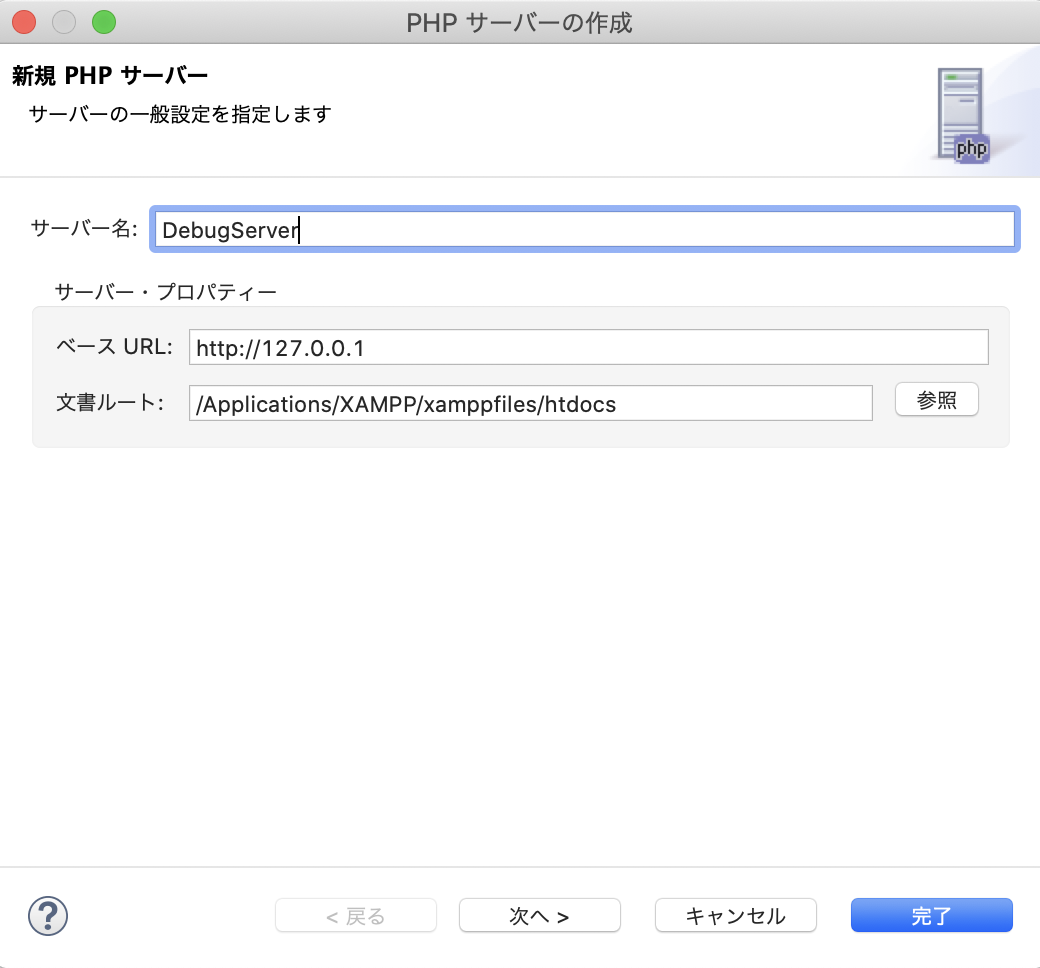
  4. 下記のように設定して完了ボタンを押下
    サーバー名 : 任意の名前
    ベースURL : http://127.0.0.1
    文書ルート : /Applications/XAMPP/xamppfiles/htdocs
    9.png

  5. PHP サーバーに先ほど作成したサーバーを選択して、ファイルに対象のプロジェクトを選択
    ※ ファイルはデバッグ実行時に起動するファイルを設定しているだけなので、とりあえずindex.phpが無難

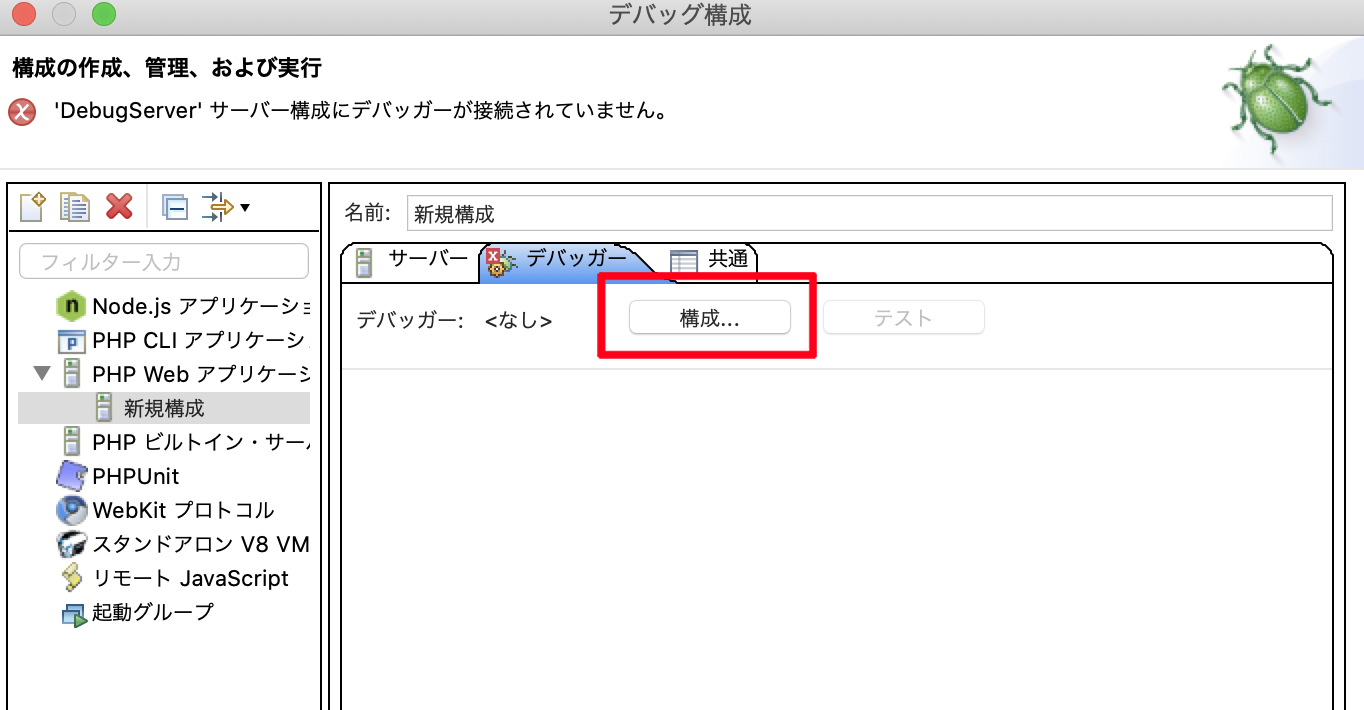
  6. デバッガーから、構成を選択
    11.png

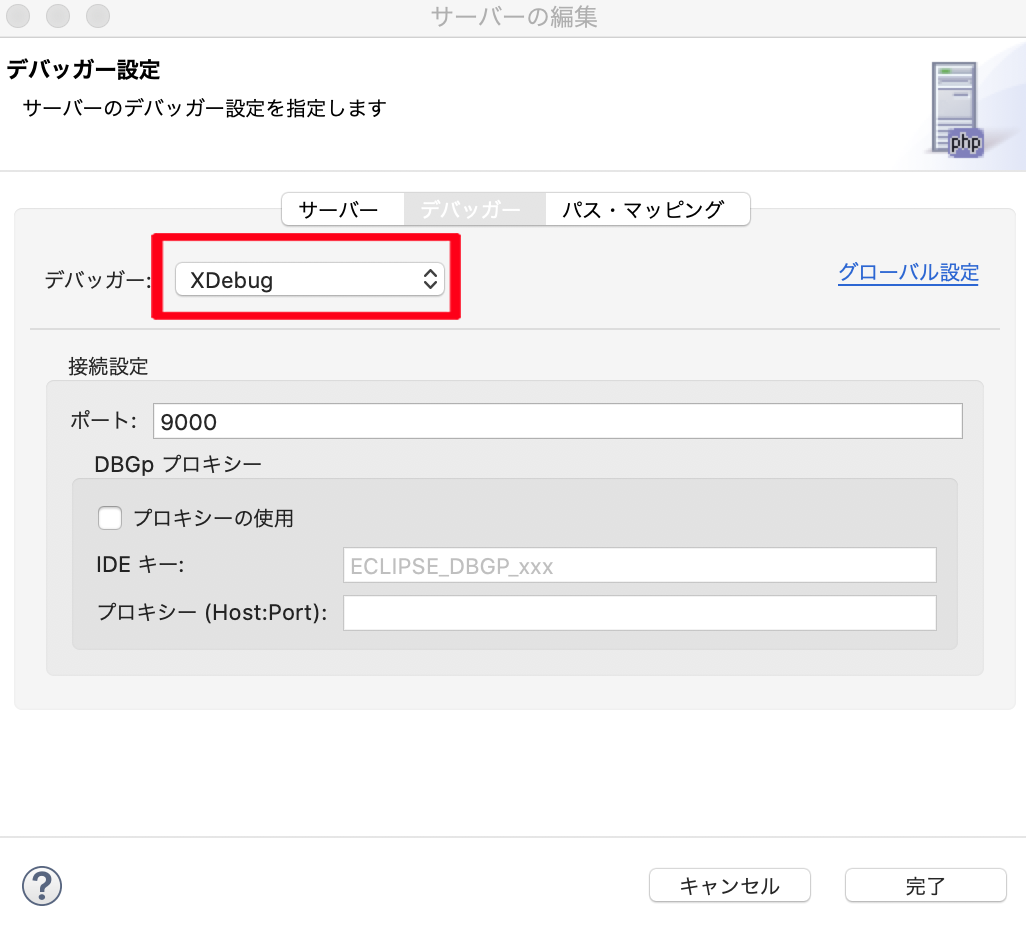
  7. デバッガーからXDebugを選択
    12.png

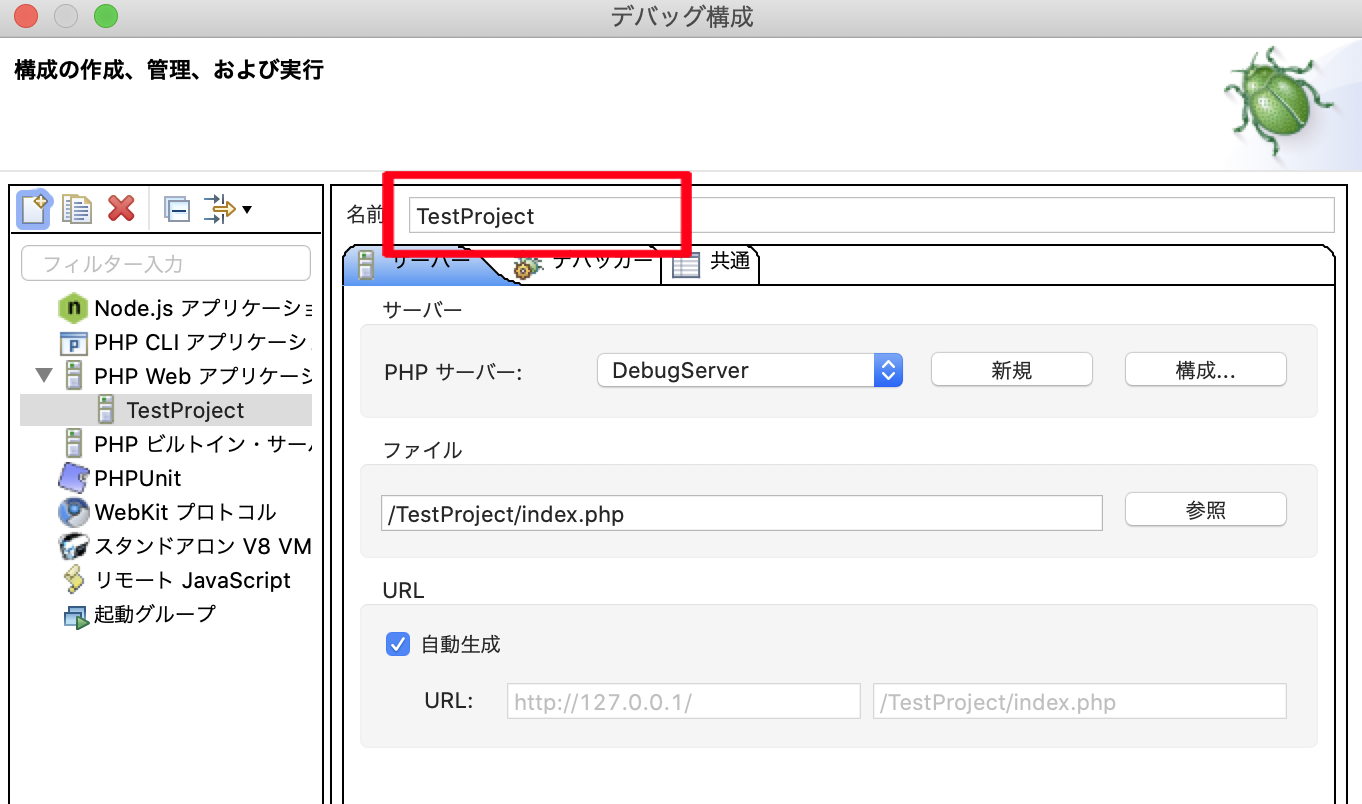
  8. 名前に任意の名前を設定しておく
    13.png

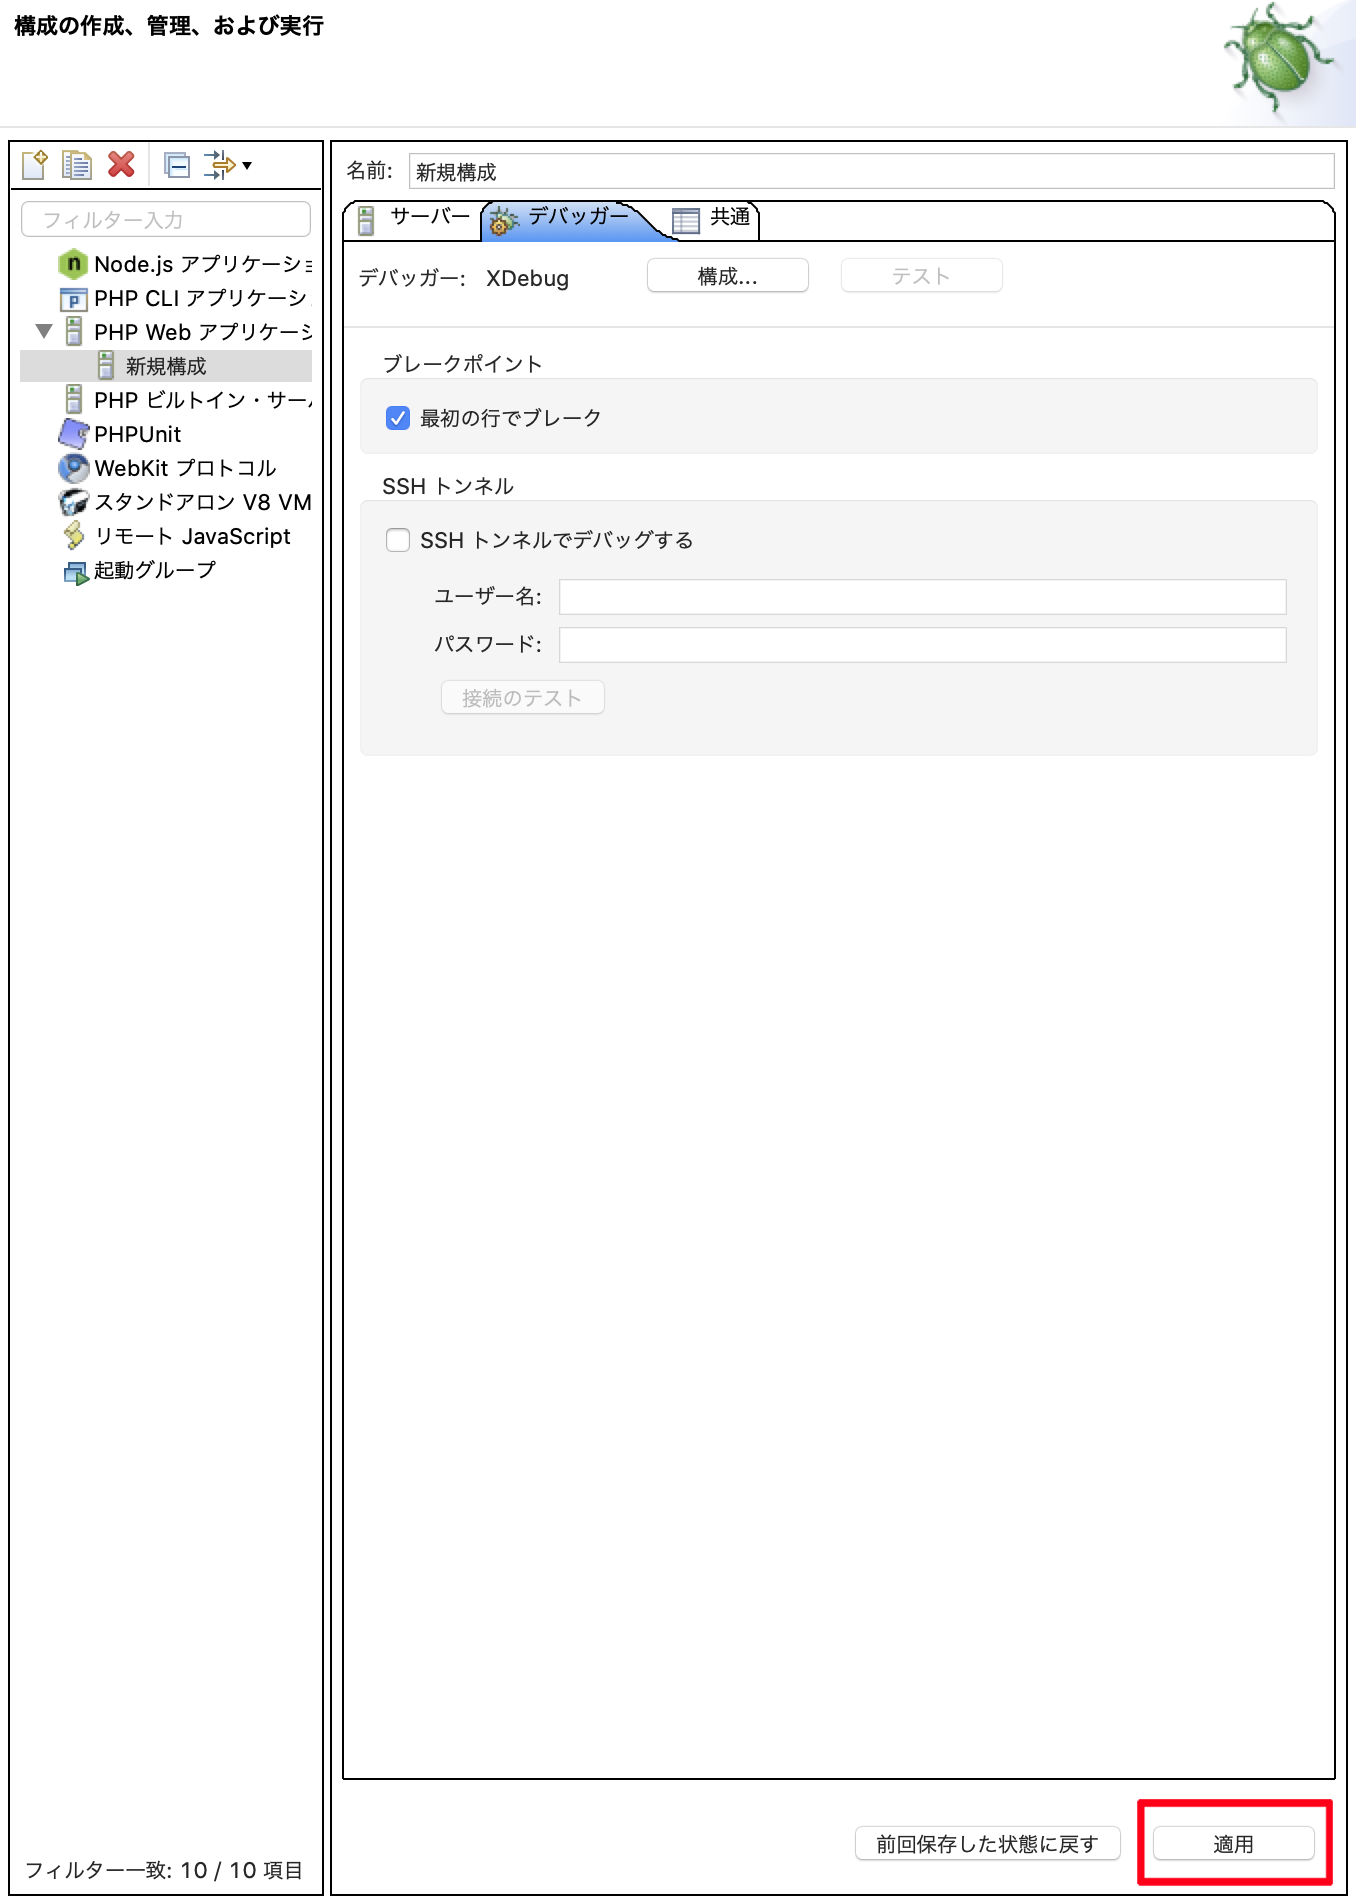
  9. 適用を押下
    14.png

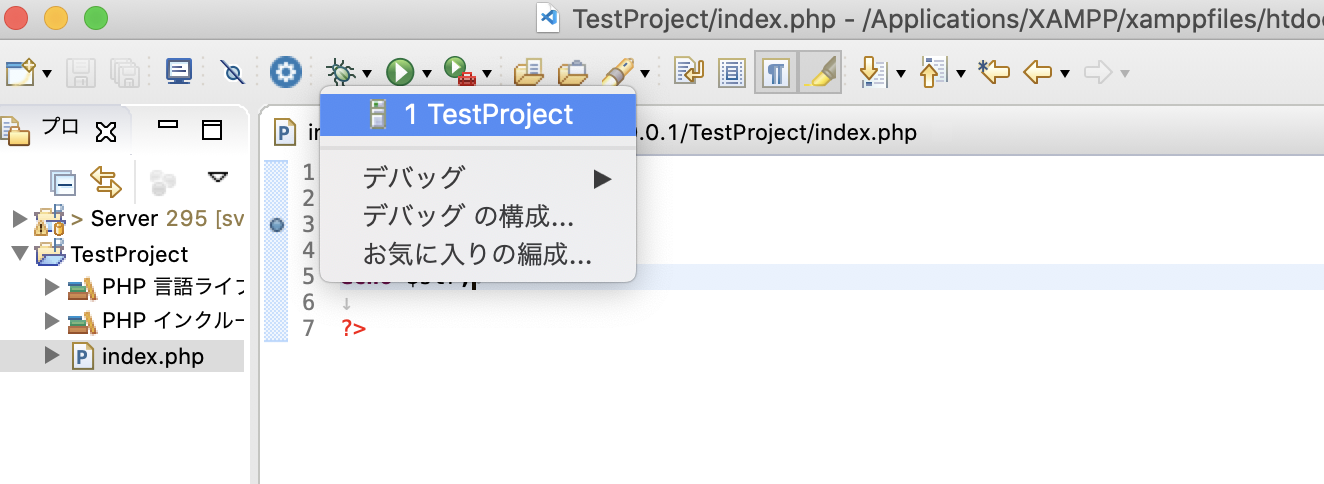
  10. 作成したデバッグ構成を実行
    15.png

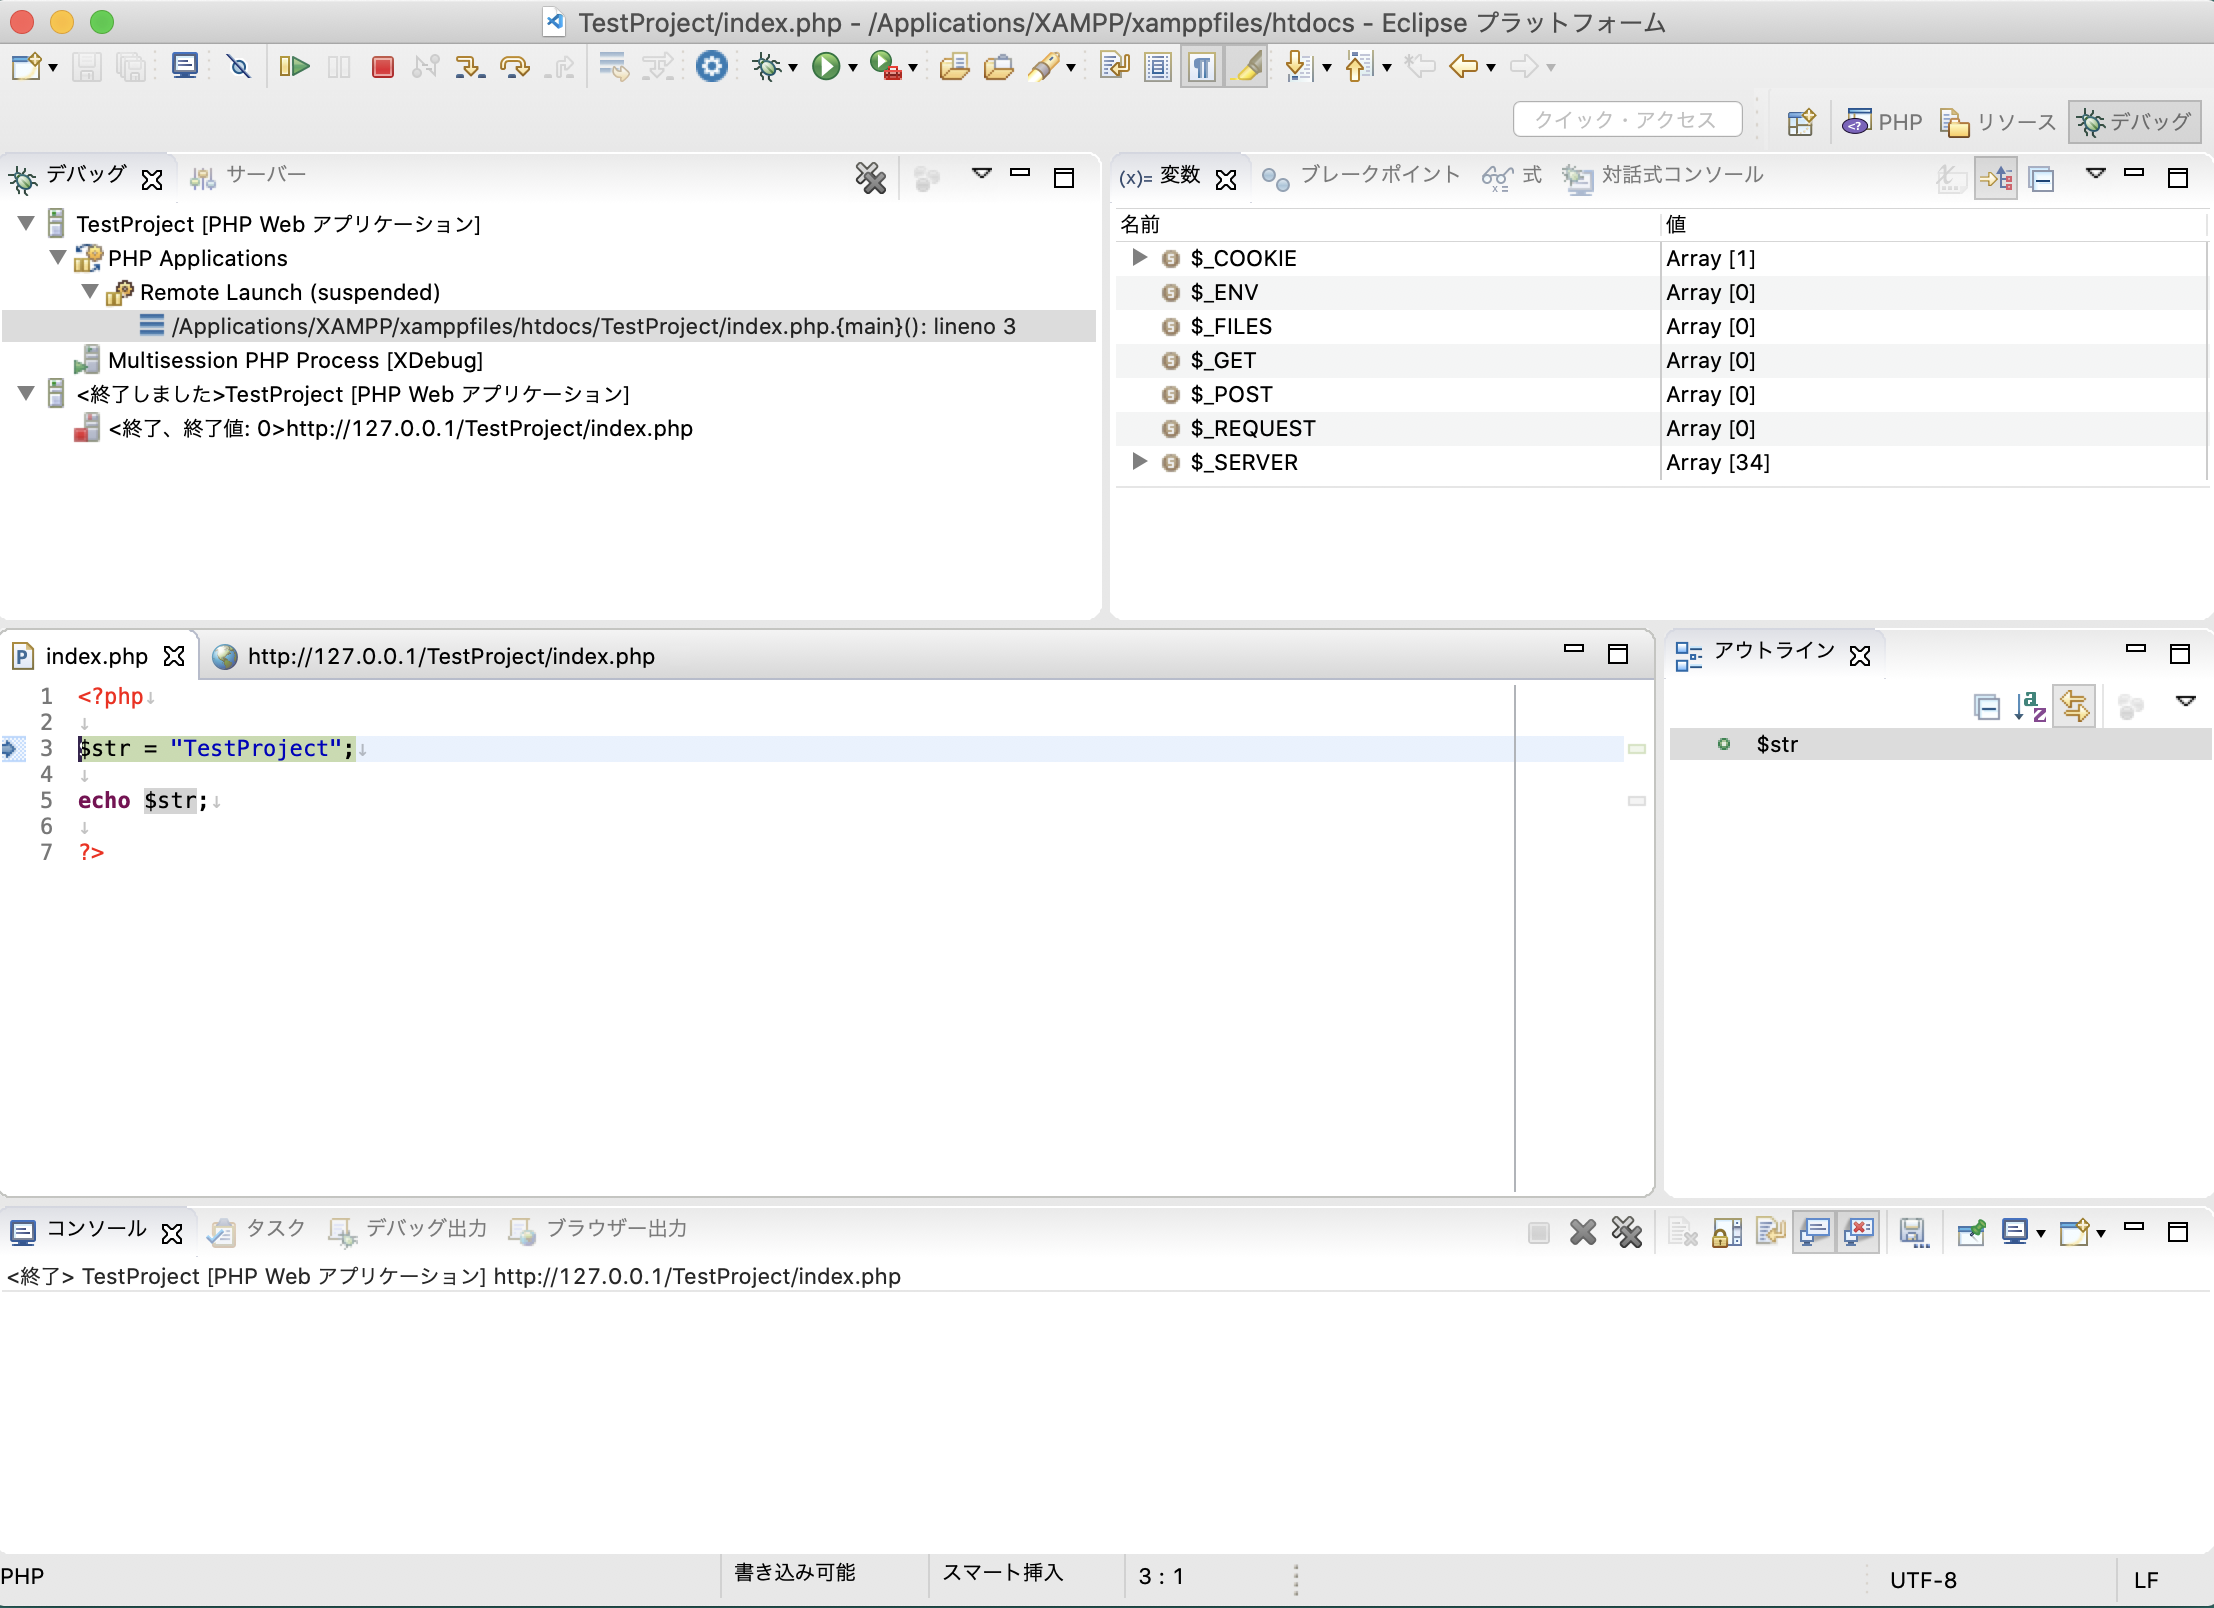
デバッグポイントに止まります
16.png

0
0
0

Register as a new user and use Qiita more conveniently

  1. You get articles that match your needs
  2. You can efficiently read back useful information
  3. You can use dark theme
What you can do with signing up
0
0

Delete article

Deleted articles cannot be recovered.

Draft of this article would be also deleted.

Are you sure you want to delete this article?