背景
Arduinoでとったセンサの値をProcessingで可視化したい場合が結構あります。
そこで、備忘録としてまとめておきます。
実行環境
PC: MacBook Pro, macOS High Sierra
Arduino: Uno
Processing: version 3.3.6
例
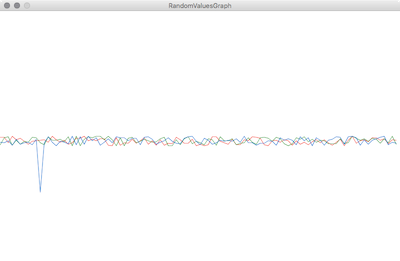
今回はセンサを使ってしまうと、記事の読者がすぐに試すことができない可能性があるため、Arduino側で生成した乱数をProcessing側で取得して折れ線グラフとしてプロットするようなものにしました。
Arduino側のソースコード
RandomValue
int randomValue1 = 0;
int randomValue2 = 0;
int randomValue3 = 0;

void setup() {
  Serial.begin(9600);
  randomSeed(analogRead(0));
}

void loop() {
  randomValue1 = random(20);
  randomValue2 = random(20);
  randomValue3 = random(20);
  Serial.print(randomValue1);
  Serial.print(",");
  Serial.print(randomValue2);
  Serial.print(",");
  Serial.println(randomValue3);
  delay(100);
}
Processing側のソースコード
RandomValueGraph
import processing.serial.*;
Serial port;

boolean DEBUG = false;
int[][] values = new int[3][100];
color[] colors = {color(244, 67, 54), color(67, 160, 71), color(25, 118, 210)};

void setup() {
  size(800, 500);
  frameRate(50);
  String[] ports = Serial.list();
  if (DEBUG) {
    for (int i = 0; i < ports.length; i++) {
      println(i + ": " + ports[i]);
    }
  } else {
    port = new Serial(this, ports[適切なポートの配列番号], 9600);
  }
}

void draw() {
  background(color(255, 255, 255));
  for (int i = 0; i < 3; i++) {
    stroke(colors[i]);
    for (int j = 0; j < 99; j++) {
      line(8 * j, 250 + values[i][j], 8 * (j + 1), 250 + values[i][j + 1]);
    }
  }
}

void serialEvent(Serial p) {
  if (p.available() > 0) {
    try {
      String input = p.readStringUntil('\n');
      if (input != null) {
        input = trim(input);
        String [] value = split(input, ',');
        println(value[0] +","+ value[1] +","+ value[2]);
        for (int i = 0; i < 3; i++) {
          values[i] = append(subset(values[i], 1), int(value[i]));
        }
      }
    } catch (RuntimeException e) {
    }
  }
}
ちょっと説明
Processing側のソースのDEBUG変数をtrueにするとシリアルポート一覧がコンソールに出力されます。ポート番号を適切に切り替えてDEBUG変数をfalseにすると、シリアル通信ができます。
