環境
- OS:Ubuntu 16.04 LTS
- UE4バージョン:4.22.1
- エディタ:Visual Studio Code
はじめに
UE4でメッシュを動的に生成する必要があり、以下の記事を参考に実装したので、その手法を紹介する。
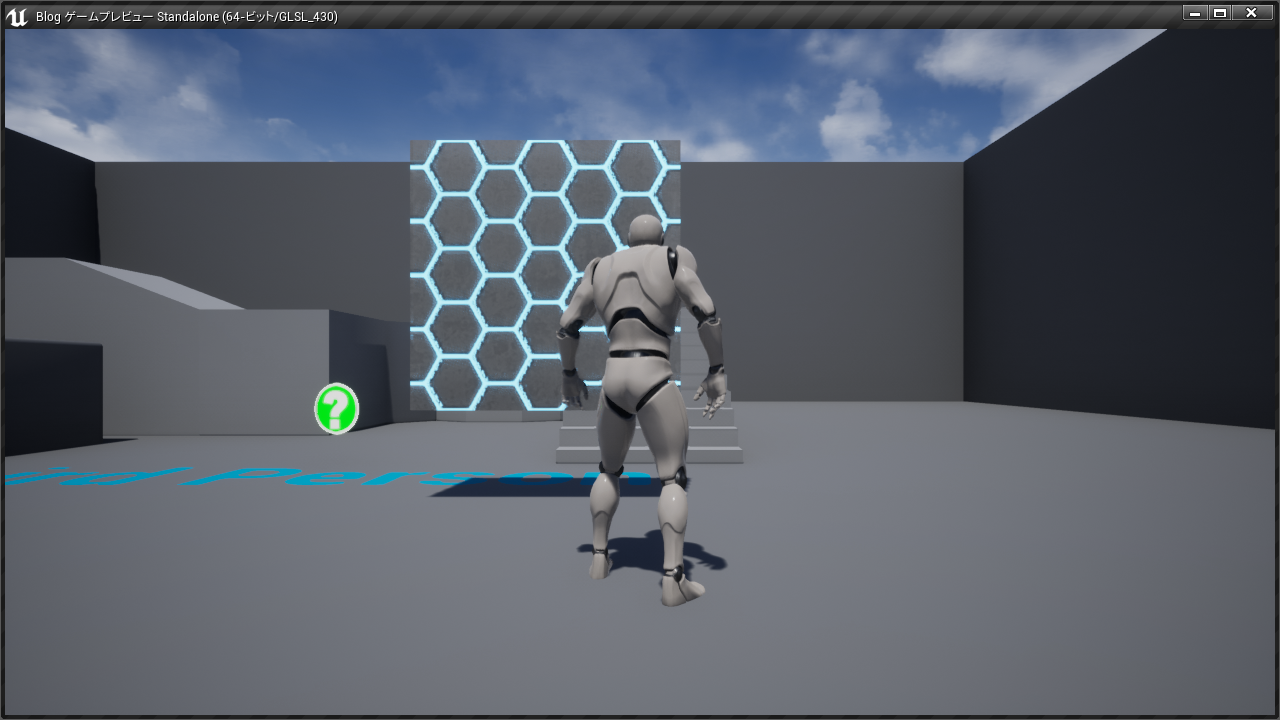
結果(再生→動的メッシュ生成)

動的メッシュ生成方法
-
<プロジェクト名>.Build.cs の PublicDependencyModuleNames.AddRange に "ProceduralMeshComponent" を追加する
-
以下のC++アクタークラスを作成する(ヘッダはデフォルトのままで問題ない)
MyActor.cpp#include "ProceduralMeshComponent.h" AMyActor::AMyActor() { UProceduralMeshComponent* mesh; // 動的メッシュを保持するポインタ mesh = CreateDefaultSubobject<UProceduralMeshComponent>(TEXT("generated-mesh")); // 動的メッシュ生成 RootComponent = mesh; // RootComponentに設定する FString materialPath = "/Game/M_Tech_Hex_Tile_Pulse"; // メッシュにマテリアルを設定する // マテリアルインスタンスを利用するときはUMaterialをUMaterialInstanceに変更する mesh->SetMaterial(0, Cast<UMaterial>(StaticLoadObject(UMaterial::StaticClass(), nullptr, *materialPath))); // 動的メッシュ用の変数 TArray<FVector> vertices; // 頂点群 TArray<int32> indices; // インデックス群 TArray<FVector> normals; // 法線群(今回は空っぽのままだが、立体を作成するときには設定しないとエッジ部分が変になる) TArray<FVector2D> texcoords0; // テクスチャー座標群 TArray<FLinearColor> vertex_colors; // 頂点カラー群(今回は空っぽのまま) TArray<FProcMeshTangent> tangents; // 接線群(今回は空っぽのままだが、立体を作成するときには設定しないとエッジ部分が変になる) // 頂点群設定 vertices.Add(FVector(-600, 200, 400)); // 左上 vertices.Add(FVector(-600, 200, 200)); // 左下 vertices.Add(FVector(-600, 400, 200)); // 右下 vertices.Add(FVector(-600, 400, 400)); // 右上 // インデックス群生成(三角形ポリゴンを反時計周りに設定) // 1つ目の三角形ポリゴン indices.Add( 0 ); indices.Add( 1 ); indices.Add( 2 ); // 2つ目の三角形ポリゴン indices.Add( 2 ); indices.Add( 3 ); indices.Add( 0 ); // テクスチャー座標群設定 texcoords0.Add(FVector2D(0, 0)); // 左上 texcoords0.Add(FVector2D(0, 1)); // 左下 texcoords0.Add(FVector2D(1, 1)); // 右下 texcoords0.Add(FVector2D(1, 0)); // 右上 // メッシュ生成 mesh->CreateMeshSection_LinearColor( 0, vertices, indices, normals, texcoords0, vertex_colors, tangents, true ); } -
動的メッシュを生成するcppファイルに以下を記述して動的メッシュを生成する
AMyActor* a = GetWorld()->SpawnActor<AMyActor>(FVector(0,0,0), FRotator(0,0,0)); -
上記処理をブループリントから呼び出す
結果
結果は冒頭で示した画像のようになる。
最後に
ヒトやモノをデータ化&解析してみたい、という方。
3D技術と深層学習を組み合わせて、何か面白いサービスを作ってみたい!、という方。
弊社では一緒に働いてくれる仲間を大募集しています。
ご興味がある方は下記リンクから是非ご応募ください!
https://about.sapeet.com/recruit/
参考
UE4: ProceduralMeshComponent 入門
UE4/C++: メッシュのマテリアルやテクスチャーをC++コードで制御する方法