初めに
今回、株式会社GENEROSITY様でインターンシップをさせていただき、その中で行った開発について記事を書いていきます!
他にもいくつか記事を書いたので、他の記事も見ていただけると嬉しいです!
本記事を読む前に
この記事では、Unityのインストールなどについては記述しません。インストールが終わっている前提で進めていきます。インストールについては下記のリンクから行ってください。
AR環境のセットアップが終了している前提で開発を進めていきます。ARのセットアップが終わっていない方は、まずセットアップを行ってください。
Unityの基本的な操作については、所々省略されている部分があります。わからないところは適宜調べてください。
本記事で出来ること
UnityでARを使っての物体認識を行うことができる。
動画のように現実にあるいろいろなオブジェクトをリアルタイムに検知ができるというものです。
今回のデモでは、Tensorflow Liteを使用しています

目次
1.事前準備
2.Tensorflow Liteとは
3.UnityでのTensorflow-Liteのセットアップ
1.Tensorflow-Liteのインストール
2.モデルのインポート
3.Editorで認識を行う
4.ARと連携する
1.Sceneの準備
2.AR用プログラム
5.結果
6.まとめ
7.参考資料
事前準備
Unityのインストールを行い、プロジェクトを作成しておいてください。
ARを使用するので、AR Foundationなどのインストールもしておいてください。
今回は下記のような環境で実行しました
・Unity 2021.3.29.f1
・URP 12.1.12
・AR Foundation 5.0.7
・Windows 11
・AR Core 5.0.7
・Android 13 (Galaxy S22)
(他のUnityバージョン、レンダリングパイプライン、プラットフォームは未確認です。)
Tensorflow Liteとは
・TensorFlowをスマートフォンやRaspberry Piなどのデバイスで動かすことを目的としているもので、計算力が乏しいデバイスでも動作することができます。
・TensorFlowとは、Google社が開発しているディープラーニング向けのフレームワークで、ニューラルネットワークを使用した学習を行うための機能がオープンソースで提供されています。
UnityでのTensorflow Liteのセットアップ
Tensorflow Liteのインストール
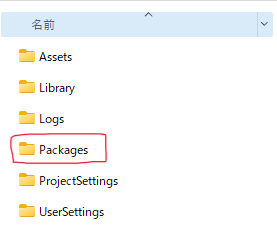
Untiyプロジェクトのフォルダを開き、Packagesフォルダ内のmanifest.jsonファイルを開きます。
manifest.json内に次の文章を追加します。
{
  "scopedRegistries": [
    {
      "name": "package.openupm.com",
      "url": "https://package.openupm.com",
      "scopes": [
        "com.cysharp.unitask"
      ]
    },
    {
      "name": "npm",
      "url": "https://registry.npmjs.com",
      "scopes": [
        "com.github.asus4"
      ]
    }
  ],
  "dependencies": {
    "com.github.asus4.tflite": "2.13.0",
    "com.github.asus4.tflite.common": "2.13.0",
    "com.github.asus4.mediapipe": "2.13.0",
    ...
  }
}
manifest.jsonの全部
{
  "scopedRegistries": [
    {
      "name": "package.openupm.com",
      "url": "https://package.openupm.com",
      "scopes": [
        "com.cysharp.unitask"
      ]
    },
    {
      "name": "npm",
      "url": "https://registry.npmjs.com",
      "scopes": [
        "com.github.asus4"
      ]
    }
  ],
  "dependencies": {
    "com.github.asus4.mediapipe": "2.13.0",
    "com.github.asus4.tflite": "2.13.0",
    "com.github.asus4.tflite.common": "2.13.0",
    "com.unity.collab-proxy": "2.0.5",
    "com.unity.ide.rider": "3.0.24",
    "com.unity.ide.visualstudio": "2.0.18",
    "com.unity.ide.vscode": "1.2.5",
    "com.unity.mobile.android-logcat": "1.3.2",
    "com.unity.render-pipelines.universal": "12.1.12",
    "com.unity.test-framework": "1.1.33",
    "com.unity.textmeshpro": "3.0.6",
    "com.unity.timeline": "1.6.5",
    "com.unity.ugui": "1.0.0",
    "com.unity.visualeffectgraph": "12.1.12",
    "com.unity.visualscripting": "1.8.0",
    "com.unity.xr.arcore": "5.0.7",
    "com.unity.xr.arfoundation": "5.0.7",
    "com.unity.modules.ai": "1.0.0",
    "com.unity.modules.androidjni": "1.0.0",
    "com.unity.modules.animation": "1.0.0",
    "com.unity.modules.assetbundle": "1.0.0",
    "com.unity.modules.audio": "1.0.0",
    "com.unity.modules.cloth": "1.0.0",
    "com.unity.modules.director": "1.0.0",
    "com.unity.modules.imageconversion": "1.0.0",
    "com.unity.modules.imgui": "1.0.0",
    "com.unity.modules.jsonserialize": "1.0.0",
    "com.unity.modules.particlesystem": "1.0.0",
    "com.unity.modules.physics": "1.0.0",
    "com.unity.modules.physics2d": "1.0.0",
    "com.unity.modules.screencapture": "1.0.0",
    "com.unity.modules.terrain": "1.0.0",
    "com.unity.modules.terrainphysics": "1.0.0",
    "com.unity.modules.tilemap": "1.0.0",
    "com.unity.modules.ui": "1.0.0",
    "com.unity.modules.uielements": "1.0.0",
    "com.unity.modules.umbra": "1.0.0",
    "com.unity.modules.unityanalytics": "1.0.0",
    "com.unity.modules.unitywebrequest": "1.0.0",
    "com.unity.modules.unitywebrequestassetbundle": "1.0.0",
    "com.unity.modules.unitywebrequestaudio": "1.0.0",
    "com.unity.modules.unitywebrequesttexture": "1.0.0",
    "com.unity.modules.unitywebrequestwww": "1.0.0",
    "com.unity.modules.vehicles": "1.0.0",
    "com.unity.modules.video": "1.0.0",
    "com.unity.modules.vr": "1.0.0",
    "com.unity.modules.wind": "1.0.0",
    "com.unity.modules.xr": "1.0.0"
  }
}
再度Unityを開き直すとインストールが完了しています。
モデルのインポート
推論で使用するモデルのインポートを行います。
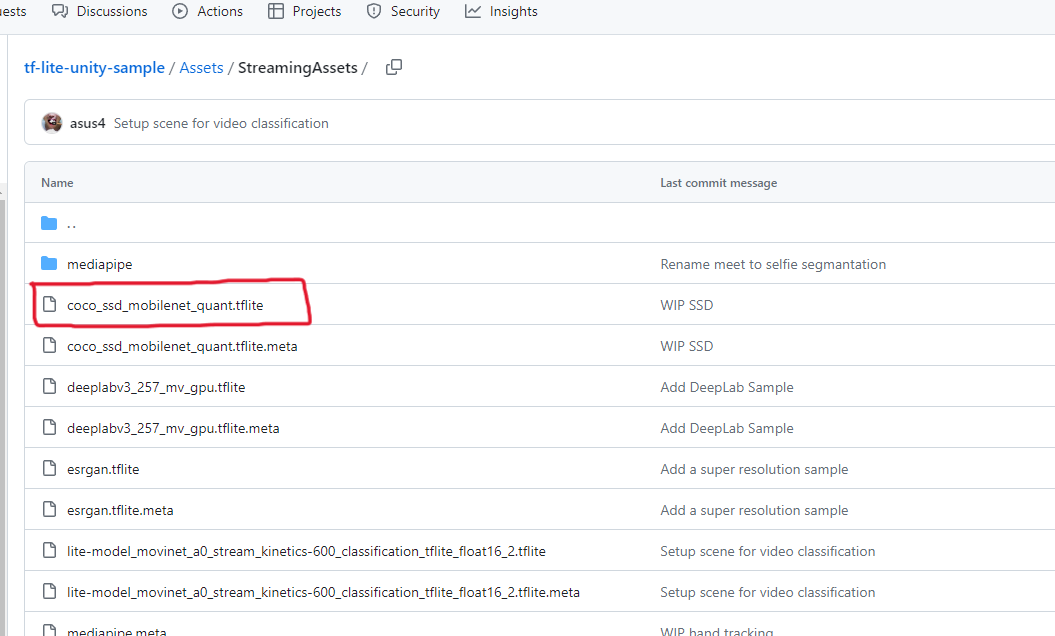
下記のGitHubよりcoco_ssd_mobilenet_quant.tfliteというモデルをダウンロードします。
UnityのAssetsの中にStreamingAssetsという名前のフォルダを作成し、その中にダウンロードしたモデルを配置します。
Editorで認識を行う
続いて、先ほどのGitHubのSampleフォルダ内のSSDフォルダ内にある、プログラムなどをダウンロードしてUnityにインポートします。下記画像の赤丸のファイルをダウンロードします。

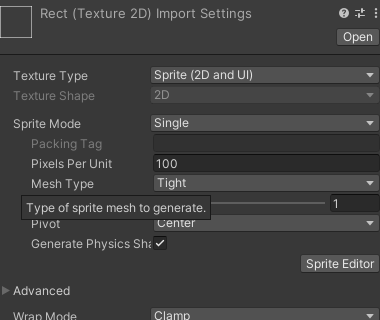
Unityにインポートしたら、rect.pngをSpliteに変更します。
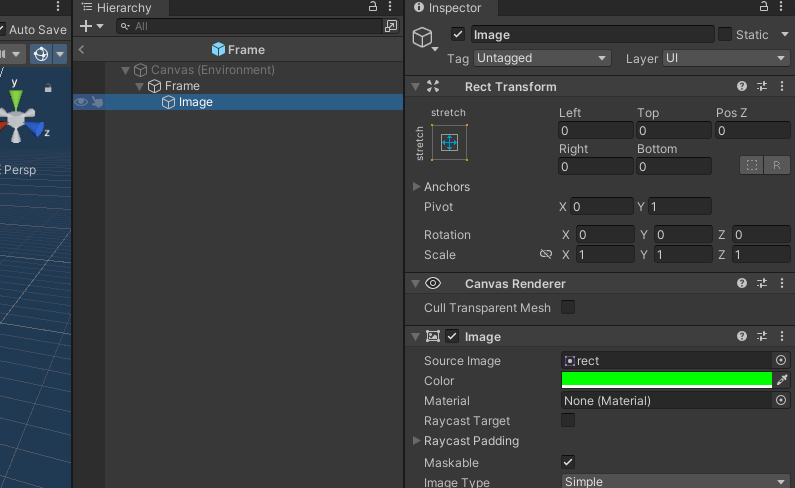
Frame.prefabを開くと、ImageのSource Imageがないので、この部分に先ほどのrectをアタッチします。
一旦、Editor上でTensorflowが動作するかの確認を行うので、AR SessionとXR Originは非アクティブにしておいてください。そして、Cameraを2つ配置しておいてください。
Render Textureを作成して、2つ作成したCameraの片方にアタッチしてください。
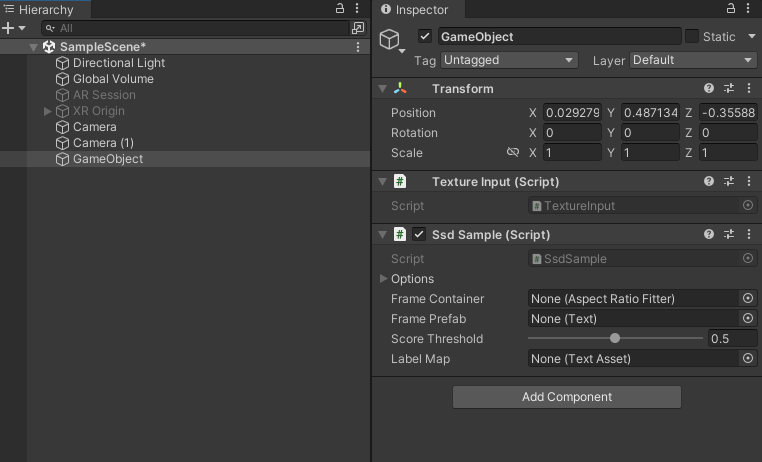
Create Emptyで空のオブジェクトを1つ作成して、そこにSsdSampleと新しくプログラムファイルを作成して、コンポーネントに追加しておきます。新しいプログラムファイルは"TextureInput"という名前にしました。
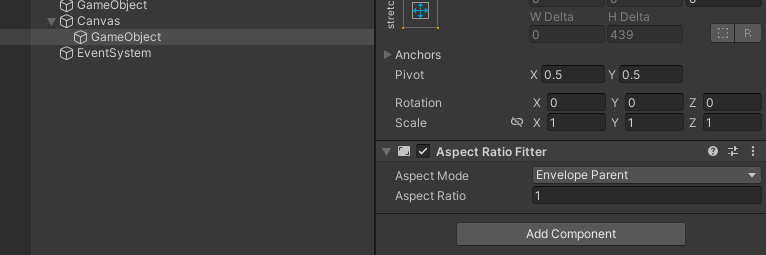
次にCanvasをSceneに追加し、Canvasの子どもにオブジェクトを作成します。作成したオブジェクトにAdd ComponentからAspect Ratio Fitterを追加します。
Aspect ModeをEnvelope Parent、Aspect Ratioを1に変更しておきます。
ここで、Texture Inputのプログラムを書いていきます。
それに伴い、SsdSampleも少し変更します。
using System;
using UnityEngine;

public class TextureInput :MonoBehaviour
{
    [SerializeField]
    private RenderTexture _renderTexture;

    [SerializeField]
    private int interval = 1;

    [SerializeField]
    private SsdSample _ssdSample;
    DateTime last;

    private void Start()
    {
        last = DateTime.Now;
    }


    void Update()
    {
        DateTime now = DateTime.Now;
        if ((now - last).TotalSeconds >= interval)
        {
            Detect();
            last = now;
        }
    }

    private void Detect()
    {
        _ssdSample.Invoke(_renderTexture);
    }
}
using TensorFlowLite;
using UnityEngine;
using UnityEngine.UI;

public class SsdSample : MonoBehaviour
{
    [SerializeField]
    private SSD.Options options = default;

    [SerializeField]
    private AspectRatioFitter frameContainer = null;

    [SerializeField]
    private Text framePrefab = null;

    [SerializeField, Range(0f, 1f)]
    private float scoreThreshold = 0.5f;

    [SerializeField]
    private TextAsset labelMap = null;

    private SSD ssd;
    private Text[] frames;
    private string[] labels;

    private void Start()
    {
#if UNITY_ANDROID && !UNITY_EDITOR
        // This is an example usage of the NNAPI delegate.
        if (options.accelerator == SSD.Accelerator.NNAPI && !Application.isEditor)
        {
            string cacheDir = Application.persistentDataPath;
            string modelToken = "ssd-token";
            var interpreterOptions = new InterpreterOptions();
            var nnapiOptions = NNAPIDelegate.DefaultOptions;
            nnapiOptions.AllowFp16 = true;
            nnapiOptions.CacheDir = cacheDir;
            nnapiOptions.ModelToken = modelToken;
            interpreterOptions.AddDelegate(new NNAPIDelegate(nnapiOptions));
            ssd = new SSD(options, interpreterOptions);
        }
        else
#endif // UNITY_ANDROID && !UNITY_EDITOR
        {
            ssd = new SSD(options);
        }

        // Init frames
        frames = new Text[10];
        Transform parent = frameContainer.transform;
        for (int i = 0; i < frames.Length; i++)
        {
            frames[i] = Instantiate(framePrefab, Vector3.zero, Quaternion.identity, parent);
            frames[i].transform.localPosition = Vector3.zero;
        }

        // Labels
        labels = labelMap.text.Split('\n');
    }

    private void OnDestroy()
    {
        ssd?.Dispose();
    }

    public void Invoke(Texture texture)
    {
        ssd.Invoke(texture);

        SSD.Result[] results = ssd.GetResults();
        Vector2 size = (frameContainer.transform as RectTransform).rect.size;
        for (int i = 0; i < 10; i++)
        {
            SetFrame(frames[i], results[i], size);
        }
    }

    private void SetFrame(Text frame, SSD.Result result, Vector2 size)
    {
        if (result.score < scoreThreshold)
        {
            frame.gameObject.SetActive(false);
            return;
        }
        else
        {
            frame.gameObject.SetActive(true);
        }

        frame.text = $"{GetLabelName(result.classID)} : {(int)(result.score * 100)}%";
        var rt = frame.transform as RectTransform;
        rt.anchoredPosition = result.rect.position * size - size * 0.5f;
        rt.sizeDelta = result.rect.size * size;
    }

    private string GetLabelName(int id)
    {
        if (id < 0 || id >= labels.Length - 1)
        {
            return "?";
        }
        return labels[id + 1];
    }

}
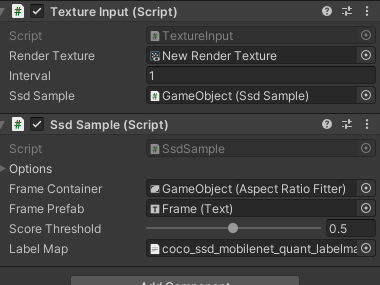
プログラムの変更が終了したら、SsdSampleとTextureInputにオブジェクトをアタッチしていきます。
Scene上にQuadを配置して、そこにラベルに含まれている物の画像を貼ります。
私はケーキの画像を貼りました。
Render TextureをつけたCameraに映るようにQuadを配置してください。
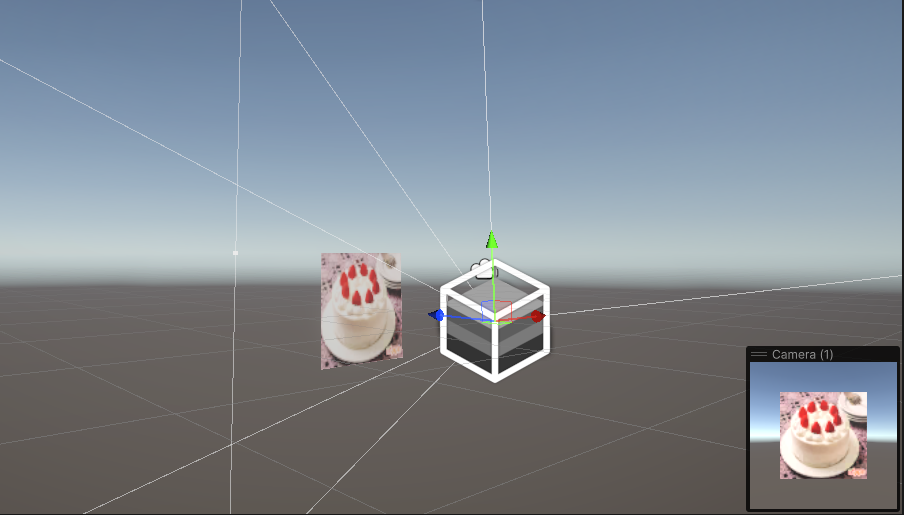
これで実行すると緑のフレームができて、認識されていると思います。
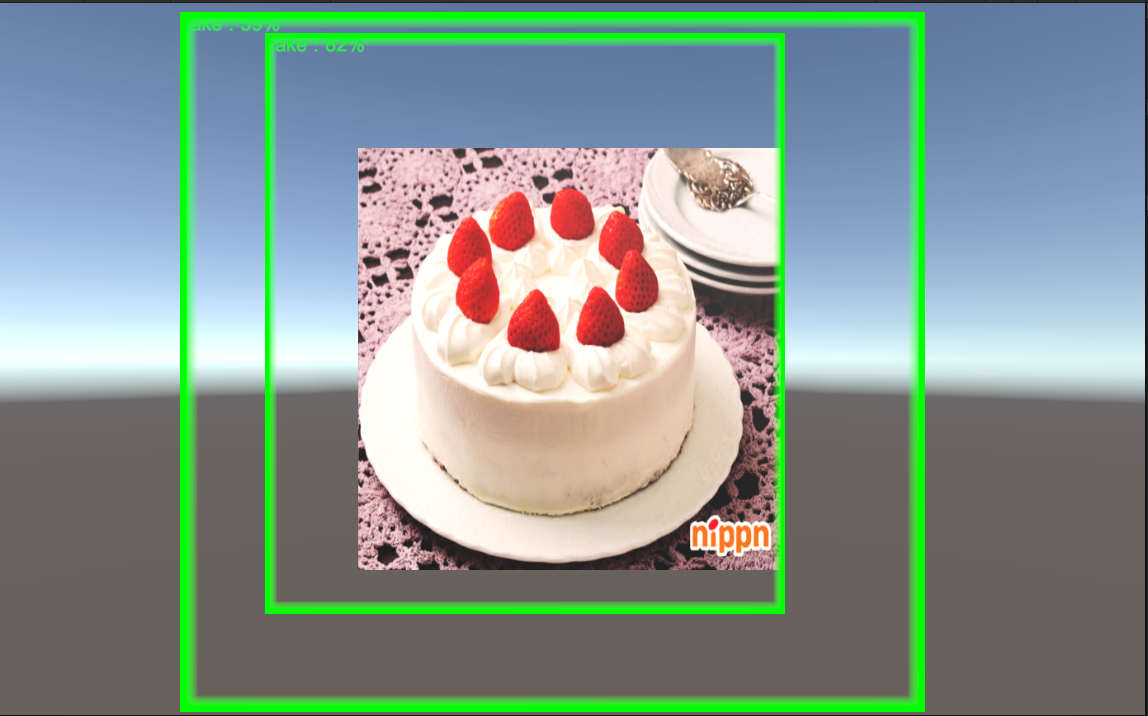
画像:https://www.nippn.co.jp/recipe/sweets/cake/detail/1207610_10063.html
カメラに映っているものがRender Textureに出力され、その出力されたTextureをAIのモデルが解析・認識を行っているという流れです。
ARと連携する
いよいよARで認識をさせるための準備をしていきます。
Sceneの準備
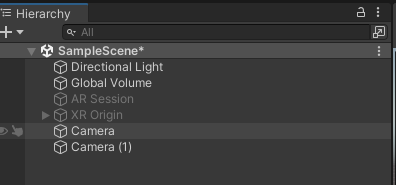
まず、ARを使うためAR SessionとXR Originをアクティブにします。
次に、Editorで動かすために作成したCamera2つと、先ほど作成したQuadオブジェクトを非アクティブ、または消します。
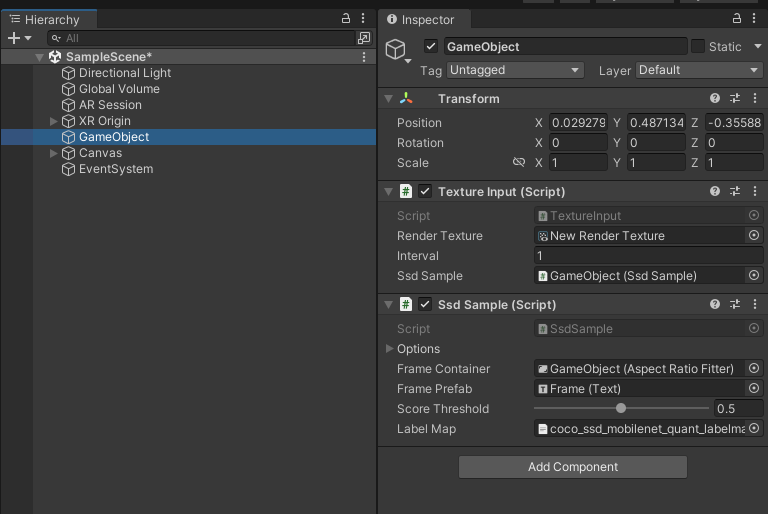
Hierarchyが下記画像のような状態になっていれば大丈夫です。
AR用プログラム
続いて、ARで動かすためにプログラムを変更します。
using System;
using UnityEngine;
using UnityEngine.XR.ARFoundation;

public class TextureInput :MonoBehaviour
{
    [SerializeField]
    private ARCameraBackground _arCameraBackground;

    [SerializeField]
    private int interval = 1;

    [SerializeField]
    private SsdSample _ssdSample;

    private RenderTexture _cameraTexture;
    DateTime last;

    private void Start()
    {
        last = DateTime.Now;
        _cameraTexture = new RenderTexture(Screen.width, Screen.height, 0);
    }


    void Update()
    {
        DateTime now = DateTime.Now;
        if ((now - last).TotalSeconds >= interval)
        {
            Detect();
            last = now;
        }
    }

    private void Detect()
    {
        //ARのカメラの画像をRenderTextureに渡している
        Graphics.Blit(null, _cameraTexture, _arCameraBackground.material);

        //Textureを解析、認識を行っている。
        _ssdSample.Invoke(_cameraTexture);
    }
}
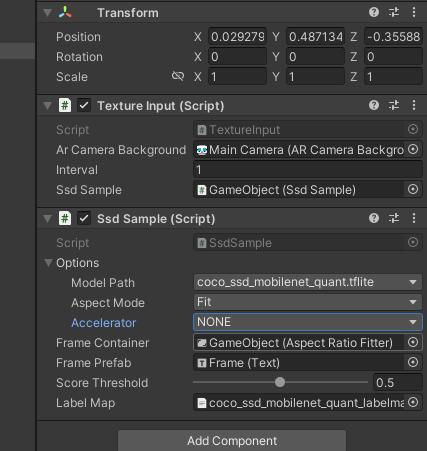
変更した後に、オブジェクトをアタッチします。
このとき、SsdSampleのOptionsの中にあるAcceleratorをNoneに設定しておいてください。
これを設定しないと、モバイルで動作しない場合があります。
ここまで出来たら実機にビルドを行ってください。
私はAndroidを使用しているので、Androidビルドをしました。
結果
動画のように検知を行えると思います。
まとめ
今までは事前に登録された画像のトラッキングを行ったことはあったのですが、そのときはその画像でしか認識、トラッキングができず、あまり拡張性がないように感じていました。ですが、この方法を使えば同じ種類の違うもの(ショートケーキとチョコケーキみたいな)でもプログラムで同じように扱えるのでとても使いやすいと思いました!
ぜひ、みなさんも試してみてください!
参考資料