SpecTest GUI ヘの道(1)
誰向け?
- VSCode で使われている Monaco Editor に興味ある人
- Monaco Editor で Markdown Editor を Electron ベースで 作りたい人
- SpecTest を 応援してくれる 人
尚、今回の結果は以下にコミットしてあります。
はじめに
SpecTest は私が欲しいと思っていた BDD を実現するための汎用フレームワーク。
今回はいつもと趣向を変えて、SpecTest GUI への道 と題して GUI 作っていきます。Kinx と両方並行して進めます。どっちかと言うとこっちがサイド・プロジェクト的な。
Markdown Editor ベース
私は普段 Virtual Studio Code にお世話になっているのだが、Markdown メモには Joplin を使っている。なので、Markdown エディタが別にあること自体に苦はないし、便利だと思う。色々 VSCode だけで行けるほうがいいとも思うが、ニッチに特化したツールはそれなりに存在意義があるし。
SpecTest も基本はマークダウンなので、Markdown Editor 的な何かがベースになると良いかなー。ということで、ちょっとした Markdown Editor ベースでいきます。結構長くなりそうなので、記事は分割します。今回は、簡易 Markdown Editor を作るところまで。最初は MavonEditor が良さそうだと思ったが、エディタ部分のフォントが変えられず、融通の利かなさでパスすることに。
簡単な Markdown Editor のサンプルにはなると思う。とは言っても今回の目玉、前々から使ってみたかった Monaco Editor を使うので意味はある。
そう、アレです。Virtual Studio Code で使われているアレです。実は、当初エディタは Atom を使おうと思っていたのだが、動作が重い...。そこで Visual Studio Code にしてみたところすこぶる軽快。しかし、どちらも Electron ベースだというではないか。 この違いは一体何だ?、と行きついたのが Monaco Editor。これは期待できる。
Monaco Editor の使い方や、Monaco Editor を使いたい人に参考になれば。
準備
node.js インストール
node.js は大体の人がインストール済みですかね。ここ からインストール。
vuecli インストール、プロジェクトの作成
以前は electron-vue を使っていたのですが、最近は vuecli + electron-builder らしいですね。今回はそれでいきます。
vuecli をインストール。既にインストール済みなら飛ばしてください。
$ npm install -g @vue/cli
プロジェクトの作成。プロジェクト名は spectest-gui にします。
$ vue create spectest-gui
Manually select features を選んで、Router と Vuex を選択します。私はいつもこれです。Router は使わないか...。あとは、TypeScript を使うかどうか。今時は使うべきかもしれないが、時間もないので慣れている JavaScript にしてしまう。
Vue CLI v4.2.3
? Please pick a preset: Manually select features
? Check the features needed for your project:
 (*) Babel
 ( ) TypeScript
 ( ) Progressive Web App (PWA) Support
 (*) Router
>(*) Vuex
 ( ) CSS Pre-processors
 (*) Linter / Formatter
 ( ) Unit Testing
 ( ) E2E Testing
あとはデフォルト。
🎉  Successfully created project spectest-gui.
👉  Get started with the following commands:

 $ cd spectest-gui
 $ npm run serve
上記が出れば成功。
electron-builder
プロジェクトが無事作成されたら、早速 electron-builder 入れてみましょう。
$ cd spectest-gui
$ vue add electron-builder
Choose Electron Version とか聞かれるので迷わず新しいのを。
? Choose Electron Version (Use arrow keys)
  ^4.0.0
  ^5.0.0
> ^6.0.0
✔ Successfully invoked generator for plugin: vue-cli-plugin-electron-builder
成功。
起動してみましょう。
$ npm run electron:serve
おぉ。
この辺で VSCode とかを立ち上げると、既に git リポジトリができていて、初版がコミットされており、既に変更があることが確認できます。必要に応じて git にコミットしておきましょう(たぶん git コマンドがないとできないと思うけど、git コマンドが無いと無視されるのかどうかとかは既に入っていたのでわかんない)。
$ git add .
$ git commit -m "added electron builder"
Vuetify
やはり流行に乗ってマテリアル・デザインで Vuetify を使います。好きなので。色々揃ってて良いですねえ。
$ vue add vuetify
以下が聞かれますが、とりあえずデフォルトで進めます。
? Choose a preset: (Use arrow keys)
> Default (recommended)
  Prototype (rapid development)
  Configure (advanced)
✔  Successfully invoked generator for plugin: vue-cli-plugin-vuetify
 vuetify  Discord community: https://community.vuetifyjs.com
 vuetify  Github: https://github.com/vuetifyjs/vuetify
 vuetify  Support Vuetify: https://github.com/sponsors/johnleider
成功したようですね。起動してみます。
$ npm run electron:serve
おぉ、変わった。
splitpanes / vue-monaco / marked / highlight.js
そしてお待ちかね、Monaco Editor の出番です。vue-monaco というパッケージがあります。ついでに今回、マルチペインで作業できるようにするつもりなので、splitpanes というライブラリを入れてしまいます。また、表示用に marked と highlight.js も入れます。さらに github-markdown-css も入れておきましょう。
$ npm install splitpanes
$ npm install vue-monaco
$ npm install marked
$ npm install highlight.js
$ npm install github-markdown-css
fontawesome
間違いなく fontawesome のアイコンは使います。入れておきます。
$ npm install @fortawesome/fontawesome-svg-core
$ npm install @fortawesome/free-solid-svg-icons
$ npm install @fortawesome/vue-fontawesome
$ npm install @fortawesome/free-brands-svg-icons
$ npm install @fortawesome/free-regular-svg-icons
色々入ったので、また変更が通知されているはずです。コミットしてしまいましょう。
$ git add .
$ git commit -m "added vuetify and some modules"
簡易 Markdown Editor
さて、Markdown Editor つくりますよ。
アイコンの設定
まず、fontawesome アイコンを使えるようにしてしまいましょう。src/main.js を開いて、import 文の最後の行の次あたりに以下の行を追加。
import { library } from '@fortawesome/fontawesome-svg-core'
import { fas } from '@fortawesome/free-solid-svg-icons'
import { fab } from '@fortawesome/free-brands-svg-icons'
import { far } from '@fortawesome/free-regular-svg-icons'
library.add(fas, far, fab)
初期画面の整理
ひとまず以下のような感じで構成してきます。
src/App.vue
   /components/MarkdownPane.vue
              /markdown/Editor.vue
              /markdown/VIewer.vue
トップレベル(src/App.vue)
Vuetify の <v-app> に <v-app-bar>、<v-content> を配置し、<v-content> に MarkdownPane を配置します。全体を書くと以下の通り。基本、あったものをざっくり消して、HelloWorld を MarkdownPane に変える。
<template>
  <v-app>
    <v-app-bar app ref="appbar">
      <v-app-bar-nav-icon></v-app-bar-nav-icon>
      <v-toolbar-title>SpecTest GUI</v-toolbar-title>
    </v-app-bar>

    <v-content>
      <MarkdownPane />
    </v-content>
  </v-app>
</template>

<script>
import MarkdownPane from './components/MarkdownPane';

export default {
  name: 'App',

  components: {
    MarkdownPane,
  },

  data: () => ({
    //
  }),
};
</script>
src/components/MarkdownPane.vue が無いので、まだ起動できない。
ペイン分割(src/components/MarkdownPane.vue)
中身のない src/components/MarkdownPane.vue を作ります。splitpanes で左右にペイン分割する。
<template>
  <splitpanes class="default-theme" :style="{ height: '100%', overflow: 'hidden' }">
    <pane class="pane-editor" ref="epane" size="55">
    </pane>
    <pane class="pane-view" ref="vpane">
    </pane>
  </splitpanes>
</template>

<script>
import { Splitpanes, Pane } from 'splitpanes'
import 'splitpanes/dist/splitpanes.css'

export default {
  name: 'MarkdownPane',

  components: {
    Splitpanes, Pane,
  },
};
</script>
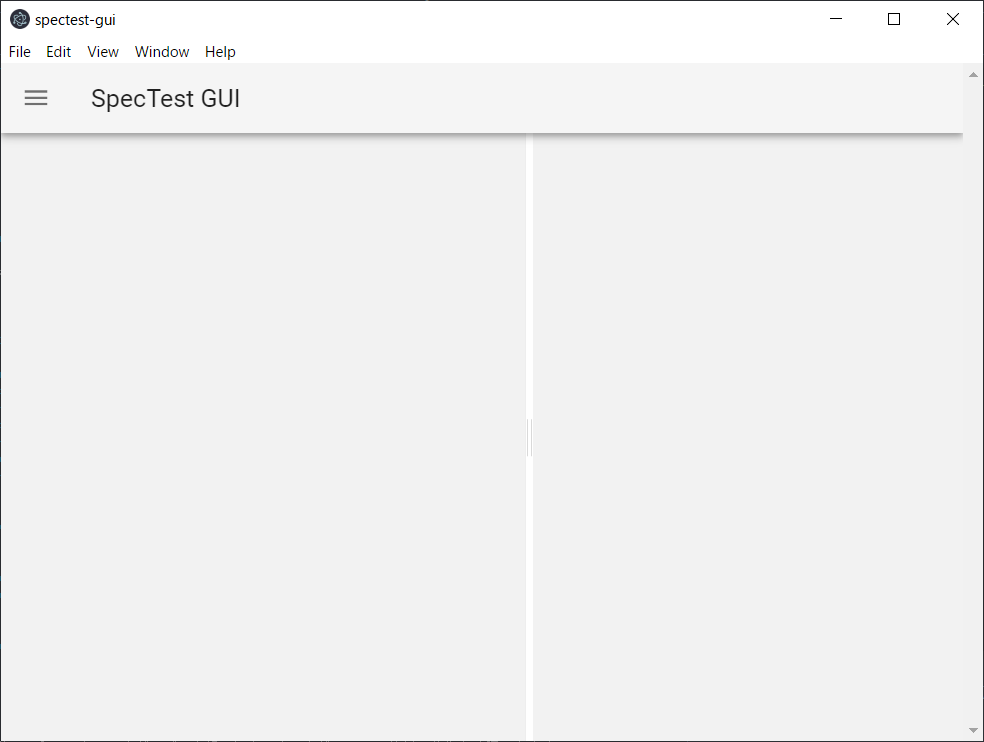
これで一応動くようにはなる。まだエディタ組み込んでませんが、ペイン分割の動作を確認できます。
こんな感じ。真ん中のスプリッタでぐりぐりと動かせます。
Window の大きさ調整
Electron を使っているとだいたいそうなのだが、ウィンドウのリサイズに追随してくれないコンポーネントが結構ある。なので、ウィンドウ・サイズを Vuex のストアに確保しておき、各コンポーネントで参照できるようにしておく。具体的には、App.vue にハンドラを設置。その際、上部のアプリケーションバーのサイズを含めないようにあらかじめ引き算しておく。軽く 3 引いているのは、誤差でスクロールバーが出たり変な感じになることがあったので気持ち少なめに程度の意味。
まず、store でウィンドウサイズを保存するように修正。
export default new Vuex.Store({
  state: {
    windowSize: { width: 0, height: 0 },
  },
  mutations: {
    setWindowSize (state, appbar) {
      state.windowSize.width = window.innerWidth
      state.windowSize.height = window.innerHeight - appbar.clientHeight - 3
    },
  },
  ...
次に App.vue の <v-app-bar> タグに ref をつけ、バーの高さを渡せるようにした上で、
<v-app-bar app ref="appbar">
methods に handleResize を追加し、ハンドラとして呼ばれるように mounted と beforeDestroy でリスナーに登録し、ウィンドウサイズを store にセットをする。
  methods: {
    handleResize: function() {
      this.$store.commit('setWindowSize', this.$refs.appbar.$el)
    },
  },

  mounted: function () {
    window.addEventListener('resize', this.handleResize)
    this.$store.commit('setWindowSize', this.$refs.appbar.$el)
  },

  beforeDestroy: function () {
    window.removeEventListener('resize', this.handleResize)
  },
テキストデータ共有
テキストエディタで編集したデータは、marked で変換されて表示される。なので、編集ドキュメント自体も store で管理。state に code として追加し、upadteCode でアップデートできるようにしておく。さっきのと合わせるとこんな感じ
export default new Vuex.Store({
  state: {
    windowSize: { width: 0, height: 0 },
    code: "",
  },
  mutations: {
    setWindowSize (state, appbar) {
      state.windowSize.width = window.innerWidth
      state.windowSize.height = window.innerHeight - appbar.clientHeight - 3
    },
    updateCode (state, code) {
      state.code = code;
    }
  },
  ...
Markdown エディタの配置
お待ちかねの MonacoEditor を組み込む時間です。
まず、src/components/markdown/Editor.vue を作ります。あらかじめ設定しているのは以下の点。
- MonacoEditor は自分でレイアウトに追随してくれないので、リサイズで再レイアウトさせる必要がある。そのための仕組みを入れておく。
-
resize自体は親コンポーネントから受け取る。 -
codeはローカルに編集するのでthisに持たせておき、変更をウォッチして store にコピーする。 - 縦横サイズはウィンドウサイズをもとに設定してやらないとうまくレイアウトできない。Pane で各ペインの高さをそろえて、その高さに Editor を合わせる。
-
@editorWillMountイベントを受け取って、monacoインスタンスを確保しておく。これは後で使う。 -
fontSizeは一応設定値として持っておく。 - エディタが見やすいように、上下に少しマージンを入れておく。
全部入れると次のようになる。
<template>
  <MonacoEditor ref="editor" v-model="code" language="markdown" class="mdeditor" :style="{ width: width, height: height }"
    :options="{ scrollBeyondLastLine: false, wordWrap: 'on', fontSize: fontSize }"
    @editorWillMount="onEditorWillMount"
  />
</template>

<script>
import MonacoEditor from 'vue-monaco'

export default {
  name: 'MarkdownEditor',
  components: { MonacoEditor },

  data: () => ({
    code: '',
    monaco: null,
    fontSize: 12,
    clientWidth: 1,
    clientHeight: 1,
  }),

  methods: {
    onEditorWillMount: function(monaco) {
      this.monaco = monaco
    },
    resize: function(el) {
      this.clientWidth = el.clientWidth - 1;
      this.clientHeight = el.clientHeight - 3;
      this.$nextTick(() => {
        this.$refs.editor.getEditor().layout()
      })
    },
  },

  computed: {
    width() {
      return this.clientWidth + 'px'
    },
    height() {
      return this.clientHeight + 'px'
    },
  },

  watch: {
    code() {
      this.$store.commit('updateCode', this.code)
    },
  },
};
</script>

<style scoped>
.mdeditor {
  margin-top: 6px;
  margin-bottom: 8px;
}
</style>
また、splitpanes でペインサイズが変わったときも追随してくれない。なので、その仕組みを入れておく。修正すると次のようになる。MarkdownEditor のメソッドを呼ぶので ref をつけておく。
<template>
  <splitpanes class="default-theme" :style="{ height: height, overflow: 'hidden' }" @resized="resizedPane($event)">
    <pane class="pane-editor" ref="epane" size="55">
      <MarkdownEditor ref="editor" />
    </pane>
    <pane class="pane-view" ref="vpane">
    </pane>
  </splitpanes>
</template>

<script>
import MarkdownEditor from './markdown/Editor'
import { Splitpanes, Pane } from 'splitpanes'
import 'splitpanes/dist/splitpanes.css'

export default {
  name: 'MarkdownPane',

  components: {
    MarkdownEditor, Splitpanes, Pane,
  },

  methods: {
    resizedPane: function() {
      this.$refs.editor.resize(this.$refs.epane.$el)
    }
  },

  computed: {
    height () {
      return (this.$store.state.windowSize.height - 1) + "px"
    },
  }
};
</script>
リサイズも通知されるように、App.vue の handleResize で通知するように修正。mounted のときも通知しておく。App.vue も全部載せると以下のようになる。
<template>
  <v-app>
    <v-app-bar app ref="appbar" height="56">
      <v-app-bar-nav-icon></v-app-bar-nav-icon>
      <v-toolbar-title>SpecTest GUI</v-toolbar-title>
    </v-app-bar>

    <v-content>
      <MarkdownPane ref="pane" />
    </v-content>
  </v-app>
</template>

<script>
import MarkdownPane from './components/MarkdownPane';

export default {
  name: 'App',

  components: {
    MarkdownPane,
  },

  data: () => ({
    //
  }),

  methods: {
    handleResize: function() {
      this.$store.commit('setWindowSize', this.$refs.appbar.$el)
      this.$refs.pane.resizedPane()
    },
  },

  mounted: function () {
    window.addEventListener('resize', this.handleResize)
    this.$store.commit('setWindowSize', this.$refs.appbar.$el)
    this.$nextTick(() => {
      this.$refs.pane.resizedPane()
    })
  },

  beforeDestroy: function () {
    window.removeEventListener('resize', this.handleResize)
  },
};
</script>
...
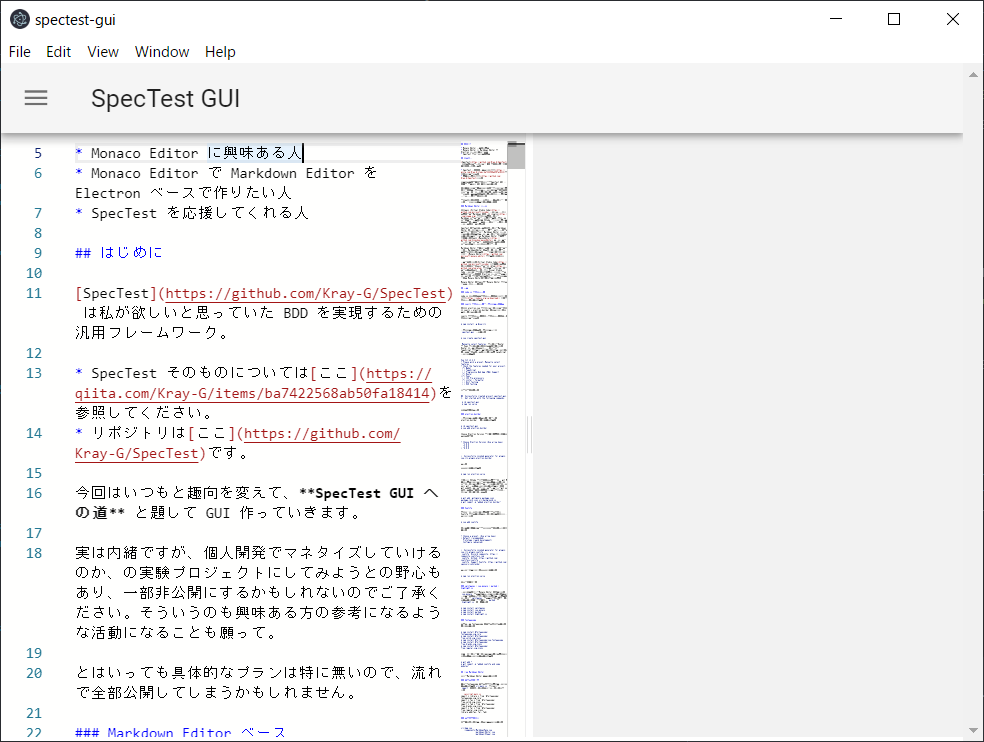
ここまでできると、エディタが使える。
やった!
VSCode と同じだ。検索も置換もできる。Minimap も付いてる。なんて素晴らしい。
Markdown ビューワの配置
編集できるだけではイマイチですね。ちゃんと HTML に変換して表示しましょう。src/components/markdown/Viewer.vue を作ります。ここでは試行錯誤した結果のみ先に見せます。
<template>
  <div id="viewer" class="mdviewer" :style="{ width: width, height: height, overflow: 'auto' }" ref="viewer">
    <div v-html="markdown" class="mdviewer-body markdown-body" />
  </div>
</template>

<script>
import marked from 'marked';
import hljs from 'highlight.js';
import 'highlight.js/styles/github-gist.css'
import 'github-markdown-css/github-markdown.css'

export default {
  name: 'MarkdownViewer',

  created: function () {
    marked.setOptions({
      langPrefix: '',
      highlight: function(code, lang) {
        var l = lang.split(':');
        return hljs.highlightAuto(code, [l[0]]).value
      }
    });
  },

  data: () => ({
    clientWidth: 1,
    clientHeight: 1,
  }),

  methods: {
    resize: function(el) {
      this.clientWidth = el.clientWidth - 1;
      this.clientHeight = el.clientHeight - 3;
    },
  },

  computed: {
    markdown: function () {
      return marked(this.$store.state.code) + '<br />'
    },
    width() {
      return this.clientWidth + 'px'
    },
    height() {
      return this.clientHeight + 'px'
    },
  }
}
</script>

<style>
.mdviewer {
  margin-top: 6px;
  margin-bottom: 8px;
}
.mdviewer-body {
  padding: 8px;
}

code {
  font-size: 85% !important;
  padding: 0px !important;
}
pre>code {
  width: 100%;
  padding: 0.5em;
  color: inherit !important;
  -webkit-box-shadow: inset 0 0px 0 #ffffff !important;
  box-shadow: inset 0 0px 0 #ffffff !important;
}
pre>code:after, pre>code:before {
  content: "" !important;
  letter-spacing: 0px !important;
}
</style>
marked で変換する際の highlight.js の設定を created で行い、エディタと同じようにサイズを調整できるようにして、どうも Vuetify が悪さしているっぽいスタイルを調整(グローバルスコープで !important とか使っているが、こうしないと回避できなかった...他に影響あったら考える)。
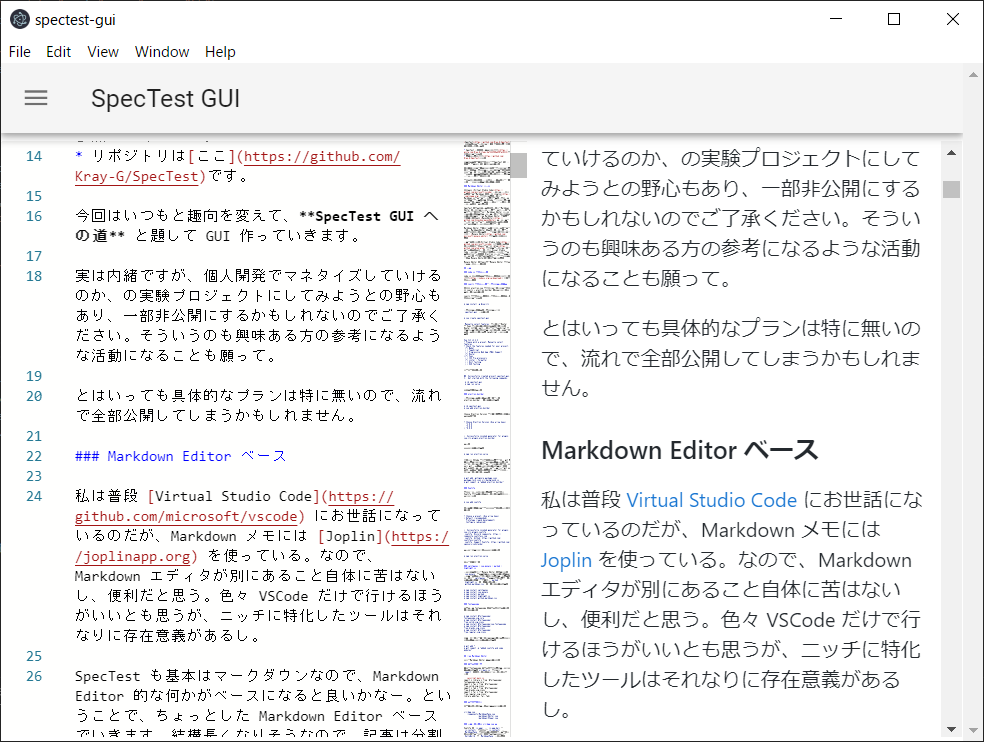
文書自体は store に変更があると自動的に computed して変換後の文書が表示される。賢いねー。
また、src/component/MarkdownPane.vue に登録してリサイズされるようにメソッドを追加。splitpanes も default-theme が邪魔な感じなので消してしまう。全体は以下の通り。
<template>
  <splitpanes :style="{ height: height, overflow: 'hidden' }" @resized="resizedPane($event)">
    <pane class="pane-editor" ref="epane" size="55">
      <MarkdownEditor ref="editor" />
    </pane>
    <pane class="pane-view" ref="vpane">
      <MarkdownViewer ref="viewer" />
    </pane>
  </splitpanes>
</template>

<script>
import MarkdownEditor from './markdown/Editor'
import MarkdownViewer from './markdown/Viewer'
import { Splitpanes, Pane } from 'splitpanes'
import 'splitpanes/dist/splitpanes.css'

export default {
  name: 'MarkdownPane',

  components: {
    MarkdownEditor, MarkdownViewer, Splitpanes, Pane,
  },

  methods: {
    resizedPane: function() {
      this.$nextTick(() => {
        this.$refs.editor.resize(this.$refs.epane.$el)
        this.$refs.viewer.resize(this.$refs.vpane.$el)
      })
    }
  },

  computed: {
    height () {
      return (this.$store.state.windowSize.height - 1) + "px"
    },
  }
};
</script>
おぉー。エディタだ。
おわりに
ここまでで簡単な Markdown Editor ができました。保存とかできないけど。あと、やはりスクロールは連動してほしい。
ということで、次回は スクロール連動 を実現させます。
ここまでの結果は、以下にコミットしてあります。
SpecTest そのものに関しては以下を参照してください。
ではまた次回。


