■はじめに
今回はインストーラーでよく使われるウィザード形式の画面を作ります。

[注意]
これまでの回で説明済みの操作方法等は、説明を省略したり簡略化している場合があります。
■開発環境
- Windows 10
- Visual Studio Community 2015 Update 3
- .NET Framework 4.x
■作ってみる
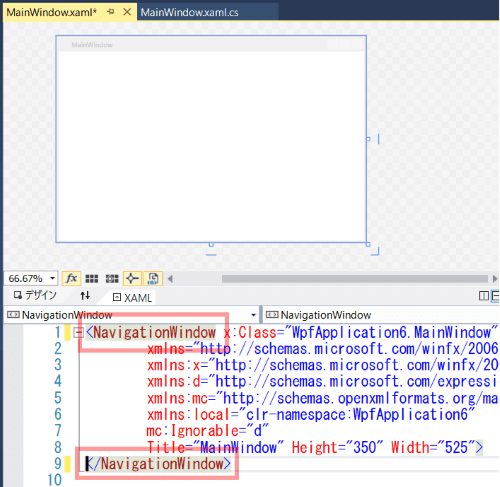
タグのWindowを、、、
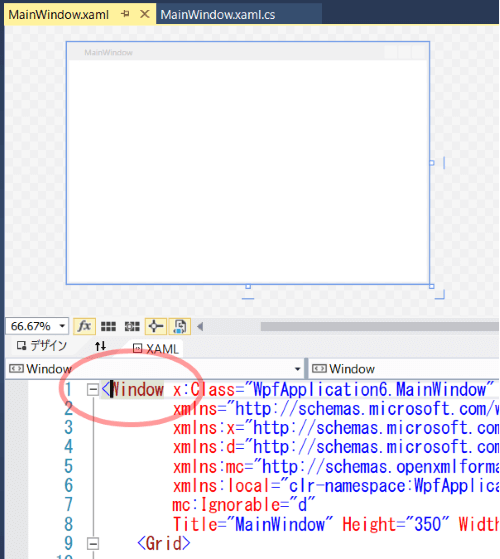
NavigationWindowに、、、
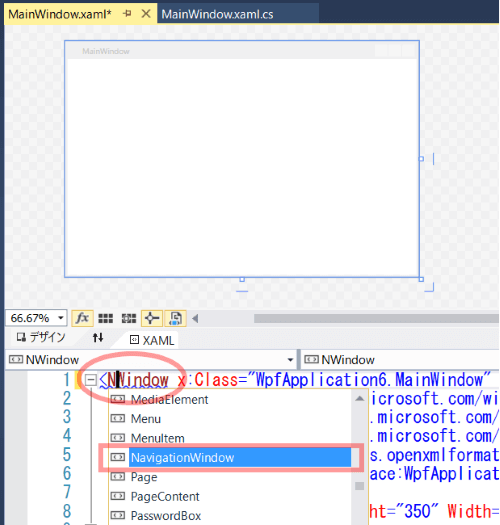
書き換えます。
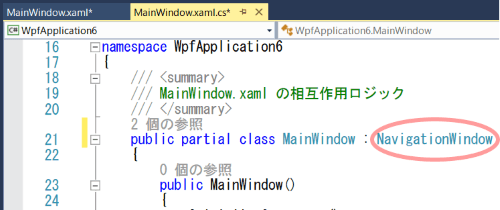
コードビハインドで基底クラスのWindowを、、、
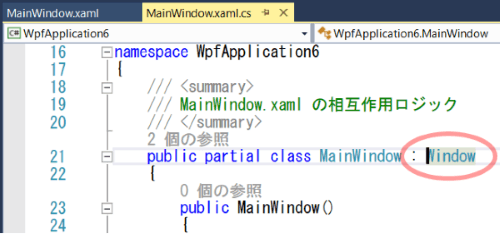
NavigationWindowに書き換えます。
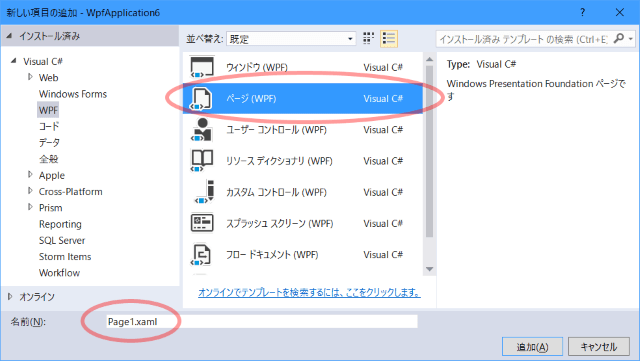
新しい項目の追加で「ページ(WPF)」を3つ追加します。
名前はPage1.xaml, Page2.xaml, Page3.xamlにします。
ドキュメントアウトラインでNavigationWindowを選択し、プロパティの「その他の指定」でSourceプロパティをPage1.xamlに設定します。

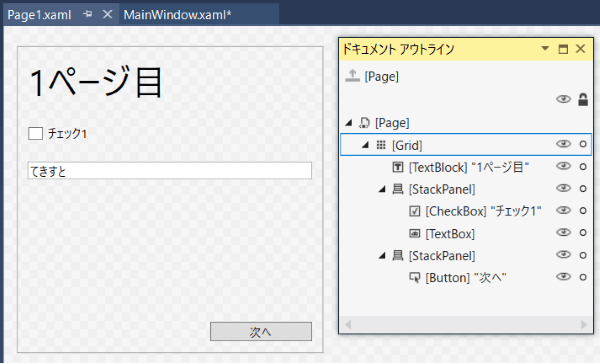
Page1を以下のように編集します。
Page1.xaml
<Page x:Class="WpfApplication6.Page1"
      xmlns="http://schemas.microsoft.com/winfx/2006/xaml/presentation"
      xmlns:x="http://schemas.microsoft.com/winfx/2006/xaml"
      xmlns:mc="http://schemas.openxmlformats.org/markup-compatibility/2006"
      xmlns:d="http://schemas.microsoft.com/expression/blend/2008"
      xmlns:local="clr-namespace:WpfApplication6"
      mc:Ignorable="d"
      d:DesignHeight="300" d:DesignWidth="300"
      Title="ページ(1/3)">
    <Grid>
        <Grid.RowDefinitions>
            <RowDefinition Height="auto"/>
            <RowDefinition/>
            <RowDefinition Height="auto"/>
        </Grid.RowDefinitions>

        <TextBlock Text="1ページ目" FontSize="36" Margin="10"/>

        <StackPanel Grid.Row="1">
            <CheckBox Content="チェック1" Margin="10"/>
            <TextBox Text="てきすと" Margin="10"/>
        </StackPanel>

        <StackPanel Grid.Row="2" Orientation="Horizontal" HorizontalAlignment="Right">
            <Button Content="次へ" Width="100" Margin="10" Click="Button_Click"/>
        </StackPanel>
    </Grid>
</Page>
NavigationService.Navigateの引数に表示したいページを渡します。
Page1.xaml.cs(抜粋)
private static Page2 page2 = null;

// コンストラクタ
public Page1()
{
    InitializeComponent();
}

// 「次へ」ボタンの処理
private void Button_Click(object sender, RoutedEventArgs e)
{
    if (page2 == null)
    {
        // 次に表示するページ(ページ2)を生成、以後使いまわし
        page2 = new Page2();
    }

    // ページ2へ移動
    this.NavigationService.Navigate(page2);
}
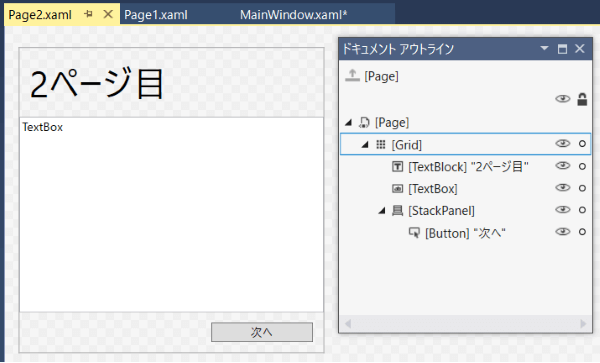
Page2を以下のように編集します。
Page2.xaml
<Page x:Class="WpfApplication6.Page2"
      xmlns="http://schemas.microsoft.com/winfx/2006/xaml/presentation"
      xmlns:x="http://schemas.microsoft.com/winfx/2006/xaml"
      xmlns:mc="http://schemas.openxmlformats.org/markup-compatibility/2006"
      xmlns:d="http://schemas.microsoft.com/expression/blend/2008"
      xmlns:local="clr-namespace:WpfApplication6"
      mc:Ignorable="d"
      d:DesignHeight="300" d:DesignWidth="300"
      Title="ページ(2/3)">
    <Grid>
        <Grid.RowDefinitions>
            <RowDefinition Height="auto"/>
            <RowDefinition/>
            <RowDefinition Height="auto"/>
        </Grid.RowDefinitions>

        <TextBlock Text="2ページ目" FontSize="36" Margin="10"/>

        <TextBox Grid.Row="1" Text="TextBox"/>

        <StackPanel Grid.Row="2" Orientation="Horizontal" HorizontalAlignment="Right">
            <Button Content="次へ" Width="100" Margin="10" Click="Button_Click"/>
        </StackPanel>
    </Grid>
</Page>
Page2.xaml.cs(抜粋)
private static Page3 page3 = null;

// コンストラクタ
public Page2()
{
    InitializeComponent();
}

// 「次へ」ボタンの処理
private void Button_Click(object sender, RoutedEventArgs e)
{
    if (page3 == null)
    {
        // 次に表示するページ(ページ3)を生成、以後使いまわし
        page3 = new Page3();
    }

    // ページ3へ移動
    this.NavigationService.Navigate(page3);
}
Page3を以下のように編集します。
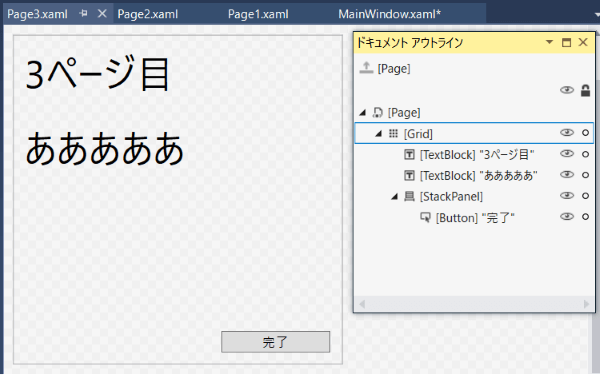
Page3.xaml
<Page x:Class="WpfApplication6.Page3"
      xmlns="http://schemas.microsoft.com/winfx/2006/xaml/presentation"
      xmlns:x="http://schemas.microsoft.com/winfx/2006/xaml"
      xmlns:mc="http://schemas.openxmlformats.org/markup-compatibility/2006"
      xmlns:d="http://schemas.microsoft.com/expression/blend/2008"
      xmlns:local="clr-namespace:WpfApplication6"
      mc:Ignorable="d"
      d:DesignHeight="300" d:DesignWidth="300"
      Title="ページ(3/3)">
    <Grid>
        <Grid.RowDefinitions>
            <RowDefinition Height="auto"/>
            <RowDefinition/>
            <RowDefinition Height="auto"/>
        </Grid.RowDefinitions>

        <TextBlock Text="3ページ目" FontSize="36" Margin="10"/>
        <TextBlock Grid.Row="1"  Text="あああああ" FontSize="36" Margin="10"/>

        <StackPanel Grid.Row="2" Orientation="Horizontal" HorizontalAlignment="Right">
            <Button Content="完了" Width="100" Margin="10" Click="Button_Click"/>
        </StackPanel>
    </Grid>
</Page>
Page3.xaml.cs(抜粋)
// コンストラクタ
public Page3()
{
    InitializeComponent();
}

// 「完了」ボタンの処理
private void Button_Click(object sender, RoutedEventArgs e)
{
    // メイン画面を閉じる
    App.Current.MainWindow.Close();
}
■動かしてみる
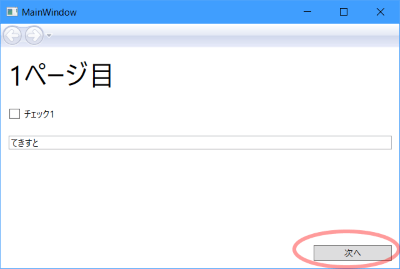
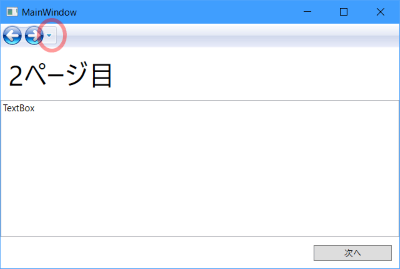
「次へ」ボタンを押して2ページ目に移動します。
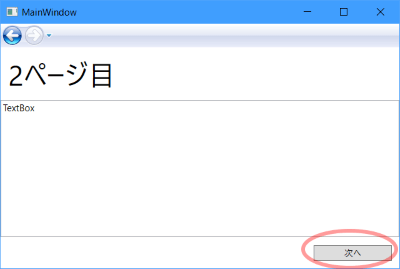
「次へ」ボタンを押して3ページ目に移動します。
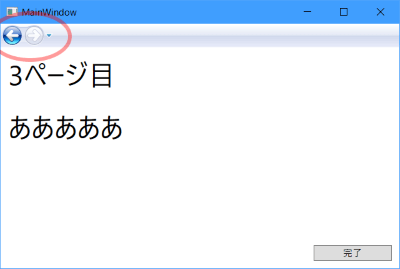
「完了」ボタンを押すとプログラムは終了します。
上に表示されているボタンはブラウザの「戻る」「進む」ボタンと同じ働きです。
これを表示したくない場合は、NavigationWindowのShowsNavigationUIプロパティをfalseに設定します。
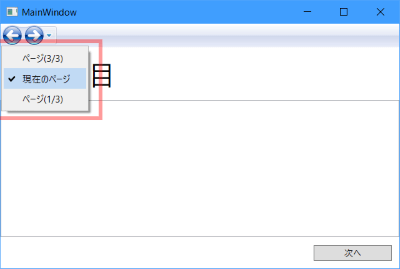
3ページ目から戻るボタンで2ページ目に戻りました。
進むボタンが有効になりました。
進むボタンのドロップダウンからもページ移動できます。
おしまい