APN Ambassador Advent Calendar 14日目のエントリです。
NTTデータの川畑です。AWSアンバサダーのカレンダーなのに、AWS以外のトピック差し込んですいません。
アンバサダーになって社内外で登壇する機会も多くなりまして、今日は私が普段プレゼンテーションで使っているReveal.jsについて概要とTipsをいくつかご紹介したいと思います。何気にQiita初投稿です。
Reveal.jsとは?
Reveal.jsはHTMLを使ってプレゼンテーションスライドを作成できるJavaScriptのライブラリです。
どうこう説明するより、百聞は一見に如かず、作ったものを見てみましょう。
去年のAWS re:Invent 2019でRecapしたときに作ったスライドです。
何がいいかって開いた瞬間にプレゼンテーションとは思えない迫力で画像差し込めるし、エンベデッドな動画やプラグインまでシームレスに表示できるのがとってもスマートです。Reveal.jsの提供元のデモみると、様々なアニメーションやスライドのオーバービュー表示など様々な機能があることがわかります。
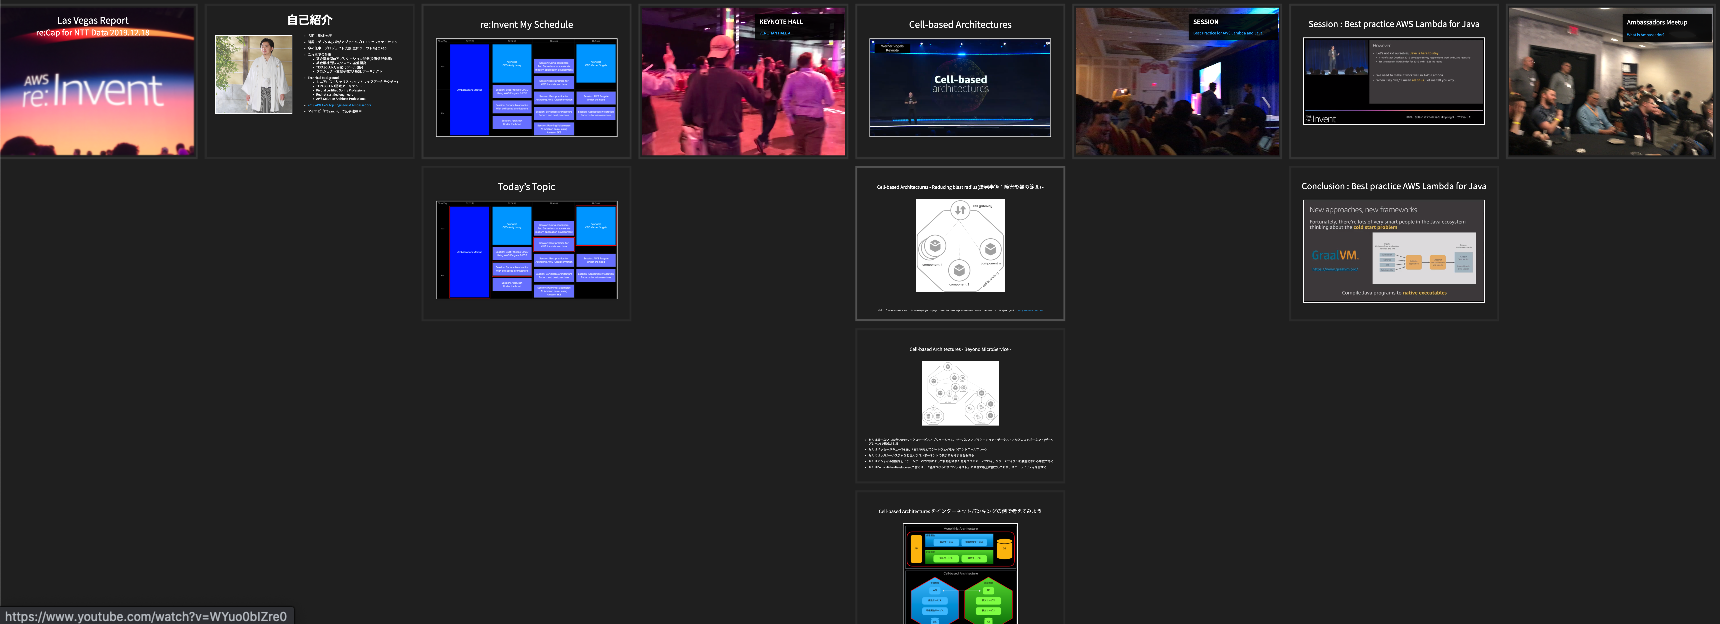
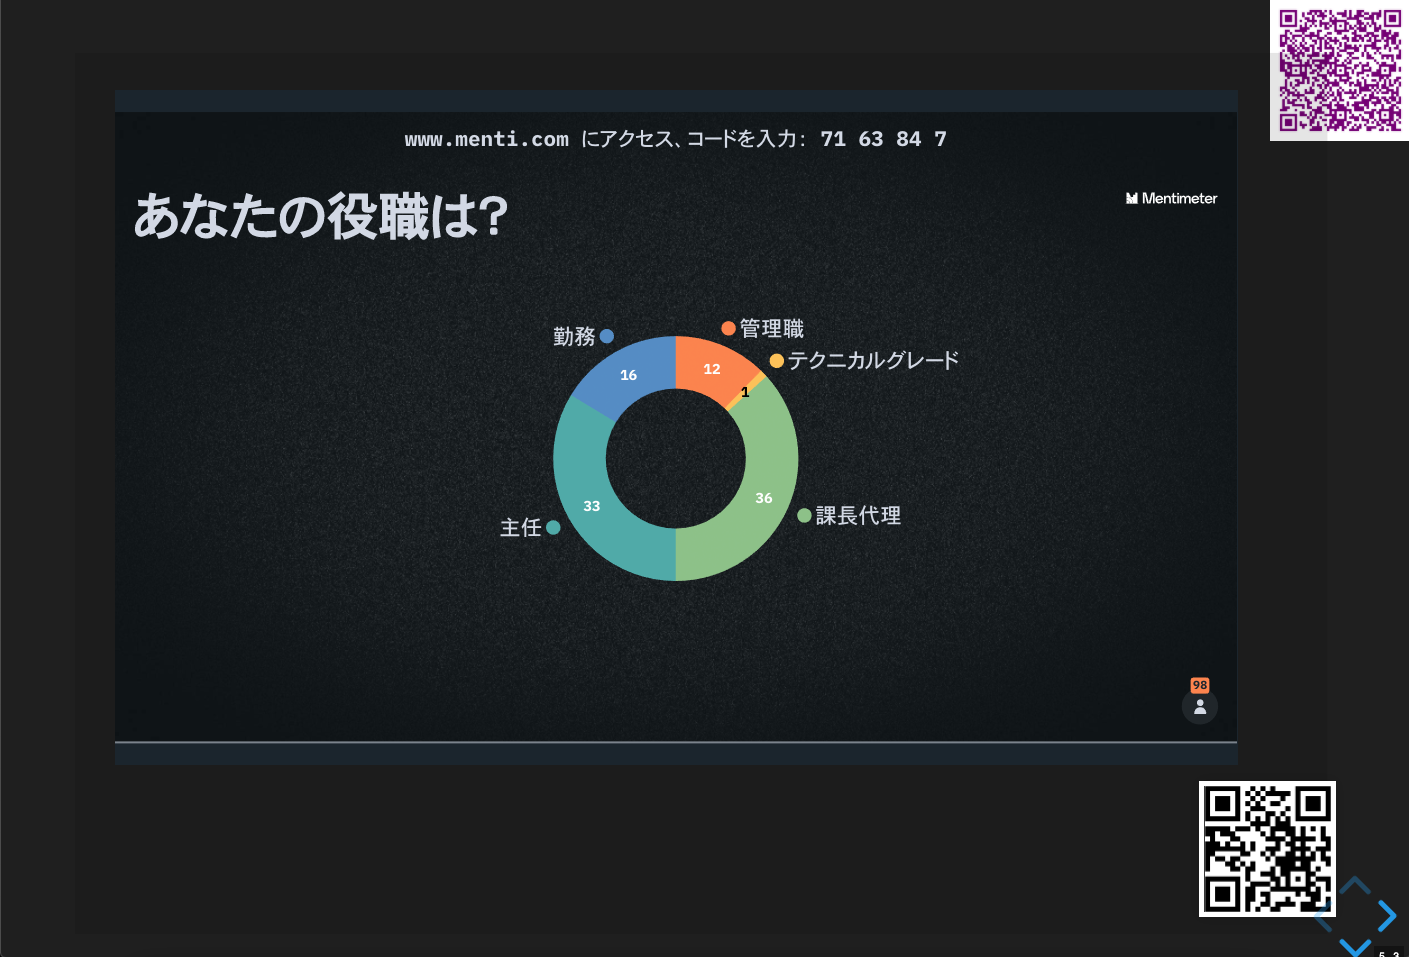
最近は高度なテクニックを駆使できるようになり、AWS Summit 2020のRecapスライドでもやってる通り、スライドのURLをQRコードにして常に表示したり、menti.comでプレゼン中にリアルタイムにアンケートをとって(AWS高橋さんが使っていたのをマネマネ)、表示結果をシームレスにスライドに組み込んだりすれば、上級プレゼンター感満載です。
ということで、使っていて役立つであろうTipsをまとめておきます。最初基本的な使い方を描こうかなと思いましたが、既に公式のマニュアルが翻訳されていましたので(素晴らしい)、備忘もかねてちょっとアドバンスドなTipsをいくつか紹介したいと思います。
Reveal.js Advanced Tips
1. HTMLで書く
Reveal.jsはマークダウンのサポートがありますが、凝ったことをやろうと思ったらHTMLを直書きして作るのがよいです。HTMLを手で書いた経験がなくても躊躇することはありません。定型フォーマットを用意したので、後は以下のことだけ知っておけば十分使えます。なお、実際にHTMLを表示するにはJavascript本体やCSSが必要です。本体から取得するか、こちらにも置いておきましたのでダウンロードください。
- スライドの内容はsectionタグで括った範囲内になる(コメントの箇所)。
<!doctype html>
<html lang="en">
<head prefix="og: http://ogp.me/ns# fb: http://ogp.me/ns/fb# article: http://ogp.me/ns/article#">
<meta charset="utf-8">
<title>Reveal.js Format</title>
<meta name="description" content="">
<meta name="author" content="">
<meta name="generator" content="reveal-ck 3.9.2">
<meta name="apple-mobile-web-app-capable" content="yes" />
<meta name="apple-mobile-web-app-status-bar-style" content="black-translucent" />
<meta name="viewport" content="width=device-width, initial-scale=1.0, maximum-scale=1.0, user-scalable=no, minimal-ui">
<link rel="stylesheet" href="css/reveal.css">
<link rel="stylesheet" href="css/theme/black.css" id="theme">
<!-- Code syntax highlighting -->
<link rel="stylesheet" href="lib/css/zenburn.css">
<link rel="stylesheet" href="css/reveal-ck.css">
<!-- Printing and PDF exports -->
<script>
var link = document.createElement( 'link' );
link.rel = 'stylesheet';
link.type = 'text/css';
link.href = window.location.search.match( /print-pdf/gi ) ? 'css/print/pdf.css' : 'css/print/paper.css';
document.getElementsByTagName( 'head' )[0].appendChild( link );
</script>
<!--[if lt IE 9]>
<script src="lib/js/html5shiv.js"></script>
<![endif]-->
</head>
<body>
<p><img src="images/site-qr.png" style="position:absolute; top:0px; right:0px; width:10%" ></p>
<div class="reveal">
<div class="slides">
<!-- ここからスライドの内容、セクションタグで区切る。セクションタグをネストすると下にスライドが遷移する -->
<section id="1" data-background="images/xxxxx.png">
タイトルスライド
</section>
<section id="2">
<h6>ご静聴ありがとうございました <img class="emoji" alt=":bow:" src="https://github.githubassets.com/images/icons/emoji/unicode/1f647.png"></h6>
</section>
<!-- ここまでがスライドの内容、他は特に触れなくてもOK -->
</div>
</div>
<script src="lib/js/head.min.js"></script>
<script src="js/reveal.js"></script>
<script>
(function() {
function extend( a, b ) {
for(var i in b) {
a[i] = b[i];
}
}
var baseOptions = {
transition: 'page',
dependencies: [
{ src: 'lib/js/classList.js', condition: function() { return !document.body.classList; } },
{ src: 'plugin/markdown/marked.js', condition: function() { return !!document.querySelector( '[data-markdown]' ); } },
{ src: 'plugin/markdown/markdown.js', condition: function() { return !!document.querySelector( '[data-markdown]' ); } },
{ src: 'plugin/highlight/highlight.js', async: true, condition: function() { return !!document.querySelector( 'pre code' ); }, callback: function() { hljs.initHighlightingOnLoad(); } },
{ src: 'plugin/zoom-js/zoom.js', async: true },
{ src: 'plugin/notes/notes.js', async: true }
]
};
var configOptions = {"autoSlide":0,"loop":false,"slideNumber":true,"autoPlayMedia":true}
var initializeOptions = {};
extend(initializeOptions, baseOptions);
extend(initializeOptions, configOptions);
Reveal.initialize(initializeOptions);
})();
</script>
</body>
</html>
- セクションタグをネストすると、下に遷移するスライドを作れる。
- title要素の箇所以外のHTMLは特に修正しなくて良い。むしろ修正しない。
- セクションタグ内の要素配置は通常のHTMLと同様(レイアウトに関しては後程いくつか詳述)。
- 細かい配置はmarginの調整が重要
2. Chrome Developer Toolでレイアウト確認・調整
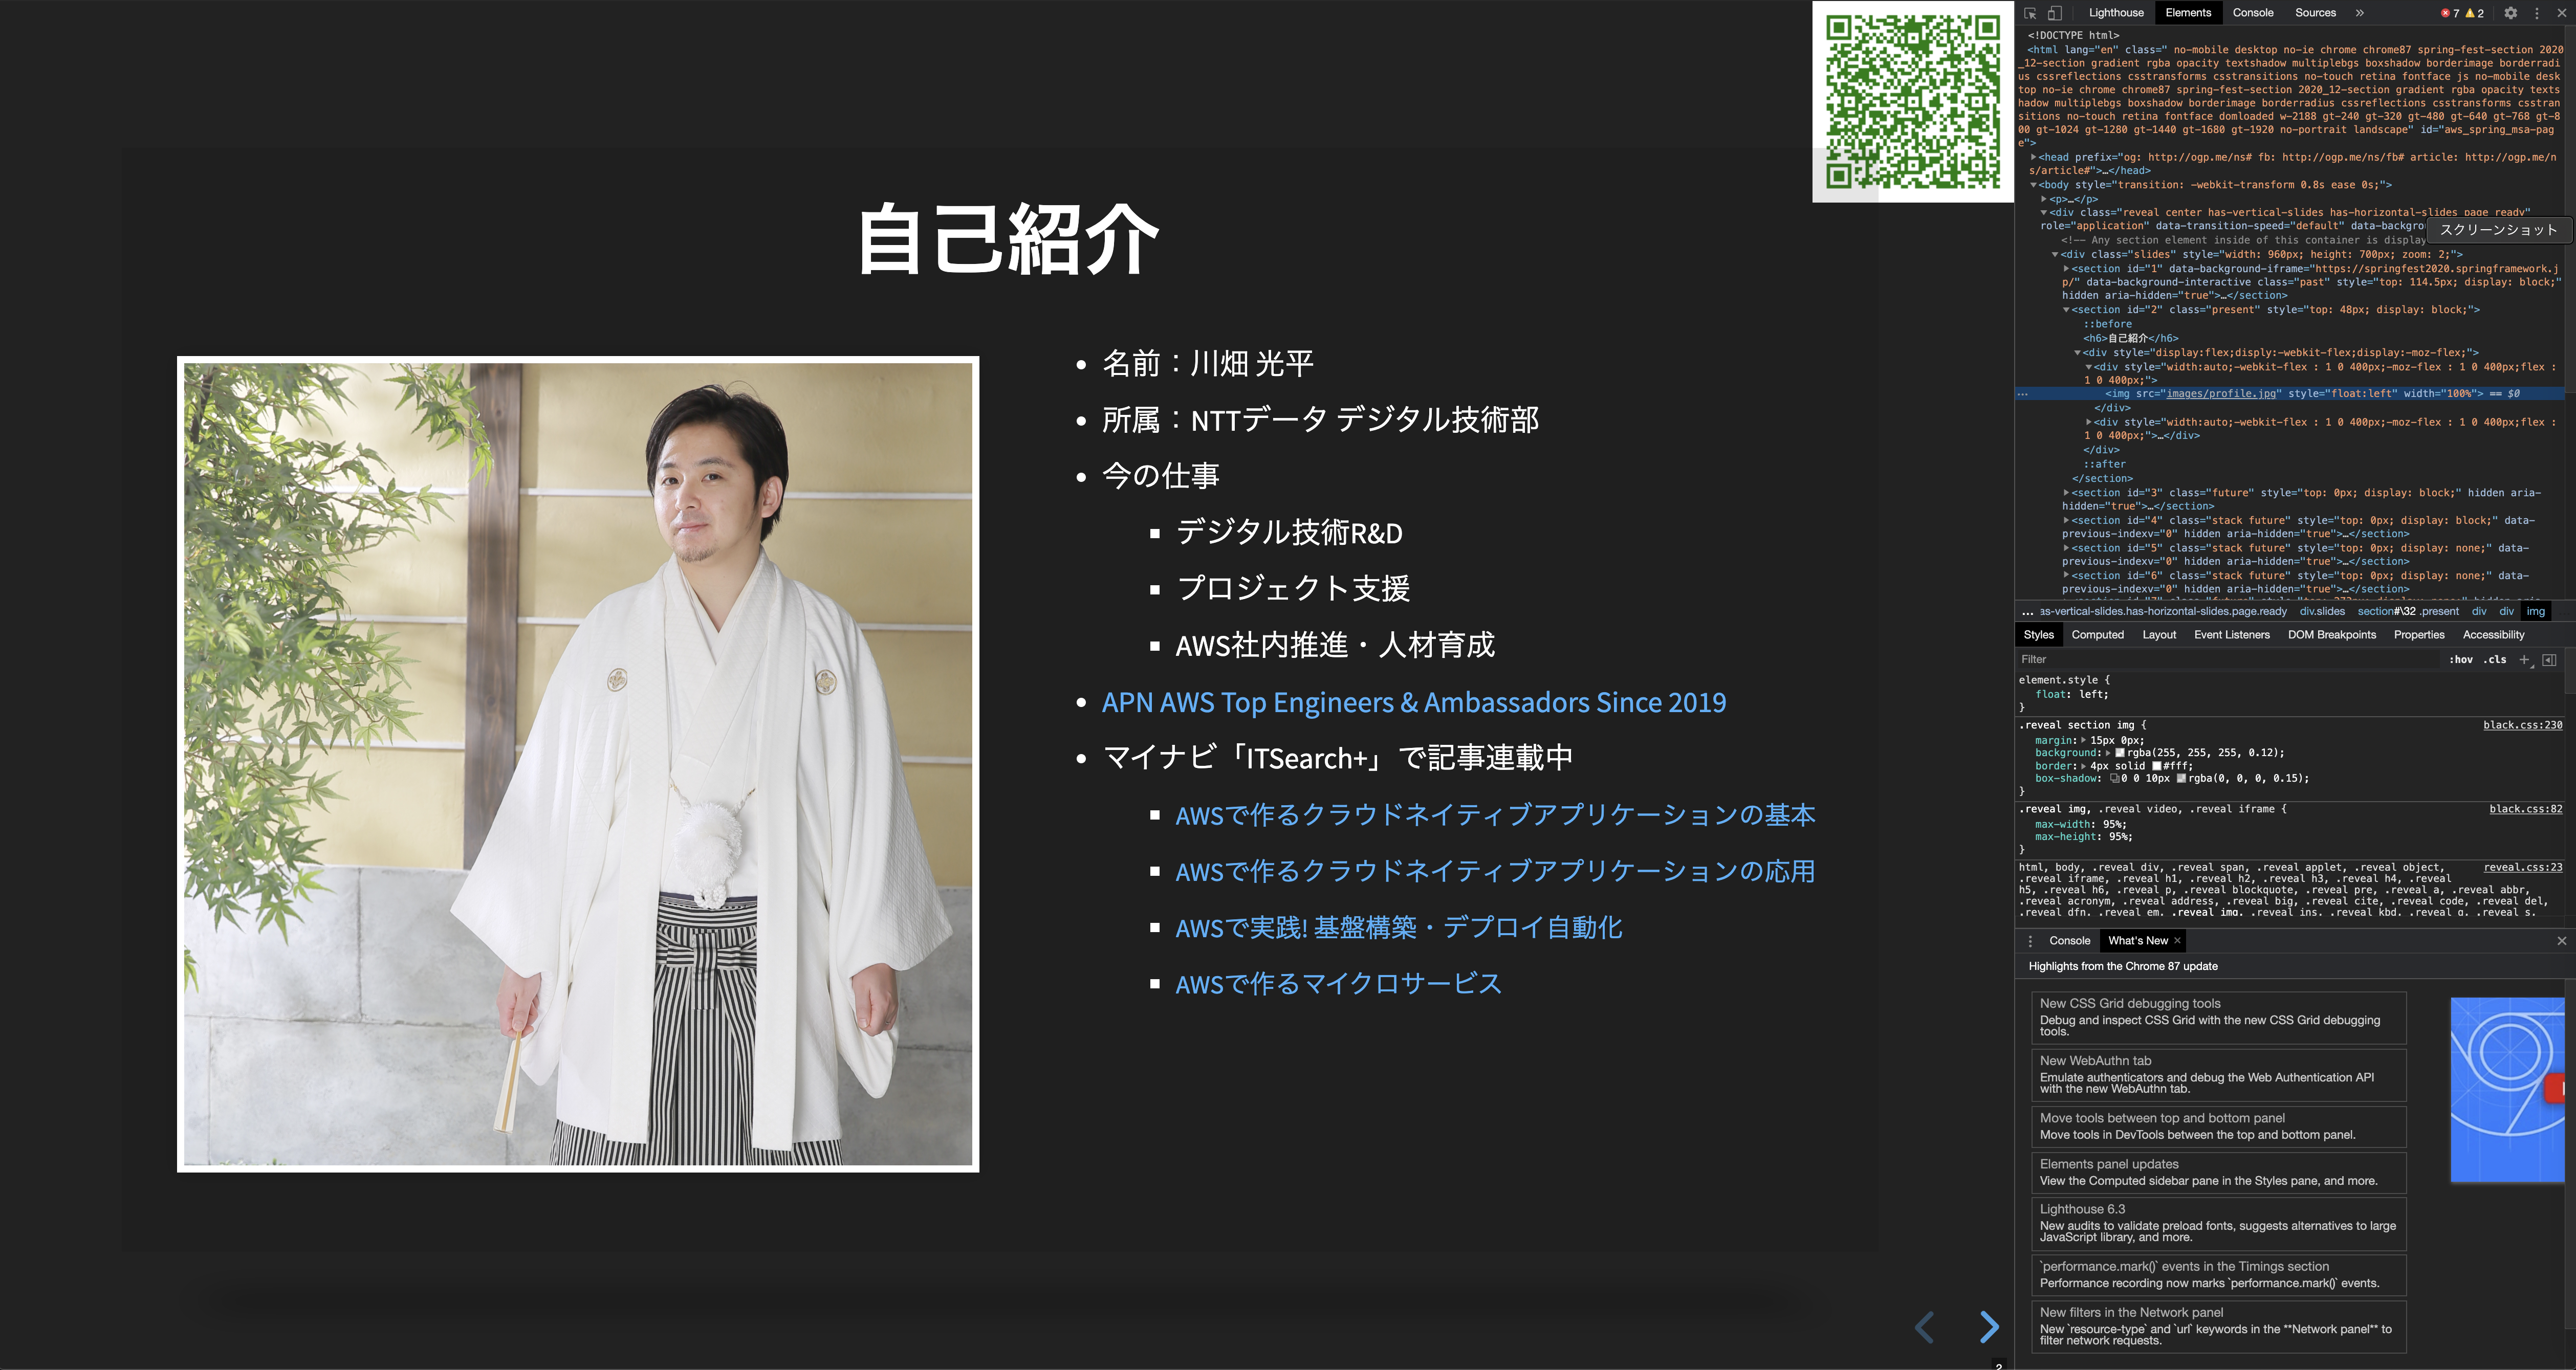
実際に表示されるイメージとレイアウトの調整はChrome Developer Toolで各要素のスタイルシートの当たり具合をみて調整します。
直接タグのstyle属性に指定した方がいいでしょう。
<section id="2">
<h6>自己紹介</h6>
<div style="display:flex;display:-webkit-flex;display:-moz-flex;">
<div style="width:auto;-webkit-flex : 1 0 400px;-moz-flex : 1 0 400px;flex : 1 0 400px;">
<img src="images/profile.jpg" width="100%">
</div>
<div style="width:auto;-webkit-flex : 1 0 400px;-moz-flex : 1 0 400px;flex : 1 0 400px;">
<ul>
<div style="font-size:16px; margin:auto">
<li style="margin: 10px 0px 10px">名前:川畑 光平</li>
<li style="margin: 10px 0px 10px">所属:NTTデータ デジタル技術部</li>
<li style="margin: 10px 0px 10px">今の仕事
<ul>
<li style="margin: 10px 0px 10px"><span style="font-size:16px">デジタル技術R&D</span></li>
<li style="margin: 10px 0px 10px"><span style="font-size:16px">プロジェクト支援</span></li>
<li style="margin: 10px 0px 10px"><span style="font-size:16px">AWS社内推進・人材育成</span></li>
</ul>
<li style="margin: 10px 0px 10px"><a href="https://aws.amazon.com/jp/partners/ambassadors/?cards-body.sort-by=item.additionalFields.ambassadorName&cards-body.sort-order=asc&cards-body.q=kawabata&cards-body.q_operator=AND" target="_blank">APN AWS Top Engineers & Ambassadors Since 2019</a></li>
<li style="margin: 10px 0px 10px">マイナビ「ITSearch+」で記事連載中
<ul>
<li style="margin: 10px 0px 10px">
<span style="font-size:14px"><a href="https://news.mynavi.jp/itsearch/series/devsoft/AWS.html" target="_blank">AWSで作るクラウドネイティブアプリケーションの基本</a></span>
</li>
<li style="margin: 10px 0px 10px">
<span style="font-size:14px"><a href="https://news.mynavi.jp/itsearch/series/devsoft/aws_adv.html" target="_blank">AWSで作るクラウドネイティブアプリケーションの応用</a></span>
</li>
<li style="margin: 10px 0px 10px">
<span style="font-size:14px"><a href="https://news.mynavi.jp/itsearch/series/devsoft/AWSAuto.html" target="_blank">AWSで実践! 基盤構築・デプロイ自動化</a></span>
</li>
<li style="margin: 10px 0px 10px">
<span style="font-size:14px"><a href="https://news.mynavi.jp/itsearch/series/devsoft/aws_2.html" target="_blank">AWSで作るマイクロサービス</a></span>
</li>
</ul>
</div>
</div>
</ul>
</div>
</section>
3. スライド内のレイアウトはflexボックスで調整
上記2のイメージのように左側に画像を配置して、右側にテキストを記述したい場合などはflexボックスを使用した方がよいです。
    <section id="2">
      <h6>タイトルなど</h6>
      <div style="display:flex; display:-webkit-flex; display:-moz-flex;">
        <div style="width:auto;-webkit-flex : 1 0 400px;-moz-flex : 1 0 400px;flex : 1 0 400px;">
          <img src="images/profile.jpg" width="100%">
        </div>
        <div style="width:auto;-webkit-flex : 1 0 400px;-moz-flex : 1 0 400px;flex : 1 0 400px;">
          なにがしかのテキスト
        </div>
      </div>
    </section>
4. 常に何かを固定表示
これも上記2のイメージのように、スライドのURLをQRコードで常に表示させたいなどの場合はbodyタグの一番冒頭で絶対位置指定で表示させると良いです。
  <body>
    <p><img src="images/site-qr.png" style="position:absolute; top:0px; right:0px; width:10%" ></p>
    <div class="reveal">
      <div class="slides">
5. 背景にiframeを差し込む
タイトルスライドとかでiframeで別のサイトを背景で表示させると結構Coolです。ちなみに下記は来週登壇予定のSpring Fest向けのスライドです。
サイトによっては別オリジンからのiframeのアクセスを禁止している場合がありますので、注意してください。
でも文字の位置調整は、brタグ使ってやってたり、これは逆にイケてませんね。
    <section id="1" data-background-iframe="https://springfest2020.springframework.jp/" data-background-interactive>
      <br/>
      <br/>
      <br/>
      <br/>
      <br/>
      <br/>
      <h3>AWSで作るマイクロサービス</h3>
    </section>
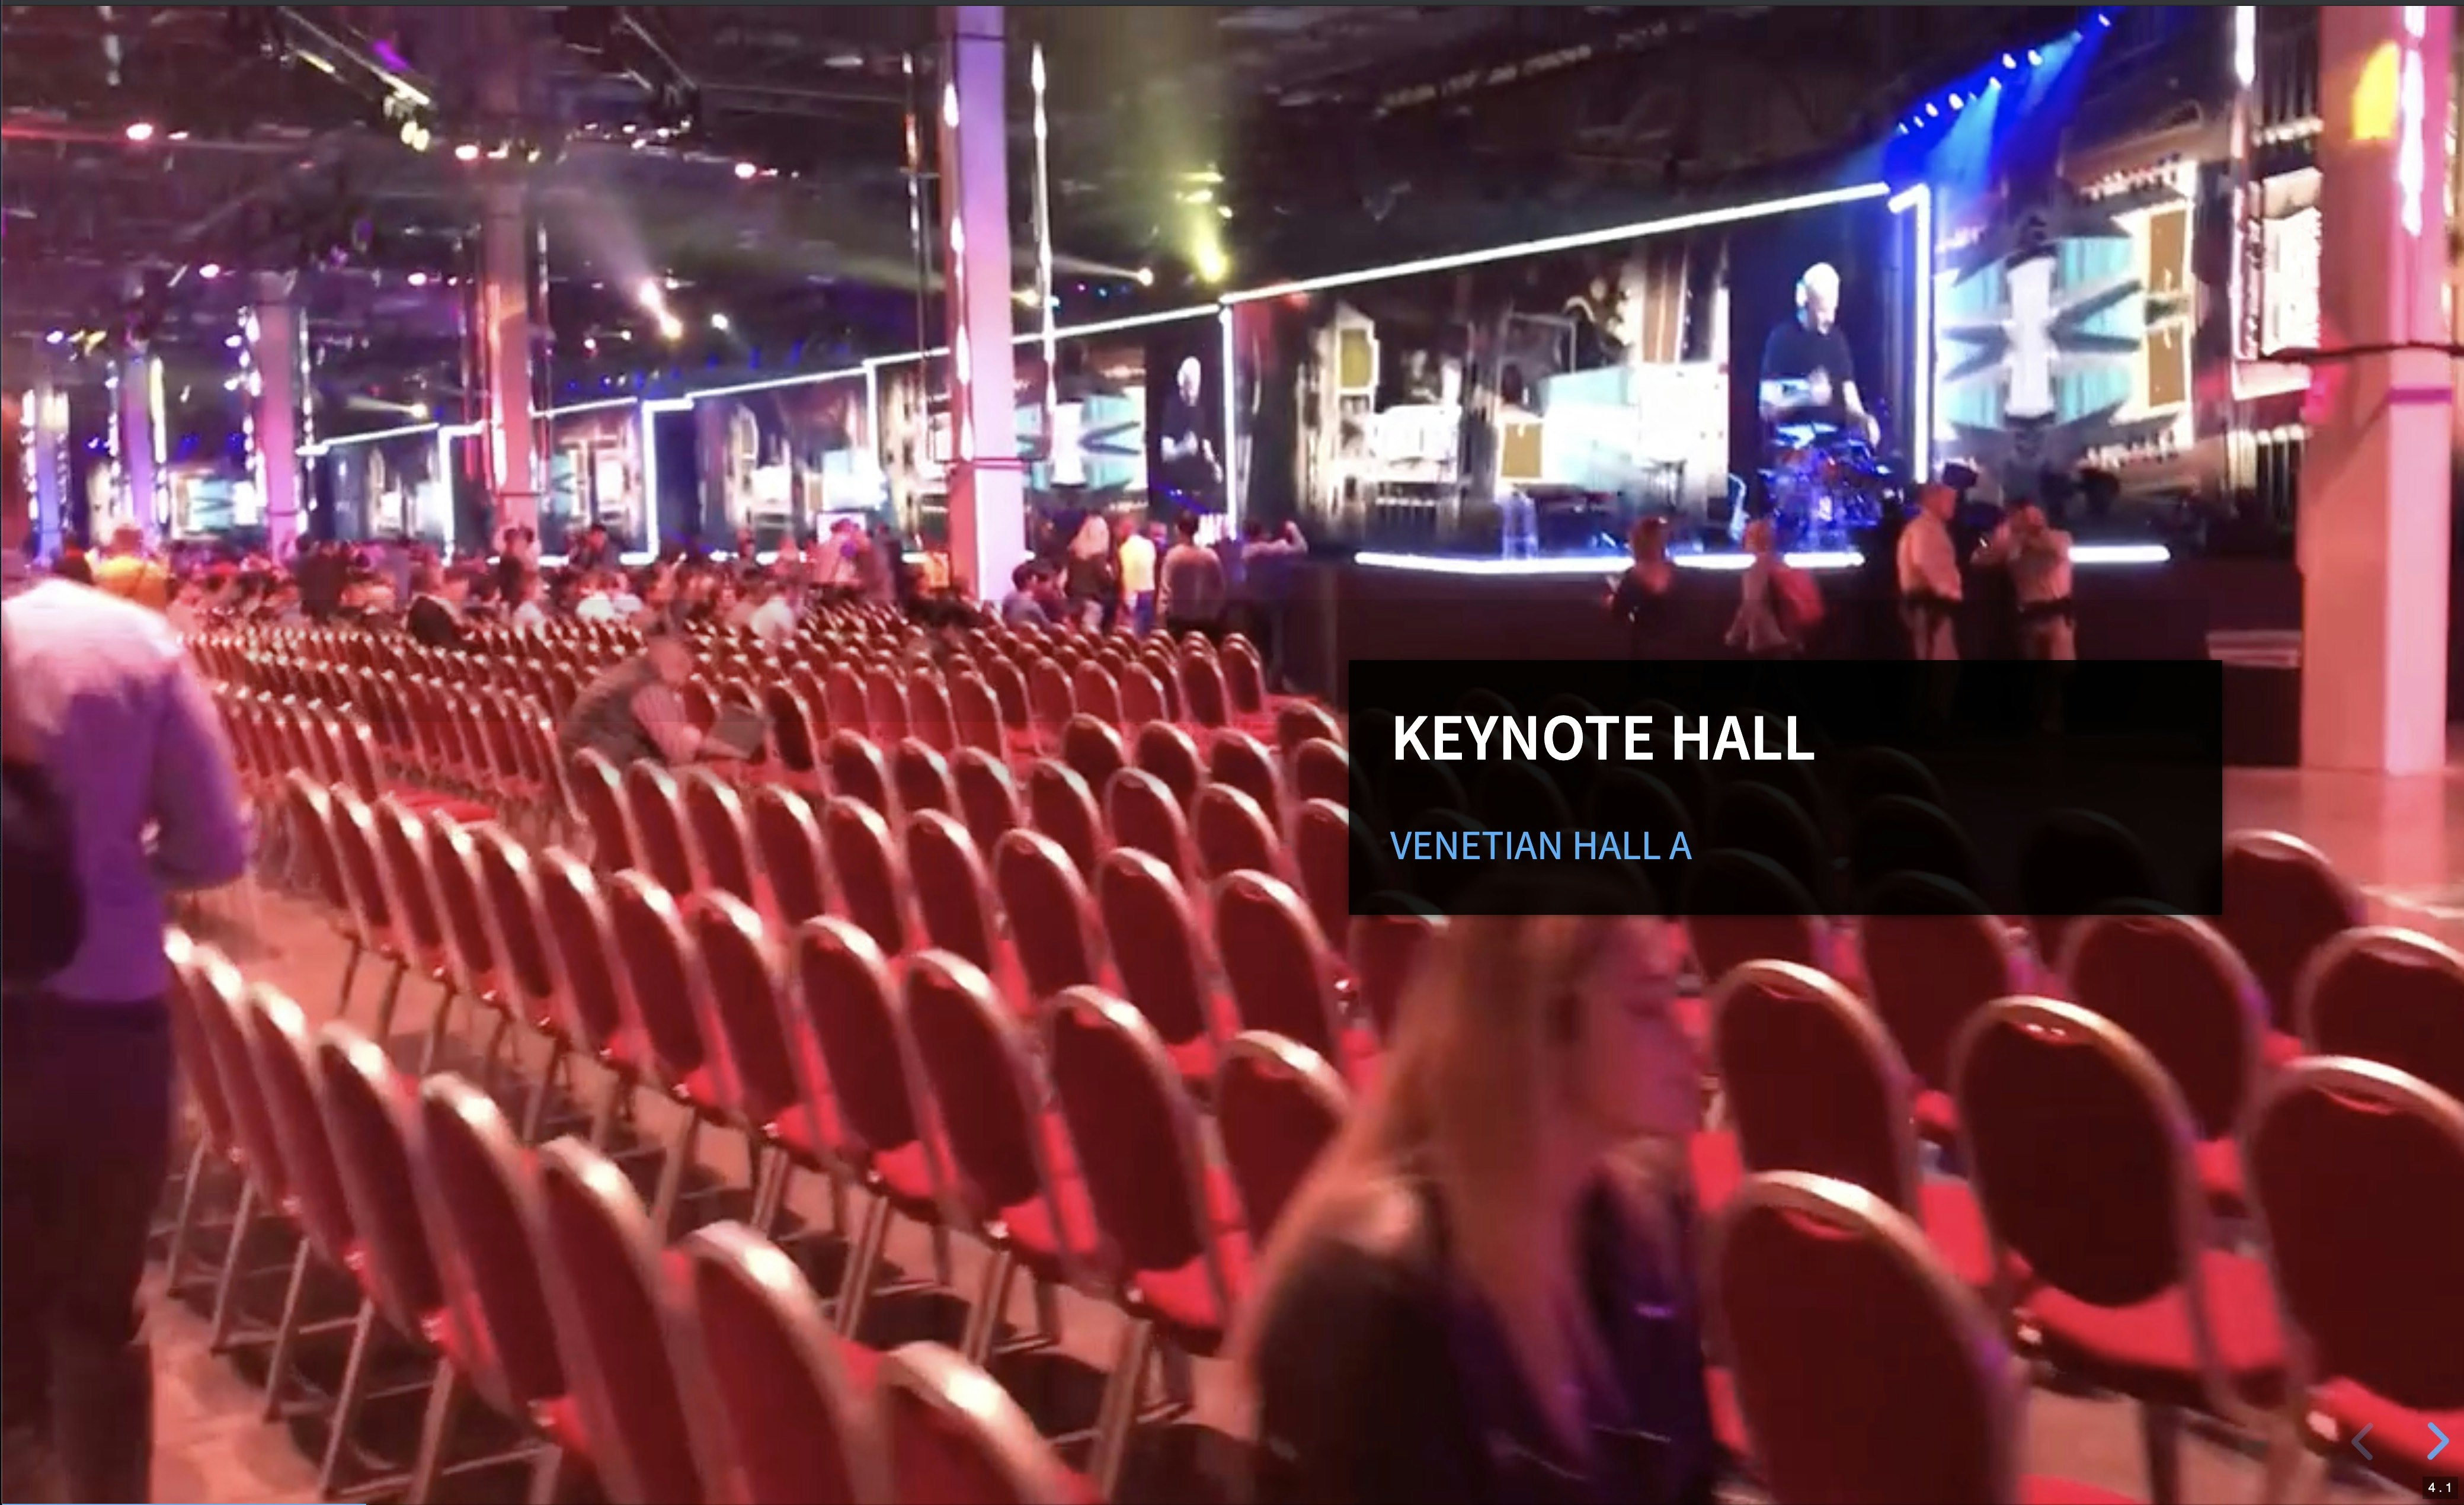
6. 背景に動画を差し込む
プレゼンテーションからいきなりシームレスに動画が再生されると結構クールだと思いませんか?
動画は重たいのでS3からダイレクトに取得するようにしましょう。テキストをどこにどれくらいの透明度で配置するかが腕の見せどころです。
<section data-background-video="https://debugroom-sample.s3-ap-northeast-1.amazonaws.com/keynote.mov" data-background-video-loop="" data-background-video-muted="" data-background-opacity="1">
  <div style="position: absolute; width: 40%; right: 0; box-shadow: 0 1px 4px rgba(0,0,0,0.5), 0 5px 25px rgba(0,0,0,0.2); background-color: rgba(0, 0, 0, 0.9); color: #fff; padding: 20px; font-size: 20px; text-align: left;">
    <h2>Keynote Hall</h2>
    <a href="https://youtu.be/OdzaTbaQwTg?t=2421" target="_blank">VENETIAN HALL A</a>
  </div>
</section>
7. ソースコードを記述する
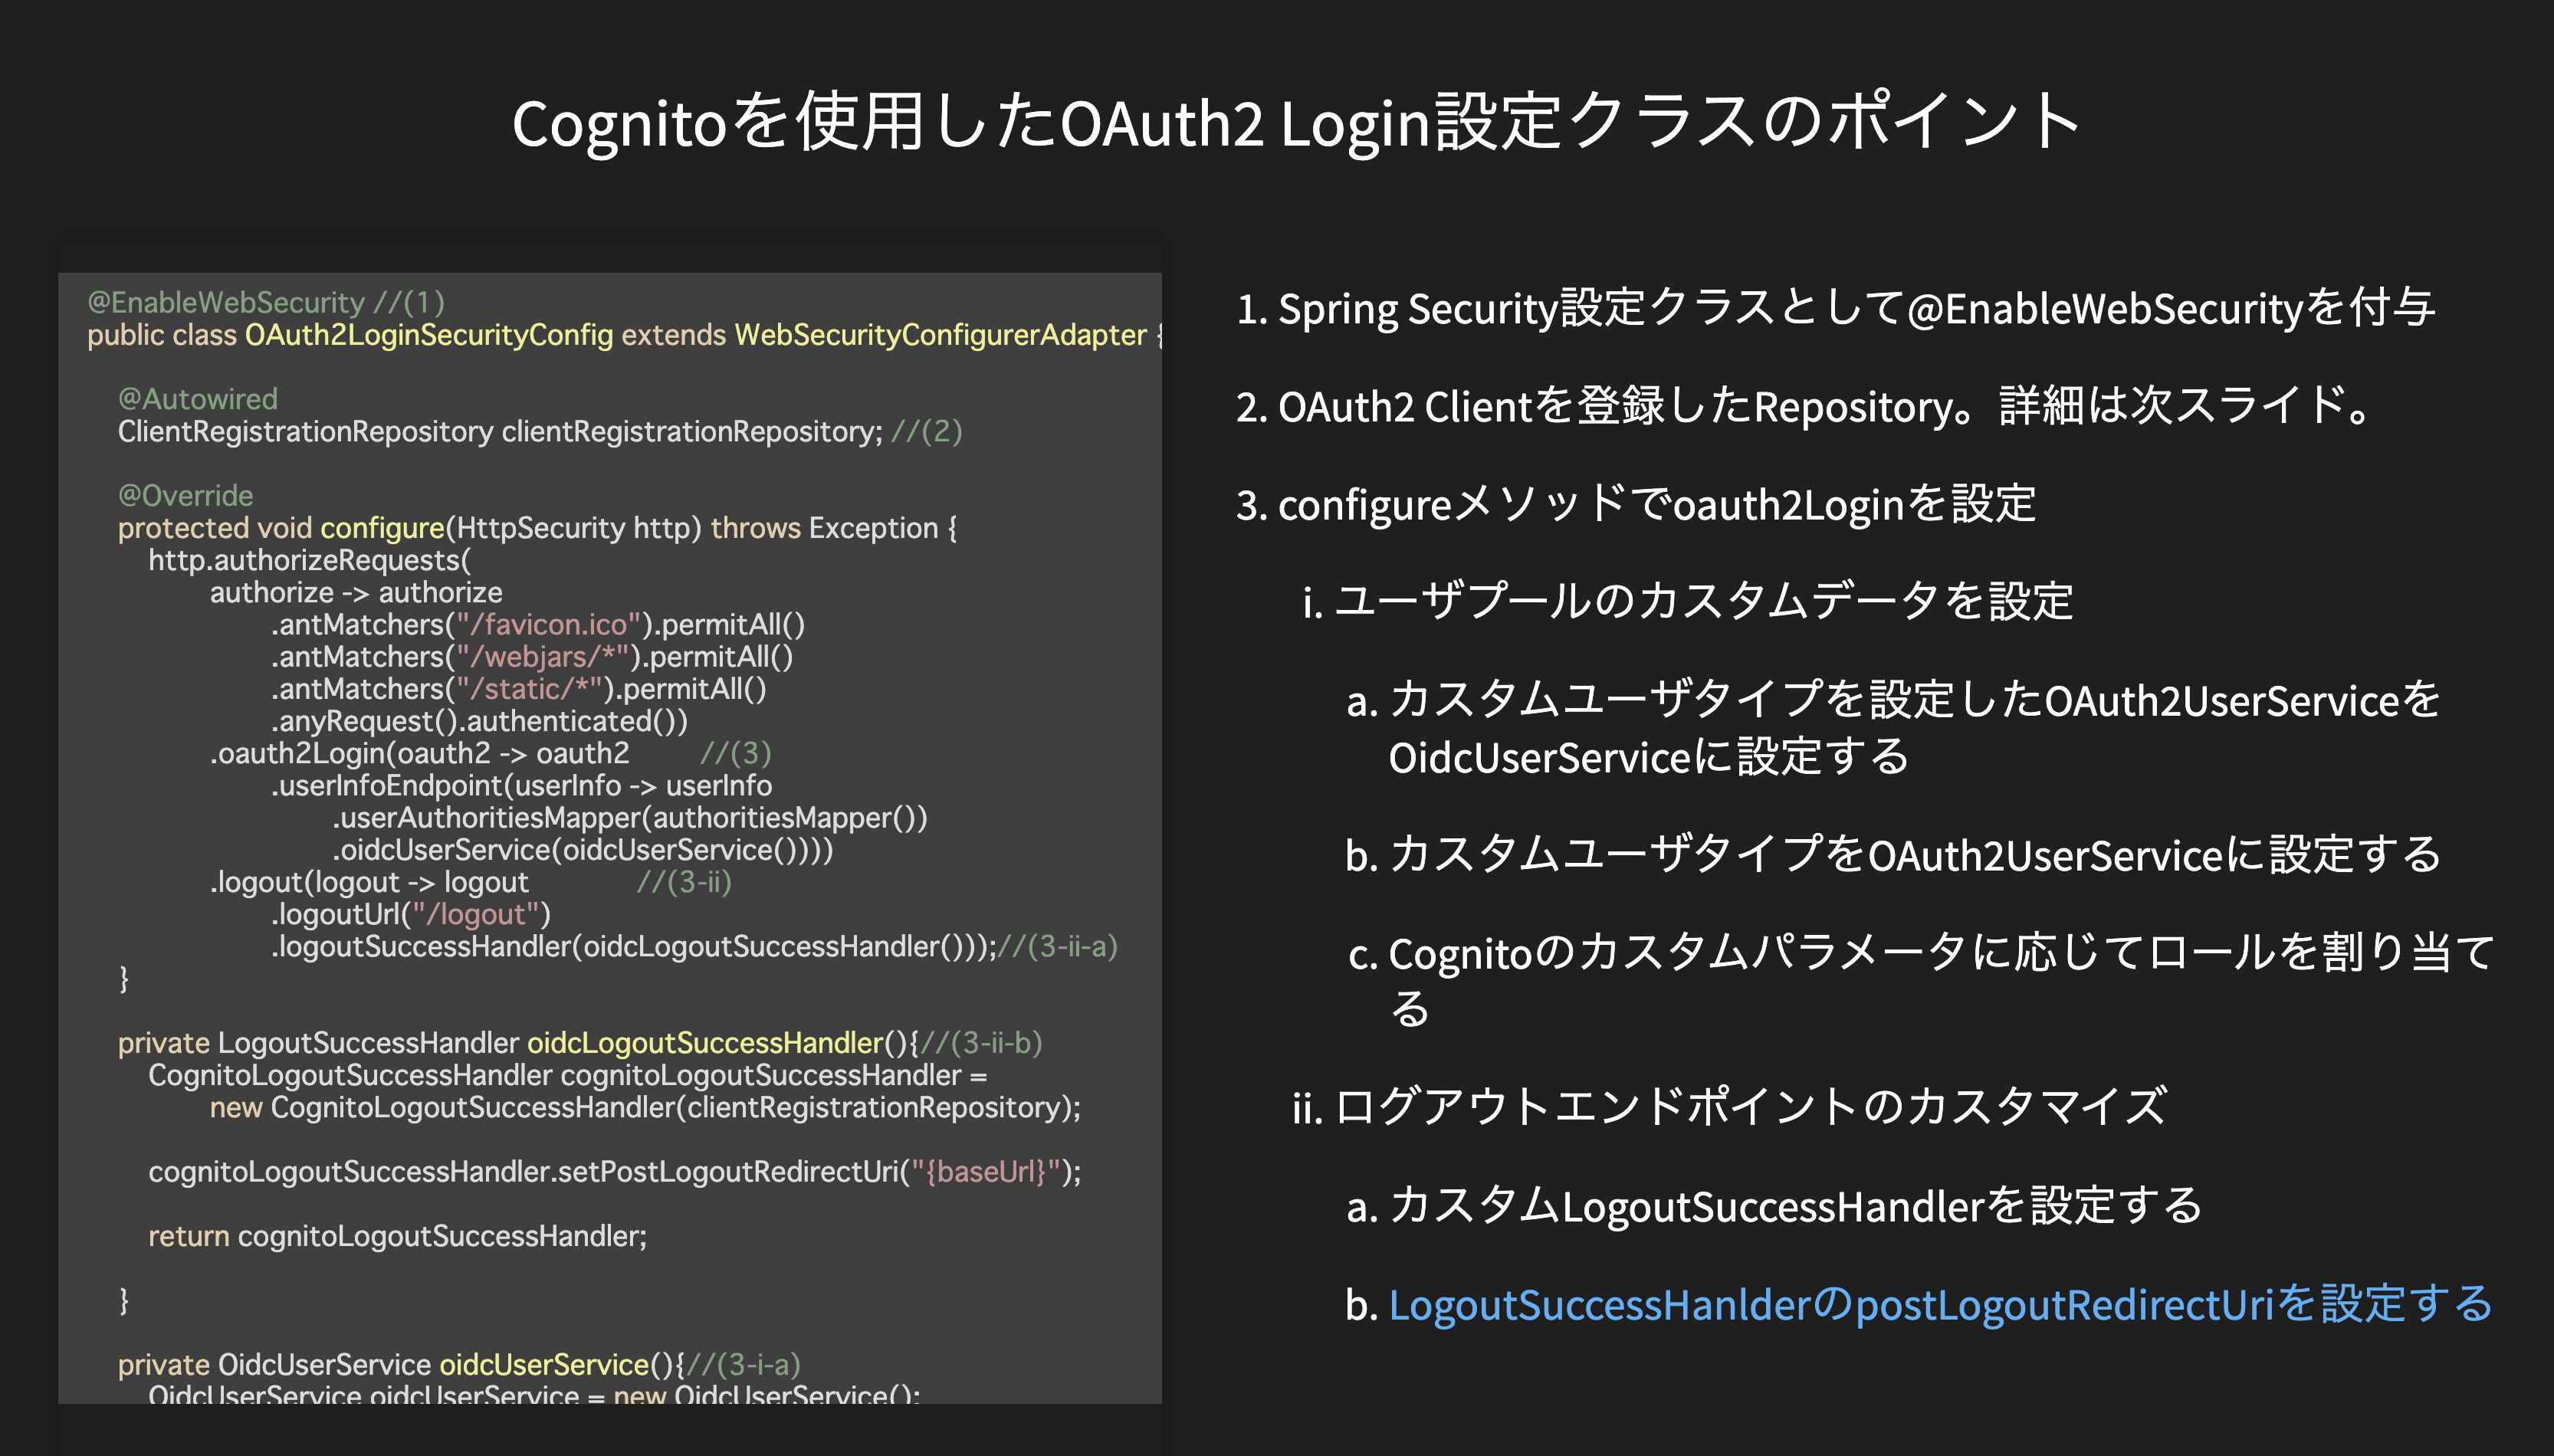
文字サイズをできるだけ大きくした方が良いですが、スクロールできるのはHTMLならではの良さですね。コードのシンタックスハイライトも自動的にやってくれるので、楽ちんです。
      <section id="6-9">
        <p><span style="font-size:24px">Cognitoを使用したOAuth2 Login設定クラスのポイント</span></p>
        <div style="display:flex;display:-webkit-flex;display:-moz-flex;">
        <pre style="font-size:8px; margin: 0;line-height:1.5em; width:400px">
          <code data-trim class="hljs java" data-noescape>

            @EnableWebSecurity //(1)
            public class OAuth2LoginSecurityConfig extends WebSecurityConfigurerAdapter {

                @Autowired
                ClientRegistrationRepository clientRegistrationRepository; //(2)

                @Override
                protected void configure(HttpSecurity http) throws Exception {
                    http.authorizeRequests(
                            authorize -> authorize
                                    .antMatchers("/favicon.ico").permitAll()
                                    .antMatchers("/webjars/*").permitAll()
                                    .antMatchers("/static/*").permitAll()
                                    .anyRequest().authenticated())
                            .oauth2Login(oauth2 -> oauth2         //(3)
                                    .userInfoEndpoint(userInfo -> userInfo
                                            .userAuthoritiesMapper(authoritiesMapper())
                                            .oidcUserService(oidcUserService())))
                            .logout(logout -> logout              //(3-ii)
                                    .logoutUrl("/logout")
                                    .logoutSuccessHandler(oidcLogoutSuccessHandler()));//(3-ii-a)
                }

                private LogoutSuccessHandler oidcLogoutSuccessHandler(){//(3-ii-b)
                    CognitoLogoutSuccessHandler cognitoLogoutSuccessHandler =
                            new CognitoLogoutSuccessHandler(clientRegistrationRepository);

                    cognitoLogoutSuccessHandler.setPostLogoutRedirectUri("{baseUrl}");

                    return cognitoLogoutSuccessHandler;

                }

                private OidcUserService oidcUserService(){//(3-i-a)
                    OidcUserService oidcUserService = new OidcUserService();
                    oidcUserService.setOauth2UserService(oAuth2UserService());
                    return oidcUserService;
                }

                private OAuth2UserService oAuth2UserService(){//(3-i-b)
                    Map<String, Class<? extends OAuth2User>> customUserTypes = new HashMap<>();
                    customUserTypes.put("cognito", CognitoOAuth2User.class);
                    return new CustomUserTypesOAuth2UserService(customUserTypes);
                }

                private GrantedAuthoritiesMapper authoritiesMapper(){//(3-i-c)
                    return authorities -> {
                        List<GrantedAuthority> grantedAuthorities = new ArrayList<>();
                        for (GrantedAuthority grantedAuthority : authorities){
                            grantedAuthorities.add(grantedAuthority);
                            if(OidcUserAuthority.class.isInstance(grantedAuthority)){
                                Map<String, Object> attributes = ((OidcUserAuthority)grantedAuthority).getAttributes();
                                JSONArray groups = (JSONArray) attributes.get("cognito:groups");
                                String isAdmin = (String) attributes.get("custom:isAdmin");
                                if(Objects.nonNull(groups) && groups.contains("admin")){
                                    grantedAuthorities.add( new SimpleGrantedAuthority("ROLE_ADMIN"));
                                }else if (Objects.nonNull(isAdmin) && Objects.equals(isAdmin, "1")){
                                    grantedAuthorities.add( new SimpleGrantedAuthority("ROLE_ADMIN"));
                                }
                            }
                        }
                        return grantedAuthorities;
                    };
                }
            }
          </code>
        </pre>
        <div style="width:auto;-webkit-flex : 1 0 400px;-moz-flex : 1 0 400px;flex : 1 0 400px;">
          <ol>
            <div style="font-size:16px; margin:auto">
              <li style="margin: 15px 0px 15px">Spring Security設定クラスとして@EnableWebSecurityを付与</li>
              <li style="margin: 15px 0px 15px">OAuth2 Clientを登録したRepository。詳細は次スライド。</li>
              <li style="margin: 15px 0px 15px">configureメソッドでoauth2Loginを設定</li>
              <ul style="margin-left:20px;list-style-type: lower-roman">
                <li style="margin: 15px 0px 15px">ユーザプールのカスタムデータを設定
                  <ol style="margin-left:20px;list-style-type: lower-latin">
                    <li style="margin: 15px 0px 15px">カスタムユーザタイプを設定したOAuth2UserServiceをOidcUserServiceに設定する</li>
                    <li style="margin: 15px 0px 15px">カスタムユーザタイプをOAuth2UserServiceに設定する</li>
                    <li style="margin: 15px 0px 15px">Cognitoのカスタムパラメータに応じてロールを割り当てる</li>
                  </ol>
                </li>
                <li style="margin: 15px 0px 15px">ログアウトエンドポイントのカスタマイズ</li>
                  <ol style="margin-left:20px;list-style-type: lower-latin">
                    <li style="margin: 15px 0px 15px">カスタムLogoutSuccessHandlerを設定する</li>
                    <li style="margin: 15px 0px 15px"><a href="https://docs.spring.io/spring-security/site/docs/current/reference/html5/#oauth2login-advanced-oidc-logout" target="_blank">LogoutSuccessHanlderのpostLogoutRedirectUriを設定する</a></li>
                  </ol>
              </ul>
            </div>
          </ol>
        </div>
        </div>
      </section>
最後に
アニメーション機能に触れられてないのですが、今後触ってみてTipsがあればアップデートしたいと思います。HTML直書きとなると少しハードル高く感じるかもしれませんが、
範囲も限定的ですし、エンジニアらしく技術で一歩進んだプレゼンテーションを作成してみてはいかがでしょうか?
It' time to shine with reveal.js!

