この記事はTech Trainの主催する【User Ver.】TechTrain Advent Calendar 2019の25日目、最後の記事です!
大阪工業大学の小林が担当します。
Pythonでのデバッガの記事です。
プログラミングを始めた当初は、デバッグといえばprintデバッグでしたが、デバッグツールの使い方を覚えればより快適なデバッグができるようになりました。
紹介するのはpdb、ipdbです。
ipdbは絶望的なまでに日本語資料がありません。
というか英語資料もなかなかありません。
頑張って調べてまとめました。
pdb
pdbとは?
pdbはデバッガの1つです。
デバッガとはエラーの原因を突き止めて修正するというデバッグをスムーズに簡単に行うことができるようにするツールです。
ドキュメントはこちら
デバッグモードへの入り方
以下のようなコードがあるとします。
import json
import requests

connpass_url = "https://connpass.com/api/v1/event/"
connpass_params = {
    "order": 3,
    "count": 100,
}

response = requests.get(connpass_url, connpass_params)
data = response.json()

osaka_events = []
for event in data["events"]:
    if event["address"] is not None:
        if "大阪" in event["address"]:
            osaka_events.append(event)
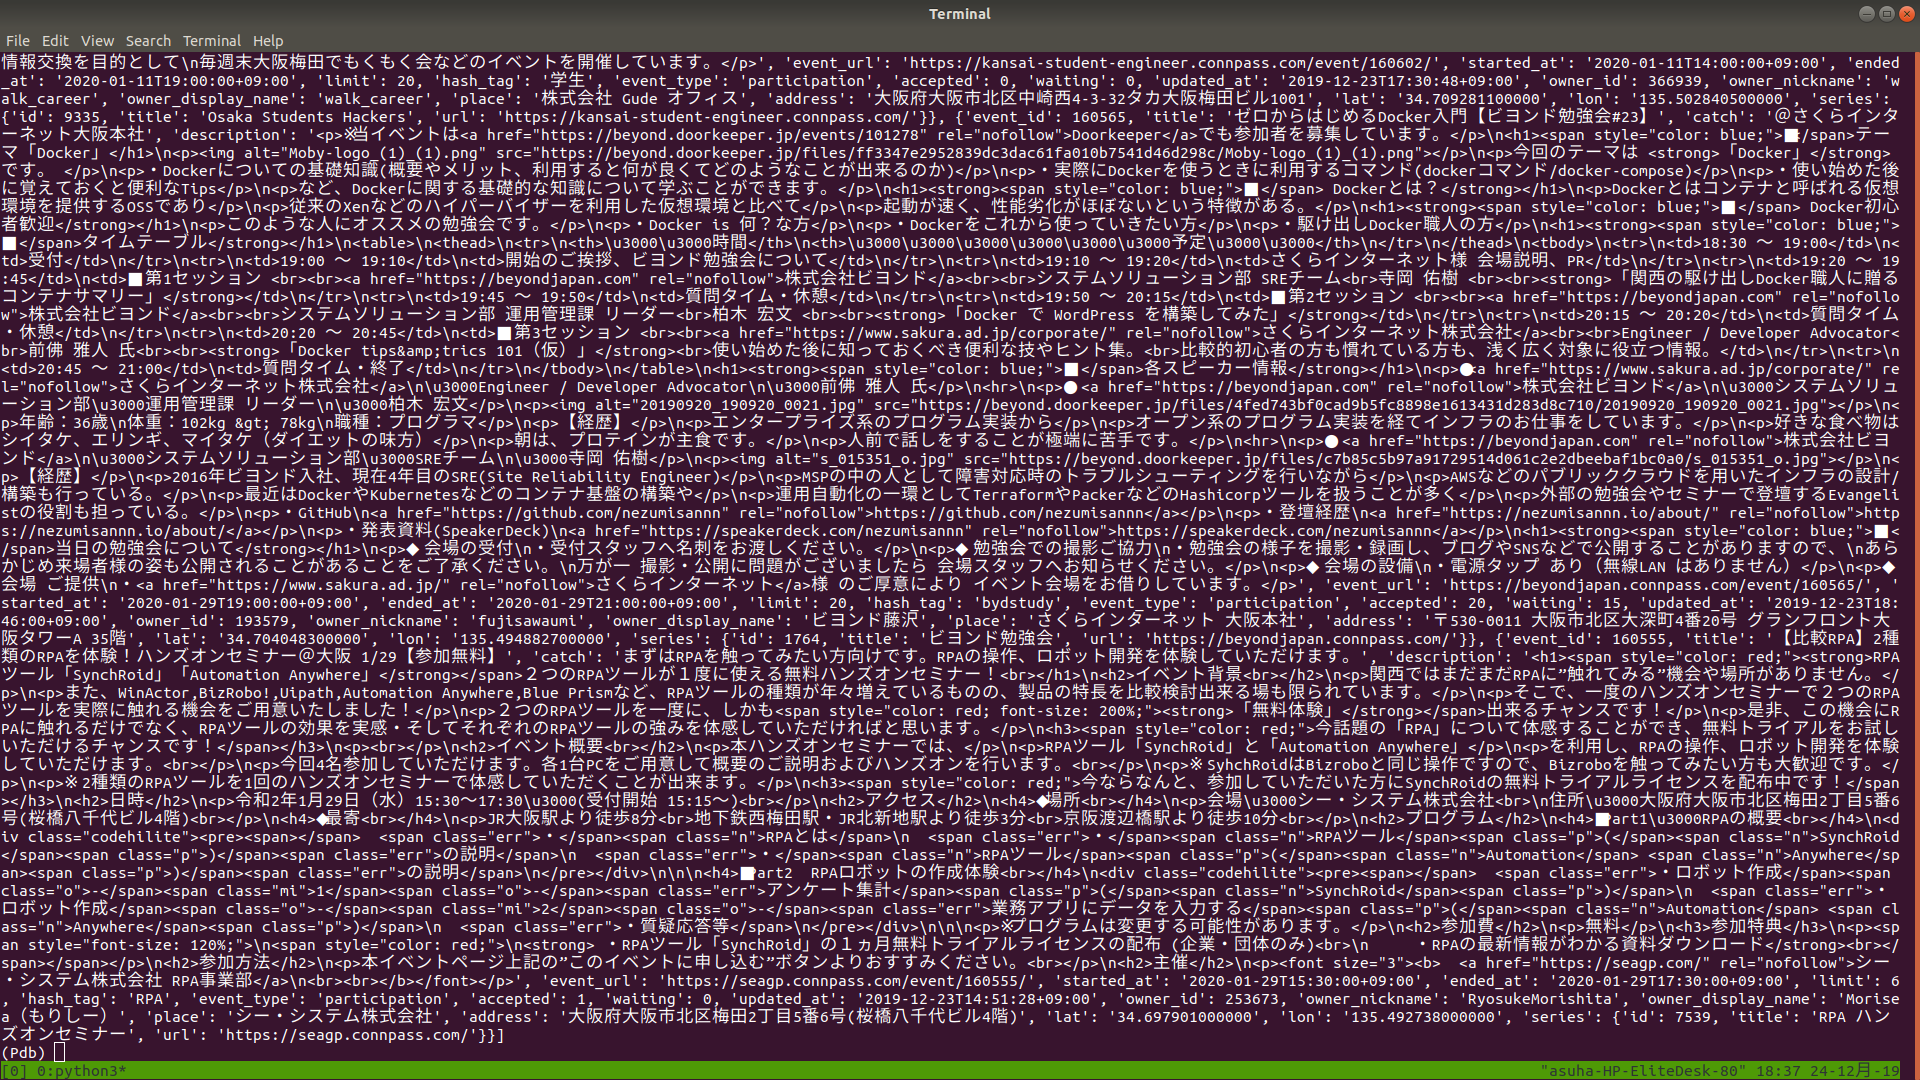
Connpass APIから大阪で開かれるイベントのみを抜き出して配列osaka_eventsに格納するプログラムです。
このまま実行しても次のように何も表示されません。
print()も使っていないので。
asuha on asuha-HP-EliteDesk-800-G4-TWR in ~/ipdb-qiita
$ python main.py
asuha on asuha-HP-EliteDesk-800-G4-TWR in ~/ipdb-qiita
$
osaka_eventsにデータを格納できたかを逐次確認したい場合、次のように書きます。
import json
import requests

connpass_url = "https://connpass.com/api/v1/event/"
connpass_params = {
    "order": 3,
    "count": 100,
}

response = requests.get(connpass_url, connpass_params)
data = response.json()

osaka_events = []
import pdb; pdb.set_trace() # 追加
for event in data["events"]:
    if event["address"] is not None:
        if "大阪" in event["address"]:
            osaka_events.append(event)
これを実行すると…
asuha on asuha-HP-EliteDesk-800-G4-TWR in ~/ipdb-qiita
$ python main.py
> /home/asuha/ipdb-qiita/main.py(15)<module>()
-> for event in data["events"]:
(Pdb)
pdbの画面に入ることができました。
(Pdb)と書かれたところにコマンドを打っていくことができます。
pdbの関数
pdbに入ることができる関数はpdb.set_trace()だけではありませんが、自分は使ったことがない。
これらは先程と同じようにプログラムの中に書くものです。
自分もよくわかっていないのでドキュメント参照
pdb基本コマンド
デバッグモードに入ったあとに打つことができるコマンドです。
詳細はドキュメントへ
コマンドの一覧はデバッグモードでhelpもしくは短縮形のhを打つことで見ることができます。
asuha on asuha-HP-EliteDesk-800-G4-TWR in ~/ipdb-qiita
$ python main.py
> /home/asuha/ipdb-qiita/main.py(15)<module>()
-> for event in data["events"]:
(Pdb) h

Documented commands (type help <topic>):
========================================
EOF    c          d        h         list      q        rv       undisplay
a      cl         debug    help      ll        quit     s        unt
alias  clear      disable  ignore    longlist  r        source   until
args   commands   display  interact  n         restart  step     up
b      condition  down     j         next      return   tbreak   w
break  cont       enable   jump      p         retval   u        whatis
bt     continue   exit     l         pp        run      unalias  where

Miscellaneous help topics:
==========================
exec  pdb

(Pdb)
また、h <コマンド名>と打つと、そのコマンドの説明を見ることができます。
例えば、h aliasと打ってみましょう。
(Pdb) h alias
alias [name [command [parameter parameter ...] ]]
        Create an alias called 'name' that executes 'command'.  The
        command must *not* be enclosed in quotes.  Replaceable
        parameters can be indicated by %1, %2, and so on, while %* is
        replaced by all the parameters.  If no command is given, the
        current alias for name is shown. If no name is given, all
        aliases are listed.

        Aliases may be nested and can contain anything that can be
        legally typed at the pdb prompt.  Note!  You *can* override
        internal pdb commands with aliases!  Those internal commands
        are then hidden until the alias is removed.  Aliasing is
        recursively applied to the first word of the command line; all
        other words in the line are left alone.

        As an example, here are two useful aliases (especially when
        placed in the .pdbrc file):

        # Print instance variables (usage "pi classInst")
        alias pi for k in %1.__dict__.keys(): print("%1.",k,"=",%1.__dict__[k])
        # Print instance variables in self
        alias ps pi self
(Pdb)
aliasについての細かな解説が得られます。(英語ですが)
これはドキュメントに書いてあることと同じなので英語を読むのが嫌なときはドキュメントを読みましょう。
いくつか基本のコマンドを紹介します。
ここに載せるもの以外も色々あるのでチェックしてみてください。
p(print), pp(prety-print)
変数の値を出力します。
Pythonでいうprint()
上のpでは見づらいことがあります。
例えば次のような場合。
以下を実行すると、
(Pdb) p data["events"]
改行なしだと見にくいですね。
ppを使うと、Pythonでpprintを使ったときのような効果が得られます。
(Pdb) pp data["events"]

l(list)
現在の行と前後5行ずつを出力します。
(Pdb) l
 10     response = requests.get(connpass_url, connpass_params)
 11     data = response.json()
 12
 13     osaka_events = []
 14     import pdb; pdb.set_trace()
 15  -> for event in data["events"]:
 16         if event["address"] is not None:
 17             if "大阪" in event["address"]:
 18                 osaka_events.append(event)
[EOF]
(Pdb)
この場合後ろの行が5行無かったので[EOF]が出力されていますね。
ll(long-list)
現在の関数またはフレームの全ソースコードを表示します。
この場合は全てのコードを表示しています。
(Pdb) ll
  1     import json
  2     import requests
  3
  4     connpass_url = "https://connpass.com/api/v1/event/"
  5     connpass_params = {
  6         "order": 3,
  7         "count": 100,
  8     }
  9
 10     response = requests.get(connpass_url, connpass_params)
 11     data = response.json()
 12
 13     osaka_events = []
 14     import pdb; pdb.set_trace()
 15  -> for event in data["events"]:
 16         if event["address"] is not None:
 17             if "大阪" in event["address"]:
 18                 osaka_events.append(event)
(Pdb)
関数の中にpdb.set_trace()を置いた場合、関数の中を全て表示します。
def func():
    import pdb; pdb.set_trace()

func()
(Pdb) ll
  1     def func():
  2  ->     import pdb; pdb.set_trace()
(Pdb)
n(next)
現在の行を実行して次の行に移ります。
> /home/asuha/ipdb-qiita/main.py(15)<module>()
-> for event in data["events"]:
(Pdb) n
> /home/asuha/ipdb-qiita/main.py(16)<module>()
-> if event["address"] is not None:
(Pdb) n
> /home/asuha/ipdb-qiita/main.py(17)<module>()
-> if "大阪" in event["address"]:
(Pdb) n
> /home/asuha/ipdb-qiita/main.py(15)<module>()
-> for event in data["events"]:
(Pdb) n
> /home/asuha/ipdb-qiita/main.py(16)<module>()
-> if event["address"] is not None:
(Pdb) n
> /home/asuha/ipdb-qiita/main.py(15)<module>()
-> for event in data["events"]:
15行目→16行目→17行目と写っていき、for文の終わりまでくるとまた15行目に戻って変数eventに新しい値を入れてプログラムを続行しています。
関数を呼び出す行に当たったときはその関数の中は1行1行実行せずに関数1行だけ実行して次の行へ進みます。
関数の中も1行1行実行したいときはs(step)を使いましょう。
r(return)
現在の関数が終わるまで実行する。
a(args)
現在の関数の引数リストを出力する。
w(where)
現在の行を表示します。
デバッグを初めてすぐやnを押したときなどに表示されるものそのままです。
pなどを使って色々表示することでログが流れてしまい、今の行が思い出せないときに使う。
(Pdb) osaka_events
[]
(Pdb) w
> /home/asuha/ipdb-qiita/main.py(17)<module>()
-> if "大阪" in event["address"]:
(Pdb)
q(quit)
デバッグを辞める際に使います。
c(continue)
次のブレークポイントが来るまで実行する。
ブレークポイントを置いていなかったら最後まで一気に実行してデバッガを抜けてしまうので注意。
b(breakpoint)
brakepointじゃないよ。
b <行数>でブレークポイントを置きます。
(Pdb) b 17
Breakpoint 1 at /home/asuha/ipdb-qiita/main.py:17
(Pdb) b 18
Breakpoint 2 at /home/asuha/ipdb-qiita/main.py:18
(Pdb)
このとき、Breakpoint 1という風に番号が与えられています。
引数無しでブレークポイントの一覧を表示します。
(Pdb) b
Num Type         Disp Enb   Where
1   breakpoint   keep yes   at /home/asuha/ipdb-qiita/main.py:17
2   breakpoint   keep yes   at /home/asuha/ipdb-qiita/main.py:18
(Pdb)
cl(clear)
引数無しで実行すると全てのブレークポイントを消します。
Clear all breaks?と聞かれるのでy(yes)を入力します。
(Pdb) b 17
Breakpoint 1 at /home/asuha/ipdb-qiita/main.py:17
(Pdb) b 18
Breakpoint 2 at /home/asuha/ipdb-qiita/main.py:18
(Pdb) cl
Clear all breaks? y
Deleted breakpoint 1 at /home/asuha/ipdb-qiita/main.py:17
Deleted breakpoint 2 at /home/asuha/ipdb-qiita/main.py:18
(Pdb)
ブレークポイントの番号を引数に指定することで1つだけ選択して消すことができます。
(Pdb) b 17
Breakpoint 3 at /home/asuha/ipdb-qiita/main.py:17
(Pdb) b 18
Breakpoint 4 at /home/asuha/ipdb-qiita/main.py:18
(Pdb) b
Num Type         Disp Enb   Where
3   breakpoint   keep yes   at /home/asuha/ipdb-qiita/main.py:17
4   breakpoint   keep yes   at /home/asuha/ipdb-qiita/main.py:18
(Pdb) cl 3
Deleted breakpoint 3 at /home/asuha/ipdb-qiita/main.py:17
(Pdb) b
Num Type         Disp Enb   Where
4   breakpoint   keep yes   at /home/asuha/ipdb-qiita/main.py:18
(Pdb)
disable, enable
指定したブレークポイントを無効にしたり有効にしたりできます。
(Pdb) b
Num Type         Disp Enb   Where
4   breakpoint   keep yes   at /home/asuha/ipdb-qiita/main.py:18
(Pdb) disable 4
Disabled breakpoint 4 at /home/asuha/ipdb-qiita/main.py:18
(Pdb) b
Num Type         Disp Enb   Where
4   breakpoint   keep no    at /home/asuha/ipdb-qiita/main.py:18
(Pdb) enable 4
Enabled breakpoint 4 at /home/asuha/ipdb-qiita/main.py:18
(Pdb) b
Num Type         Disp Enb   Where
4   breakpoint   keep yes   at /home/asuha/ipdb-qiita/main.py:18
(Pdb)
Enbのところがnoになったりyesになったりしているのがわかります。
引数無しで実行したからと言って全部変更されるわけではないらしい。
(Pdb) b
Num Type         Disp Enb   Where
4   breakpoint   keep yes   at /home/asuha/ipdb-qiita/main.py:18
5   breakpoint   keep yes   at /home/asuha/ipdb-qiita/main.py:17
(Pdb) disable
(Pdb) b
Num Type         Disp Enb   Where
4   breakpoint   keep yes   at /home/asuha/ipdb-qiita/main.py:18
5   breakpoint   keep yes   at /home/asuha/ipdb-qiita/main.py:17
(Pdb)
alias
自分オリジナルのコマンドを作ることができる。
あまり使いみちが思い浮かばないかもしれませんが、このaliasは次に紹介するpdbrcを使うことで真価を発揮します。
(Pdb) alias count len(osaka_events)
(Pdb) count
0
(Pdb)
.pdbrc
rcはRun Commandsの略です。
デバッガが起動したときにここに書いてあるコマンドを一通り実行します。
これは特にaliasを設定するときに役立ちます。
pdbに自分好みのコマンドを自由に作ることができるのです。
この.pdbrcはホームディレクトリとカレントディレクトリにあるものを順番に読み込んで実行します。
ホームディレクトリにあるコマンドとカレントディレクトリにあるコマンドの名前が被った場合はカレントディレクトリのもので上書きされます。
ドキュメントを参考に次のように書きました。
alias pi for k in %1.keys(): print("%1.",k,"=",%1[k])
辞書型のデータの値を一つずつ出力するコマンドです。
このように引数を取ることもできるため、応用幅は広いと言えます。
以下実行結果
(Pdb) pi osaka_events[0]
osaka_events[0]. event_id = 160650
osaka_events[0]. title = 1/9(木)Umekitaforce新年LT大会
osaka_events[0]. catch =
osaka_events[0]. description = <p>第26回UmekitaForceのご案内です。</p>
<p>今回は、新年一発目ということで、+LT大会を開催したいと思います。
Winter20についてや、Dreamforceについてのお話などざっくばらんにお話聞けると思います。</p>
<h2>アジェンダ</h2>
<ul>
<li>本日の会の説明:10分</li>
<li>LT
 5人くらい?
-DF19お土産プレゼント</li>
<li>まとめ、質問会:15分</li>
<li>懇親会 (近隣のお店にて)</li>
</ul>
<h2>事前に準備するもの</h2>
<ul>
<li>やる気! 元気!</li>
<li>※Wifiはご用意しますが、接続数が多くなると不安定になる可能性もございますのでお持ちの方はご持参いただけると助かります。</li>
</ul>
osaka_events[0]. event_url = https://umekitaforce.connpass.com/event/160650/
osaka_events[0]. started_at = 2020-01-09T19:30:00+09:00
osaka_events[0]. ended_at = 2020-01-09T21:30:00+09:00
osaka_events[0]. limit = None
osaka_events[0]. hash_tag =
osaka_events[0]. event_type = participation
osaka_events[0]. accepted = 2
osaka_events[0]. waiting = 0
osaka_events[0]. updated_at = 2019-12-24T19:01:50+09:00
osaka_events[0]. owner_id = 144430
osaka_events[0]. owner_nickname = HidekiAkizuki
osaka_events[0]. owner_display_name = hideki_akizuki
osaka_events[0]. place = 株式会社タンバリン
osaka_events[0]. address = 大阪市北区同心1丁目11番6号
osaka_events[0]. lat = 34.701625200000
osaka_events[0]. lon = 135.515051900000
osaka_events[0]. series = {'id': 3789, 'title': 'Umekita Force', 'url': 'https://umekitaforce.connpass.com/'}
(Pdb)
他の人の.pdbrcも参考にしてみると良いでしょう。
Python debugging tips - Stack Overflow
ipdb
ipdbとは?
ipdbのgithubのページにはこうあります。
ipdb exports functions to access the IPython debugger, which features tab completion, syntax highlighting, better tracebacks, better introspection with the same interface as the pdb module.
ipdbはIPythonデバッガにアクセスするための関数を提供します。IPythonデバッガはタブ補完、syntax highliting、よりよいtraceback、よりよいイントロスペクションなどの機能とpdbと同じインターフェースを持ちます
ipdbはpdbの拡張であるため、pdbの機能はそのまま使えると思ってよいでしょう。
pdbとipdbの違い
ipdbがpdbと違うところを並べていきます。
以下はすべてipdbの特徴です。
インストールが必要
pdbはPythonにデフォルトで入っていますが、ipdbを使うには下記のようなコマンドでインストールが必要です。
pip install ipdb
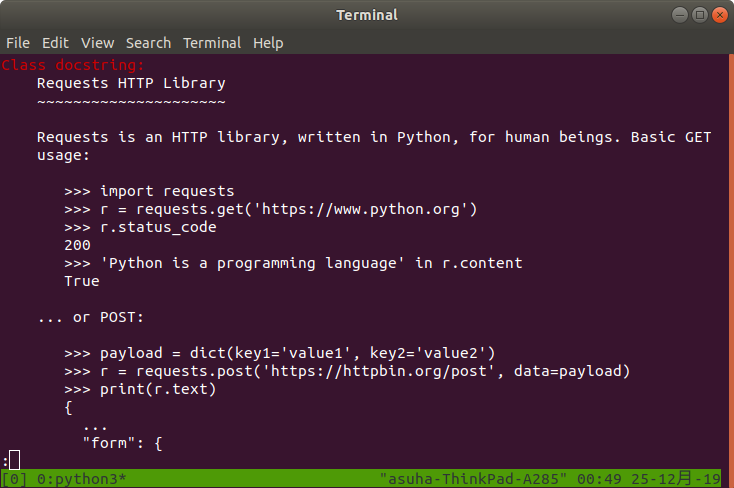
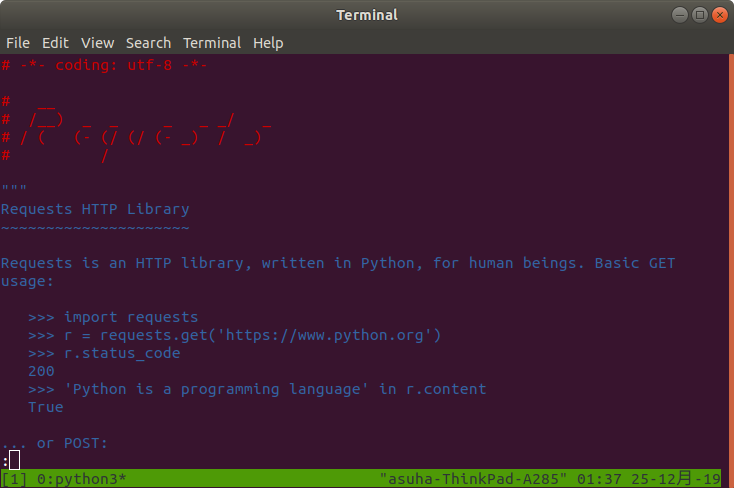
デバッガのデザインが少し違う
これがpdb

これがipdb
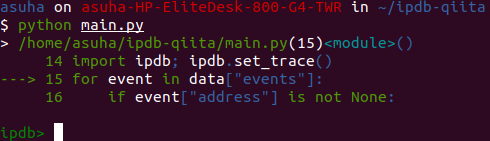
ipdbでは色分けがされます。
文法の認識はガバガバですが…
単語の区切りは認識できているので少しは見やすくなっているかも?
さらに現在の行の前後1列を表示しています。
これは現在の行がどこか認識するのに役に立ちそうです。
タブ補完機能がある
このプログラムではosaka_eventsという配列を用意しています。
これをosakaとだけ打ったところで、
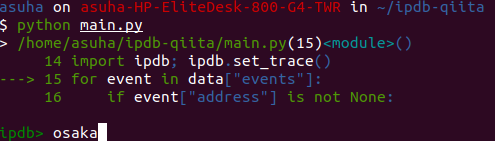
Tabキーを打つと、
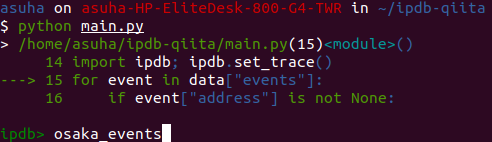
上のように補完してくれます。
複数候補がある場合は次のようになります。
このときはoだけ入力してTabキーを押しました。

使えるコマンドが増える
pdbのコマンド

ipdbのコマンド

以下がipdbで追加されたコマンドです。
これらはIPythonのマジックコマンドをipdb向けに使えるようにしたコマンドです。
- pdef
- pdoc
- pfile
- pinfo
- pinfo2
- psource
pdef
ipdb> h pdef
Print the call signature for any callable object.

        The debugger interface to %pdef
指定したオブジェクトの引数の情報を表示する。

pdoc
ipdb> h pdoc
Print the docstring for an object.

        The debugger interface to %pdoc.
docstringを表示します。
ipdb> pdoc requests
pfile
ipdb> h pfile
Print (or run through pager) the file where an object is defined.

        The debugger interface to %pfile.
指定したオブジェクトが定義されているファイルを開いて表示します。
pinfo
ipdb> h pinfo
Provide detailed information about an object.

        The debugger interface to %pinfo, i.e., obj?.
引数に指定したオブジェクトの情報を表示します。

pinfo2
ipdb> h pinfo2
Provide extra detailed information about an object.

        The debugger interface to %pinfo2, i.e., obj??.
引数に指定したオブジェクトの情報をpinfoより詳細に表示します。

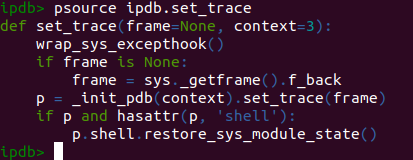
psource
ipdb> h psource
Print (or run through pager) the source code for an object.
引数に指定したオブジェクトのソースコードを表示します。
ipdbの導入方法
pdbと変わらず、
import ipdb; ipdb.set_trace()
といったように書けば動きます。
ただ、上でも述べたように、インストールが必要である点には注意しましょう。
参考
pdb --- Python デバッガ — Python 3.8.1 ドキュメント
gotcha/ipdb: Integration of IPython pdb
cpython/pdb.py at master · python/cpython
Python debugging tips - Stack Overflow
Christian Long's Blog · ipdb, the iPython debugger
Built-in magic commands — IPython 7.10.2 documentation