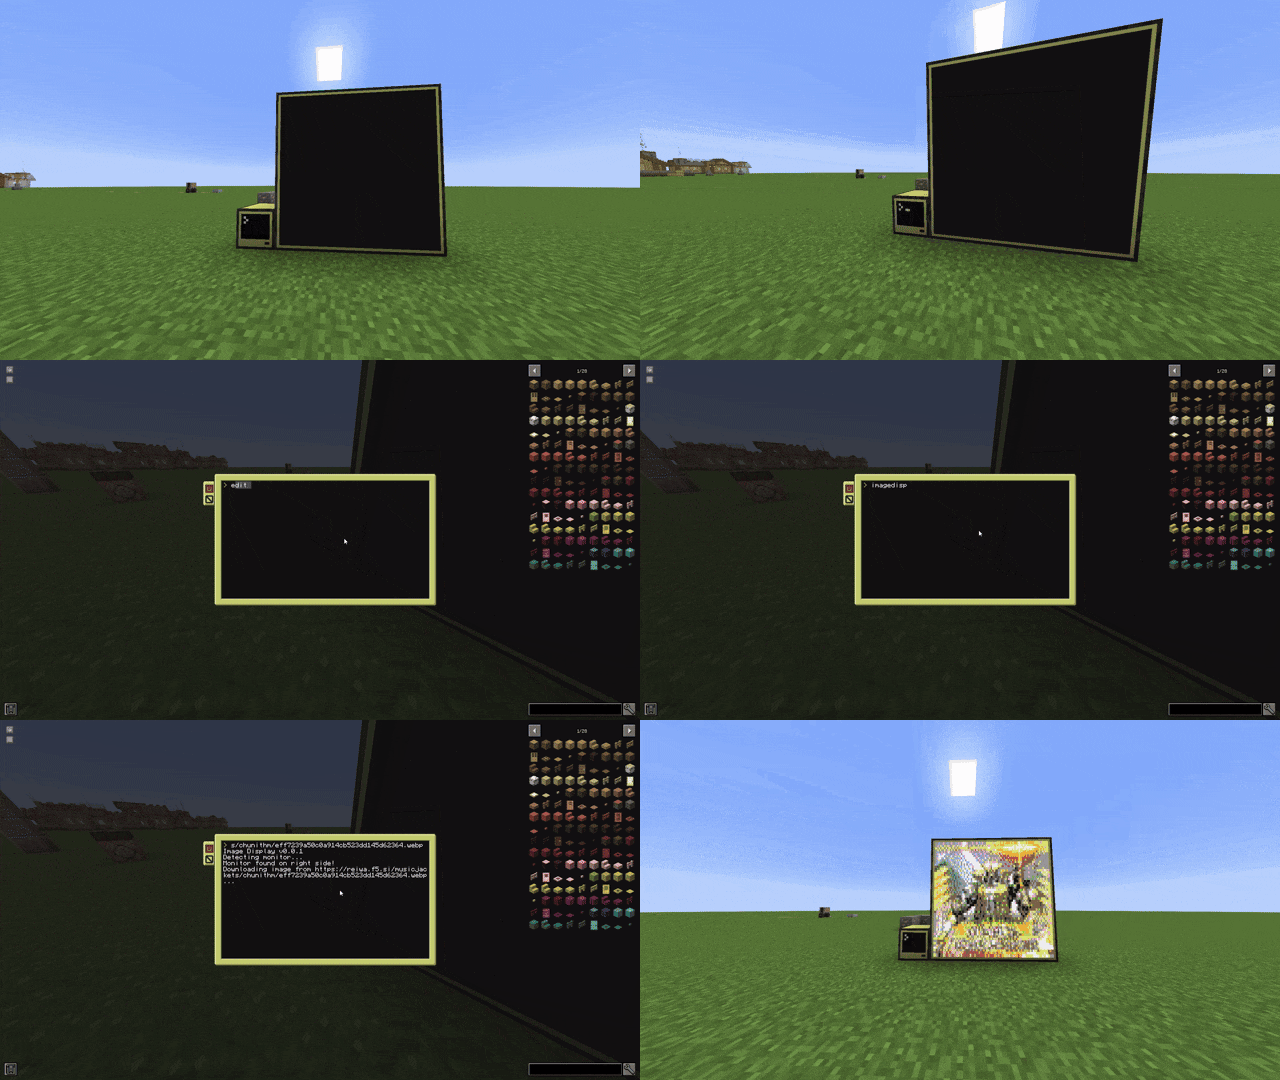
(表示されているのは音楽ゲーム『CHUNITHM』の楽曲『World Vanquisher』のジャケット画像です)
おことわり
本記事で使用しているMinecraftのMODは『CC:Tweaked』です。これはComputerCraftを元のMODとは別の作者がMinecraft 1.12.2以降に対応させた別物ではあるのですが、高度な互換性がありほとんど同じものと言っても過言ではないので、本記事内では一貫して『ComputerCraft』と呼ばせていただきます。
本記事で使用しているMinecraftは1.20.1、CC:Tweakedのバージョンは1.111.0です。
概要
Pythonで画像加工のAPIを作り、それをComputerCraftのHTTP APIを利用して引っ張ってきています。
画像加工自体はComputerCraft上で行っていません。
探したところ、純粋なLuaで書かれたPNGデコーダーがあったのですが、当然ながらPythonでやれることのほうが幅広いためPython側で画像を加工しています。
雑にいろいろな種類の画像を突っ込んでもなんとかしてくれるのが良いところです。
いまのところ画像の縦横比の維持は考慮しておらず、モニタサイズに合わせて伸縮してしまいます。
Pythonでの処理
サーバレス関数
Napkinというサーバレス関数のプラットフォームを使用しています。
無料で月間25000リクエストまで飛ばせます。公開するAPIとしては心もとないですが、身内でワイワイするには十分すぎるほどの無料枠だと思います。
Napkinという独自ライブラリを使った書き方をしますが、内部的にはflaskを使用しているようです。
ライブラリはPillowとrequestsを利用しています。
ソースコードはほぼ全てClaudeとChatGPTに書かせました。
from napkin import request, response
from PIL import Image
from requests import get
from io import BytesIO

def download_image(url):
    response = get(url)
    return Image.open(BytesIO(response.content))

def convertcc(image) -> str:
    base_palette = [
        [240, 240, 240], [242, 178, 51], [229, 127, 216], [153, 178, 242],
        [222, 222, 108], [127, 204, 25], [242, 178, 204], [76, 76, 76],
        [153, 153, 153], [76, 153, 178], [178, 102, 229], [37, 49, 146],
        [127, 102, 76], [87, 166, 78], [204, 76, 76], [25, 25, 25]
    ]

    color_to_char = {
        (240, 240, 240): "0", (242, 178, 51): "1", (229, 127, 216): "2", (153, 178, 242): "3",
        (222, 222, 108): "4", (127, 204, 25): "5", (242, 178, 204): "6", (76, 76, 76): "7",
        (153, 153, 153): "8", (76, 153, 178): "9", (178, 102, 229): "a", (37, 49, 146): "b",
        (127, 102, 76): "c", (87, 166, 78): "d", (204, 76, 76): "e", (25, 25, 25): "f"
    }

    flat_palette = sum(base_palette, [])
    palette = (flat_palette * (256 // len(base_palette) + 1))[:256*3]
    palette_bytes = bytes(palette)
    palette_image = Image.new("P", (1, 1))
    palette_image.putpalette(palette_bytes)
    reduced_image = image.quantize(palette=palette_image)
    width, height = reduced_image.size
    pixels = reduced_image.load()

    text_representation = ""
    for y in range(height):
        for x in range(width):
            color_index = pixels[x, y]
            color = tuple(palette_bytes[color_index*3:color_index*3+3])
            text_representation += color_to_char[color]
        text_representation += "\n"

    return text_representation


def process_image(url, target_width, target_height):
    try:
        image = download_image(url)

        if target_width and target_height:
            image = image.resize((target_width, target_height), Image.LANCZOS)

        return convertcc(image)
    except Exception as e:
        print(f"Error processing image: {str(e)}")  # For logging purposes
        return None

def main():
    image_url = request.args.get("image", "")
    width = request.args.get("width")
    height = request.args.get("height")

    if not image_url:
        response.status_code = 400
        response.body = "No image URL provided"
        return

    try:
        target_width = int(width) if width else None
        target_height = int(height) if height else None
    except ValueError:
        response.status_code = 400
        response.body = "Invalid width or height parameter. Please provide integer values."
        return

    result = process_image(image_url, target_width, target_height)

    if result is None:
        response.status_code = 400
        response.body = "Error processing the image"
    else:
        response.status_code = 200
        response.body = result
        response.headers["Content-Type"] = "text/plain"

main()
減色処理
ComputerCraftは残念ながら16777216色の表示には対応しておらず、それどころかgifもびっくりの16色しか使えません。
それもただ16色に減色すれば良いというわけではなく、普通の色からは若干ずれた独自の16色を使用しています。
| 色 | カラーコード | 画像データ | 数値 |
|---|---|---|---|
| White | #F0F0F0 |
0 | 1 |
| Orange | #F2B233 |
1 | 2 |
| Magenta | #E57FD8 |
2 | 4 |
| LightBlue | #99B2F2 |
3 | 8 |
| Yellow | #DEDE6C |
4 | 16 |
| Lime | #7FCC19 |
5 | 32 |
| Pink | #F2B2CC |
6 | 64 |
| Gray | #4C4C4C |
7 | 128 |
| LightGray | #999999 |
8 | 256 |
| Cyan | #4C99B2 |
9 | 512 |
| Purple | #B266E5 |
a | 1024 |
| Blue | #253192 |
b | 2048 |
| Brown | #7F664C |
c | 4096 |
| Green | #57A64E |
d | 8192 |
| Red | #CC4C4C |
e | 16384 |
| Black | #191919 |
f | 32768 |
Pillowを使うと『パレットを利用して減色する』という機能があったので、そのようにしました。(convertcc関数内)
若干書き方に癖があります。AIに生成させたのでもしかしたらもっと良い書き方があるのかもしれませんが、ひとまず動作しているので良しとします。
画像形式
ComputerCraftには独自の形式の画像を表示する仕組みがデフォルトで備わっています (今回は画像フォーマットだけ利用して仕組み自体は使いませんが)。
形式はプレーンテキストで、前述の表にある『画像データ』列がまさにそれぞれの画素の色を表します。
サイズが36 x 24の画像は以下のようになります。
88888686088488444441444044444444
48464844446464646414004000044114
3608883600688868446111111111e484
6083086300003838888ec1e11ecc8888
897883803000680666488ec48cc18888
cd48880803600446408888cce8888888
444cd8803084048d8c81c8c8c848c446
41488798008dc8ccc78cc67758888884
464cc8988034ccc78ccd80fce77c8446
41448cd8808c888c8444ccc75fc8c884
444edc898867446004647f771c864844
4144c87888d7cc484ccccff688605c84
4648ccc88f777cc8cc5c77d7c4ccc148
441684888777c7c8dc7cf80fc8ccc784
46848cc77c0cccdcccc1c60c7fc5cc48
8688177f868c77c8ccdcc8487c464818
8048467cc8d77cc7ccc77cdcc8488484
868005c1441cc1514544c51c11418484
606081114d8484848884484111488644
8448644148848c86c686ccc411488464
48518848418464484818188448484061
8ce464888888884688c88818cc8c0006
4884848188818188481cccc4c8844046
cc18e684ececec11114414144604446c

潰れている上に著しく解像度が落ちていますが、冒頭で表示していたものと同じく『World Vanquisher』のジャケット画像です。
なぜ縦横比が変わっているのかについては後述します。
プログラム上ではこの画像文字列を直接返すようにしています。
ComputerCraft (Lua) での処理
ソースコードは以下の通りです。
function drawPx(x, y, color, mon)
  mon.setBackgroundColor(color)
  mon.setCursorPos(x, y)
  mon.write(" ")
end

print("Image Display v0.0.1")

local url = ...
if url == nil then
  print("Usage: imagedisp <URL>")
end

-- Get monitor's direction
print("Detecting monitor...")
local p_dirs = peripheral.getNames()
local monitorSide = ""
for i = 1, #p_dirs do
  periType = peripheral.getType(p_dirs[i])
  if periType == "monitor" then
    monitorSide = p_dirs[i]
    print("Monitor found on "..monitorSide.." side!")
    break
  end
end

-- Get monitor's handler
local mon = peripheral.wrap(monitorSide)
mon.setTextScale(0.5)

-- Get image from Internet
print("Downloading image from "..url.."...")
local width, height = mon.getSize()
local imgHandler = http.get("{サーバレス関数URL}?image="..url.."&width="..width.."&height="..height)
print("Loading image...")
local imageText = imgHandler.readAll()

local hex_table = {["0"] = 1, ["1"] = 2, ["2"] = 4, ["3"] = 8, ["4"] = 16, ["5"] = 32, ["6"] = 64, ["7"] = 128, ["8"] = 256, ["9"] = 512, ["a"] = 1024, ["b"] = 2048, ["c"] = 4096, ["d"] = 8192, ["e"] = 16384, ["f"] = 32768}
local crrX = 1
local crrY = 1
for i=1, #imageText do
  local char = string.sub(imageText, i, i)
  if char == "\n" then
    crrY = crrY + 1
    crrX = 1
  else
    local colorValue = hex_table[char]
    drawPx(crrX, crrY, colorValue, mon)
    crrX = crrX + 1
  end
end

print("Done!")
モニターを隣接させておけば自動的に検出して画像を表示してくれます。
モニター操作
外部に取り付けたモニターを操作するためには、
- モニターの操作用インスタンスを取得して操作する
- ターミナル表示をモニターにリダイレクトする
の2つの手段があります。
このプログラムでは前者の手法を使っています。JavaScriptからcanvas要素を弄る感覚に少し似ている気がします。
実はこの方法ではdrawRectangle()などの便利な関数が使えないのですが、今回は画像を1pxずつ描いていくので簡単な関数を自作してなんとかしました。
文字サイズの変更
画像の表示といっても、普通のPCのように画像を表示するための機能があるわけではなく、文字の背景色を変えることで擬似的に画像を表示しています。
デフォルトでは文字が見やすいよう文字サイズは1に設定されていますが、これをsetTextScale()で0.5に変更します。
この文字の縦横比は2:3の縦長に設定されています。
先ほど正方形の画像が潰されていたのはこれが理由で、この比率でリサイズしておくと表示したときにちょうど元の画像と同じように表示されます。
画像のレンダリング
画像のフォーマットは0-fの文字列を用いて記述してありますが、内部的にはこれとはまた別の数値を用いて色を管理しています。
ComputerCraftで使用可能な色の表を再掲します。
| 色 | カラーコード | 画像データ | 数値 |
|---|---|---|---|
| White | #F0F0F0 |
0 | 1 |
| Orange | #F2B233 |
1 | 2 |
| Magenta | #E57FD8 |
2 | 4 |
| LightBlue | #99B2F2 |
3 | 8 |
| Yellow | #DEDE6C |
4 | 16 |
| Lime | #7FCC19 |
5 | 32 |
| Pink | #F2B2CC |
6 | 64 |
| Gray | #4C4C4C |
7 | 128 |
| LightGray | #999999 |
8 | 256 |
| Cyan | #4C99B2 |
9 | 512 |
| Purple | #B266E5 |
a | 1024 |
| Blue | #253192 |
b | 2048 |
| Brown | #7F664C |
c | 4096 |
| Green | #57A64E |
d | 8192 |
| Red | #CC4C4C |
e | 16384 |
| Black | #191919 |
f | 32768 |
この表における一番右側の『数値』が内部で色を表す数値になっています。色ごとに別のビットが立つため、ビット演算しやすくなっています。
setBackgroundColor()関数にこの数値を渡すことで、カーソル位置の背景色が変わります。
注意点
調べていると、ComputerCraftのHTTP APIはConfigファイルで明示的に有効化しないと使えないとの記述がありました。
今回使用したCC:Tweakedにおいてはそのようなことはありませんでしたが、プログラムを使用するときは気をつけてください。
その他
今回作ったLuaプログラムは、ComputerCraftから利用しやすいようにGistに上げておきます。
ComputerCraftのコンピュータからwgetコマンドを利用してダウンロードすることができます。
wget https://gist.githubusercontent.com/Qman11010101/aacd23b4838ab2b0c254a87077d8aba6/raw/7a2864fa2f159f89e4d43920d18999ffda7d0834/imagedisp.lua
参照した資料 (ComputerCraftについて)
PythonやPillowについてはいくらでも情報が手に入りますし、ChatGPTなんかも全然間違えないのですが、ComputerCraftについては情報が古くなっていたり散逸していたりで追いづらかったので、参照した資料を書いておきます。
- 画像のピクセルサイズについて: https://w.atwiki.jp/mccc/pages/39.html#id_3d68ae48
- 色について: https://w.atwiki.jp/mccc/pages/16.html#id_3d3f6f8b
- ComputerCraft特有の機能 (API) について: https://seesaawiki.jp/computercraft/d/API%3a%a5%c8%a5%c3%a5%d7
- その他ComputerCraftの諸々について: https://hevohevo.hatenablog.com/
- おそらく日本で一番ComputerCraftに言及している方の (古い) ブログです
- CC:Tweakedの公式ドキュメント: https://tweaked.cc/
ほとんどの情報は10年ほど前に書かれたもので、もはや骨董品のようなものばかりですが、基本的にはこれらを参照するだけで問題なくプログラムを書けるかと思います。