背景
Firestoreを使用する場合、大抵はフロントエンドから直接クエリを発行してDB操作を行うのだろうが、実装者のスキルセットや要件によってはFirestoreの操作に関する処理をサーバーサイドに置きたい場合もある。例えば以下のような事例が見つかった。
- 既にREST API/RDSが存在しており、部分的にFirestoreを利用したハイブリッドな構成にしたい場合
- 小規模なアプリの開発時、ちょっとしたデータ置き場としてFirestoreを利用したい場合
- フロントエンドにDBへの書き込み処理を実装することによって生じる実装の煩雑さを回避したい場合
上記の事例の全てに該当する点として、サーバーサイドはRailsで構成されることが前提となっている。これはFirebaseとRailsが共にスタートアップのスピーディーなプロダクト開発と相性が良いため必然的にそうなっているのだろう。そしてRailsサーバーのデプロイ先と言えばやはりHerokuが真っ先に頭に浮かぶ(Firebaseとの連携を考えるならGCPの方が本当は色々やりやすいのだろうけど)。
自分も例に漏れず、Rails on HerokuなアプリからFirestoreにアクセスしたいという場面に出くわした。
その際特にFirestoreの認証情報をHerokuに読み込ませる辺りでハマったので、備忘録も兼ねてプロジェクトの土台作りの手順をまとめておく。
環境
- Rails 6.0.2.1
- Ruby 2.6.5 (なぜ2.7系ではないかというとgoogle-cloud-firestore gemが2020/3/1時点で2.7系に未対応だから...)
(RailsサーバーはFirestoreに接続するだけでなく自分のとこのMySQLも使うという場合を想定) - MySQL 5.7
- フロントの設定はRails 6にデフォで組み込まれているWebpackerではなくSimpackerで生成(自分は宗教上の理由でWebpackerを使えません)。JSフレームワークは何でも良いが例としてReact×Typescriptな構成を考える。
- 開発環境ではforemanを使ってRailsサーバーとwebpack-dev-serverを同時に立ち上げる
- Rails側からFirestoreに接続する部分にはgoogle-cloud-firestore gemを利用
- 本番環境はHeroku + Clear DB
- Firestoreは本番用と開発時などのデバッグ用の2つが用意されているものとする
プロジェクトの土台作り
$ bundle exec rails new rails_firestore_sample -B -C -M -T -J -S -d mysql --skip-turbolinks
$ cd rails_firestore_sample
$ bundle add simpacker
$ bundle exec rails simpacker:install
$ npm i -D webpack-dev-server typescript ts-loader @types/react @types/react-dom
$ npm i -S react react-dom
$ vi webpack.config.js
以下のように修正する。
//...(中略)
    entry: {
      application: path.resolve(__dirname, "app/javascript/index.tsx") // < ココ変更
    },
    output: {
      path: path.resolve(__dirname, "public/packs"),
      publicPath: isProd ? "/packs/" : "//localhost:8081/packs/", // < ココ変更
      filename: isProd ? "[name]-[hash].js" : "[name].js"
    },
    resolve: {
      extensions: [".js", ".jsx", ".ts", ".tsx"]  // < ココ変更
    },
    module: {  // < ココ追加
      rules: [
        {
          test: /\.tsx?$/,
          loader: "ts-loader",
          options: {
            transpileOnly: true
          }
        }
      ]
    },
    devServer: {  // < ココ追加
      contentBase: path.resolve(__dirname, "public"),
      publicPath: "/packs/",
      host: "localhost",
      port: 8081,
      headers: {
        "Access-Control-Allow-Origin": "*"
      }
    },
    plugins: [new WebpackAssetsManifest({ publicPath: true, writeToDisk: true })] // < ココ変更
$ vi tsconfig.json
以下の内容を貼る。./node_modules/.bin/tsc --init でtsconfigを生成しても良いが、必ずapp/javascriptをincludeすること。
{
  "compilerOptions": {
    "target": "es5",
    "lib": ["es2019", "dom", "dom.iterable"],
    "module": "es2015",
    "jsx": "react",
    "moduleResolution": "node",
    "esModuleInterop": true,
    "downlevelIteration": true,
    "sourceMap": true,
    "removeComments": false,
    "noImplicitAny": false,
    "strictNullChecks": true,
    "strictFunctionTypes": true,
    "strictBindCallApply": true,
    "strictPropertyInitialization": true,
    "noImplicitThis": true
  },
  "include": ["app/javascript/**/*"]
}
開発環境でRailsサーバーとwebpack-dev-serverを同時に立ち上げるためforeman gemを追加する。
$ bundle add foreman
foremanが管理するプロセスの起動方法をProcfileに定義する。
web: bundle exec rails s
web: bundle exec rails s
client: ./node_modules/.bin/webpack-dev-server
これで開発時にはbundle exec foreman start -f Procfile.dev とするだけでRailsとwebpack-dev-serverが起動し、JS/TSファイルのホットリロードが効くようになる。Herokuへのデプロイ時にはProcfileの方が参照されてRailsサーバーのみが立ち上がる。
動作確認用に簡単なviewを用意していく。まずルートページを表示するためにpages controllerを用意し、indexアクションを追加する。
# frozen_string_literal: true

class PagesController < ApplicationController
  def index; end
end
<div id="app"></div>
# frozen_string_literal: true

Rails.application.routes.draw do
  root 'pages#index'
end
JSファイルを読み込ませるためlayoutファイルにjavascript_pack_tagを追加。
...(中略)
<%= csp_meta_tag %>

- <%= stylesheet_link_tag 'application', media: 'all' %>  <!-- 不要なので削除 -->
+ <%= javascript_pack_tag 'application' %>  <!-- 追加 -->
</head>
動作確認用に以下のようなコンポーネントを用意。
import React, { FC } from "react";

interface Props {
  name: string;
}

export const Hello: FC<Props> = ({ name }) => {
  return <div>Hello{name}!</div>;
};
import React from "react";
import ReactDOM from "react-dom";
import { Hello } from "./components/App";

document.addEventListener("DOMContentLoaded", () => {
  ReactDOM.render(<Hello name="Rails" />, document.getElementById("app"));
});
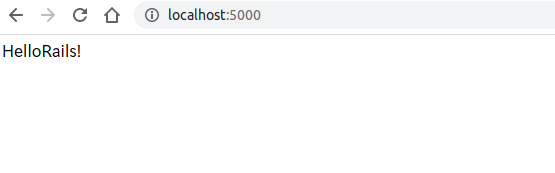
bundle exec foreman start -f Procfile.devでサーバーを起動し、localhost:5000にアクセスすると以下のようなページが表示される。App.tsxの中身を編集して保存すると自動でビルドが走ってページが更新されるのが確認できればOK。
Firestore上のデータをRails側から参照する
まずはgoogle-cloud-firestoreをインストールする。
$ bundle add google-cloud-firestore
次にFirestoreへの接続用の基底クラスを用意する。
# frozen_string_literal: true

require 'google/cloud/firestore'

class Firestore::Base
  class_attribute :client
  self.client = Google::Cloud::Firestore.new(project_id: ENV['FIREBASE_PROJECT_ID'])
end
環境変数 FIREBASE_PROJECT_ID には作成しておいた開発時用のFirebaseプロジェクトのProject IDを入れておく。
続いてFirestore上の何らかのコレクションを参照するAPIを生やしていく。
まずFirestoreのコンソール等で何らかのコレクションを作成し、Seedデータを投入しておく(ここは説明省略)。
ここでは例としてFirestore上にusersコレクション(name fieldを持っているものとする)が用意されているものとし、usersの一覧表示と詳細表示までできるようにする。
# frozen_string_literal: true

class Firestore::User < Firestore::Base
  COLLECTION_NAME = 'users'

  class_attribute :repo
  self.repo = client.col COLLECTION_NAME

  def self.all
    repo.order('name').get.map do |user|  # nameの値でソートしてuserの一覧を返す
      user.data.merge({ documentId: user.document_id })  # この辺はお好みでどうぞ
    end
  end

  def self.find(document_id)
    snapshot = repo.doc(document_id).get

    snapshot.data.merge({ documentId: snapshot.document_id }) if snapshot.exists?
  end
end
コントローラーを用意する。
# frozen_string_literal: true

class Api::Firestore::UsersController < ApplicationController
  before_action :set_user, only: :show

  def index
    @users = Firestore::User.all
    render json: @users
  end

  def show
    render json: @user
  end

  private

  def set_user
    @user = Firestore::User.find(params[:id])
  end
end
ルートを追加。
# frozen_string_literal: true

Rails.application.routes.draw do
  root 'pages#index'

  namespace :api, format: :json do
    namespace :firestore do
      resources :users, only: %i[index show]
    end
  end
end
これで localhost:5000/api/users, localhost:5000/users/:idにアクセスするとuserの一覧、詳細が返却され...
ない!! その前にもう一つやることがある。
GCPの認証情報をRailsに読み込ませるための設定を追加
Firebase公式 > Cloud Firestoreを使ってみる > 開発環境を設定するに書かれているように、
Cloud Firestore サーバーのクライアント ライブラリ(Java、Node.js、Python、Go、PHP、C#、Ruby)は、認証に Google アプリケーションのデフォルト認証情報を使用します。
開発環境から認証するには、JSON サービス アカウント キーファイルを指すように GOOGLE_APPLICATION_CREDENTIALS 環境変数を設定します。キーファイルは、API Console の認証情報ページで作成できます。
なのでAPI consoleからプロジェクトを選択 > サービスアカウントを選択 > キーを作成 > キーのタイプはJSONを選択
し、本番用と開発用のFirebaseプロジェクトそれぞれについて認証情報が書かれたJSONファイルを落としてきてRailsプロジェクトのルートに配置してください。これらのファイルは間違ってもgitにコミットしないように.gitignoreに追加しておきます。
そして最初の方で作成しておいたforemanの設定ファイルを修正します。
web: GOOGLE_APPLICATION_CREDENTIALS=[開発用のFirebaseプロジェクトの認証情報が書かれたjsonファイル名] bundle exec rails s
client: ./node_modules/.bin/webpack-dev-server
これで開発環境でforemanを使って立ち上げたRailsサーバーについては開発用のFirestoreにアクセスできるようになります。先程生やしたAPIにアクセスすると投入しておいたSeedデータがちゃんと返ってくるはずです。
問題はこのアプリをHerokuにデプロイした際にはGOOGLE_APPLICATION_CREDENTIALSで在り処を指定しているjsonファイルはgitの管理外なので、Procfile.devと同じようにProcfileを記述しても、このjsonファイルを読むことはできず、Firestoreに接続できないという点です。この点についてはFirebaseのドキュメントには一切記述がないのですが、実はgoogle-cloud-firestore gemのドキュメントをよーく読むとコソッと書いてありまして、
Project and Credential Lookup
(中略)
Environment Variables
The Project ID and Credentials JSON can be placed in environment variables instead of declaring them directly in code. Each service has its own environment variable, allowing for different service accounts to be used for different services. (See the READMEs for the individual service gems for details.) The path to the Credentials JSON file can be stored in the environment variable, or the Credentials JSON itself can be stored for environments such as Docker containers where writing files is difficult or not encouraged.
(中略)
The environment variables that google-cloud-firestore checks for credentials are configured on Google::Cloud::Firestore::V1::Credentials:
1. FIRESTORE_CREDENTIALS - Path to JSON file, or JSON contents ⇐ コレが使える!!!
- FIRESTORE_KEYFILE - Path to JSON file, or JSON contents
- GOOGLE_CLOUD_CREDENTIALS - Path to JSON file, or JSON contents
- GOOGLE_CLOUD_KEYFILE - Path to JSON file, or JSON contents
- GOOGLE_APPLICATION_CREDENTIALS - Path to JSON file ⇐ これは開発環境のようにjsonファイルが実際に配置可能な時なら使えるので, Procfile.devの方はこちらを使っても良い
ということなので、本番環境のProcfileの方はそのままいじらずに、HerokuのダッシュボードやCLIから環境変数FIRESTORE_CREDENTIALSに本番用のFirebaseプロジェクトの認証情報が書かれたjsonファイルの中身を直接セットするようにすれば動きます。Heroku CLIから環境変数をセットする場合には
$ heroku config:set FIRESTORE_CREDENTIALS="$(< ./[認証情報が書かれたjsonファイル名])"
のようにすればOKです。
【最後に】Simpacker使用時のHerokuへのデプロイにおける注意点
Herokuへのデプロイ手順については本題と外れるのでここまで触れてきませんでしたが、上で述べたようにFirestoreの認証情報を環境変数にセットすればFirestoreに接続するAPIの部分は動いても、実はフロントエンドのコードが動作しません。
というのもHerokuへのRailsアプリのデプロイ時には自動的にassets:precompileタスクが実行されるようになっているのですが、今回rails newしたときにはオプションでsprocketsを入れないようにしており、このままではassets:precompileタスクが定義されていないとHerokuに怒られます。おとなしくWebpackerを使っていれば脳死でとりあえずgit push heroku masterするだけで良いのですが、前述したように自分は宗教上の理由でWebpackerが使えまs...
そこで対策として自前でassets:precompileタスクを追加し、このタイミングでnode_modulesのインストール及びwebpackによるProductionビルドが実行されるようにします。この辺りはSimpacker heroku example(GitHub)の方で説明されています。
# frozen_string_literal: true

namespace :assets do
  task :precompile do
    sh 'npm install'
    sh 'NODE_ENV=production ./node_modules/.bin/webpack --mode production'
  end
end
こいつを用意した状態で
$ heroku buildpacks:add --index 1 heroku/nodejs
してNodeのbuildpackをRubyより手前に入れてから git push heroku master すれば(本当はまだClear DBのセットアップも残っていますが)フロントエンドも動作するようになります。
あとはゴリゴリReactでフロント作ってRailsのAPI経由でFirestoreをいじるだけです。