以前の記事(【知識0からのCloudFormation】LambdaをデプロイするCodePipelineを組む)でCodeCommitにPushしたらデプロイするパイプラインの作成までやった。
今回は以下の変更を目標とする。
- デプロイする前にテストコードを挟む。
- ソースコードをGitHubで管理する。
前提
- Admin権限のIAMユーザを作成している。(adminである必要はないがとりあえず面倒なので)
- AWSコンソールに上記ユーザでサインインしている。
- git、aws-cliインストール済。
CodeCommitにリポジトリを用意
秘密鍵と公開鍵の作成
$ ssh-keygen -t rsa -C "hogehoge@gmail.com"
Generating public/private rsa key pair.
Enter file in which to save the key (/Users/hoge/.ssh/id_rsa): ./codecommit_rsa
Enter passphrase (empty for no passphrase):                   # 何も指定せずEnter。GitHubとミラーリングさせる時にエラーするため。
Enter same passphrase again:
Your identification has been saved in codecommit_rsa.
Your public key has been saved in codecommit_rsa.pub.
The key fingerprint is:
SHA256:EG3hs70mTNPFKE0AMJP0s9rij9QIeh1fQRhaPLNVErX hogehoge@gmail.com
The key's randomart image is:
+---[RSA 2048]----+
|         .* + .B#|
|     = *.%.  o.oB|
IAMユーザと紐付け
IAM > ユーザ > 自分のユーザ名 > 認証情報(タブ) > AWS CodeCommitのSSHキー に公開鍵をUploadする。以下で中身をまるっとコピペする。
$ cat ~/.ssh/codecommit_rsa.pub
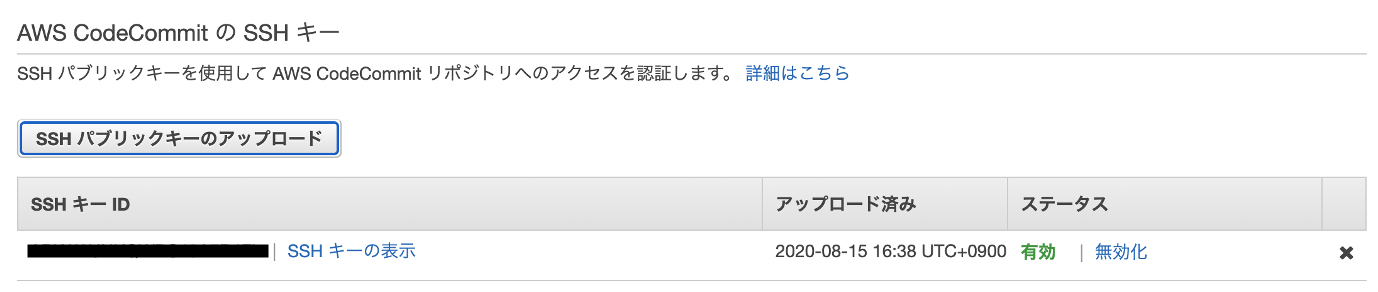
アップロードするとSSHキーIDが発行される。
configファイルの設定
UserはIAMにキーをUploadしたときに発行されるSSHキーID。
Host git-codecommit.*.amazonaws.com
  User APKA****************
  IdentityFile ~/.ssh/codecommit_rsa
リポジトリ作成
CodeCommitコンソールからリポジトリを作成をクリックし、リポジトリ名を入力。
作成後gitクローン。
$ git clone ssh://git-codecommit.リージョン名.amazonaws.com/v1/repos/リポジトリ名
Cloning into 'リポジトリ名'...
warning: You appear to have cloned an empty repository.
リファレンス
リポジトリのファイル構成
CodeBuildの実体はubuntuのDockerコンテナなのでその中でpythonのunittestを実行するコマンドを叩いてあげることでテストできる。
なお、コマンドを実行する階層はCodeCommitのリポジトリのルートの階層になる。
コマンドがどこで実行されるか初めわかっておらずはまった。
$ ./testRepository
└── pipeline_settings
    ├── buildspec.yml
    ├── hogehoge.py                                 # デプロイするコード
    ├── template.yml
    └── tests
        └── test_hogehoge.py                        # UTコード
各ファイル詳細
version: 0.2

phases:
  build:
    commands:
      - echo Build started on `date`
      - echo Compiling the Python code...
      - pwd                                         # /codebuild/output/src078561561/src
      - ls                                          # pipeline_settings
      - cd pipeline_settings
      - python3 -m unittest tests.test_hogehoge     # tests下のtest_hogehogeを実行。
      - |
        aws cloudformation package \
          --template-file template.yml \
          --s3-bucket $S3_BUCKET \
          --output-template-file $PACKAGED_TEMPLATE_FILE_PATH
  post_build:
    commands:
      - echo Build completed on `date`
artifacts:
  files:
    - $PACKAGED_TEMPLATE_FILE_PATH
    - pipeline_settings/*
    - hogehoge.py
  discard-paths: yes
import json

def lambda_handler(event, context):
    # TODO implement
    return {
        'statusCode': 200,
        'body': json.dumps('Hello')
    }
AWSTemplateFormatVersion: "2010-09-09"

# パラメータにs3Bucketとs3keyを受け取る口を用意。
Parameters:
  funcName:
    Type: String
    Default: deployedLambda                        # デプロイするLambda関数名
  s3Bucket:
    Type: String
  s3Key:
    Type: String

Resources:
  # IAMロール作成
  LambdaExecutionRole:
    Type: AWS::IAM::Role
    Properties:
      AssumeRolePolicyDocument:
        Version: 2012-10-17
        Statement:
          -
            Effect: "Allow"
            Principal:      # 誰に権限を与えるのか
              Service:
                - "lambda.amazonaws.com"
            Action:         # 何の権限を与えるのか
              - "sts:AssumeRole"    # Lambdaに対して一時的な権限を発行する。
      ManagedPolicyArns:
      - "arn:aws:iam::aws:policy/service-role/AWSLambdaBasicExecutionRole"
      RoleName: !Ref funcName   # 実行時に指定

  # コードの参照先を変更。
  Function:
    Type: "AWS::Lambda::Function"
    Properties:
      Code:
        S3Bucket: !Ref s3Bucket
        S3Key: !Ref s3Key
      FunctionName: !Ref funcName
      Handler: "hogehoge.lambda_handler"
      Role: !GetAtt LambdaExecutionRole.Arn
      Runtime: "python3.8"
リファレンス
パイプラインを作成
CodeCommitにPushしたらCloudFormationを用いてパイプラインを用意する。
以下でスタックpipeline-stackを用意する。
$ aws cloudformation deploy --stack-name pipeline-stack --template-file pipeline.yml --capabilities CAPABILITY_NAMED_IAMD
pipeline.yml詳細
AWSTemplateFormatVersion: "2010-09-09"

Resources:
  ArtifactBucket:
    Type: AWS::S3::Bucket

  BuildProject:
    Type: AWS::CodeBuild::Project
    Properties:
      Name: 'testbuildproj'                        # buildプロジェクト名を指定
      ServiceRole: !GetAtt CodeBuildRole.Arn
      Artifacts:
        Type: CODEPIPELINE
      Environment:
        Type: LINUX_CONTAINER
        ComputeType: BUILD_GENERAL1_SMALL
        Image: aws/codebuild/ubuntu-base:14.04
        EnvironmentVariables:                      # buildspec.yml内で使用する環境変数。
          - Name: PACKAGED_TEMPLATE_FILE_PATH
            Value: 'packaged.yml'
          - Name: S3_BUCKET
            Value: !Ref ArtifactBucket
      Source:
        Type: CODEPIPELINE
        BuildSpec: pipeline_settings/buildspec.yml # ルート直下にbuildspecがあるなら指定不要。

  # デプロイ時のロール。面倒なので全てAdmin権限を与えておく。
  PipelineDeployRole:
    Type: AWS::IAM::Role
    Properties:
      AssumeRolePolicyDocument:
        Version: '2012-10-17'
        Statement:
          - Effect: 'Allow'
            Principal:
              Service:
                - 'cloudformation.amazonaws.com'
            Action:
              - 'sts:AssumeRole'
      ManagedPolicyArns:
      - 'arn:aws:iam::aws:policy/AdministratorAccess'
      RoleName: 'cfnrole'                         # ロール名

  # パイプラインのロール。面倒なので全てAdmin権限を与えておく。
  PipelineRole:
    Type: AWS::IAM::Role
    Properties:
      AssumeRolePolicyDocument:
        Version: '2012-10-17'
        Statement:
          - Effect: 'Allow'
            Principal:
              Service:
                - 'codepipeline.amazonaws.com'
            Action:
              - 'sts:AssumeRole'
      ManagedPolicyArns:
      - 'arn:aws:iam::aws:policy/AdministratorAccess'
      RoleName: 'pipelinerole'                    # ロール名

  # ビルド時のロール。面倒なので全てAdmin権限を与えておく。
  CodeBuildRole:
    Type: AWS::IAM::Role
    Properties:
      AssumeRolePolicyDocument:
        Version: '2012-10-17'
        Statement:
          - Effect: 'Allow'
            Principal:
              Service:
                - 'codebuild.amazonaws.com'
            Action:
              - 'sts:AssumeRole'
      ManagedPolicyArns:
      - 'arn:aws:iam::aws:policy/AdministratorAccess'
      RoleName: 'buildrole'                      # ロール名

  Pipeline:
    Type: AWS::CodePipeline::Pipeline
    Properties:
      Name: 'testpipeline'                         # パイプライン名
      RoleArn: !GetAtt PipelineRole.Arn
      ArtifactStore:
        Type: S3
        Location: !Ref ArtifactBucket
      Stages:
        - Name: Source
          Actions:
            - Name: DownloadSource
              ActionTypeId:
                Category: Source
                Owner: AWS
                Version: 1
                Provider: CodeCommit
              Configuration:
                RepositoryName: 'testRepository'   # リポジトリ名
                BranchName: 'master'
              OutputArtifacts:
                - Name: SourceOutput               # オブジェクト名
        - Name: Build
          Actions:
            - InputArtifacts:
                - Name: SourceOutput               # オブジェクト名
              Name: Package
              ActionTypeId:
                Category: Build
                Provider: CodeBuild
                Owner: AWS
                Version: 1
              OutputArtifacts:
                - Name: BuildOutput                # オブジェクト名
              Configuration:
                ProjectName: !Ref BuildProject
        - Name: Deploy
          Actions:
            - Name: CreateChangeSet
              ActionTypeId:
                Category: Deploy
                Owner: AWS
                Provider: CloudFormation
                Version: '1'
              InputArtifacts:
                - Name: BuildOutput                # オブジェクト名
              Configuration:
                ActionMode: CHANGE_SET_REPLACE
                RoleArn: !GetAtt PipelineDeployRole.Arn
                StackName: 'system-stack'
                ChangeSetName: 'system-stack-changeset'
                Capabilities: CAPABILITY_NAMED_IAM
                TemplatePath: 'BuildOutput::packaged.yml'
                ParameterOverrides: |
                  {
                    "s3Bucket": { "Fn::GetArtifactAtt" : [ "BuildOutput", "BucketName" ] },
                    "s3Key": { "Fn::GetArtifactAtt" : [ "BuildOutput", "ObjectKey" ] }
                  }
              RunOrder: '1'
            - Name: ExecuteChangeSet
              ActionTypeId:
                Category: Deploy
                Owner: AWS
                Provider: CloudFormation
                Version: '1'
              InputArtifacts:
                - Name: BuildOutput                # オブジェクト名
              Configuration:
                ActionMode: CHANGE_SET_EXECUTE
                ChangeSetName: 'system-stack-changeset'
                StackName: 'system-stack'
              RunOrder: '2'
スタックの作成に成功すると勝手にパイプラインが走りLambdaが生成される。
以降、リポジトリにpushするとLambdaが更新される。
GitHubのミラーリング
参考)
https://furiblog.com/github-codecommit-mirroring
参考ページに書いてある通り設定したらよい。
なお、環境変数の変数名は任意の名称で可
GitHubのリポジトリのSetting > Secretから以下の値を指定する。
CODECOMMIT_SSH_PRIVATE_KEYに秘密鍵をまるっとコピー
-----BEGIN OPENSSH PRIVATE KEY-----
b6A...
              (略)
                              ...WCD
-----END OPENSSH PRIVATE KEY-----
CODECOMMIT_SSH_PRIVATE_KEY_IDにSSHキーID(前述)をまるっとコピー。
前述の通り、SSHキーにパスフレーズを設定しているとエラーした。
Actionでは以下を使わせていただいている。
https://github.com/pixta-dev/repository-mirroring-action
name: {任意の名前}

on: [ push, delete ]

jobs:
  {任意の名前}:
    runs-on: ubuntu-18.04
    steps:
      - uses: actions/checkout@v1
      - uses: pixta-dev/repository-mirroring-action@v1
        with:
          target_repo_url:
            ssh://git-codecommit.ap-northeast-1.amazonaws.com/v1/repos/xxxxx
          ssh_private_key:
            ${{ secrets.CODECOMMIT_SSH_PRIVATE_KEY }}
          ssh_username:
            ${{ secrets.CODECOMMIT_SSH_PRIVATE_KEY_ID }}