PCLのインストール
- Windows:https://tecsingularity.com/pcl/environment/
- Ubuntu:https://qiita.com/tewi_r/items/941acb2af690f8f184a1
上記のサイトに従っていけばOK
PCLの解説
PCL自体の日本語資料は少なく,基本的なことしかの書かれていない印象.(参考サイト1,2,3)
☝のサイトに書かれていることは,ここでは割愛する.
ウサギのpoint cloud を表示する!
PCLが公式に出しているサンプルコードこちらを参考にして,ウサギの形のpoint cloudを表示させてみた.
ただし,ウサギのもととなるbunny.pcdファイルはgithubからダウンロード(またはコピペ)した.コピペする場所はファイル構成を参照.
-
フォルダの作成
$ mkdir -p pcl-test/src $ cd pcl-test $ mkdir build <ファイル構成> pcl-test |----- CMakeList.txt |----- src |----- bunny_rgb.cpp |----- build |----- bunny.pcd -
CMakeList.txtを記入
pcl-test/CMakeList.txtcmake_minimum_required(VERSION 2.8 FATAL_ERROR) project(pcd_write) find_package(PCL 1.2 REQUIRED) include_directories(${PCL_INCLUDE_DIRS}) link_directories(${PCL_LIBRARY_DIRS}) add_definitions(${PCL_DEFINITIONS}) add_executable (bunny_rgb src/bunny_rgb.cpp) target_link_libraries (bunny_rgb ${PCL_LIBRARIES}) -
ソースコードの作成
もとのウサギはXYZ情報(各点の位置情報)のみであり,RGB情報は含まない(各点に色が付いていない).そこで,読み込んだ情報に色を付けて表示する.pcl-test/src/bunny_rgb.cpp#include <pcl/visualization/cloud_viewer.h> #include <pcl/io/pcd_io.h> #include <iostream> #include <pcl/common/impl/io.hpp> using namespace std; // ビューワー起動時の一回だけ呼ばれる void viewerOneOff(pcl::visualization::PCLVisualizer& viewer) { // 背景色の設定 viewer.setBackgroundColor(1, 1, 1); //white cout << "viewerOneOff" << std::endl; } // ビューワー起動中の毎フレーム実行される void viewerPsycho(pcl::visualization::PCLVisualizer& viewer) { cout << "viewerPsycho" << std::endl; } int main() { // set Type using CloudType = pcl::PointCloud<pcl::PointXYZ>; using CloudType2 = pcl::PointCloud<pcl::PointXYZRGB>; CloudType::Ptr original_cloud(new CloudType); CloudType2::Ptr rgb_cloud(new CloudType2); // 作成したPointCloudを読み込む pcl::io::loadPCDFile("bunny.pcd", *original_cloud); // copy p_cloud data into rgb_cloud copyPointCloud(*original_cloud, *rgb_cloud); // add RGB data to rgb_cloud for (int h = 0; h < rgb_cloud->height; h++) { for (int w = 0; w < rgb_cloud->width; w++) { pcl::PointXYZRGB &point = rgb_cloud->points[w + h * rgb_cloud->width]; point.r = 255; point.g = 0; point.b = 0; } } // ビューワーの作成 pcl::visualization::CloudViewer viewer("PointCloudViewer"); viewer.showCloud(rgb_cloud); // ビューワー起動時の一回だけ呼ばれる関数をセット viewer.runOnVisualizationThreadOnce(viewerOneOff); // ビューワー起動中の毎フレーム実行される関数をセット viewer.runOnVisualizationThread(viewerPsycho); // ビューワー視聴用ループ while (!viewer.wasStopped()) { } return 0; } -
ビルドする
$ cd ~/pcl-test/build $ cmake .. $ make -
実行する
$ ./bunny_rgbred points 
rainbow points 
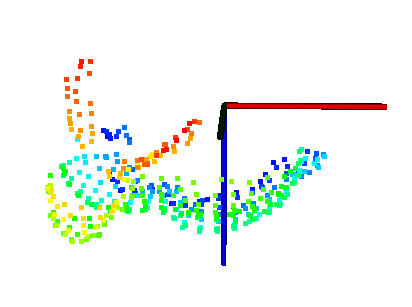
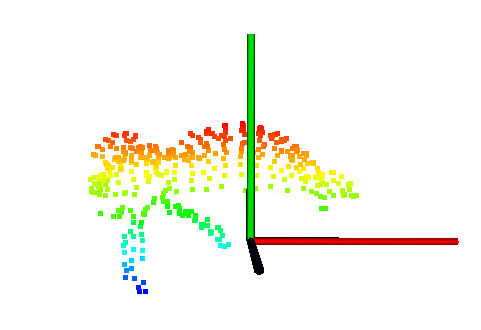
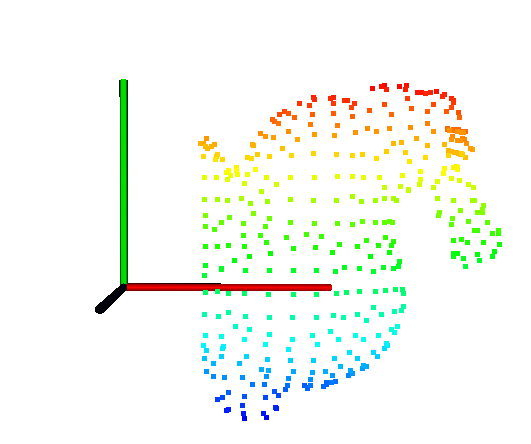
カラーマップでウサギをグラデーション
3次元画像で高低差を色で示すように,y方向の値の大きさによって点の色を変えた.
(☟の写真の緑がy軸,赤がx軸,青がz軸であることに注意!)
下のコードの流れとしては,
1. 各点を赤く設定していたコードを削除
2. main関数の外にカラーマップ用の関数GetColorを作成
3. main関数の中に,y方向の最大/最小値を取得する関数を作成
4. main関数の中で,GetColor関数を実行
1. 各点を赤く設定していたコードを削除
int main(){
    ...
    ...
    // add Red Points to rgb_cloud
    for (int h = 0; h < rgb_cloud->height; h++) {
        for (int w = 0; w < rgb_cloud->width; w++){
            pcl::PointXYZRGB &point = rgb_cloud->points[w + h * rgb_cloud->width];
            point.r = 255;
            point.g = 0;
            point.b = 0;
        }
    }
2. main関数の外にカラーマップ用の関数 GetColor を作成
// Color map
typedef struct {
    double r,g,b;
} COLOR;

COLOR GetColor(double v,double vmin,double vmax)
{
   COLOR c = {255, 255, 255}; // white
   double dv;

   if (v < vmin)
      v = vmin;
   if (v > vmax)
      v = vmax;
   dv = vmax - vmin;

   if (v < (vmin + 0.25 * dv)) {
      c.r = 0;
      c.g = 4 * (v - vmin) / dv * 255;
      c.b = 255;
   } else if (v < (vmin + 0.5 * dv)) {
      c.r = 0 * 255;
      c.g = 255;
      c.b = 255 + 4 * (vmin + 0.25 * dv - v) / dv * 255;
   } else if (v < (vmin + 0.75 * dv)) {
      c.r = 4 * (v - vmin - 0.5 * dv) / dv * 255;
      c.g = 255;
      c.b = 0 * 255;
   } else {
      c.r = 255;
      c.g = 255 + 4 * (vmin + 0.75 * dv - v) / dv * 255;
      c.b = 0 * 255;
   }

   return(c);
}
3. main関数の中に,y方向の最大/最小値を取得する関数を作成
int main(){
    ・・・
    ・・・

        // add Rainbow Point to rgb_cloud
        // get min&max value
        double min = INT_MAX; double max = INT_MIN;
        for (int h = 0; h < rgb_cloud->height; h++) {
                for (int w = 0; w < rgb_cloud->width; w++) {
                        pcl::PointXYZRGB &point = rgb_cloud->points[w + h * rgb_cloud->width];
                        if (point.y < min) {
                                min = point.y;
                        }
                        if (point.y > max) {
                                max = point.y;
                        }
                }
        }
4. main関数の中で,GetColor関数を実行
int main(){
    ・・・
    ・・・
       // add RGB data to rgb_cloud
        for (int h = 0; h < rgb_cloud->height; h++) {
                for (int w = 0; w < rgb_cloud->width; w++) {
                        pcl::PointXYZRGB &point = rgb_cloud->points[w + h * rgb_cloud->width];
                        COLOR c = GetColor(point.y, min, max);
                        point.r = c.r;
                        point.g = c.g;
                        point.b = c.b;
                }
        }
}
ポイントクラウドの座標を回転
回転行列を用いて,ウサギを各軸まわりに回転させる.
注意!
回転行列が回転させるのは座標系なので
90°回転させる回転行列=座標系が90°回転=各点(ウサギ)は-90°回転
// Rotation module
typedef struct {
    double array[3];
} POSITION;

POSITION rot(POSITION p0, double phi_deg, double sita_deg, double psi_deg)
{
    POSITION pz = {0, 0, 0}; //position rotated around z axis
    POSITION py = {0, 0, 0}; //position roteted around y axis
    POSITION px = {0, 0, 0}; //position rotated around x axis

    double RAD = M_PI / 180; // convert degree to rad
    double phi = phi_deg * RAD;
    double sita = sita_deg * RAD;
    double psi = psi_deg * RAD;

    double Rx[3][3] = {
        {1, 0, 0},
        {0, cos(phi), sin(phi)},
        {0, -1 * sin(phi), cos(phi)}
    };

    double Ry[3][3] = {
        {cos(sita), 0, -1 * sin(sita)},
        {0, 1, 0},
        {sin(sita), 0, cos(sita)}
    };

    double Rz[3][3] = {
        {cos(psi), sin(psi), 0},
        {-1 * sin(psi), cos(psi), 0},
        {0, 0, 1}
    };

    for (int i = 0; i < 3; i++){
        for (int j = 0; j < 3; j++){
            pz.array[i] = pz.array[i] + Rz[i][j] * p0.array[j];
        }
    }

   for (int i = 0; i < 3; i++){
        for (int j = 0; j < 3; j++){
            py.array[i] = py.array[i] + Ry[i][j] * pz.array[j];
        }
    }


    for (int i = 0; i < 3; i++){
        for (int j = 0; j < 3; j++){
            px.array[i] = px.array[i] + Rx[i][j] * py.array[j];
        }
    }
    return (px);
}

void main(){
    ...
    ...
    ...
        // Rotate Point Cloud to rgb_cloud
        // rotate rgb_cloud around x-axis and name it rgb_cloud
        for (int h = 0; h < rgb_cloud->height; h++) {
                for (int w = 0; w < rgb_cloud->width; w++) {
                        pcl::PointXYZRGB &point = rgb_cloud->points[w + h * rgb_cloud->width];
                        POSITION p0 = {point.x, point.y, point.z};
                        POSITION p = rot(p0, 0, 0, 90);
                        point.x = p.array[0];
                        point.y = p.array[1];
                        point.z = p.array[2];
              }
        }

}
| front view | side view | |
|---|---|---|
| オリジナル | 
|

|
| x軸回り | 
|

|
| y軸回り | 
|

|
| z軸回り | 
|

|
rosでPCLを使う
rosインターフェースのインストール
このページから,必要なパッケージは以下と分かる.
- perception_pcl
- pcl_conversions
- pcl_msgs
- pcl_ros
perception_pclパッケージに3つが含まれている形(のはず)なので,perception_pclをインストールする.
sudo apt install ros-rosのバージョン-perception-pcl
ros topicのpublish & subscribe
ros wikiのページに載っている通りに書けばできる.
point cloud の表示など
topicのpublish/subscribeはrosWikiの通りにやれば問題なくできるが,一方このままでは使えるPCLの機能が非常に少ない.
具体的には,subscribeしたpoint cloudをウィンドウで表示することすらできない!
そこで,CMakeListにPCL本体を使えるようにするコードを書き足す必要がある.(つまり,rosインターフェースはその名の通り,ros topicに対応するデータ型にPCLのデータ型を変換するだけ)
+    find_package(PCL 1.8 REQUIRED)

+    include_directories(
+     include
+      ${PCL_INCLUDE_DIRS}
+    )

    /// node作成時のみ
    add_executable(rotation_pcl
      src/rotation_pcl.cpp
      src/func.cpp
    )
    add_dependencies(rotation_pcl ${${PROJECT_NAME}_EXPORTED_TARGETS} ${catkin_EXPORTED_TARGETS})
    target_link_libraries(rotation_pcl
+   ${PCL_LIBRARIES}   <---通常のノード作成コードに加えて${PCL_LIBRARIES}を追加
    ${catkin_LIBRARIES}
    )
あとは,普通にPCLを使うのと同じ!