4
2

Delete article

Deleted articles cannot be recovered.

Draft of this article would be also deleted.

Are you sure you want to delete this article?

More than 3 years have passed since last update.

MySQL 5.7(Docker)環境構築メモ

Last updated at Posted at 2020-11-22

Dockerを用いてMySQL5.7環境を構築し、MySQL Workbenchで接続するまでの手順をまとめる。
※Dockerなどはインストール済みであること。

  • フォルダ構成

    project/
          ├ docker/
          |       └ db/
          |          L data    # マウント場所
          |          ├ my.cnf  # 設定ファイル     
          └ docker-compose.yml  
    

1.docker-compose.ymlを作成する。

version: '3'

services:
  db:
    image: mysql:5.7
    container_name: mysql_container
    environment:
      MYSQL_ROOT_PASSWORD: rootpass
      MYSQL_DATABASE: sample_db
      MYSQL_USER: mysqluser
      MYSQL_PASSWORD: mysqlpass
    volumes:
    - ./docker/db/data:/var/lib/mysql
    - ./docker/db/my.cnf:/etc/mysql/conf.d/my.cnf
    restart: always
    ports:
    - 3306:3306

※環境設定は自環境に合わせて適宜設定する。

2.my.cnf(MySQL設定ファイル)を作成する。

[mysqld]
character-set-server=utf8mb4
collation-server=utf8mb4_unicode_ci

[client]
default-character-set=utf8mb4

※要件に合わせて適宜設定する。上例は文字コードのみを設定している。

3.MySQLコンテナを起動する。

上記projectフォルダに移動し、以下のdocker-composeコマンドを実行する。

docker-compose up -d

docker psコマンドを実行し、mysql_containerのステータスがUPになっていることを確認する。

4. MySQL Workbenchからコンテナにアクセスする。
※MySQL Workbenchは公式よりインストールする。
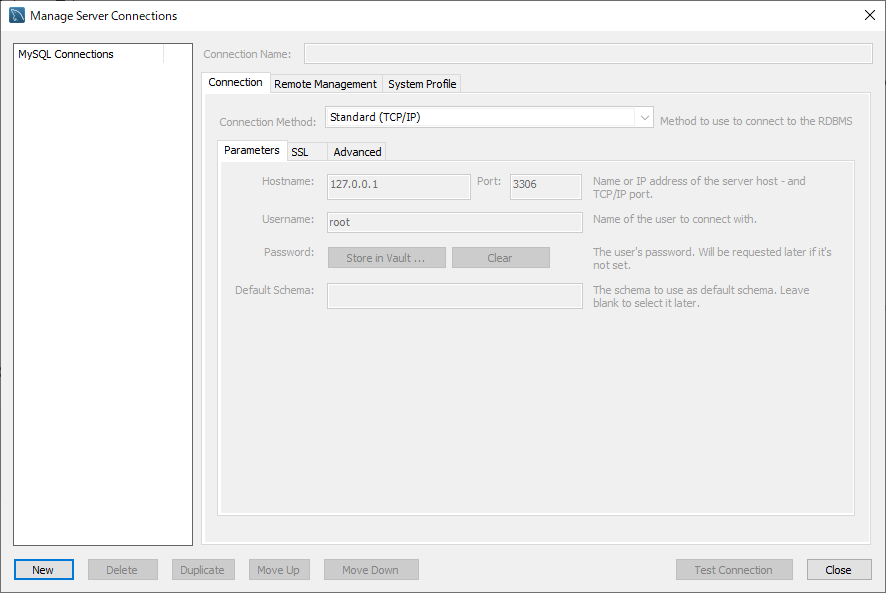
  1. タブDatabase -> Manage Connections... を選択する。

    以下のManage Server Connections画面が表示される。mysql_manage_server_connections.png

  2. Newを押下し、docker-compose.ymlに記載した接続情報を入力する。

  3. Test Connectionでコンテナに接続できるかを確認する。

4
2
0

Register as a new user and use Qiita more conveniently

  1. You get articles that match your needs
  2. You can efficiently read back useful information
  3. You can use dark theme
What you can do with signing up
4
2

Delete article

Deleted articles cannot be recovered.

Draft of this article would be also deleted.

Are you sure you want to delete this article?