点群からデプス画像(低密度)を作る
はじめに
前回numpyを利用して、デプス画像を点群に変換するやり方を説明した。
今回では前回の逆 点群からデプス画像(低密度)への変換を話します
テスト用例
テスト用例としては、kittiデータセットを使います

以下の文章で使ったのは2011_09_26_drive_0005 中の第150フレーム画像データとLiDARデータ

コードはオンラインの形でgoogle Colab
データ導入
画像データ:
kitti/2011_09_26/2011_09_26_drive_0005_sync/image_00/0000000150.png
LiDARデータ:
kitti/2011_09_26/2011_09_26_drive_0005_sync/velodyne_points/data/0000000150.bin
ここでは直接データをgoogle Colabにアップロードしたので
import numpy as np
import cv2
import matplotlib.pyplot as plt


pointcloud = np.fromfile("/content/0000000150.bin",dtype=np.float32).reshape(-1,4)
pointcloud = pointcloud[:,:3].astype(np.float64)
image = cv2.imread("/content/0000000150.png")
kittiでLiDARデータでは[X,Y,Z,反射率]の形、4位の反射率を捨てる
投影変換(Project) I
投影変換ではopencvの関数 cv2.projectPointsを使い
入力データは
1.点群
2.点群座標系とカメラ座標系の回転行列
3.点群座標系とカメラ座標系の変換ベクトル
4.カメラ行列
5.カメラ歪み係数
要するには点群座標系とカメラ座標系の変換パラメータとカメラパラメータ
LiDARとカメラの座標変換では、kittiデータセット中がある
/kitti/2011_09_26/calib_velo_to_cam.txt
calib_time: 25-May-2012 16:47:16
R: 9.999976e-01 7.553071e-04 -2.035826e-03 -7.854027e-04 9.998898e-01 -1.482298e-02 2.024406e-03 1.482454e-02 9.998881e-01
T: -8.086759e-01 3.195559e-01 -7.997231e-01
カメラパラメータではここを参考
rotation = np.array([7.533745e-03, -9.999714e-01, -6.166020e-04, 1.480249e-02, 7.280733e-04, -9.998902e-01, 9.998621e-01, 7.523790e-03, 1.480755e-02],dtype="float").reshape(3,3)
translation = np.array([-4.069766e-03, -7.631618e-02, -2.717806e-01],dtype="float").reshape(1,3)
distortion = np.array([[0,0,0,0]],dtype="float")
camera = np.array((721.5377,0,609.5593,
        0,721.5377,172.854,
        0,0,1),dtype="float").reshape(3,3)
さらに、カメラは後ろの点を投影できないのため
ここでは後ろの点を捨てる、つまりX軸マイナスの部分
a = np.where(pointcloud[:,0]>=0)
pointcloud = pointcloud[a]
残された点群と先のパラメータ一緒に入力して
reTransform = cv2.projectPoints(pointcloud,rotation,translation,camera,distortion)
reTransform = reTransform[0][:,0].astype(int)
これでは3次元の点群をカメラ座標系に投影完了
でも結果中でまだカメラは投影できないの点があるため、も一回フィルタする
対象は座標が画像のサイズ (1242,375) を超えた点
pixel = reTransform
filter = np.where((pixel[:,0]<1242)&(pixel[:,1]<375)&(pixel[:,0]>=0)&(pixel[:,1]>=0))
pixel = pixel[filter]
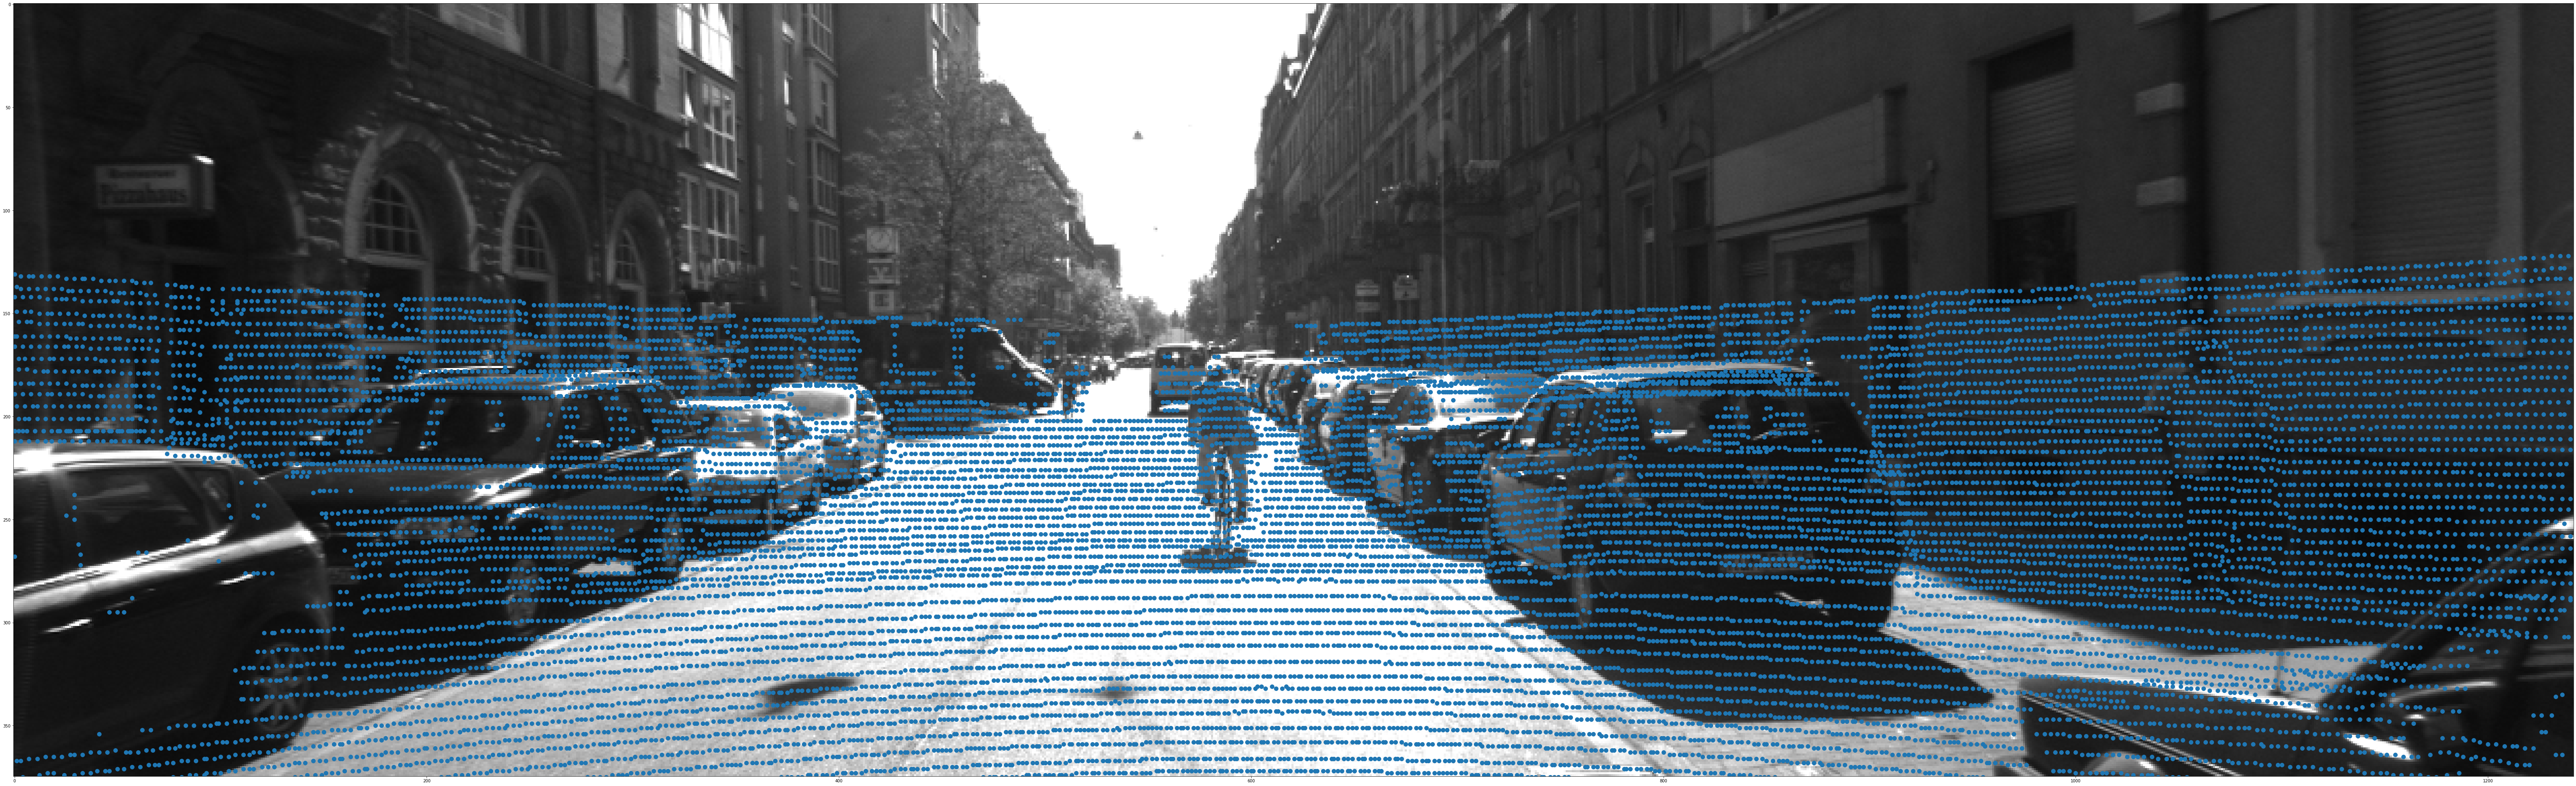
可視化
plt.scatter(pixel[:,0], pixel[:,1] , s=100)
plt.imshow(image)

投影変換(Project) II
先のcv2.projectPoints関数では点群を
LiDAR座標系---カメラ座標系---画像座標系
このようなルートで変換した
今回の目的、デプス画像を作るため 点群がカメラ座標系でのデータは欲しいので
LiDAR座標系---カメラ座標系部分の変換を先に計算する
点群の座標系変換では pcl ,open3d ,ROS 中でも関数があるけど
今回ではnumpyでやりましょう
3次元の座標変換のやり方では 3次元座標を4次元のように書き 4x4の変換行列式と掛け
![]()
変換行列では回転行列と変換ベクトルの組合である
![]()
も一回点群データを導入、さらに後の計算ため 今回は4位の反射率データを捨てじゃなく 全部1に設置する
pointcloud = np.fromfile("/content/0000000150.bin",dtype=np.float32).reshape(-1,4)
pointcloud[:,3] = 1
rotationとtranslationより 変換行列transformを作成
transform = np.hstack((rotation,translation.reshape(3,-1)))
transform = np.vstack((transform,np.array([0,0,0,1])))
7.533745e-03 -9.999714e-01 -6.166020e-04 -4.069766e-03
1.480249e-02 7.280733e-04 -9.998902e-01 -7.631618e-02
9.998621e-01 7.523790e-03 1.480755e-02 -2.717806e-01
0.000000e+00 0.000000e+00 0.000000e+00 1.000000e+00
次は点群中でループする すべての点群を変換行列と掛けすれば
点群はカメラ座標系に変換する
さらに、変換した点群対して 4位のデータは無用になるため 捨てる
for i in range(pointcloud.shape[0]):
    pointcloud[i] = np.dot(transform,pointcloud[i].reshape(4,-1)).reshape(-1,4)

pointcloud=pointcloud[:,:3]
ここではカメラ座標系での点群データを手に入れた
残るのカメラ座標系---画像座標系変換では、先のようにcv2.projectPointsを使えばよい
同じで、カメラ後ろの点を削除 今回はカメラ座標系のため 対象はZ値がマイナスの点
a = np.where(pointcloud[:,2]>=0)
pointcloud = pointcloud[a]
点群もうカメラ座標系に変換したので、tranlationとrotationを0に設定
rotation=np.array([0,0,0],dtype="float").reshape(3,1)
translation=np.array([0,0,0],dtype="float").reshape(1,3)

reTransform_2=cv2.projectPoints(pointcloud,rotation,translation,camera,distortion)
reTransform_2 = reTransform_2[0][:,0].astype(int)
後のは先と完全一致
pixel = reTransform_2
filter = np.where((pixel[:,0]<1242)&(pixel[:,1]<375)&(pixel[:,0]>=0)&(pixel[:,1]>=0))
pixel = pixel[filter]

plt.scatter(pixel[:,0], pixel[:,1] , s=100)
plt.imshow(image)
当然投影した結果も、先と一致
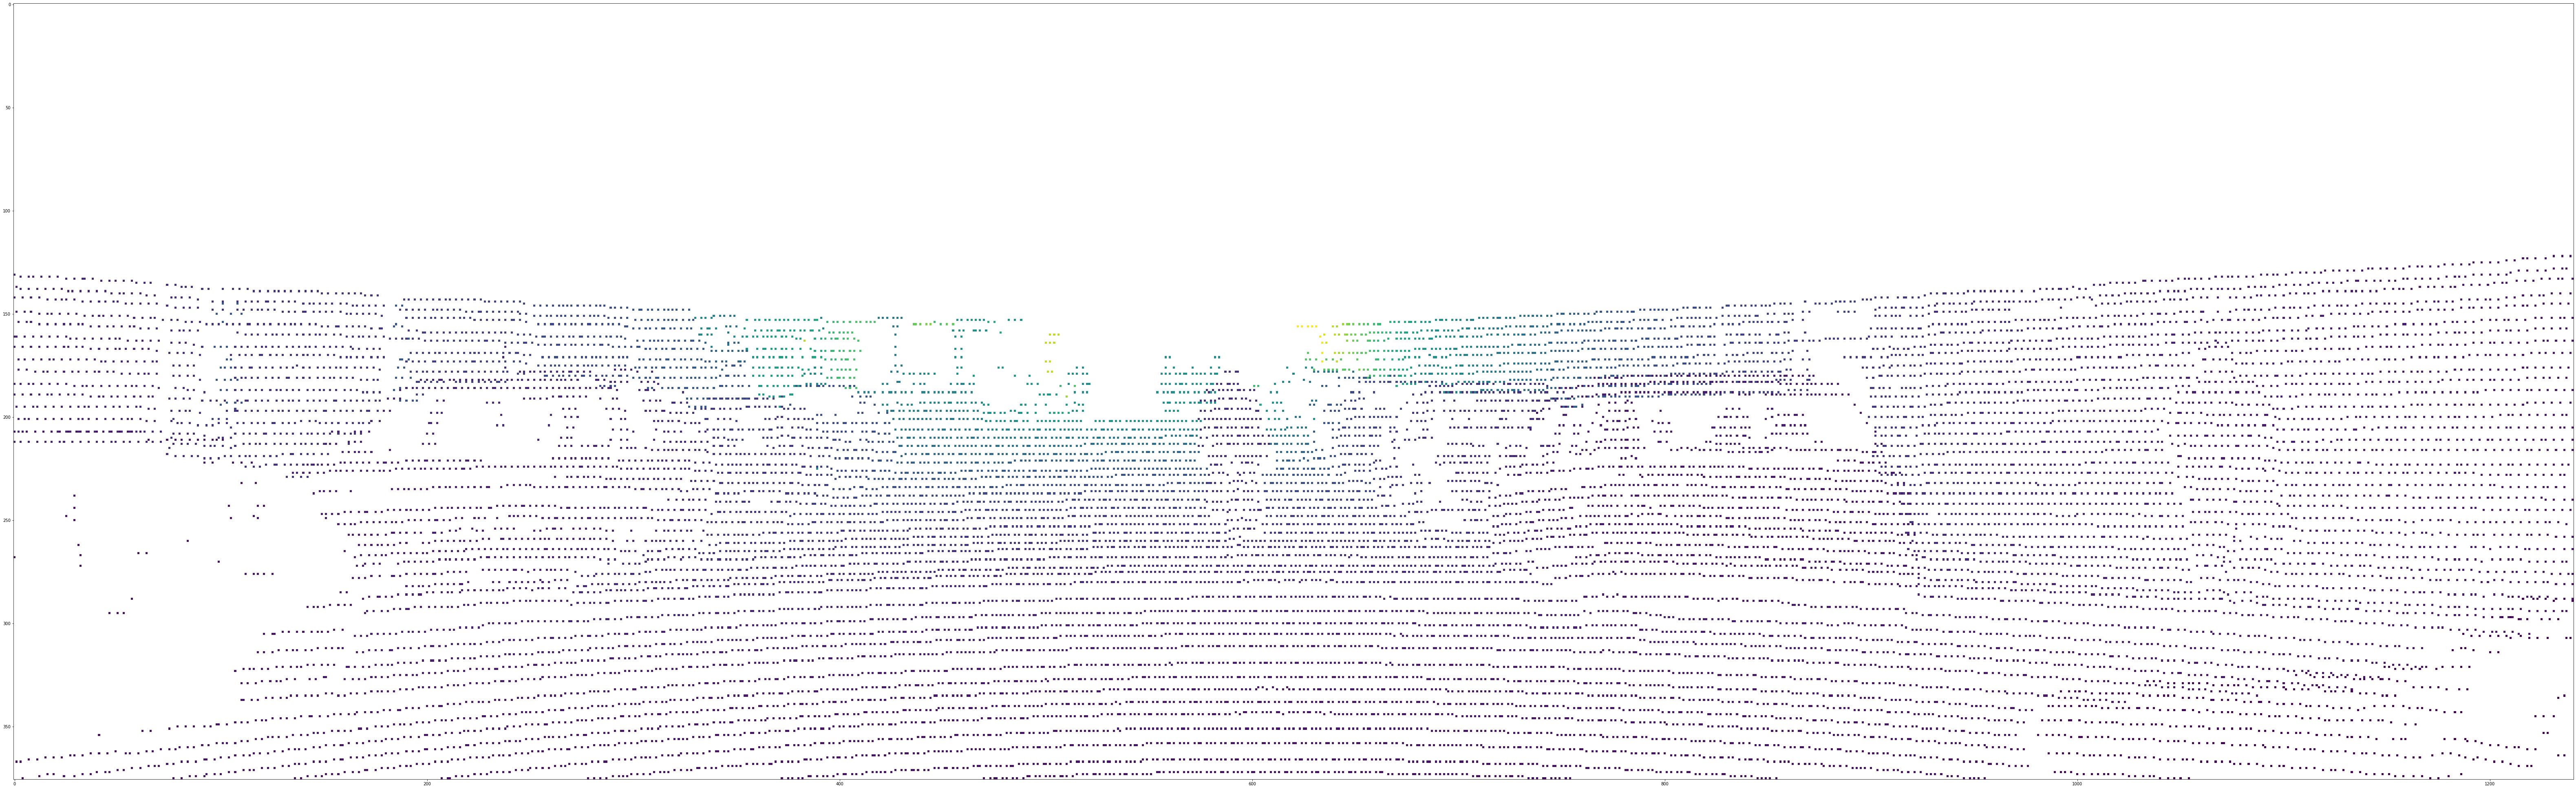
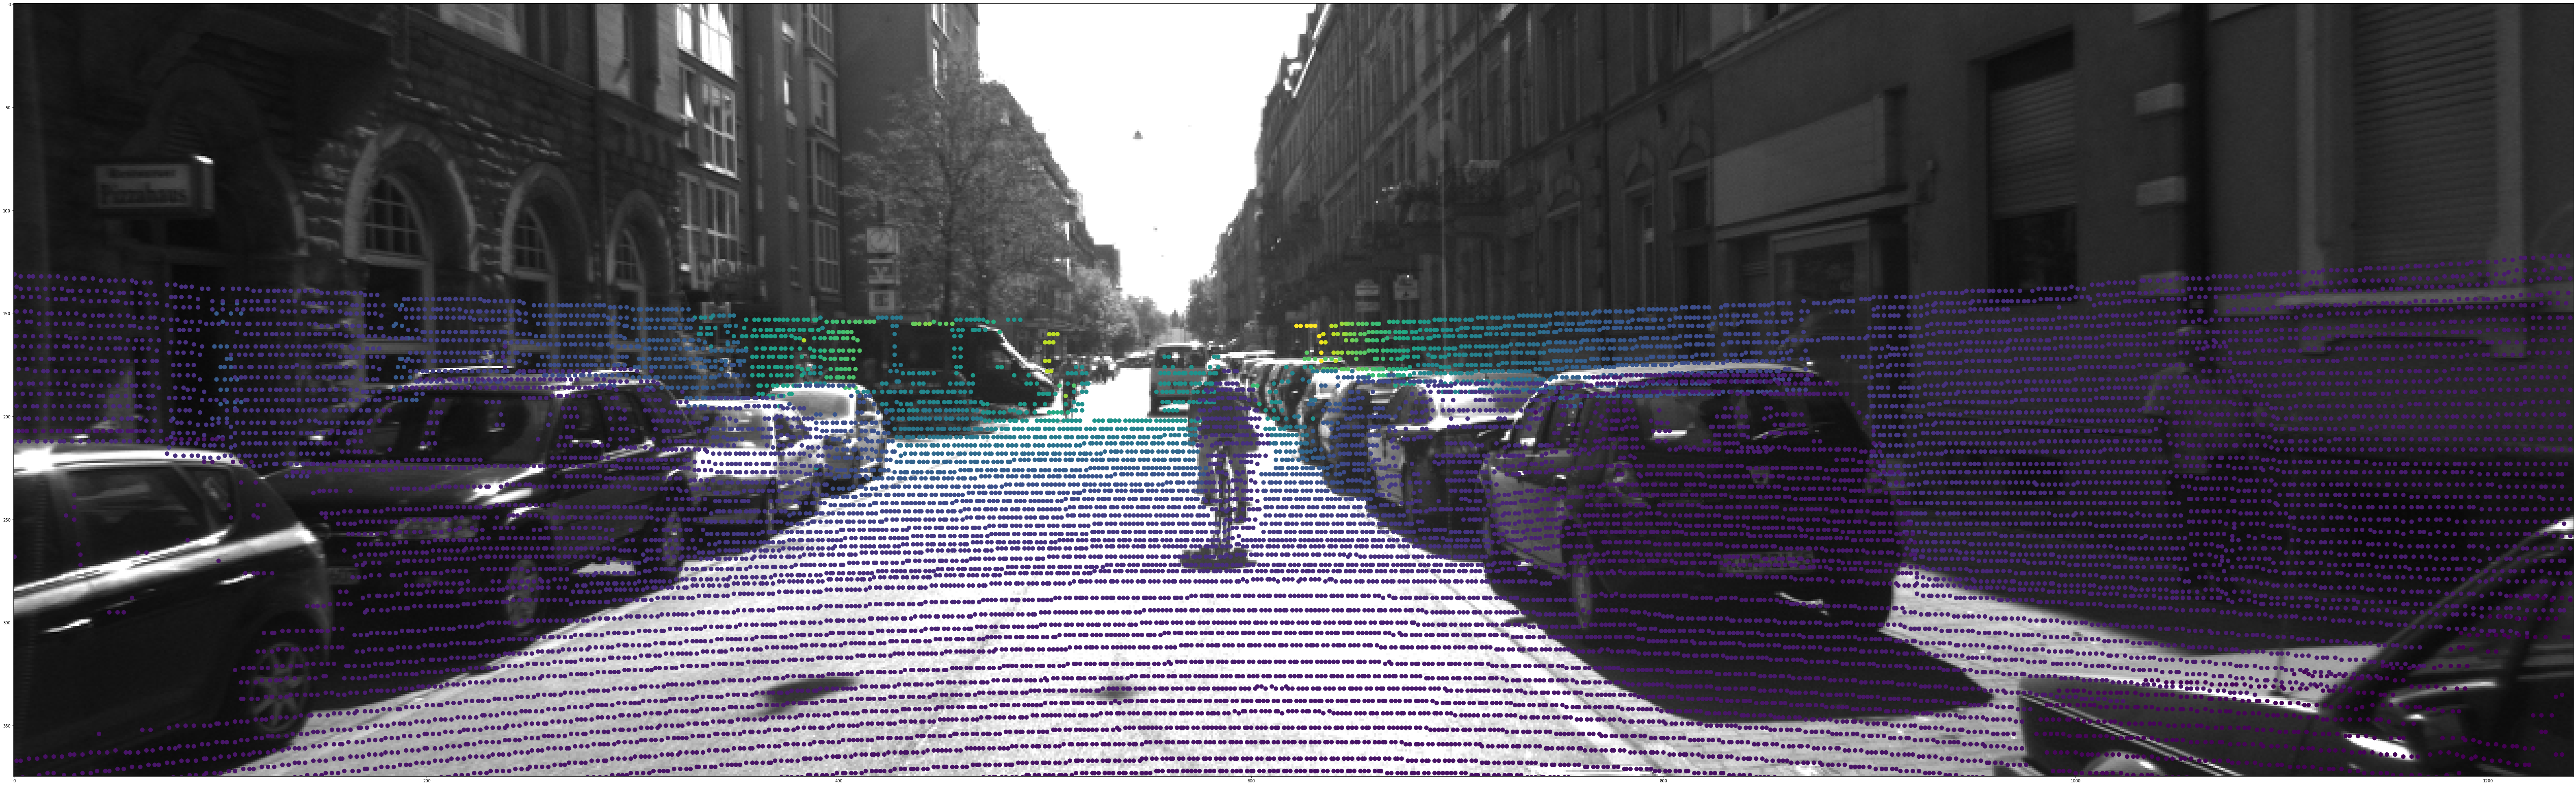
デプス画像作成
デプス画像のデプスでは 点とカメラの距離 すなわちカメラ座標系でのZ値である
先フィルタを用いて画面以外の点を削除したので、デプス値も対応のデータを削除
depth = pointcloud[:,2].reshape(-1,1)[filter]
plt.scatter(pixel[:,0], pixel[:,1] ,c=depth, s=100)
plt.imshow(image)
これでは必要のデータを準備完了
まずは空白の画像を作成
さらに、先投影したpixelデータを座標にとして入力
対応した位置に対応のdepthデータを入れる
depth_image=np.full(image.shape[0:2],np.nan)
depth_image[pixel[:,1],pixel[:,0]] = depth[:,0]
これではデプス画像(低密度)を作成しました