概要
-
ローカルで開発したサーバを一時的に公開するのに便利な ngrok というサービスを試してみました。
-
例えば次のようなことができます。
- 「localhost:3000」で動かしている手元のサーバへアクセスするためのURLを発行し、同僚に試してもらう。
- Google Colabで実行しているLLMをAPIとして一時的に公開し、クライアントに触ってもらう。
-
「ちょっとした機能を試してもらいたいけれど、公開やセキュリティが気になる」という場面で非常に便利です。
筆者はデータサイエンティストとしてクライアント向けに分析やモデル構築を行っています。これまでは、手元で動かしているモデルをデモする際、画面共有で見せるだけでした。しかし「実際に触ってみたい」という要望に応えられず、もどかしく感じていました。
そんなときに便利なのがngrokです。これを使えば、手元のFastAPIなどを一時的にWeb公開し、クライアントが自分で触れるデモ環境を用意できるようになります。
また、URLと認証情報(ID/パスワード)を知っている人だけに限定して公開できるのも安心です。
使い方
事前準備
-
ngrokのトークンを発行します。
ngrokの公式サイト でアカウントを作成すれば、すぐに発行できます。
無料プランでも月2万回までアクセスできるため、軽いデモ用途なら十分です。 -
発行したトークンをGoogle Colabの「シークレット」機能に登録します。
コード例と整合性を取るため、キー名はNGROK_AUTHTOKENとして登録してください。
超単純な使い方(Google Colab前提)
⚠️ まずは仕組み理解のための最小構成です。
セキュリティ面で脆弱なので、社内共有やクライアント公開の際は後述のBasic認証を必ず設定してください。
1. ライブラリのインストール
!pip install -q fastapi nest-asyncio uvicorn pyngrok
2. ライブラリのインポート
from fastapi import FastAPI
from fastapi.middleware.cors import CORSMiddleware
import nest_asyncio
from pyngrok import ngrok
import uvicorn
3. FastAPIサーバの設定
app = FastAPI()

# CORS設定
app.add_middleware(
    CORSMiddleware,
    allow_origins=["*"],
    allow_credentials=True,
    allow_methods=["*"],
    allow_headers=["*"],
)
4. APIエンドポイントの定義
@app.get("/")
async def root():
    return {"hello": "world"}
5. サーバ起動とトンネル接続
nest_asyncio.apply()
import asyncio
from google.colab import userdata

ngrok.set_auth_token(userdata.get("NGROK_AUTHTOKEN"))
ngrok_tunnel = ngrok.connect(8000)
print("PUBLIC_URL:", ngrok_tunnel.public_url)

config = uvicorn.Config(app, port=8000)
server = uvicorn.Server(config=config)
asyncio.run(server.serve())
実行すると、
PUBLIC_URL: https://xxxxxx.ngrok-free.dev のようにURLが出力されます。
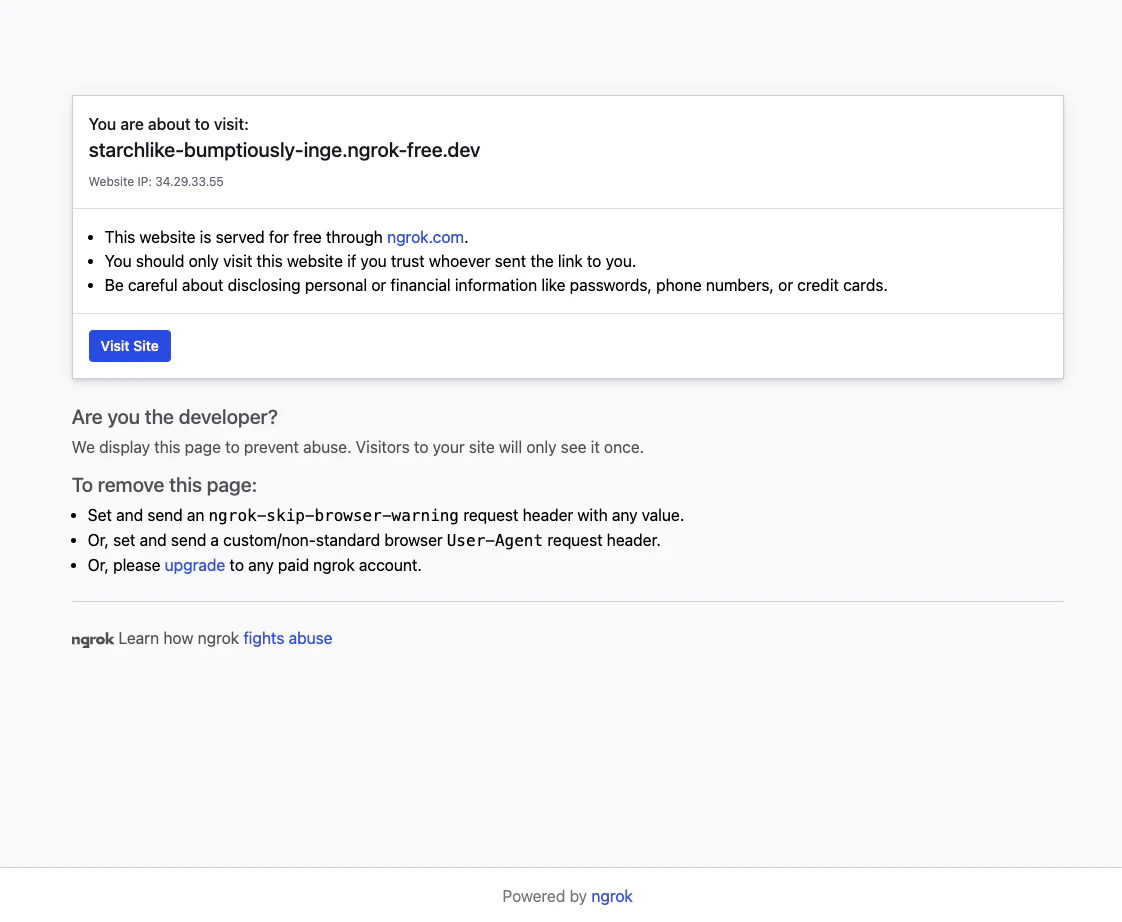
クリックすると以下のようなものが出るかもしれませんが、VisitSiteをクリックして大丈夫です。
ブラウザでアクセスすると {'hello': 'world'} が表示され、APIが外部公開されたことが確認できます。
サーバを閉じる方法
テストが終わったら、必ずトンネルを閉じて公開を停止しましょう。
ngrok.disconnect(ngrok_tunnel.public_url)
仕組みの理解
ngrokを使うと、次のような仕組みでColab上のAPIに外部からアクセスできます。
-
ユーザーがngrokのURLにアクセス
例)https://xxxx.ngrok-free.app -
ngrokのクラウドサーバが受け取る
リクエストはインターネット経由でngrokサーバに届きます。 -
暗号化されたトンネルを通して転送
ngrokはColab上のポート(例:8000)に接続しているトンネルを介してリクエストを転送します。 -
Colab上のFastAPIが処理し、結果を返す
つまり、ファイアウォール設定やネットワーク構成を気にせず、ローカル環境を一時的に外部公開できるという仕組みです。
Basic認証を使ってセキュアに公開する
💡 一時的なデモや検証用途に限定して利用しましょう。
常時稼働する本番APIには不向きです。
ngrokでは「URLを知っている+ID/パスワードを知っている人だけがアクセスできる」設定が可能です。
Basic認証の設定ポイント
認証をかけられる箇所は2つあります。
| 番号 | 認証を行う場所 | 概要 |
|---|---|---|
| ① | ngrokサーバ側 | トンネルの入り口で認証を実施 |
| ② | APIサーバ側 | FastAPI側で認証を実施 |
短時間のデモ利用であれば、①だけでも十分です。
以下で両方のパターンを紹介します。
① ngrokサーバ側でBasic認証をかける
!pip install -q fastapi nest-asyncio uvicorn pyngrok
from fastapi import FastAPI
from fastapi.middleware.cors import CORSMiddleware
from pyngrok import ngrok
import nest_asyncio, uvicorn, asyncio
from google.colab import userdata
app = FastAPI()
@app.get("/")
async def root():
    return {"hello": "world"}
ngrok.set_auth_token(userdata.get("NGROK_AUTHTOKEN"))
ngrok_tunnel = ngrok.connect(8000, auth="test-user:test-secret-password")
print("PUBLIC_URL:", ngrok_tunnel.public_url)

app.add_middleware(
    CORSMiddleware,
    allow_origins=[ngrok_tunnel.public_url],
    allow_credentials=True,
    allow_methods=["GET", "POST"],
    allow_headers=["Authorization", "Content-Type"],
)
nest_asyncio.apply()
config = uvicorn.Config(app, port=8000)
server = uvicorn.Server(config=config)
asyncio.run(server.serve())
アクセスすると、ブラウザに認証ダイアログが表示されます。
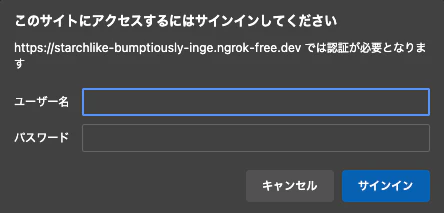
ここに設定した test-user と test-secret-password を入力すればアクセスできます。
終了時は以下を実行してトンネルを閉じます。
ngrok.disconnect(ngrok_tunnel.public_url)
② APIサーバ側でBasic認証をかける
!pip install -q fastapi nest-asyncio uvicorn pyngrok
from fastapi import FastAPI, Depends, HTTPException, status
from fastapi.security import HTTPBasic, HTTPBasicCredentials
from fastapi.middleware.cors import CORSMiddleware
from pyngrok import ngrok
import nest_asyncio, uvicorn, asyncio, secrets
from google.colab import userdata
app = FastAPI()
security = HTTPBasic()

# =============
# NOTE:
# FastAPIを使って、IDとPasswordを検証し、
# 不正なものであれば、401をreturnし、正常なIDとPasswordでは正しくエンドポイント今回の場合は、(root関数に)接続できます。
# =============
def verify_credentials(credentials: HTTPBasicCredentials = Depends(security)):
    correct_username = "test-user"
    correct_password = "test-secret-password"
    if not (secrets.compare_digest(credentials.username, correct_username) and
            secrets.compare_digest(credentials.password, correct_password)):
        raise HTTPException(
            status_code=status.HTTP_401_UNAUTHORIZED,
            detail="Invalid credentials",
            headers={"WWW-Authenticate": "Basic"},
        )
    return credentials.username

@app.get("/")
async def root(username: str = Depends(verify_credentials)):
    return {"hello": f"world, welcome {username}"}
ngrok.set_auth_token(userdata.get("NGROK_AUTHTOKEN"))
ngrok_tunnel = ngrok.connect(8000)
print("PUBLIC_URL:", ngrok_tunnel.public_url)

app.add_middleware(
    CORSMiddleware,
    allow_origins=[ngrok_tunnel.public_url],
    allow_credentials=True,
    allow_methods=["GET", "POST"],
    allow_headers=["Authorization", "Content-Type"],
)

nest_asyncio.apply()
config = uvicorn.Config(app, port=8000)
server = uvicorn.Server(config=config)
asyncio.run(server.serve())
アクセス時に認証ダイアログが表示され、設定したユーザー名・パスワードで認証できます。

ここに設定した test-user と test-secret-password を入力すればアクセスできます。
終了時は以下を実行してトンネルを閉じます。
ngrok.disconnect(ngrok_tunnel.public_url)
まとめ
- ngrokを使えば、Google Colabやローカル環境のAPIを簡単に外部公開できる。
- Basic認証を併用することで、限定的で安全なデモ環境を構築できる。
- 公開後は必ずトンネルを閉じること。
ちょっとしたモデルやアプリのデモをクライアントに「触ってもらう」際に、とても役立ちます。