はじめに
性能とコーディングスピードのいいとこ取りをしたいと考えたとき、PythonからC++を呼ぶことを一度は検討すると思います。CPUをたくさん使う重たい処理(HotSpot)だけC++で実装し、I/Fは実装が楽なPythonで実装することで、ナイスなソフトウェアが作れそうです。
一方で、複数言語からなるソフトウェアは保守面を考えるとあまりやりたくないため、なかなか手が出づらい領域ではあります。また、バインディングにはオーバヘッドが必ず存在するため、要求性能によってはそれが足かせになってしまうかもしれません。実際どのぐらいオーバヘッドがあるのかも調査しなければなりません。
とはいえどうすれば実装できるのか、課題としてどんなものがあるのかは知識として持っておきたかったので、試行錯誤した記録を残したいと思います。
環境
- Windows10
- gcc 13.1.0(MinGW)
- Make 3.81
- cmake 3.27.0
- Python 3.11.9
作業の前に
PythonからC++を呼ぶ方法は複数あるらしい。以下に著名なものをとざっくりとした特徴を列挙します。
| ライブラリ名 | 特徴 |
|---|---|
| Python C API | Python標準実装。コードが複雑になりがち。 |
| Cython | Python風な記法で記述するとCに変換して実行してくれる。逆に言えばCを呼んでいるわけではない。 |
| Boost.Python | Python C APIより簡潔に記述可能。C++からPythonを呼ぶことも可能。 |
| pybind11 | Boost.Pythonより後発なため更に簡潔に記述可能。C++からPythonを呼ぶことも可能。 |
| SWIG | Pythonに限らずスクリプト言語からC++を呼ぶフレームワーク |
今から手を出すなら、Boost.Pythonかpybind11が良さそう。ネット上の情報もそれなりに充実してきている。今回は後発のpybind11のほうが便利になっているだろうと想像してpybind11を試して見ます。
環境構築
pybind11
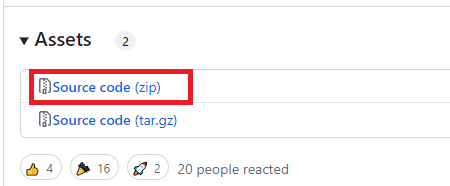
pybind11はヘッダーオンリーなライブラリのため、ビルド作業は不要です。以下からライブラリをダウンロードします。
プロジェクトを作る
今回はcpp_extentionというディレクトリを作成して作業しました。ダウンロードしたpybind11を解凍し、cpp_extention/extern/pybind11に配置します。
cpp_extention
├─extern
│  └─pybind11
├─src
│  └─modules.cpp
└─CMakeLists.txt
CMakeLists.txt
CMakeLists.txtに以下を記述します。
cmake_minimum_required(VERSION 3.21)
project(cpp_extention CXX)

add_subdirectory(extern/pybind11)

file(GLOB MY_SOURCE src/*)

pybind11_add_module(${PROJECT_NAME} ${MY_SOURCE})

target_include_directories(
    ${PROJECT_NAME}
    PRIVATE
)

target_link_libraries(
    ${PROJECT_NAME}
    PRIVATE
)
ポイントは2つ。1つめがadd_subdirectoryでpybind11と関連付けているところ、2つめがpybind11_add_moduleというpybind11の関数を使って、モジュールを作成しているところです。
チュートリアルの例
チュートリアルにある、c++で2つのintの加算結果を返すプログラムを作ってみます。
#include <pybind11/pybind11.h>

int add(int i, int j) {
    return i + j;
}

PYBIND11_MODULE(cpp_extention, m) {
    m.doc() = "pybind11 example plugin"; // optional module docstring

    m.def("add", &add, "A function that adds two numbers");
}
これをビルドすると、build/cpp_extention.cpp311-win_amd64.pydのように共有オブジェクトが出来上がります。Linuxだと.so形式になります。
使うときは上記共有オブジェクトにPYTHONPATHを通した状態で、モジュール名でインポートすることで実行できます。
import cpp_extention

print(cpp_extention.add(3, 4))
よくあるエラー
Python実行時に「ImportError: DLL load failed while importing cpp_extention: 指定されたモジュールが見つかりません。」のエラーが発生する場合があります。
原因1
cpp側でPYBIND11_MODULEマクロの第一引数で宣言しているcpp_extentionですが、これがビルドしてできた共有オブジェクトにかかれているモジュール名と一致していない可能性があります。
PYBIND11_MODULE(cpp_extention, m) {
今回の例だとCMakeLists.txtでプロジェクト名cpp_extentionをモジュール名としているため、module.cpp側でもcpp_extentionとする必要があります。
project(cpp_extention CXX)

pybind11_add_module(${PROJECT_NAME} ${MY_SOURCE})
原因2
これはWindowsだけですが、MinGWを使用している場合、mingw64/bin配下のDLLがうまく読み込めていない場合にも発生します。
設定や環境変数を見直す他、os.add_dll_directory関数でパスを追加する方法もあります。
import os
os.add_dll_directory("C:/mingw64/bin")
配列の連携
pybind11/stl.hをインクルードすることで、std::vectorやstd::arrayなどの配列のやり取りができるようになります。Python側では標準の配列のほかNumpyを直接入力することもできます。
#include <pybind11/pybind11.h>
#include <pybind11/stl.h>

#include <algorithm>
#include <vector>

std::vector<int> twice(const std::vector<int>& vec) {
    std::vector<int> result(vec.size());
    std::transform(vec.begin(), vec.end(), result.begin(),
                   [](int x) { return x * 2; });
    return result;
}

PYBIND11_MODULE(cpp_extention, m) {
    m.doc() = "pybind11 example plugin";  // optional module docstring

    m.def("twice", &twice, "A function to double the elements");
}
vec = [1, 2, 3, 4, 5]
print(cpp_extention.twice(vec))
# [2, 4, 6, 8, 10]

vec = np.array(vec)
print(cpp_extention.twice(vec))
# [2, 4, 6, 8, 10]
構造体・クラスの連携
C++で定義した構造体やクラスをPython側に連携することも可能です。
namespace py = pybind11;

struct MyStruct {
    int int_value;
    std::string string_value;
};

MyStruct change_value(MyStruct member) {
    member.int_value = 10;
    member.string_value = "test";
    return member;
}

PYBIND11_MODULE(cpp_extention, m) {
    m.doc() = "pybind11 example plugin";  // optional module docstring

    py::class_<MyStruct>(m, "MyStruct")
        .def(py::init<>())
        .def_readwrite("int_value", &MyStruct::int_value)
        .def_readwrite("string_value", &MyStruct::string_value);
    m.def("change_value", &change_value,
          "A function that changes struct members");
}
my_struct = cpp_extention.MyStruct()
my_struct = cpp_extention.change_value(my_struct)
print(f"{my_struct.int_value=}, {my_struct.string_value=}")
# my_struct.int_value=10, my_struct.string_value='test'
OpenCV画像の連携
pybind11/numpy.hをインクルードすることで、Python側で読み込んだ画像データ(np.ndarray形式)をC++に共有し、C++側でOpenCVの関数を実行するようなこともできます。
#include <pybind11/numpy.h>
#include <pybind11/pybind11.h>

#include <opencv2/opencv.hpp>

// NumPy配列をOpenCVのMatに変換
cv::Mat numpy_to_mat(py::array_t<uint8_t> input_array) {
    py::buffer_info buf_info = input_array.request();
    int rows = buf_info.shape[0];
    int cols = buf_info.shape[1];
    uint8_t* data = static_cast<uint8_t*>(buf_info.ptr);
    return cv::Mat(rows, cols, CV_8UC3, data);
}

// OpenCVのMatをNumPy配列に変換
py::array_t<uint8_t> mat_to_numpy(const cv::Mat& mat) {
    py::array_t<uint8_t> output_array({mat.rows, mat.cols}, mat.data);
    return output_array;
}

// 画像をグレースケールに変換する関数
py::array_t<uint8_t> convert_to_grayscale(py::array_t<uint8_t> input_array) {
    // NumPy配列をOpenCVのMatに変換
    cv::Mat image = numpy_to_mat(input_array);

    // グレースケールに変換
    cv::Mat gray_image;
    cv::cvtColor(image, gray_image, cv::COLOR_BGR2GRAY);

    // グレースケール画像をNumPy配列に変換して返す
    return mat_to_numpy(gray_image);
}

PYBIND11_MODULE(cpp_extention, m) {
    m.doc() = "pybind11 example plugin";  // optional module docstring

    m.def("convert_to_grayscale", &convert_to_grayscale,
          "A function that converts an image to grayscale");
}
image = cv2.imread("cat.jpg")
image = cpp_extention.convert_to_grayscale(image)
cv2.imwrite("cat_gray.jpg", image)
おわりに
想像より簡単にC++連携が実装できて驚き。比較のためBoost.Pythonを使った方法も試してみたい。
