
こんにちは、世田谷区の 用賀じゅんちゃんおじさん です。
直にうごくJavaScript になるか実験
HSP3Dishは現状でもブラウザ上で動作します、が…
国産プログラミング言語【 HSP3 】は もともとWindows用アプリ開発のための言語でしたが、現在では【 HSP3Dish 】というスタイルでプログラミングすることで、スマホやWebブラウザ上でも動作させることが可能になっています。
ただ、完成したあとに、
・HSP3Dish Helper での変換作業が必要になる
・ブラウザ上で動作させるには【 hsp3dish.js 】というランタイム(ファイル)が必要になる
という制約がありました。
なので、今回は実験的に、
「 HSP3Dishで作ったスクリプト(簡単なシューティングゲームプログラム)を、そのままブラウザ上で直接うごくJavaScriptにしてくれ!」
と AI に依頼(丸投げ)したらどうなるかやってみました。
あなたは、ゲーム開発プログラマーです。以下のHSP3Dish用のスクリプトを、普通のJavaScriptに書き換えて、
ブラウザ上で動作するゲームになるように修正してください

// いちばん簡単なシューティングゲーム
//	むかしのHSP公式サンプル(ver2.5時代)を hsp3Dish.js で動作するように修正したスクリプト
#include "hsp3dish.as"

	screen 0,320,400			// メイン画面(ID 0)のサイズを設定
	buffer 1,128,128
	celload "chr.png",1,0		// 画像は好きな素材に変更してもよい
	celdiv	1,48,48,0,0			// 1セルのサイズが変わったら変更する
	gsel 0

	//ボタンオブジェクト
	objsize 60,30
	pos 320-64,400-32 : button "Shot ON!", *shot_on
	autoshot = 0		//自動ショットフラグ
	//--------------------------- 自機の初期設定
	px=144 : py=352		// 自機の初期位置
	tmx=3				// 自機弾の最大数
	hp=5				// 自機の耐久値(★この数値をあげると強くなります!
	dim tf,tmx			// 自機弾発射中フラグ
	dim tx,tmx : dim ty,tmx			// 弾位置の配列変数
	repeat tmx : tf.cnt=0 : loop	// 自機弾発射中フラグ(1で発射中)
	//--------------------------- 敵の初期設定
	emx=4				// 敵の数
	ecn=emx				// 敵の全滅チェック用
	dim ehp,emx					// 敵の耐久値
	dim ex,emx : dim ey,emx		// 敵の位置
	dim dx,emx : dim dy,emx		// 移動方向の配列変数
	repeat emx					// 敵の数だけ繰り返す
		ehp.cnt=3							// 敵の耐久値
		ex.cnt=rnd(288) : ey.cnt=rnd(168)	// 位置
		r=rnd(5) : dx.cnt=(r-2)*4 : r=rnd(5) : dy.cnt=(r-2)*4	// 移動方向を設定
	loop

	etmx=8						// 敵弾の数
	dim etf,etmx				// 敵弾発射中フラグ
	dim etx,etmx : dim ety,etmx	// 弾の位置
	dim tdx,etmx : dim tdy,etmx	// 弾移動方向の配列変数
	repeat etmx : etf.cnt=0 : loop	// 敵弾発射中フラグ(1で発射中)

	gmode 2		//モードを透明色ありに設定
//===============================================↓このまま突入
// メインループ
*main
	redraw 0			// 画面描画を一時停止
	color 0,0,0 : boxf	// 画面を黒に塗りつぶす
	stick ky,15			//キー入力検知(1+2+4+8=15 方向キー4つは非トリガータイプ指定)
	if ky&1 : px-=8 : if px<8 : px=8		// 自機の移動
	if ky&4 : px+=8 : if px>280 : px=280
	if ky&2 : py-=8 : if py<200 : py=200
	if ky&8 : py+=8 : if py>360 : py=360
	// 《 タッチ検出 》
	mtlist touchid			//現在タッチされている情報を持つポイントIDリストを取得
	id = touchid(0)			//シングルタッチのみ対応
	mtinfo touch,id
	if touch(0) = 1 {	//タッチしているあいだは実行
		//どこがタッチされたか判定
		y = touch(2) : x = touch(1)		//タッチされたxy座標
		// 自機サイズが48*48なのでその中心を基準にするため+24して判定
		if x<px+24 : px-=8 : if px<8 : px=8		// 自機の移動
		if x>px+24 : px+=8 : if px>280 : px=280
		if y<py+24 : py-=8 : if py<200 : py=200
		if y>py+24 : py+=8 : if py>360 : py=360
	}
 	//-----------------------------------------------------------------------
	repeat tmx			// 自機弾の数だけ繰り返す (スペースキーはトリガタイプ)

		if tf.cnt=0 {	// 自機弾の発射準備

			if autoshot=1 {
				tx.cnt=px+8 : ty.cnt=py-16 : tf.cnt=1 : ky=0
			}else{
				if ky&16 : tx.cnt=px+8 : ty.cnt=py-16 : tf.cnt=1 : ky=0
			}

		else { ty.cnt-=16 : if ty.cnt<0 : tf.cnt=0 // 自機弾をまっすぐ移動
		}
		if tf.cnt=1 : n=cnt : gosub *hitchk	//自機弾判定(自機弾が敵に当たったか?)
	loop
 	//-----------------------------------------------------------------------
	pos px,py : celput 1,0,1.0,1.0,0.0		// 自機を表示
	repeat emx								// 敵の数だけ繰り返す
		if ehp.cnt>0 {						// 存在する(HPが1以上ある)敵だけ
			r=rnd(10)						// 動きを乱数で決定
			if r=0 : r=rnd(5) : dx.cnt=(r-2)*4 : r=rnd(5) : dy.cnt=(r-2)*4
			x=ex.cnt : ex.cnt+=dx.cnt
			if (ex.cnt<8)|(ex.cnt>280) : ex.cnt=x : dx.cnt=-dx.cnt
			y=ey.cnt : ey.cnt+=dy.cnt
			if (ey.cnt<8)|(ey.cnt>168) : ey.cnt=y : dy.cnt=-dy.cnt
			pos ex.cnt,ey.cnt : celput 1,3,1.0,1.0,0.0	// 敵を表示
		}
	loop
 	//-----------------------------------------------------------------------
	r=rnd(etmx) : e=rnd(emx)					// 敵弾の発射準備
	if (etf.r=0)&(ehp.e>0) { etx.r=ex.e+8 : ety.r=ey.e+16
		x=rnd(5) : tdx.r=(x-2)*4 : y=rnd(2) : tdy.r=(y+1)*8
		etf.r=1
	}
	repeat etmx			// 敵弾の数だけ繰り返す(敵弾が自機に当たったか?)
		x=etx.cnt : y=ety.cnt
		if ((((etf.cnt=1)&((px+32)>x))&((x+16)>px))&((py+32)>y))&((y+16)>py) {
			etf.cnt=0 : hp- : if hp<1 : end	// 自機の耐久値がゼロになったらゲームオーバー
		}

		if etf.cnt=1 { pos etx.cnt,ety.cnt : celput 1,2,1.0,1.0,0.0	// 敵弾の表示
			etx.cnt+=tdx.cnt : ety.cnt+=tdy.cnt						// 敵弾の移動
			if ((etx.cnt<0)|(etx.cnt>304))|(ety.cnt>384) : etf.cnt=0
		}
	loop
 	//-----------------------------------------------------------------------
	redraw 1				// 描画した画面を更新
	await 100				// ★この数値を変えるとゲームスピードを調整できます!
	if ecn>0 : goto *main	// 敵が全滅するまでメインへループ↑
stop
//=================================================================================
// あたり判定(自機弾が敵に当たったか?)
*hitchk
	repeat emx			// 敵の数だけ繰り返す
		x=ex.cnt : y=ey.cnt
		if ((((ehp.cnt>0)&((x+32)>tx.n))&((tx.n+16)>x))&((y+32)>ty.n))&((ty.n+16)>y) {
			tf.n=0 : ehp.cnt- : if ehp.cnt<1 : ecn-		// 敵の耐久値が0以下なら消滅
		} else {
			pos tx.n,ty.n : celput 1,1,1.0,1.0,0.0		// 自機弾の表示
		}
	loop
return
//=================================================================================
//自動ショットボタンをONにした
*shot_on
	if autoshot=0 : autoshot=1 : else : autoshot=0
	goto *main
//=================================================================================
↑ このAIプロンプトはあくまで書き方の例のひとつです。 AIに指示をするための文章は自由に入力してかまいません。
よりAIにこちらの意図がつたわりやすい書き方、なるべくこちらの期待どおりの成果結果がでる書き方を自分なりにためしてみましょう
⭐️このSTGスクリプト解説ページ →https://junji.jp/net/hsp3/hsp3dish-js-sample_stg/
⭐️このSTGスクリプトが実際に動作しているページ(hsp3dish.jsランタイム使用)→https://dev.onionsoft.net/seed/webdish/b30e1da62e66be69bf74e2c5b199c534.html
< Gemini の回答 >
<!DOCTYPE html>
<html lang="ja">
<head>
    <meta charset="UTF-8">
    <meta name="viewport" content="width=device-width, initial-scale=1.0">
    <title>HSP Shooting Game JS</title>
    <style>
        body {
            background-color: #222;
            color: #fff;
            font-family: sans-serif;
            text-align: center;
            margin: 0;
            padding: 20px;
        }
        #game-container {
            position: relative;
            width: 320px;
            margin: 0 auto;
        }
        canvas {
            background-color: #000;
            border: 2px solid #555;
            display: block;
            touch-action: none; /* タッチイベントのデフォルト動作を抑止 */
        }
        #ui-bar {
            margin-top: 10px;
            display: flex;
            justify-content: space-between;
            align-items: center;
        }
        button {
            padding: 6px 12px;
            font-size: 14px;
            cursor: pointer;
        }
    </style>
</head>
<body>

<h1>HSP2JS Shooting Game</h1>
<div id="game-container">
    <canvas id="canvas" width="320" height="400"></canvas>
    <div id="ui-bar">
        <span id="hp-disp">HP: 5</span>
        <button id="shot-btn">Shot OFF</button>
    </div>
</div>

<script>
// ==========================================
// 初期設定 & 変数定義 (HSPの移植部)
// ==========================================
const canvas = document.getElementById("canvas");
const ctx = canvas.getContext("2d");
const hpDisp = document.getElementById("hp-disp");
const shotBtn = document.getElementById("shot-btn");

let autoshot = 0; // 自動ショットフラグ

// --------------------------- 自機の初期設定
let px = 144, py = 352;
const tmx = 3; // 自機弾の最大数
let hp = 5;

// 自機弾の配列管理
let playerBullets = Array.from({ length: tmx }, () => ({
    tf: 0, // 発射中フラグ
    x: 0,
    y: 0
}));

// --------------------------- 敵の初期設定
const emx = 4; // 敵の数
let ecn = emx; // 敵の全滅チェック用
let enemies = [];

for (let i = 0; i < emx; i++) {
    let r1 = Math.floor(Math.random() * 5);
    let r2 = Math.floor(Math.random() * 5);
    enemies.push({
        ehp: 3,
        x: Math.floor(Math.random() * 288),
        y: Math.floor(Math.random() * 168),
        dx: (r1 - 2) * 4,
        dy: (r2 - 2) * 4
    });
}

// --------------------------- 敵弾の初期設定
const etmx = 8; // 敵弾の数
let enemyBullets = Array.from({ length: etmx }, () => ({
    etf: 0,
    x: 0,
    y: 0,
    tdx: 0,
    tdy: 0
}));

// --------------------------- 入力管理
const keys = {};
window.addEventListener("keydown", (e) => { keys[e.code] = true; });
window.addEventListener("keyup", (e) => { keys[e.code] = false; });

// タッチ/マウス操作の検出
let isTouching = false;
let touchX = 0, touchY = 0;

function updateTouchPos(e) {
    const rect = canvas.getBoundingClientRect();
    const clientX = e.touches ? e.touches[0].clientX : e.clientX;
    const clientY = e.touches ? e.touches[0].clientY : e.clientY;
    touchX = clientX - rect.left;
    touchY = clientY - rect.top;
}

canvas.addEventListener("pointerdown", (e) => { isTouching = true; updateTouchPos(e); });
canvas.addEventListener("pointermove", (e) => { if (isTouching) updateTouchPos(e); });
canvas.addEventListener("pointerup", () => { isTouching = false; });
canvas.addEventListener("pointerleave", () => { isTouching = false; });

// ボタン操作
shotBtn.addEventListener("click", () => {
    autoshot = autoshot === 0 ? 1 : 0;
    shotBtn.textContent = autoshot === 1 ? "Shot ON!" : "Shot OFF";
});

// ==========================================
// ゲームループ & 移動・判定ロジック
// ==========================================
let lastTime = 0;
const interval = 100; // HSPの await 100 に相当(約10fps相当のウエイト)

function gameLoop(timestamp) {
    if (timestamp - lastTime >= interval) {
        lastTime = timestamp;

        // 画面のクリア (color 0,0,0 : boxf)
        ctx.fillStyle = "black";
        ctx.fillRect(0, 0, canvas.width, canvas.height);

        // --- キー&タッチ入力処理 ---
        let isSpacePressed = keys["Space"];

        // キーボード操作 (stick ky,15)
        if (keys["ArrowLeft"] || keys["KeyA"])  { px -= 8; if (px < 8) px = 8; }
        if (keys["ArrowRight"] || keys["KeyD"]) { px += 8; if (px > 280) px = 280; }
        if (keys["ArrowUp"] || keys["KeyW"])    { py -= 8; if (py < 200) py = 200; }
        if (keys["ArrowDown"] || keys["KeyS"])  { py += 8; if (py > 360) py = 360; }

        // タッチ操作
        if (isTouching) {
            if (touchX < px + 24) { px -= 8; if (px < 8) px = 8; }
            if (touchX > px + 24) { px += 8; if (px > 280) px = 280; }
            if (touchY < py + 24) { py -= 8; if (py < 200) py = 200; }
            if (touchY > py + 24) { py += 8; if (py > 360) py = 360; }
        }

        // --- 自機弾の移動&発射 ---
        for (let i = 0; i < tmx; i++) {
            let b = playerBullets[i];
            if (b.tf === 0) {
                if (autoshot === 1 || isSpacePressed) {
                    b.x = px + 8;
                    b.y = py - 16;
                    b.tf = 1;
                    keys["Space"] = false; // ワンショット処理風にするためクリア
                }
            } else {
                b.y -= 16;
                if (b.y < 0) b.tf = 0;
            }

            // 当たり判定
            if (b.tf === 1) {
                hitCheck(i);
            }
        }

        // --- 自機の描画 ---
        ctx.fillStyle = "#3388ff";
        ctx.fillRect(px, py, 48, 48); // 画像(celput)の代わりに青矩形

        // --- 敵の移動&描画 ---
        for (let i = 0; i < emx; i++) {
            let e = enemies[i];
            if (e.ehp > 0) {
                if (Math.floor(Math.random() * 10) === 0) {
                    let r1 = Math.floor(Math.random() * 5);
                    let r2 = Math.floor(Math.random() * 5);
                    e.dx = (r1 - 2) * 4;
                    e.dy = (r2 - 2) * 4;
                }

                let oldX = e.x;
                e.x += e.dx;
                if (e.x < 8 || e.x > 280) { e.x = oldX; e.dx = -e.dx; }

                let oldY = e.y;
                e.y += e.dy;
                if (e.y < 8 || e.y > 168) { e.y = oldY; e.dy = -e.dy; }

                // 敵を表示
                ctx.fillStyle = "#ff4444";
                ctx.fillRect(e.x, e.y, 48, 48);
            }
        }

        // --- 敵弾の発射準備 ---
        let r = Math.floor(Math.random() * etmx);
        let eIdx = Math.floor(Math.random() * emx);
        if (enemyBullets[r].etf === 0 && enemies[eIdx].ehp > 0) {
            let eb = enemyBullets[r];
            eb.x = enemies[eIdx].x + 8;
            eb.y = enemies[eIdx].y + 16;
            let rx = Math.floor(Math.random() * 5);
            let ry = Math.floor(Math.random() * 2);
            eb.tdx = (rx - 2) * 4;
            eb.tdy = (ry + 1) * 8;
            eb.etf = 1;
        }

        // --- 敵弾の移動・描画・自機ヒット判定 ---
        for (let i = 0; i < etmx; i++) {
            let eb = enemyBullets[i];
            let x = eb.x;
            let y = eb.y;

            // 矩形同士の当たり判定
            if (eb.etf === 1 && (px + 32 > x) && (x + 16 > px) && (py + 32 > y) && (y + 16 > py)) {
                eb.etf = 0;
                hp--;
                hpDisp.textContent = `HP: ${hp}`;
                if (hp < 1) {
                    alert("GAME OVER");
                    return; // ループ終了
                }
            }

            if (eb.etf === 1) {
                // 敵弾表示
                ctx.fillStyle = "#ffff00";
                ctx.fillRect(eb.x, eb.y, 16, 16);

                eb.x += eb.tdx;
                eb.y += eb.tdy;

                if (eb.x < 0 || eb.x > 304 || eb.y > 384) {
                    eb.etf = 0;
                }
            }
        }

        // クリアチェック
        if (ecn <= 0) {
            alert("STAGE CLEAR!");
            return;
        }
    }

    requestAnimationFrame(gameLoop);
}

// ==========================================
// 当たり判定サブ・ルーチン (gosub *hitchk に相当)
// ==========================================
function hitCheck(bulletIdx) {
    let b = playerBullets[bulletIdx];
    for (let i = 0; i < emx; i++) {
        let e = enemies[i];
        if (e.ehp > 0 && (e.x + 32 > b.x) && (b.x + 16 > e.x) && (e.y + 32 > b.y) && (b.y + 16 > e.y)) {
            b.tf = 0;
            e.ehp--;
            if (e.ehp < 1) {
                ecn--;
            }
        } else {
            // 自機弾の表示
            ctx.fillStyle = "#00ff88";
            ctx.fillRect(b.x, b.y, 16, 16);
        }
    }
}

// ゲームスタート
requestAnimationFrame(gameLoop);
</script>
</body>
</html>
前回の比較実験でHSP3には Gemini のAIが相性良さそうだったので今回 Gemini を使いましたが、ChatGPT でも Grok でも同様の実験ができると思います
<結果>
⭐️生成結果のSTGスクリプトが実際に動作しているページ(JavaScriptのみで動作。ランタイム無し)→https://junji.jp/net/junchan_stg
生成AIがHSP3dishのスクリプトをJavaScriptに移植(変換、翻訳)できるのか?
一発勝負で実行してみました。試行錯誤はありません。
AIへの日本語指示(AIプロンプト)は思いつきで書きました。所要時間3秒程度。
2026年8月現在、だれでも一般のひとが無料で簡単に使える Google の Gemini AIアシスタント(会話チャット形式)に上記の「AIプロンプト」を貼り付けただけで、見事にJavaScriptに変換して、
そのスクリプトを含む.htmlファイルを生成してくれました。
ほんとうにたったこれだけの「雑な」指示だけで、全自動的にうまいこと移植してくれました。
まったく苦労なく、時間もかかりません。
生成に待つ時間は数秒でした。
もとの内容と同等ななかみになっているだけではなく、元のスクリプトでは外部の画像ファイルを使用している部分を、画像ファイルなしで動作するように「とりあえず楽でイイ感じ」に修正し、きちんと動作するところまで完成させてくれています。
今回はわかりやすいようにスクリプトを貼っていますが、「AIエージェント」、自律的な動作ができるAIであれば、URLを指定すればAI自身がそこにあるスクリプトやソースを収集してくることも可能です。
(URL指定すら無しでも自分で検索して見つけてこられるはずです)
今回の実験をみて、興味を持たれた人はAIを活用して、
ご自身が過去にHSP3で作ったゲームやアプリを移植してみたり、現在の端末環境やプラットフォームに合った最新用に生まれ変わらせるアップデートを施してみたりという実験をしてみるのはいかがでしょうか?
生成AIの使用、無料提供されているWebサービスの利用は、使用条件、使用許諾、免責事項について各自でかならず確認して問題がないか納得してから使用してください。
・生成AIは常にリアルタイムで学習やアップデートを頻繁に行なっています。
おなじ指示文章(プロンプト)を実行しても、おなじ結果が得られないこともあります。
・生成AIを使用する際の指示文章(プロンプト)は自然な日本語のほかに、生成AIが理解しやすく誤解が起きにくい書き方、書式、テクニックがあります。「プロンプト記号」「指示記号」などで検索するとヒントがでてきます。
お知らせ: 現在 HSPプログラムコンテスト2026開催 作品募集中 2026年8月〜10月末日
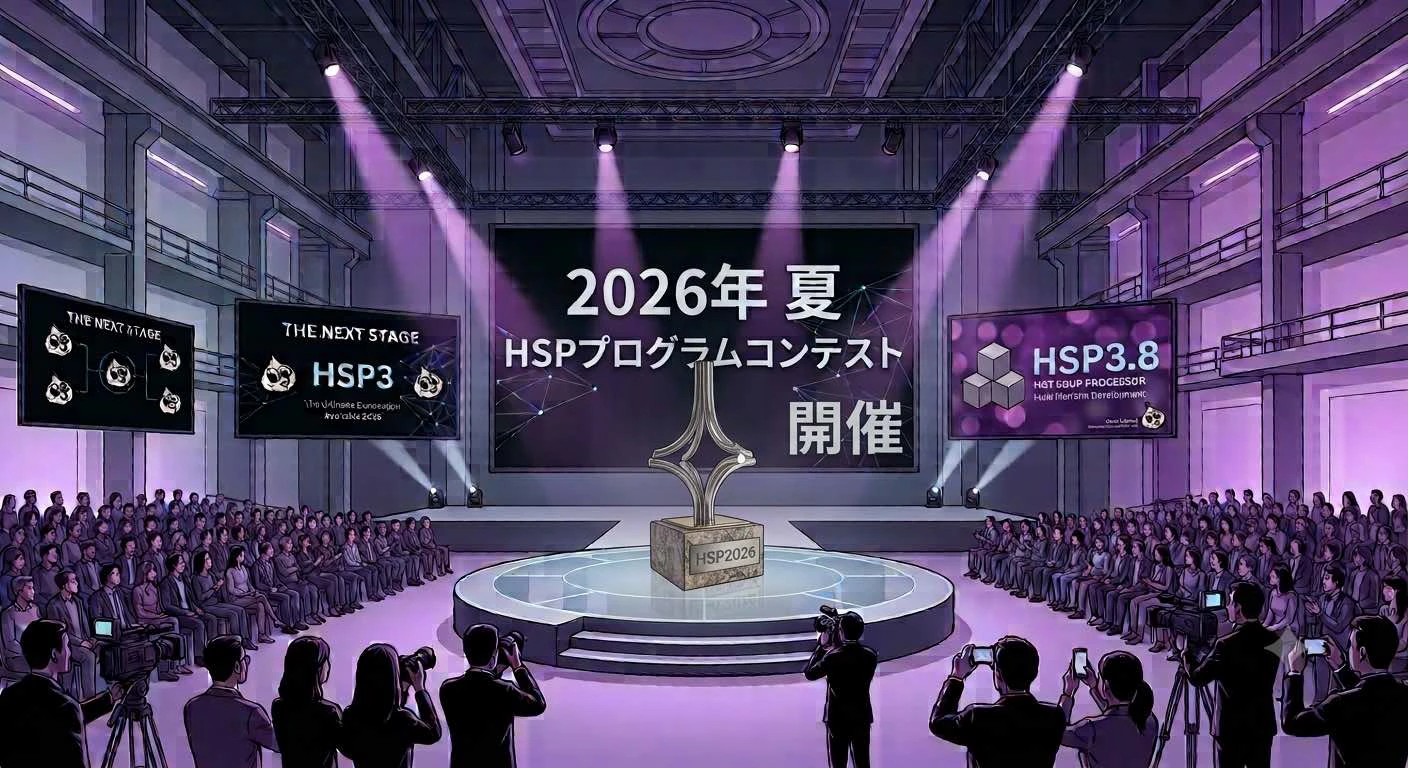
毎年恒例 20年以上の歴史をもつ国産プログラミング言語HSP3のコンテストです。
だれでも気軽に応募できます。
応募された作品はいますぐにだれでもダウンロードしたりブラウザから遊んでみることができます
↓ じゅんちゃんおじさんが作っている HSP3の情報サイト
せたがや新聞 用賀じゅんちゃんおじさん
☺️ 最新版は HSP3.8ベータ版です。
最新のベータ版ダウンロードURLは、HSP公式掲示板の「おにたま(管理人)」という投稿者名の最新投稿に含まれています
ためしてみたら、遠慮なく掲示板に感想や動作結果を書き込んでいただけましたら、みんなの開発アップデート作業の参考になりますので、お気軽に書き込み、お願いいたします