起
秋月電子通商の『Raspberry Piキャラクタ液晶ディスプレイモジュールキット』を使ってIPアドレスを表示する方法を解説する。
なんで秋月電子のI2C液晶かといえば、ぶっちゃけやすく手に入り、RaspberryPiでも割と楽にハンドリングできるからである。
「スイッチサイエンス:Raspberry Pi起動時にI2C接続の小型液晶にIPアドレスを表示させてみる」を参考に動かない部分は修正した。
必要な部品
必要な部品は次の通り。
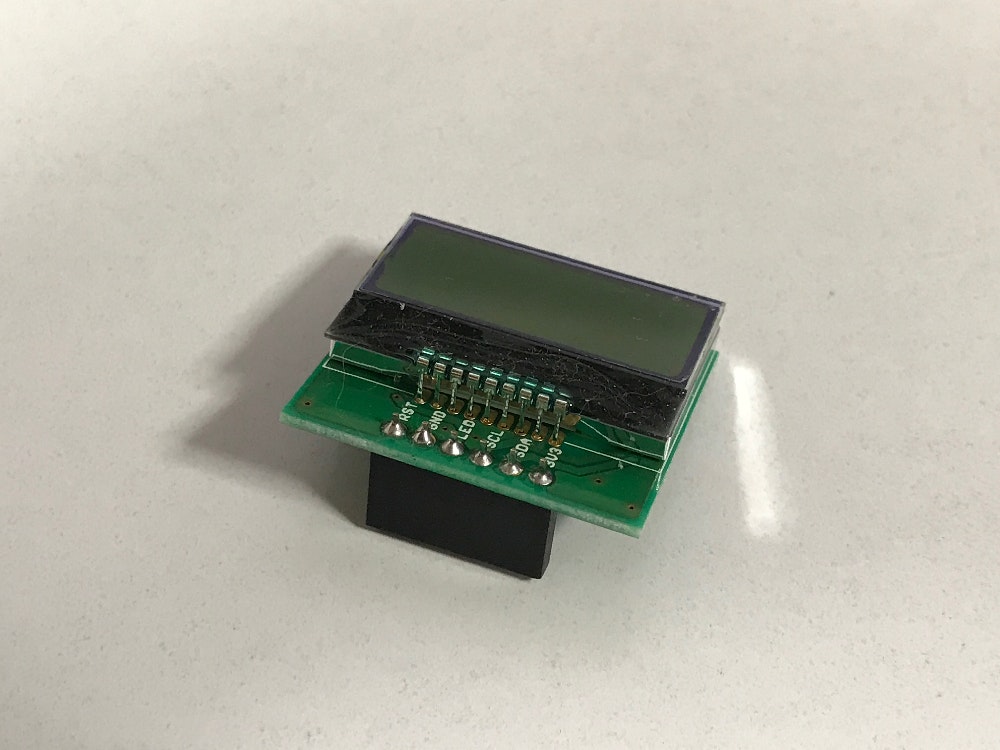
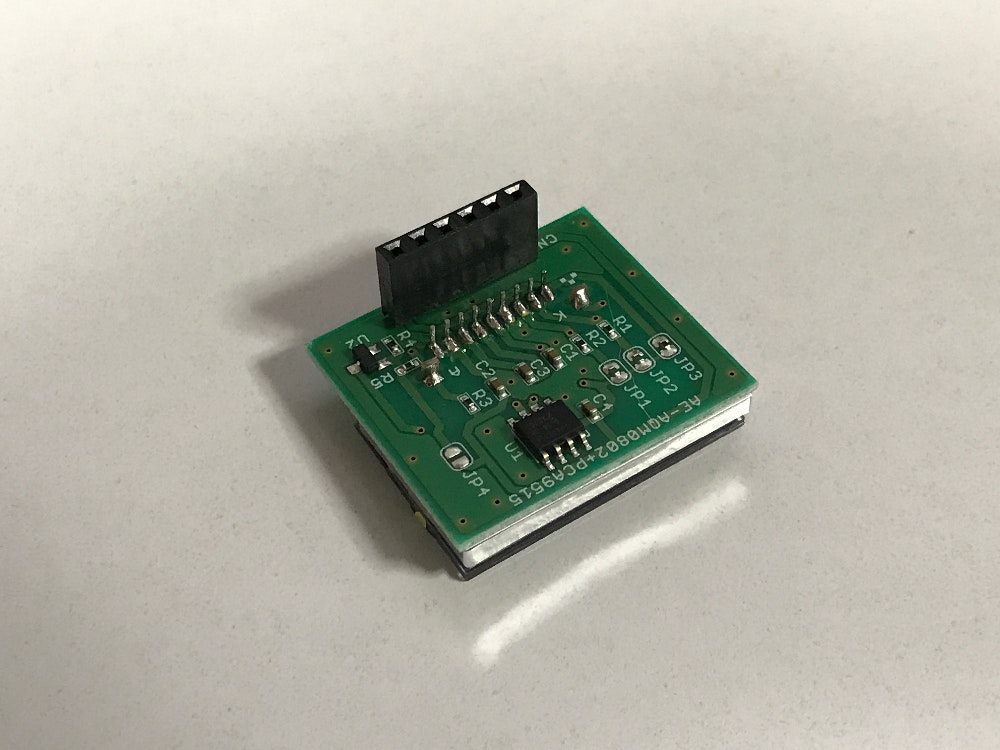
- Raspberry Pi キャラクタ液晶ディスプレイモジュールキット
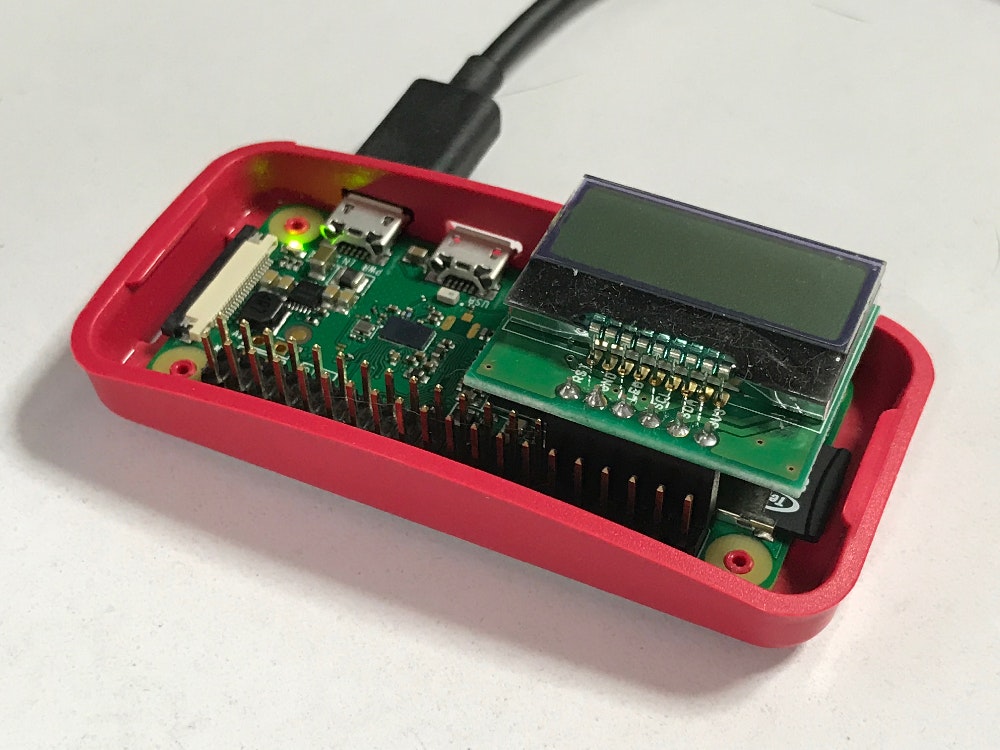
- Raspberry Pi(Zeroでも3でもなんでもいいが、今回はZeroを活用)
秋月のキャラクタ液晶ディスプレイモジュールキットは液晶キットとなるので、はんだ作業に自信がないのであればやめて置いた方がいい。
特にかなり精密なはんだ作業が必要となるので、それなりの機材がないと難しいといえる。
作業
まずははんだ作業であるが、これはキット自体に解説が載っているし、それほど難しい設定でもないので、割愛させて頂く。
ここではソフトウェアの設定などを進めていく。
接続
Raspberry Piとの接続は次のように行う。
キットの中には立ち上げ式と寝かせ式があるので、どちらを使っても問題ない。
液晶のセットアップ
液晶のセットアップはそれほど難しくない。
まずは液晶自体を認識させるため、raspi-configをroot権限で立ち上げ、 5 Interfacing Options を選択する。
┌─────────────────────────────┤ Raspberry Pi Software Configuration Tool (raspi-config) ├──────────────────────────────┐
│                                                                                                                      │
│                  1 Change User Password Change password for the current user                                         │
│                  2 Hostname             Set the visible name for this Pi on a network                                │
│                  3 Boot Options         Configure options for start-up                                               │
│                  4 Localisation Options Set up language and regional settings to match your location                 │
│                  5 Interfacing Options  Configure connections to peripherals                                         │
│                  6 Overclock            Configure overclocking for your Pi                                           │
│                  7 Advanced Options     Configure advanced settings                                                  │
│                  8 Update               Update this tool to the latest version                                       │
│                  9 About raspi-config   Information about this configuration tool                                    │
│                                                                                                                      │
│                                                                                                                      │
│                                  <Select>                                  <Finish>                                  │
│                                                                                                                      │
└──────────────────────────────────────────────────────────────────────────────────────────────────────────────────────┘
すると次のような画面が表示されるので、P5 I2Cを選択する。
┌─────────────────────────────┤ Raspberry Pi Software Configuration Tool (raspi-config) ├──────────────────────────────┐
│                                                                                                                      │
│                   P1 Camera      Enable/Disable connection to the Raspberry Pi Camera                                │
│                   P2 SSH         Enable/Disable remote command line access to your Pi using SSH                      │
│                   P3 VNC         Enable/Disable graphical remote access to your Pi using RealVNC                     │
│                   P4 SPI         Enable/Disable automatic loading of SPI kernel module                               │
│                   P5 I2C         Enable/Disable automatic loading of I2C kernel module                               │
│                   P6 Serial      Enable/Disable shell and kernel messages on the serial connection                   │
│                   P7 1-Wire      Enable/Disable one-wire interface                                                   │
│                   P8 Remote GPIO Enable/Disable remote access to GPIO pins                                           │
│                                                                                                                      │
│                                                                                                                      │
│                                  <Select>                                  <Back>                                    │
│                                                                                                                      │
└──────────────────────────────────────────────────────────────────────────────────────────────────────────────────────┘
そうすると、下記の様にWould you like the ARM I2C interface to be enabled? とI2Cを有効にするかどうかを聞いてくるので、<Yes>と答えると、次の画面で、 The ARM I2C interface is enabledとなるので、<Ok>を選び、最初の画面で<Finish>を選択して終了する。
                              ┌──────────────────────────────────────────────────────────┐
                              │                                                          │
                              │ Would you like the ARM I2C interface to be enabled?      │
                              │                                                          │
                              │                                                          │
                              │                                                          │
                              │                                                          │
                              │                                                          │
                              │                                                          │
                              │                                                          │
                              │                                                          │
                              │                                                          │
                              │                                                          │
                              │                                                          │
                              │                                                          │
                              │                                                          │
                              │                                                          │
                              │               <Yes>                  <No>                │
                              │                                                          │
                              └──────────────────────────────────────────────────────────┘
これで液晶が使用できるようになっているはずである。
確認として、sudo i2cdetect -y 1と入力し、出力を見てみる。
次のように表示されていれば、認識している。
     0  1  2  3  4  5  6  7  8  9  a  b  c  d  e  f
00:          -- -- -- -- -- -- -- -- -- -- -- -- --
10: -- -- -- -- -- -- -- -- -- -- -- -- -- -- -- --
20: -- -- -- -- -- -- -- -- -- -- -- -- -- -- -- --
30: -- -- -- -- -- -- -- -- -- -- -- -- -- -- 3e --
40: -- -- -- -- -- -- -- -- -- -- -- -- -- -- -- --
50: -- -- -- -- -- -- -- -- -- -- -- -- -- -- -- --
60: -- -- -- -- -- -- -- -- -- -- -- -- -- -- -- --
70: -- -- -- -- -- -- -- --
エラー表示を吐いていれば、はんだと接続方法を確認してほしい。
IPアドレスを表示する
次に表示用のスクリプトを次のように入手する。
$ wget https://gist.github.com/MKnkgw/6510893/raw/d1e5ab06725f36d1259a1772cd722b14b0d7f161/ipaddr.sh
ipaddr.shというファイルがダウンロードされたはずなので、chmodコマンドで次のように実行ファイル化を行う。
$ chmod +x ipaddr.sh
このままだと、IPアドレスが表示されないので、少々スクリプトに手を入れる。
まずはnanoコマンドを使用してipaddr.shを開く。
$ nano ipaddr.sh
次のように表示される。
# !/bin/sh

LCD=0x3e
NETWORK=eth0

LANG=
IP=`/sbin/ifconfig $NETWORK | grep "inet addr:" | cut -f2 -d : | cut -f1 -d " "`

echo "IP: $IP"

ip_char_at(){
  ch=`echo -n $IP | od -An -tx1 | cut -d " " -f$1`
  if [ -z $ch ]; then
    echo 0x20
  else
    echo 0x$ch
  fi
}

IP1=`ip_char_at 2`
IP2=`ip_char_at 3`
IP3=`ip_char_at 4`
IP4=`ip_char_at 5`
IP5=`ip_char_at 6`
IP6=`ip_char_at 7`
IP7=`ip_char_at 8`
IP8=`ip_char_at 9`
IP9=`ip_char_at 10`
IP10=`ip_char_at 11`
IP11=`ip_char_at 12`
IP12=`ip_char_at 13`
IP13=`ip_char_at 14`
IP14=`ip_char_at 15`
IP15=`ip_char_at 16`

sudo i2cset -y 1 $LCD 0 0x38 0x39 0x14 0x70 0x56 0x6c i
sudo i2cset -y 1 $LCD 0 0x38 0x0d 0x01 i
sudo i2cset -y 1 $LCD 0x40 $IP1 $IP2 $IP3 $IP4 $IP5 $IP6 $IP7 $IP8 i
sudo i2cset -y 1 $LCD 0x00 0xc0 i
sudo i2cset -y 1 $LCD 0x40 $IP9 $IP10 $IP11 $IP12 $IP13 $IP14 $IP15 i
ここで、注目してほしいのは、7行目付近にあるIP=`/sbin/ifconfig $NETWORK | grep "inet addr:" | cut -f2 -d : | cut -f1 -d " "`である。
ifconfigコマンドを使ってネットワーク情報を取り、grepでIPアドレスを取っているわけであるが、これを行ってもIPアドレスが表示されない。
なので、`/bin/hostname -I | cut -f1 -d' '`と変更してしまう。
また、Etherネットではなく、wlanの値を取りたい場合は、4行目にあるNETWORK=eth0をNETWORK=wlan0と変更しておく。
修正が終わったら、実際に./ipaddr.sh として実行してみよう。
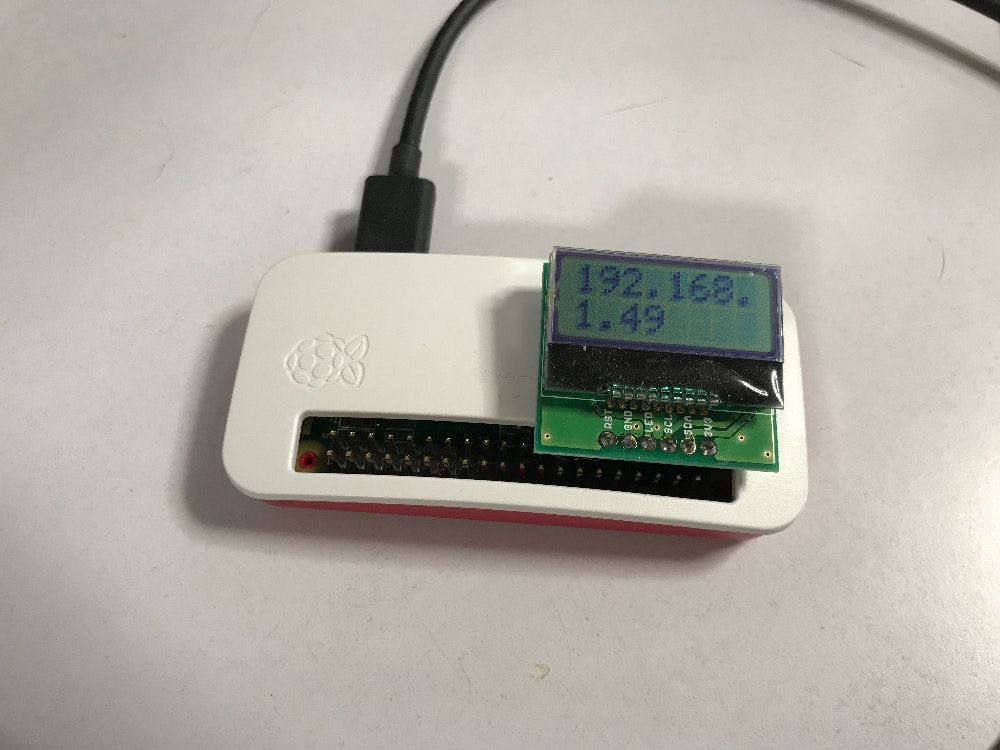
次のように表示され、液晶にIPアドレスが表示されれば成功である。
IP: 192.168.1.49
起動時にIPアドレスを表示する
次に起動時にIPアドレスを表示するようcronにスクリプトを設定する。
crontab -eでcronの編集モードに入り、次のように設定する。
@reboot /home/pi/ipaddr.sh
これで起動時に1回だけスクリプトが実行されるようになる。
ただし、これだとwlanのIPアドレスがうまく取れない。
理由は単純で、起動してからwlanのIPを取得するまでに時間がかかり、起動タイミングではwlanの値が取れないため、表示されないというわけである。
なので、スクリプトの上にsleep命令を付けてあげ、ある程度余裕を持ったタイミングで実行させればいいだろう。
完成したスクリプトは次の様になる。
# !/bin/sh

sleep 30.0

LCD=0x3e
NETWORK=wlan0

LANG=
IP=`/bin/hostname -I | cut -f1 -d' '`

echo "IP: $IP"

ip_char_at(){
  ch=`echo -n $IP | od -An -tx1 | cut -d " " -f$1`
  if [ -z $ch ]; then
    echo 0x20
  else
    echo 0x$ch
  fi
}

IP1=`ip_char_at 2`
IP2=`ip_char_at 3`
IP3=`ip_char_at 4`
IP4=`ip_char_at 5`
IP5=`ip_char_at 6`
IP6=`ip_char_at 7`
IP7=`ip_char_at 8`
IP8=`ip_char_at 9`
IP9=`ip_char_at 10`
IP10=`ip_char_at 11`
IP11=`ip_char_at 12`
IP12=`ip_char_at 13`
IP13=`ip_char_at 14`
IP14=`ip_char_at 15`
IP15=`ip_char_at 16`

sudo i2cset -y 1 $LCD 0 0x38 0x39 0x14 0x70 0x56 0x6c i
sudo i2cset -y 1 $LCD 0 0x38 0x0d 0x01 i
sudo i2cset -y 1 $LCD 0x40 $IP1 $IP2 $IP3 $IP4 $IP5 $IP6 $IP7 $IP8 i
sudo i2cset -y 1 $LCD 0x00 0xc0 i
sudo i2cset -y 1 $LCD 0x40 $IP9 $IP10 $IP11 $IP12 $IP13 $IP14 $IP15 i
Waitタイミングは30秒ぐらい取っているが、Raspberry Pi 3であればもっと早く取れるだろう。
私の場合はZero Wなので時間がかかることを考えて30秒と設定した。
結
ここでは割愛したが、バックライトを点灯し、キャラクタを表示するという方法もあるので色々遊んでみるのもいい。
また、GPSユニットと併用して測位データを表示させるということもできる。