

はじめに
Windows 11 のアップデート(既定のコンソールホストが Windows Terminal に変更された環境など)以降、従来のコンソールアプリから ::GetDC(::GetConsoleWindow()) を取得して画面に直接 GDI 描画するアプローチが機能しなくなったり、描画が即座に消去されたりする制限に直面することが増えました。
単体テストやちょっとしたグラフィックスの実験のために、わざわざ WinMain を書き、ウィンドウクラスを登録し、メッセージループを記述するのは非常に冗長で面倒です。
そこで、ヘッダファイルを 1本インクルードしてコールバック関数を登録するだけで、独立ウィンドウでの GDI 描画テストが手軽に行える、最小限の Win32 コールバック・フレームワーク( GDI_CB.inc )を構築しました。
使い方(最小限のコード)
構築したフレームワークを利用する側のコードは、以下のように非常にシンプルになります。
#include    "GDI_CB.inc"

/*
void OnDraw (HWND hWnd, HDC hDC)
{
    HPEN hPen = ::CreatePen(PS_SOLID, 2, RGB(0, 255, 0));
    HPEN hOldPen = (HPEN)::SelectObject(hDC, hPen);

    ::MoveToEx(hDC, 50, 50, NULL);
    ::LineTo(hDC, 300, 50);
    ::LineTo(hDC, 300, 200);
    ::LineTo(hDC, 50, 200);
    ::LineTo(hDC, 50, 50);

    ::SelectObject(hDC, hOldPen);
    ::DeleteObject(hPen);
}
*/

int main(void)
{
    ::gdiCreateWindow(_T("Test"));
//  ::gdiDisplayFunc(OnDraw);
    ::gdiMainLoop();
    return  0 ;
}
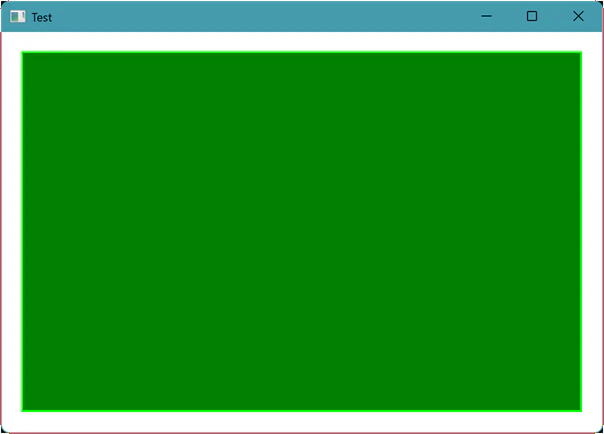
あとは、OnDraw 部分のコメントを解除して内部を書き換え、::gdiDisplayFunc(OnDraw); を登録するだけで、面倒なお約束コードなしに GDI の検証を開始できます。
フレームワークの実装( GDI_CB.inc )
インクルードする内部実装は以下の通りです。
// **************************************************************************
//  @file       GDI_CB.INC
//  @brief      CALLBACK GDI FRAMEWORK INTERFACE AND IMPLEMENTATION
//
//  @author     Iwao (https://mish.work/)
//  @date       2026-07-02
//
//  @modify
//  2026-07-02  新規作成
//
//  @disclaimer
//  本コードの使用により生じたいかなる損害についても著作者は責任を負いません
//  引用時は上記 URL を明記してください
//
//  (C) 2026 Iwao. All Rights Reserved.
// **************************************************************************

#pragma once

#include <windows.h>
#include <tchar.h>
#include <iostream>

// コールバック関数の型定義
typedef void (*GDI_DRAW_FUNC) (HWND hWnd, HDC hDC);
typedef void (*GDI_MOUSE_FUNC)(int button, int state, int x, int y);
typedef void (*GDI_KEY_FUNC)  (unsigned char key,     int x, int y);

// デフォルトコールバック関数
inline void DefaultDrawFunc(HWND hWnd, HDC hDC)
{
    RECT rect;
    if (::GetClientRect(hWnd, &rect))
    {
        rect.left   += 20;
        rect.top    += 20;
        rect.right  -= 20;
        rect.bottom -= 20;

        if (rect.left < rect.right && rect.top < rect.bottom)
        {
            // ペン:明るい緑 (0, 255, 0)
            HPEN hPen = ::CreatePen(PS_SOLID, 2, RGB(0, 255, 0));
            HPEN hOldPen = (HPEN)::SelectObject(hDC, hPen);

            // ブラシ:暗い緑 (0, 128, 0)
            HBRUSH hBrush = ::CreateSolidBrush(RGB(0, 128, 0));
            HBRUSH hOldBrush = (HBRUSH)::SelectObject(hDC, hBrush);

            ::Rectangle(hDC, rect.left, rect.top, rect.right, rect.bottom);

            ::SelectObject(hDC, hOldBrush);
            ::SelectObject(hDC, hOldPen);
            ::DeleteObject(hBrush);
            ::DeleteObject(hPen);
        }
    }
}

inline void DefaultMouseFunc(int button, int state, int x, int y)
{
    // 左ボタン(0)が押された(0)場合に座標を出力する
    if (button == 0 && state == 0)
    {
        std::cout << "Mouse L-Down at: " << x << ", " << y << std::endl;
    }
}

inline void DefaultKeyFunc  (unsigned char key, int x, int y)
{
    // ESCキー('\x1b')が押された場合にウィンドウを閉じるメッセージを送る
    if (key == '\x1b')
    {
        HWND hWnd = ::GetActiveWindow();
        if (hWnd != NULL)
        {
            ::PostMessage(hWnd, WM_CLOSE, 0, 0);
        }
    }
}

// 内部管理用グローバル変数群
namespace GdiInternal {
    static GDI_DRAW_FUNC  g_pDrawFunc  = DefaultDrawFunc;
    static GDI_MOUSE_FUNC g_pMouseFunc = DefaultMouseFunc;
    static GDI_KEY_FUNC   g_pKeyFunc   = DefaultKeyFunc;
    static HWND           g_hWnd       = NULL;
    static int            g_nX         = 100;
    static int            g_nY         = 100;
    static int            g_nW         = 600;
    static int            g_nH         = 400;
    static const TCHAR* g_szClassName = _T("GdiCallbackWindowClass");
}

// 内部ウィンドウプロシージャ
inline LRESULT CALLBACK GdiWndProc(HWND hWnd, UINT msg, WPARAM wp, LPARAM lp)
{
    switch (msg)
    {
    case WM_PAINT:
        if (GdiInternal::g_pDrawFunc != NULL)
        {
            PAINTSTRUCT ps;
            HDC hDC = ::BeginPaint(hWnd, &ps);
            GdiInternal::g_pDrawFunc(hWnd, hDC);
            ::EndPaint(hWnd, &ps);
        }
        return 0;

    case WM_LBUTTONDOWN:
    case WM_LBUTTONUP:
    case WM_RBUTTONDOWN:
    case WM_RBUTTONUP:
        if (GdiInternal::g_pMouseFunc != NULL)
        {
            int button = (msg == WM_LBUTTONDOWN || msg == WM_LBUTTONUP)   ? 0 : 1;
            int state  = (msg == WM_LBUTTONDOWN || msg == WM_RBUTTONDOWN) ? 0 : 1;
            int x = LOWORD(lp);
            int y = HIWORD(lp);
            GdiInternal::g_pMouseFunc(button, state, x, y);
        }
        return 0;

    case WM_CHAR:
        if (GdiInternal::g_pKeyFunc != NULL)
        {
            POINT pt;
            ::GetCursorPos(&pt);
            ::ScreenToClient(hWnd, &pt);
            GdiInternal::g_pKeyFunc((unsigned char)wp, pt.x, pt.y);
        }
        return 0;

    case WM_DESTROY:
        GdiInternal::g_hWnd = NULL;
        ::PostQuitMessage(0);
        return 0;
    }

    return ::DefWindowProc(hWnd, msg, wp, lp);
}

// フレームワークAPI実装
inline void gdiInitWindowPosition(int x, int y)
{
    GdiInternal::g_nX = x;
    GdiInternal::g_nY = y;
}

inline void gdiInitWindowSize(int w, int h)
{
    GdiInternal::g_nW = w;
    GdiInternal::g_nH = h;
}

inline void gdiCreateWindow(const TCHAR* title)
{
    HINSTANCE hInst = ::GetModuleHandle(NULL);

    WNDCLASS wc;
    if (!::GetClassInfo(hInst, GdiInternal::g_szClassName, &wc))
    {
        ::ZeroMemory(&wc, sizeof(wc));
        wc.style         = CS_HREDRAW | CS_VREDRAW;
        wc.lpfnWndProc   = GdiWndProc;
        wc.hInstance     = hInst;
        wc.hCursor       = ::LoadCursor(NULL, IDC_ARROW);
        wc.hbrBackground = (HBRUSH)(COLOR_WINDOW + 1);
        wc.lpszClassName = GdiInternal::g_szClassName;

        ::RegisterClass(&wc);
    }

    RECT rect = { 0, 0, GdiInternal::g_nW, GdiInternal::g_nH };
    ::AdjustWindowRect(&rect, WS_OVERLAPPEDWINDOW, FALSE);

    GdiInternal::g_hWnd = ::CreateWindow(
        GdiInternal::g_szClassName,
        title,
        WS_OVERLAPPEDWINDOW,
        GdiInternal::g_nX,
        GdiInternal::g_nY,
        rect.right - rect.left,
        rect.bottom - rect.top,
        NULL,
        NULL,
        hInst,
        NULL
    );

    if (GdiInternal::g_hWnd != NULL)
    {
        ::ShowWindow(GdiInternal::g_hWnd, SW_SHOW);
        ::UpdateWindow(GdiInternal::g_hWnd);
    }
}

inline void gdiMouseFunc(GDI_MOUSE_FUNC func)
{
    GdiInternal::g_pMouseFunc = (func != NULL) ? func : DefaultMouseFunc;
}

inline void gdiKeyboardFunc(GDI_KEY_FUNC func)
{
    GdiInternal::g_pKeyFunc = (func != NULL) ? func : DefaultKeyFunc;
}

inline void gdiDisplayFunc(GDI_DRAW_FUNC func)
{
    GdiInternal::g_pDrawFunc = (func != NULL) ? func : DefaultDrawFunc;

    // 管理中のウィンドウが存在すれば、そのハンドルへ直接再描画を要求する
    if (GdiInternal::g_hWnd != NULL)
    {
        ::InvalidateRect(GdiInternal::g_hWnd, NULL, TRUE);
        ::UpdateWindow(GdiInternal::g_hWnd);
    }
}

inline void gdiMainLoop(void)
{
    MSG msg;
    while (::GetMessage(&msg, NULL, 0, 0))
    {
        ::TranslateMessage(&msg);
        ::DispatchMessage(&msg);
    }
}
既存コードの移行・リファクタリング手順
このフレームワークを用いることで、静的ローカル変数による共有状態( RenderContext )を定義し、既存のコンソール直接描画経路を維持したまま、フラグ( useWindow )ひとつで今回構築した「独立ウィンドウ表示」へとスムーズに切り替えるハイブリッド形式へのリファクタリングが可能です。
実際のテスト用コンソールプログラムから、どのように状態分離を行い、どのようにフレームワークへコードを組み替えていくかという具体的な移行ステップとコード例の全体像については、以下のブログ記事にて詳しく記録・解説しています。
-
詳細解説とリファクタリングの実装記録はこちら:
main GDI Callback | mish.work
※ 本記事の構成および文章の作成には、生成 AI を利用しています。