初めに
小ネタですが、Spresense が超高速で音声を再生できる機能を持っていたので、これをうまく使えないかな~、と思いちょっとしたサンプラーのようなものを作ってました。
これを整理してQiitaに書いておこうというモチベーションです。
※Advent Calendar 2021 の記事を埋めるためというわけでは…。
用意したもの
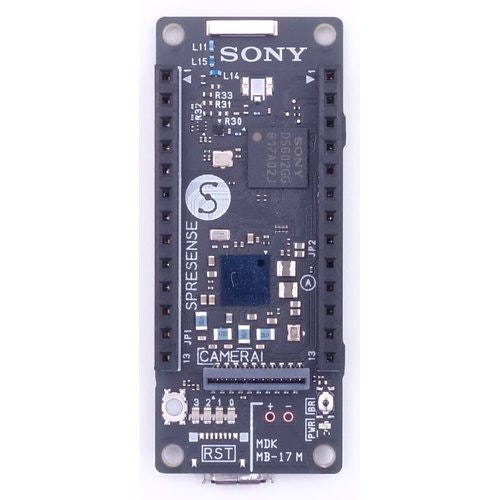
SPRESENSEメインボード[CXD5602PWBMAIN1]
https://www.switch-science.com/catalog/3900/

B-stem PDA01 SPRESENSE用機能拡張ボード
https://www.switch-science.com/catalog/5687/

今回も、単純に音が出るものであればよかったんだけど、既にPDA01を持っていたので使いました。
当然、純正拡張ボードでも良いです。
SPRESENSE拡張ボード[CXD5602PWBEXT1]
https://www.switch-science.com/catalog/3901/

それに、Qwiicのコネクタとキーパッド。
SPRESENSE用Qwiic接続基板
https://www.switch-science.com/catalog/6318/

Qwiic - キーパッド(12ボタン)
https://www.switch-science.com/catalog/5535/

さらに、SDカード。KIOXIAだと問題ないです。
KIOXIA(キオクシア) 旧東芝メモリ microSDHCカード 32GB
https://www.amazon.co.jp/dp/B08PTNWQ6P?aaxitk=a8f1b316576d3af7dc8db832d10d5cd9&smid=AN1VRQENFRJN5&ref=dacx_dp_7467415030103_8217637380303&th=1

ブログ(元ネタ)
この記事は、以下のブログに過去に投稿したもののまとめです。
サンプラーっぽいものを作ってみよう!
http://spresense.livedoor.blog/archives/24494066.html
サンプルプログラム
Spresense のサンプルの中に、文字 を打つとすぐに 音を鳴らせる サンプルがあります。
これを使うと、シリアル入力した文字に合わせて、遅延なく音を出せるので、
これをスイッチに繋ぐだけで簡単にできます。
音源ファイルの準備
音源ファイルは、チュートリアルにあるように、鳴らしたい音の数分用意してください。
音源ファイルのフォーマットは、生のPCM ファイルです。
Audacity とか使うとWAVのヘッダのない生のPCMファイル簡単に作れます。
Audacity
https://www.audacityteam.org/

入力をキーパッドに変更する
では、早速、このサンプルを変更していきます。
[application/rendering_objif/rendering_objif.ino]
(https://github.com/sonydevworld/spresense-arduino-compatible/tree/master/Arduino15/packages/SPRESENSE/hardware/spresense/1.0.0/libraries/Audio/examples/application/rendering_objif/rendering_objif.ino)
まず、キーパッドが使えるように、以下をincludeとインスタンスを追加。
# include <Wire.h>
# include "SparkFun_Qwiic_Keypad_Arduino_Library.h"
KEYPAD keypad1; //Create instance of this object
次に、setupの中の "Serial.begin(115200);"の後で、で、初期化を呼ぶ。
  if (keypad1.begin() == false) 	// Note, using begin() like this will use default I2C address, 0x4B.
									// You can pass begin() a different address like so: keypad1.begin(Wire, 0x4A).
  {
    Serial.println("Keypad does not appear to be connected. Please check wiring. Freezing...");
    while (1);
  }
で、文字をscanしている部分を、キーパッド入力に変える。
  keypad1.updateFIFO();  // necessary for keypad to pull button from stack to readable register
  char button = keypad1.getButton();

  while (button == -1)
  {
    Serial.println("No keypad detected");
    delay(1000);
  }

  if (button != 0)
    {
      switch (button) {
        case '1': // play
          playno = start_event(playno,0);
          break;
        case '2': // play
          playno = start_event(playno,1);
          break;
        case '3': // play
          playno = start_event(playno,2);
          break;
        case '#': // stop
          if (s_state == Active)
            {
              stop();
            }
          s_state = Stopping;
          break;

        default:
          break;
      }
    }
これで、簡単に、ボタンを押すと効果音が鳴るようになりました!
