はじめに
目的
Payjpを導入し、ユーザー登録と同時にカード情報を登録する
前提
- Railsでの実装
- deviseの導入が済んでいる
- hamlでの記載(gem 'haml-rails')をする
注:フリマアプリのコピーサイト作成の為、ビュー(詳細)は省略します
また、登録画面はウィザードを使用しています
全体の流れ
- Payjpのアカウント作成
- gem 'payjp'導入
- gem 'dotenv'導入*しなくてもいい
- payjp読み込みの記述
- viewの設定
- JavaScriptの作成
- modelの作成
- コントローラーの設定
- ルーティング設定
- 登録の確認
- 次回 => 購入手順
1.Payjpのアカウント作成
Payjpの公式HPへとび、アカウントを作成する
https://pay.jp/
作成後、サイドバーのAPI内にあるキーを見つける

サンプルとして使用する場合は上の二つ「テスト」のキーを使います
サービスとしてリリースする場合は「本番」用のキーを使います
今回は「テスト」のキーを使用します。
2.各gemの導入
Gemfileに以下を追加
gem 'payjp'
gem 'dotenv'
お決まりの'bundle install'
dotenvを入れた場合は、下記を作業ディレクトリで入力すると.envファイルが出現します
$ echo HOGE=\"hogehoge\" > .env
"hogehoge"は作業ディレクトリ名
普通に手打ち作成でも問題ない(はず)です
.envファイルにはキー情報を先に入力しておきます。
PAYJP_PRIVATE_KEY = 'sk_test_xxxxxxxxxxxxxxxxxxxx' # テスト秘密鍵
PAYJP_KEY = 'pk_test_xxxxxxxxxxxxxxxxxxxx' # テスト公開鍵
Githubを使用して管理されている場合は、gitignorに記述を忘れないように注意してください
使用しない場合どこに記述すればいいかはご自身で調べてみてください
3.Payjpを読み込むための記述
application.html.hamlに以下の記述を追加する
%script{src: "https://js.pay.jp/", type: "text/javascript"}
この1文で読み込むことができます
*Controllerごとにlayoutを変えている場合は、実装するlayoutに記述してください
上記の場合は、SignupController内で、signup.html.hamlをapplication.html.hamlの代わりに読み込んでいます
4.viewの設定
ここでのポイントは、'name'属性をしっかりと設定することです
後のJavascriptに影響します
user登録画面の一部に以下を組み込んでください
  .session_wrapper
    .single_container
      .session__main
        .session__main__container
          %h2.session__main__container__title 支払い方法
          = form_with url: signup_index_path, name: "charge-form", id: 'charge-form', method: :post, html:{class: 'session__main__container__box'} do |f|
            .session__main__container__formGroup
              %label{for: "nickname"}
                カード番号
                %span.form__require 必須
              = f.text_field "number", class: "input__default", placeholder: "半角数字のみ", type: "text", id: "card_number", maxlength: "16"
              .session__main__container__formGroup__sub
                %i.fab.fa-cc-visa
                %i.fab.fa-cc-mastercard
                %i.fab.fa-cc-jcb
                %i.fab.fa-cc-discover
                %i.fab.fa-cc-amex
            .session__main__container__formGroup
              %label{for: "nickname"}
                有効期限
                %span.form__require 必須
              .session__main__container__formGroup__sub
                %select.select__wap#exp_month{name: "exp_month", type: "text"}
                  %option{value: ""} --
                  %option{value: "01"} 01
                  %option{value: "02"} 02
                  %option{value: "03"} 03
                  %option{value: "04"} 04
                  %option{value: "05"} 05
                  %option{value: "06"} 06
                  %option{value: "07"} 07
                  %option{value: "08"} 08
                  %option{value: "09"} 09
                  %option{value: "10"} 10
                  %option{value: "11"} 11
                  %option{value: "12"} 12
                %i.fas.fa-chevron-down.select_arrow
                %p 月
                %select.select__wap#exp_year{name: "exp_year", type: "text"}
                  %option{value: ""} --
                  %option{value: "2019"} 19
                  %option{value: "2020"} 20
                  %option{value: "2021"} 21
                  %option{value: "2022"} 22
                  %option{value: "2023"} 23
                  %option{value: "2024"} 24
                  %option{value: "2025"} 25
                %i.fas.fa-chevron-down.select_arrow
                %p 年
              .session__main__container__formGroup
                %label{for: "nickname"}
                  セキュリティーコード
                  %span.form__require 必須
                = f.text_field "cvc", class: "input__default cvc", placeholder: "カード背面4桁もしくは3桁の番号", type: "text"
                .session__main__container__formGroup__link
                  = link_to root_path do
                    %i.fas.fa-question-circle
                    %p セキュリティーコードとは
                .session__main__container__formGroup#card_token
                  = f.submit "次へ進む", class: "btn_default btn_mail", id: "token_submit"
ここでのポイントは、idとnameです
それ以外は好きなレイアウトで進めてください
idとnameは変更して構いませんが、以降出てくるものを読み替えて進めてください
5.JavaScriptの設定
公式のサンプルを参考に作成します
https://payjp.hatenablog.com/entry/2017/12/05/134933
document.addEventListener(
  "DOMContentLoaded", e =>{
    if (document.getElementById("token_submit") != null) { //token_submitというidがnullの場合、下記コードを実行しない
      Payjp.setPublicKey("pk_test_58392e1461d9d74ed1018221"); //公開鍵直書き
      let btn = document.getElementById("token_submit"); //IDがtoken_submitの場合に取得される
      btn.addEventListener("click", e => { //ボタンが押されてイベント発火
        e.preventDefault();
        let card = {
          number: document.getElementById("card_number").value,
          cvc: document.getElementById("cvc").value,
          exp_month: document.getElementById("exp_month").value,
          exp_year: document.getElementById("exp_year").value,
        }; //入力されたデータを取得
        Payjp.createToken(card, (status, response) => {
          if (status === 200){
            $("#card_nummber").removeAttr("name");
            $("#cvc").removeAttr("name");
            $("#exp_month").removeAttr("name");
            $("#exp_year").removeAttr("name");//データを自サーバに保存しないようにname属性を削除
            var token = response.id;
            $("#charge-form").append($('<input type="hidden" name="payjp_token" class="payjp-token" />').val(token));
            $("#charge-form").get(0).submit();
          }else{
            alert("Error");
          }
        });
      });
    }
  },
  false
);
何をしているかというと、使い捨てのtokenの作成をしています。
tokenを作成して、その情報を元に、Payjpの方へ登録と、カード情報の紐付けを行なっています
ここでのポイントはname属性です
特に一番最後の name="payjp_token" はcontroller側でも使用するので間違えないように注意してください
6.modelの作成
modelを忘れておりました、すみません
$ rails g model Card user_id:integer customer_id:string card_id:string
migrationfileは以下となります
class CreateCards < ActiveRecord::Migration[5.2]
  def change
    create_table :cards do |t|
      t.references :user, null: false, foreign_key:true
      t.string :customer_id, null: false
      t.string :card_id, null: false
      t.timestamps
    end
  end
end
nullはあってもなくても大丈夫です
users_tableとのアソシエーション組はしてください
7.controllerの作成
controllerを作成します
$ rails g controller signup
  require 'payjp' #payjpの読み込み

  def create
    @user = User.new(
# <--------------- 今回関係ないので省略 ------------------>#
    )


    if @user.save
      session[:id] = @user.id
      sign_in User.find(session[:id]) unless user_signed_in?
      #後にcurrent_user.idが必要なので、signinさせてしまう
    else
      render '/signup/step1'
    end
    Payjp.api_key = ENV["PAYJP_PRIVATE_KEY"] # APIキーの呼び出し
    if params['payjp_token'].blank? # ここはJavaScriptの.append()内のname属性です
      render '/signup/step4'
    else
      customer = Payjp::Customer.create(        # customerの定義、ここの情報を元に、カード情報との紐付けがされる
        description: 'test',                    # なくてもいいです
        email: current_user.email,              # なくてもいいです
        card: params['payjp_token'],            # 必須です
        metadata: {user_id: current_user.id}    # なくてもいいです
      )
      @card = Card.new(                  # カードテーブルのデータの作成
        user_id: current_user.id,        # ここでcurrent_user.idがいるので、前もってsigninさせておく
        customer_id: customer.id,        # customerは上で定義
        card_id: customer.default_card   # .default_cardを使うことで、customer定義時に紐付けされたカード情報を引っ張ってくる ここがnullなら上のcustomerのcard: params['payjp_token']が読み込めていないことが多い
      )

      if @card.save
        redirect_to done_signup_index_path
      else
        redirect_to action: "create"
      end
    end
  end
詳細はコード内に書いてあるのでもう不要かと思います
user登録と同時にしない場合は、cards_controllerを作成して、sign_inしていないと表示できない状況を作ってやれば、Payjp.api_key = ~~~~~~~~以下をコピペすれば使えます
8.ルーティング設定
最後にルーティングの設定です
Rails.application.routes.draw do
  devise_for :users

  resources :signup do
    collection do
      get 'step1'
      get 'step2'
      get 'step3'
      get 'step4' # ユーザーおよびカードの登録
      get 'done' # 登録完了後のページ
    end
  end
9.登録の確認
公式サイト(https://pay.jp/docs/testcard) を参考に、作成します。
有効期限はもちろんのことですが、未来を選択してください
DBに以下のように作成されていれば成功です
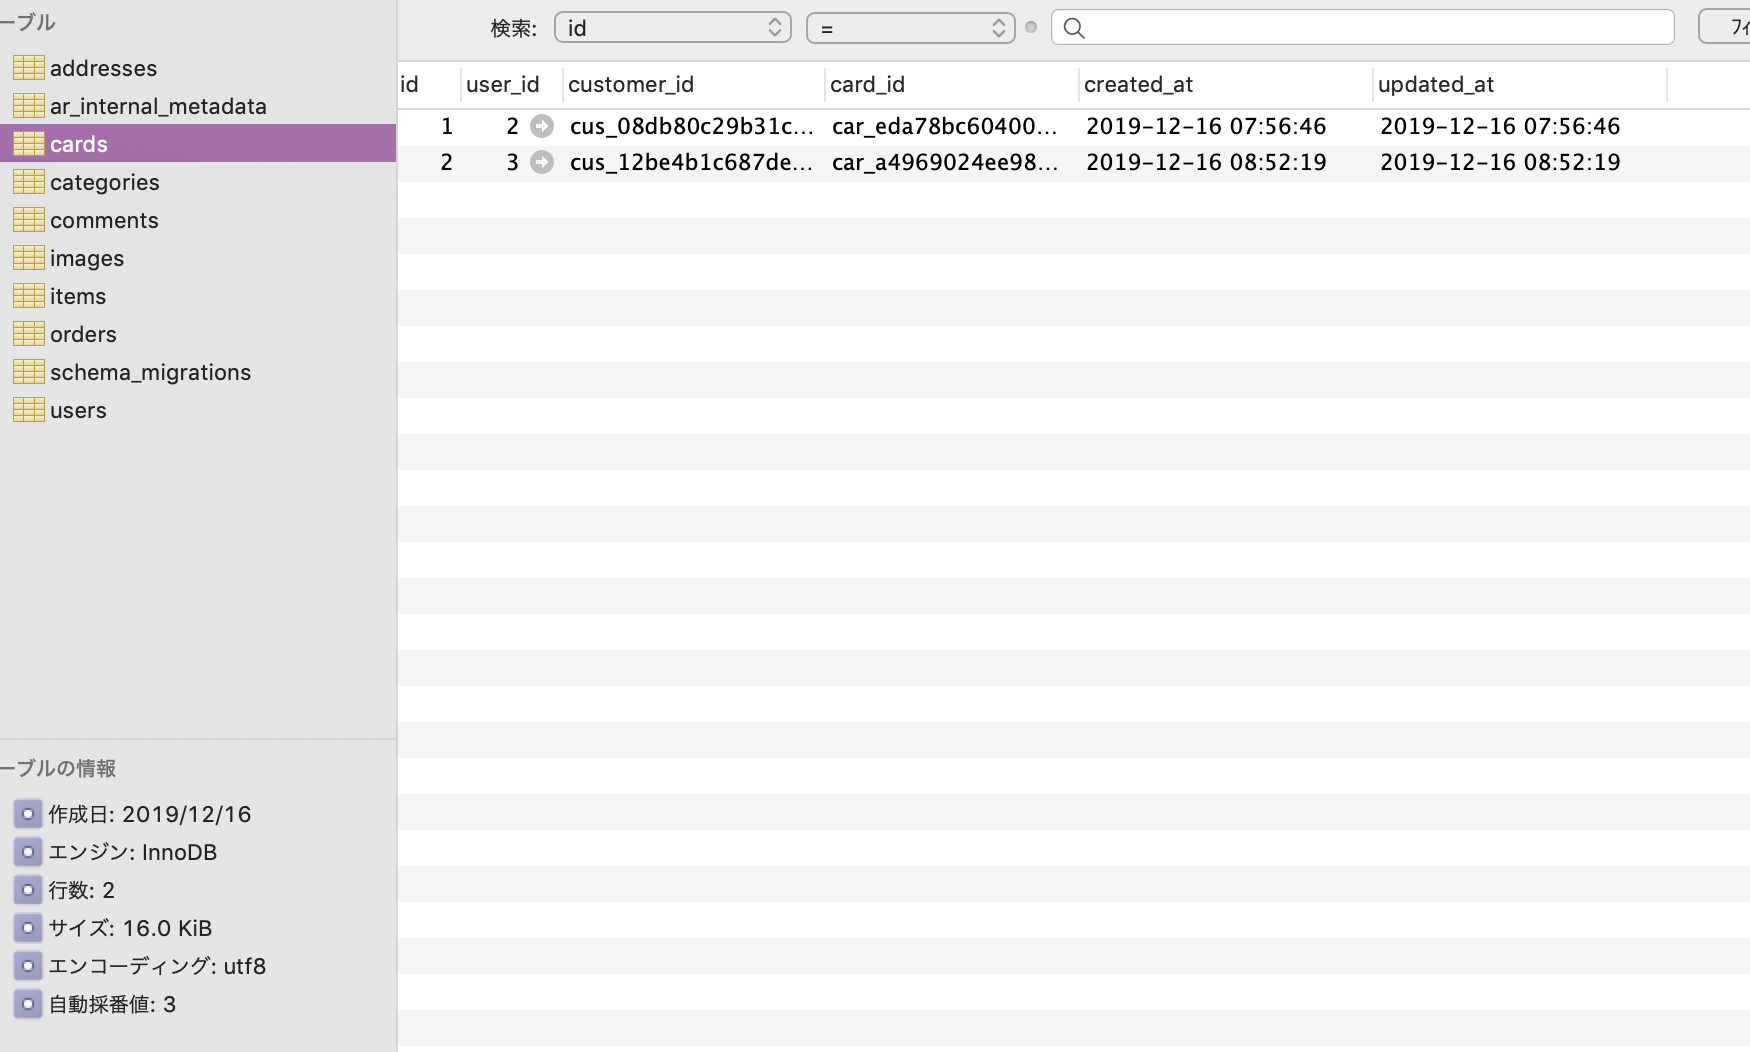
Payjpの画面 *顧客を押せば見れます
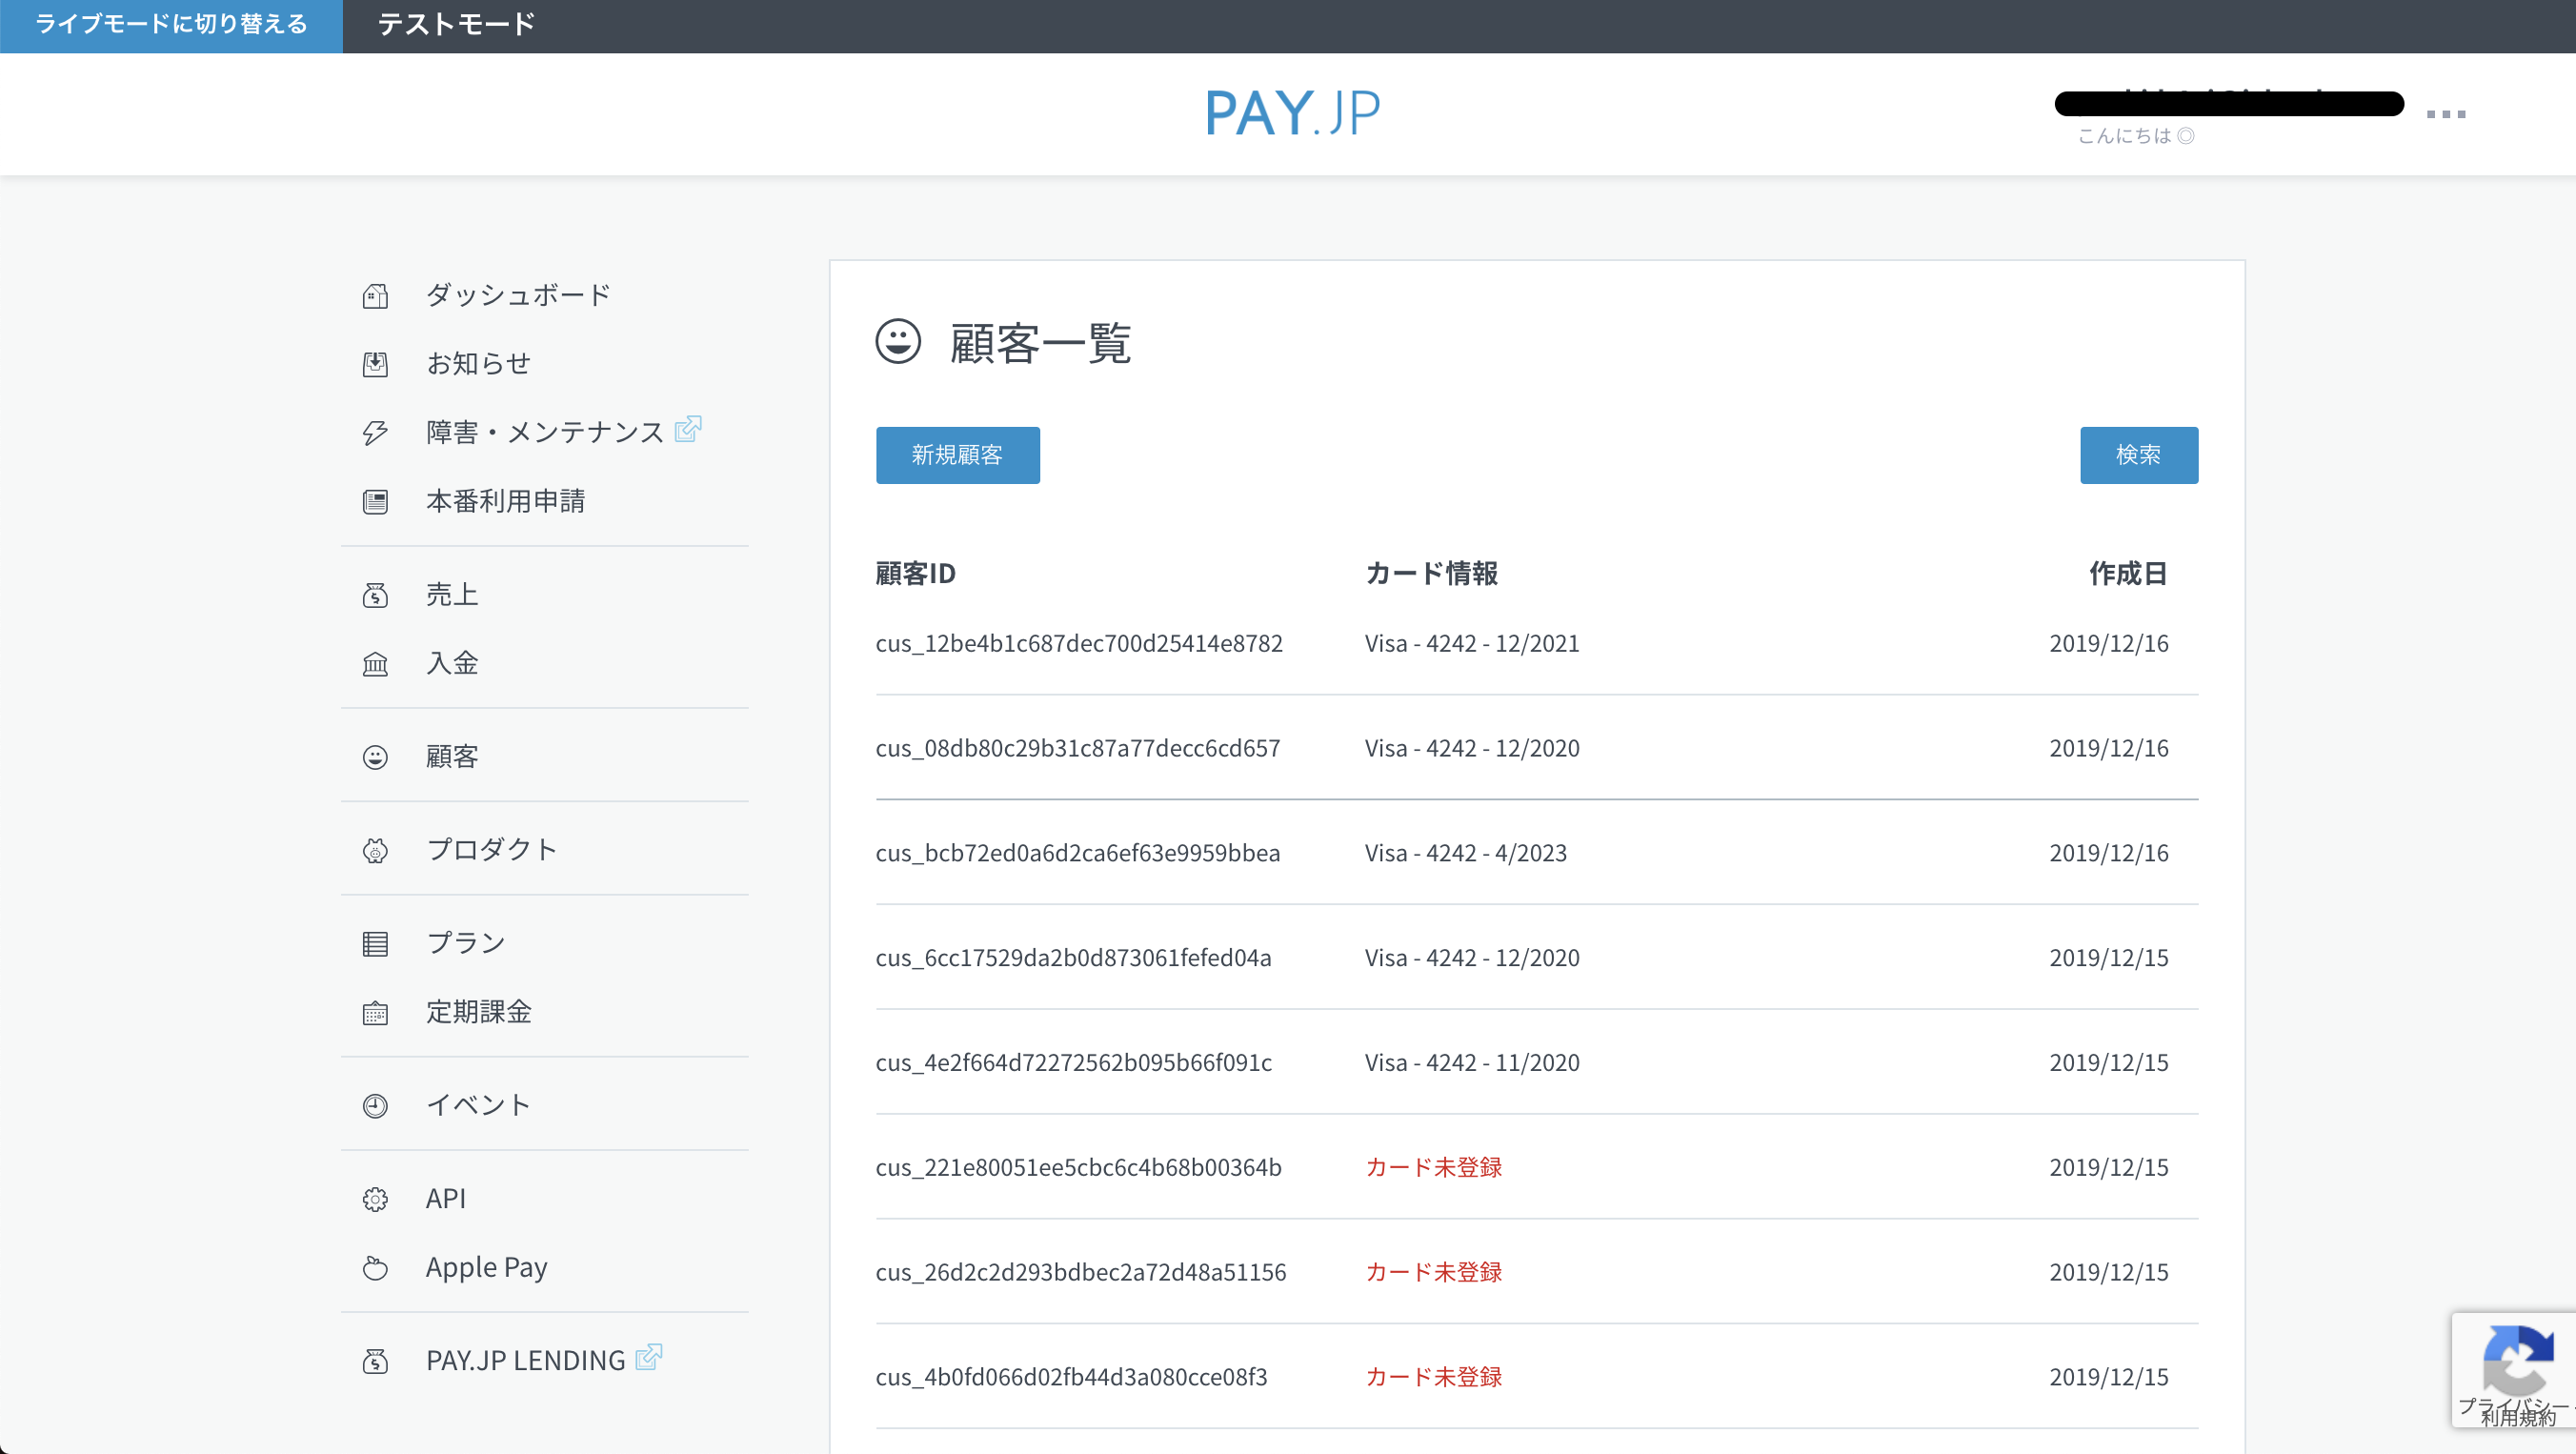
*紐付けが失敗していると、画像にあるように、"カード未登録"と表示されます
さいごに
次回は商品の購入についてお話ししたいと思います
今回初めて記事作成をしたので、至らない点が多くあるかと思います
誤っている点等ございましたらご指摘いただければ幸いです
ありがとうございました