概要
- 以下のような簡単なテーブルを作っていきます。
- (基本的な所は省略して、忘備録的に書いていますので細かい所はサンプル参照ということでご容赦を…。)

- また以下のテーブルのセルは
xibファイルから読み込んだものを使用しています。

GitHub
参考
-
Macアプリ初心者:NSTableView でカスタムした一覧を作ってみる - Qiita
- 別Xibにしない場合について書かれています。
テキストだけの単純なテーブル
Storyboard側
-
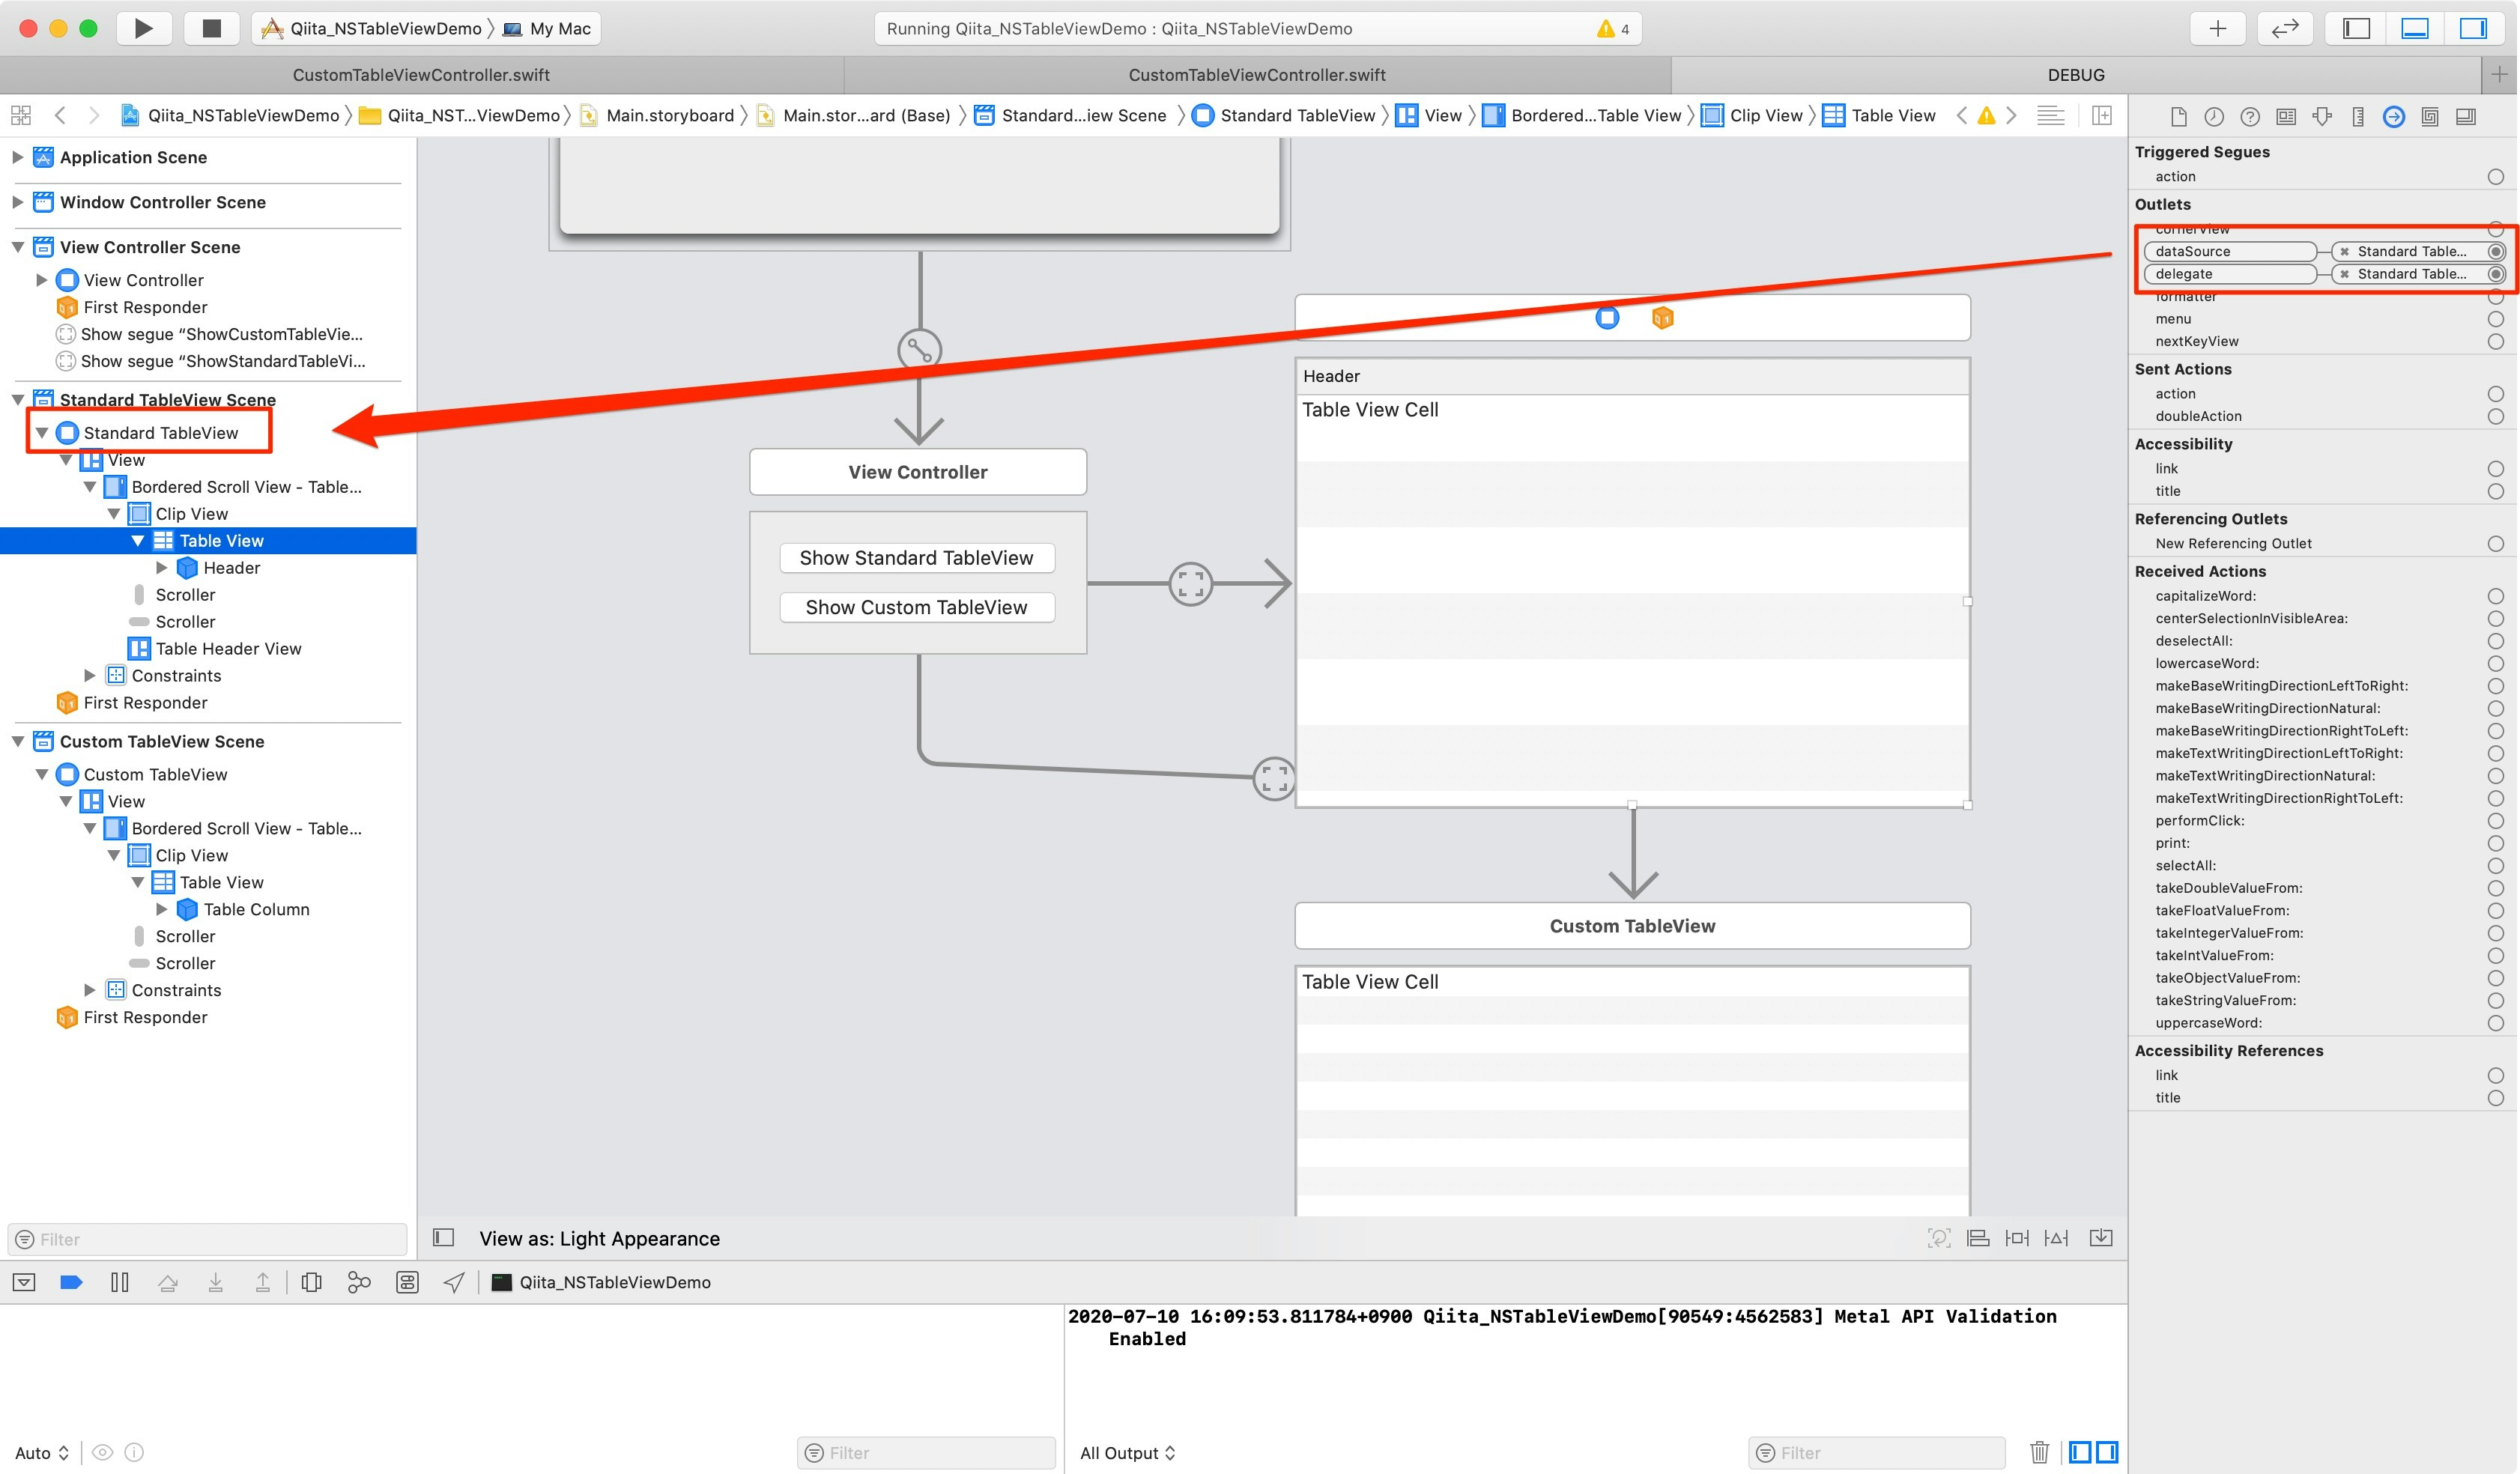
TableViewのdelegateとdatasourceをコントローラにバインディング
-
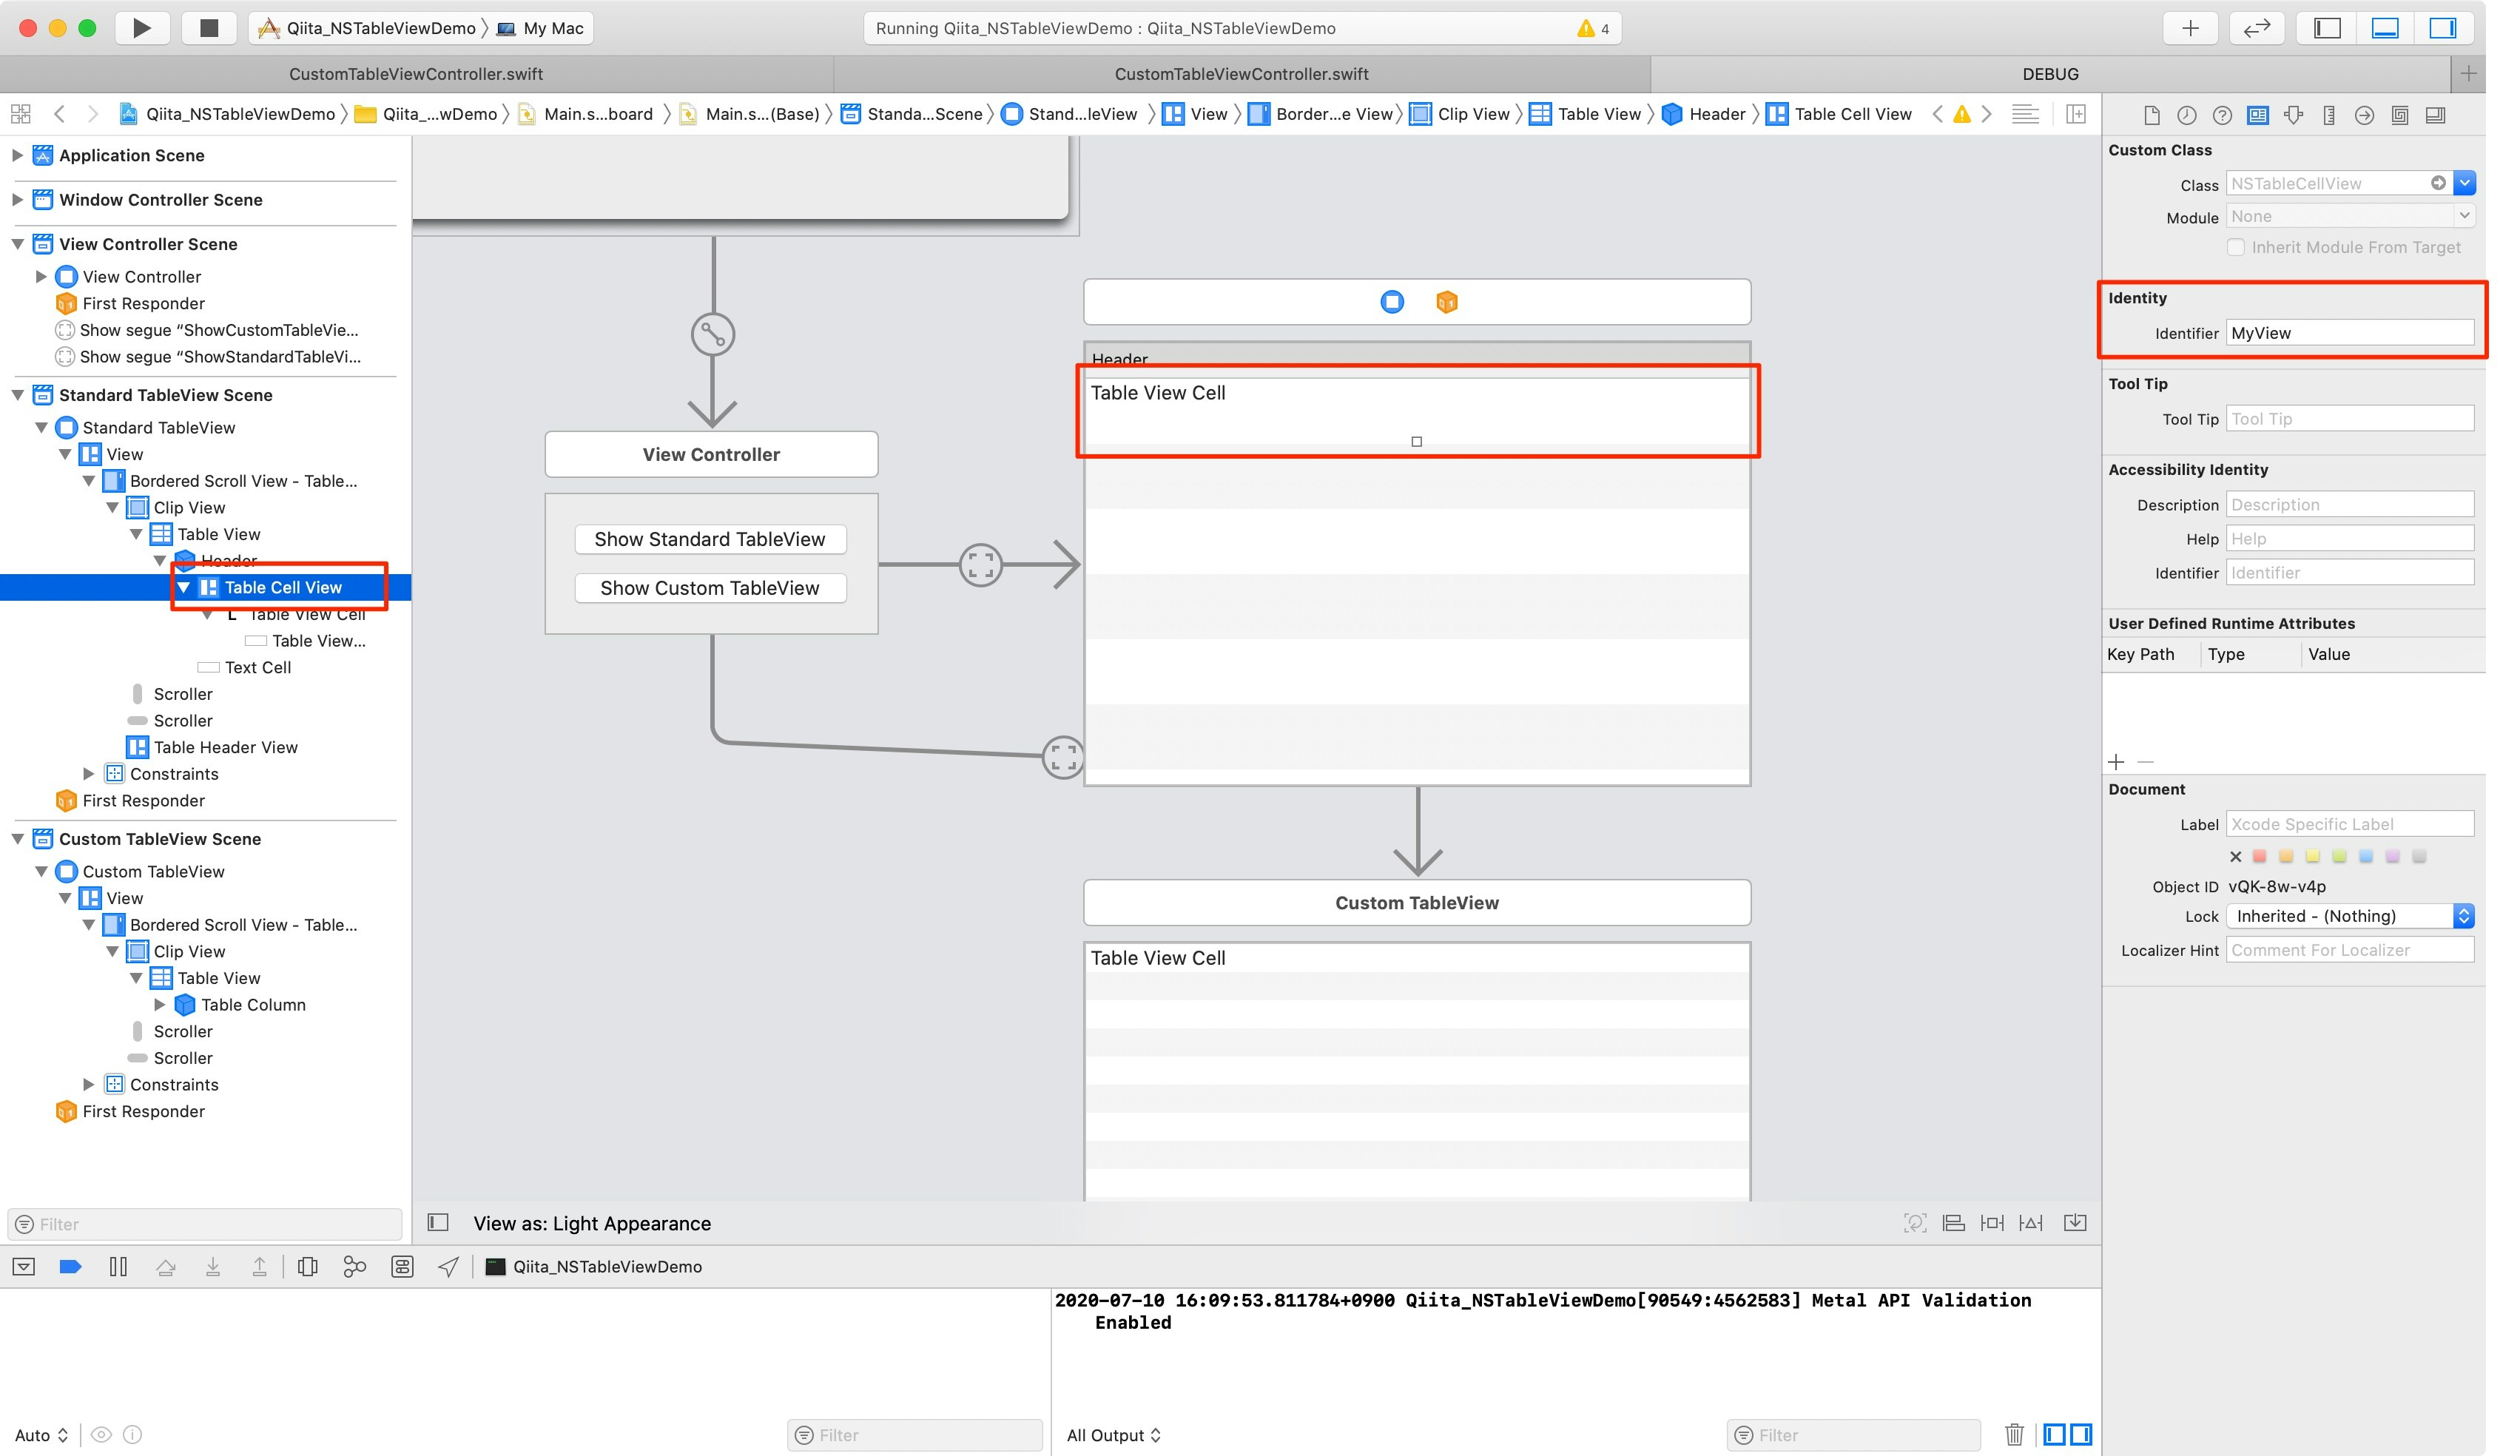
CellViewのIdentifierをMyViewに設定しておく
コード
- 表示するデータを用意
var messages = ["sample message 1",
                "sample message 2",
                "sample message 3"]
- テーブル表示に必要なメソッド2種を実装する
-
NSUserInterfaceItemIdentifier(rawValue: "MyView")により、
Storyboardで指定したMyViewを読み込んでコード内で使用することができる
extension StandardTableViewController : NSTableViewDelegate, NSTableViewDataSource {
    func numberOfRows(in tableView: NSTableView) -> Int {
        return messages.count
    }

    func tableView(_ tableView: NSTableView, viewFor tableColumn: NSTableColumn?, row: Int) -> NSView? {
        guard let cellView = tableView.makeView(withIdentifier: NSUserInterfaceItemIdentifier(rawValue: "MyView"), owner: self) as? NSTableCellView else {
            return NSTableCellView()
        }

        cellView.textField?.stringValue = messages[row]

        return cellView
    }
}
カスタムXibを用いたテーブルビュー
概要
- 別のXibファイルをセルに使用したい場合の実装です。
実装
カスタムセルのクラス(CustomTableCellView.swift)
- カスタムセルのため、
NSTableCellViewのサブクラスを作成します。 - テーブルの
delegate設定等は前述と同じなので割愛しています。
protocol CustomTableCellViewDelegate: class {
    func selectionButtonClicked(for cell: NSTableCellView)
}

class CustomTableCellView: NSTableCellView {

    @IBOutlet weak var cellImageView: NSImageView!
    @IBOutlet weak var titleLabel: NSTextField!
    @IBOutlet weak var descriptionLabel: NSTextField!
    @IBOutlet weak var selectionButton: NSButton!

    var delegate: CustomTableCellViewDelegate?

    override func draw(_ dirtyRect: NSRect) {
        super.draw(dirtyRect)

    }

    func configure(for cellData: CustomCellData) {
        self.cellImageView.image          = cellData.image
        self.titleLabel.stringValue       = cellData.title
        self.descriptionLabel.stringValue = cellData.descriptionText
    }


    // MARK: - Actions

    @IBAction func selectionButtonClicked(_ sender: NSButton) {
        // セルのボタンのアクションをコントローラに返すため、delegateを使用する
        delegate?.selectionButtonClicked(for: self)
    }

}
カスタムセルのxib(CustomTableCellView.xib)
- カスタムセルのUI側です。
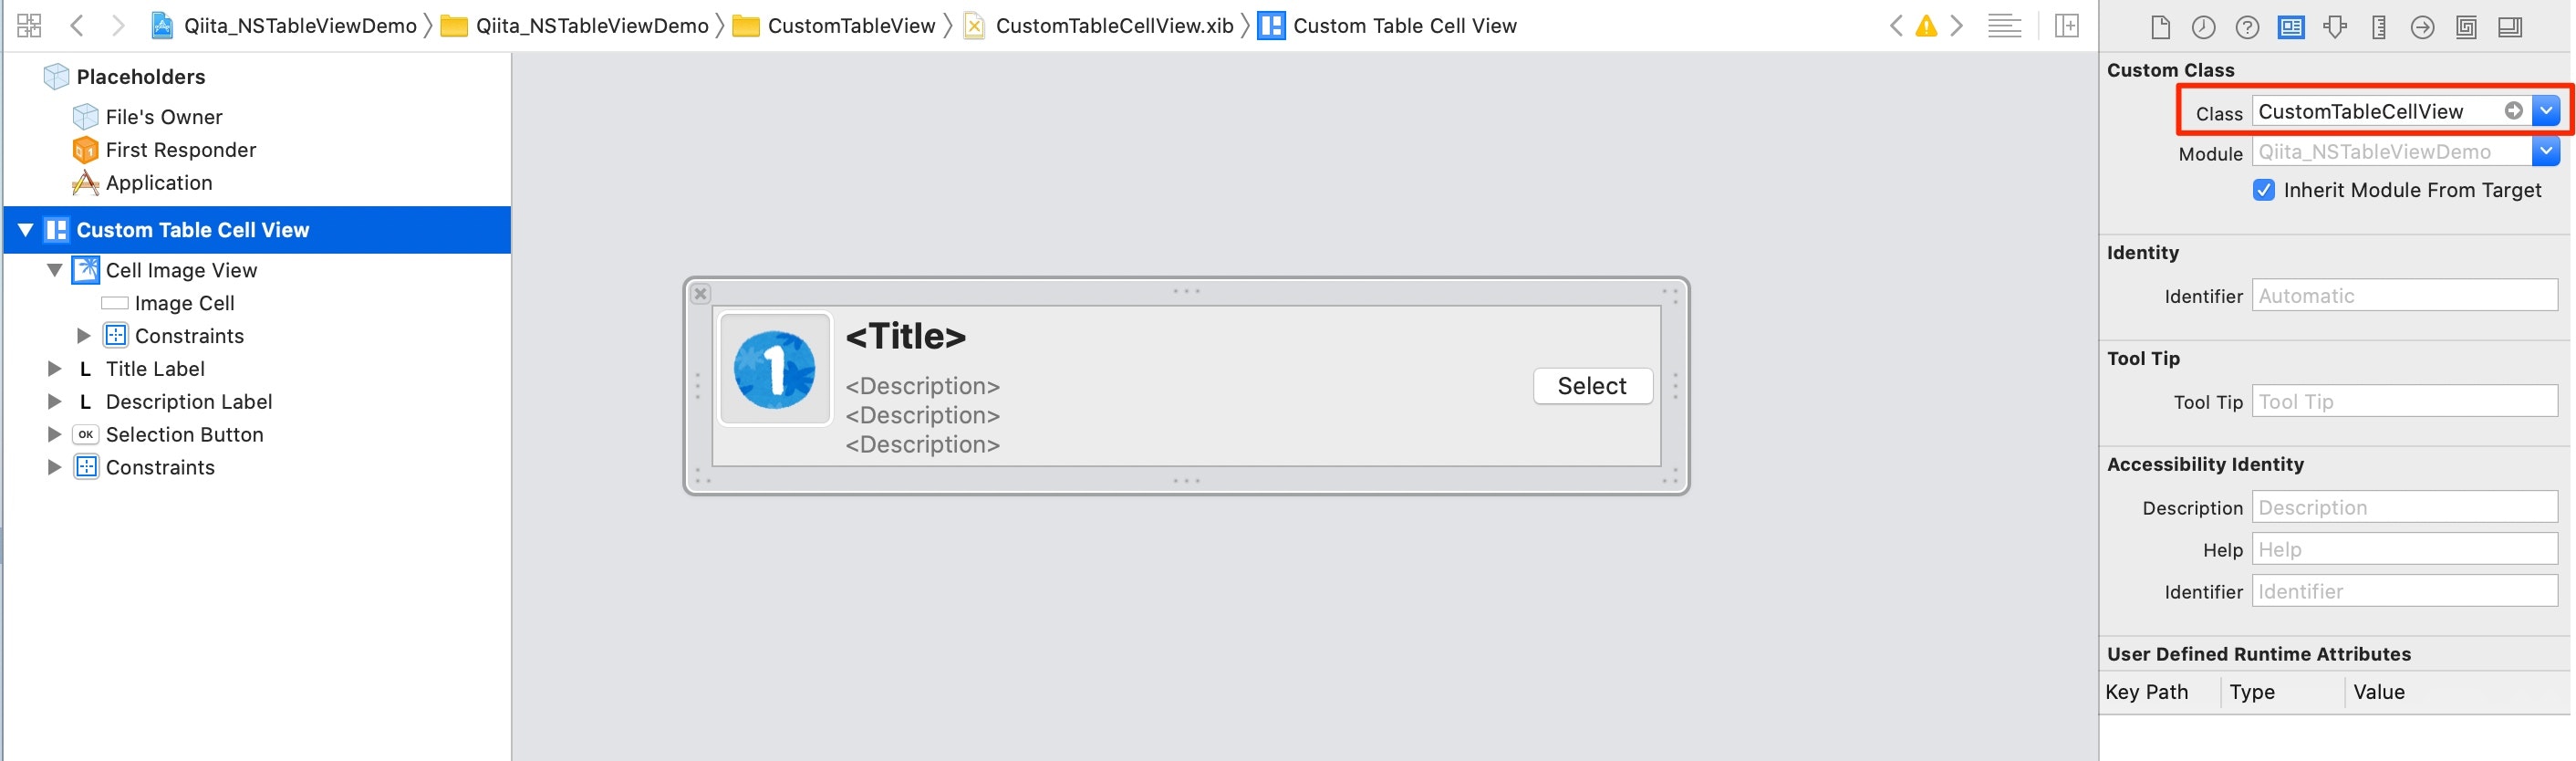
- クラスを作成する
CustomTableCellViewに指定します - セルの
identifier等の設定は不要です。-
CustomTableViewControllerのtableView.registerで設定するからですね
-
定数定義ファイル(Konst.swift)
- identifier等に使用する定数をファイルで定義しておきます
struct Konst {

    struct SegueIdentifier {
        static let showStandardTableViewController = "ShowStandardTableViewController"
        static let showCustomTableViewController   = "ShowCustomTableViewController"
    }

    struct CellIdentifier {
        static let customTableCellView = "CustomTableCellView"
    }

    struct NibName {
        static let customTableCellView = "CustomTableCellView"
    }
}
ビューコントローラ(CustomTableViewController.swift)
- 別のxibファイルから読み込むため、
viewDidLoadでtableViewにxibの登録を行う- iOSでカスタムセルを使う際と同じですね。
// 別のXibファイルから読み込む場合は登録が必要
tableView.register(NSNib(nibNamed: Konst.NibName.customTableCellView, bundle: nil),
                    forIdentifier: NSUserInterfaceItemIdentifier(rawValue: Konst.CellIdentifier.customTableCellView))
tableView.reloadData()
- 同様にテーブル表示に必要なプロトコルメソッドを実装
-
cellのUI設定はcell側 = Model側に任せてしまう。教本でよく見る実装です。cellView.configure(for: cellDataList[row])
// MARK: - NSTableViewDelegate, NSTableViewDataSource Methods

extension CustomTableViewController: NSTableViewDelegate, NSTableViewDataSource {
    func numberOfRows(in tableView: NSTableView) -> Int {
        return cellDataList.count
    }

    func tableView(_ tableView: NSTableView, viewFor tableColumn: NSTableColumn?, row: Int) -> NSView? {
        guard let cellView = tableView.makeView(withIdentifier: NSUserInterfaceItemIdentifier(rawValue: Konst.CellIdentifier.customTableCellView), owner: self)
            as? CustomTableCellView else {
            return NSTableCellView()
        }

        cellView.delegate = self
        cellView.configure(for: cellDataList[row])

        return cellView
    }
}
- カスタムセル内のボタンのアクションを受け取るため、delegateパターンを使用しています。
// CustomTableCellViewDelegate Methods

extension CustomTableViewController: CustomTableCellViewDelegate {
    func selectionButtonClicked(for cell: NSTableCellView) {
        let rowIndex = tableView.row(for: cell)  // 選択されたcellViewのIndexを取得できる
        print("selected row: [\(rowIndex)]")
    }
}