概要
- NSUserNotificationはmacOS 10.14からDeprecadedになりました。
- 代わりがUser Notificationsであり、今回これを実装してみます。

参考
-
Swift macOS Tutorial: Notifications (UNUserNotificationCenter, adding images and actions in Big Sur)
- 実装は主にこちらを参照しました。
- 動画内では他にもバナーにボタンをつけてアクションできるようにしているので、必要であれば参照ください。
実装
ユーザへ許可を求める
- 最初にユーザに許可を求め、通知を許可してもらう必要があります。
- 許可しない限り下記の
authorizedはfalseが返ってきます。
import UserNotifications

let userNotificationCenter = UNUserNotificationCenter.current()

userNotificationCenter.requestAuthorization(options: [.alert, .sound]) { authorized, error in
    guard authorized else {
        print("Not authorized")
        return
    }
}
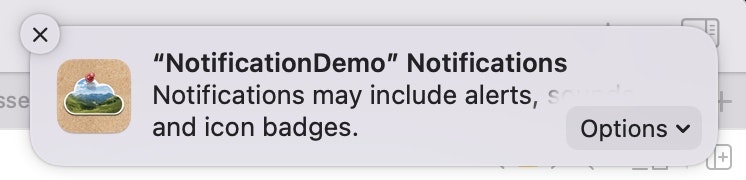
- 下記のように通知が表示され、クリックすると設定画面が表示されます。
通知の作成
- まず通知が許可されているかをgetNotificationSettings(completionHandler:)で確認します。
- 具体的な通知の値はUNMutableNotificationContentオブジェクトを使います。
-
let image = NSImage(contentsOf: imageUrl)の部分はメインスレッドだとUIが止まってしまうので、DispatchQueue.global().asyncを使用しています。 - (試した所通知はサブスレッドのままで動作したのですが、恐らくメインスレッドで呼ぶべきだと思うのでそうしています。)
userNotificationCenter.getNotificationSettings { settings in
    guard settings.authorizationStatus == .authorized else {
        return
    }

    let content = UNMutableNotificationContent()
    content.title = "Title Sample"
    content.subtitle = "Subtitle Sample"
    content.body = "Body sample"
    content.sound = UNNotificationSound.default

    /*
     // プロジェクトのResourceファイルを使用する場合
     guard let fileUrl = Bundle.main.url(forResource: "sampleImage1", withExtension: ".png"),
     let attachment = try? UNNotificationAttachment(identifier: fileUrl.lastPathComponent, url: fileUrl, options: nil)
     else {
     return
     }
     */

    // ファイルをダウンロードする場合
    DispatchQueue.global().async {
        guard let imageUrl = URL(string: "https://i.imgur.com/tanIcMA.png"),
              let image = NSImage(contentsOf: imageUrl),
              let attachment = UNNotificationAttachment.create(identifier: "attachment",
                                                               image: image,
                                                               options: .none)
        else {
            return
        }

        content.attachments = [attachment]
        let request = UNNotificationRequest(identifier: imageUrl.lastPathComponent, content: content, trigger: nil)

        DispatchQueue.main.async {
            userNotificationCenter.add(request) { error in
                if error != nil {
                    print(error?.localizedDescription as Any)
                }
            }
        }
    }

}
- 通知に画像を添付したい場合、ローカルPC上にファイルが存在する必要があります。
- 画像をNSImageで指定できるよう、下記のextensionを利用します。
- Tempフォルダを作ってそこに画像を保存して、
UNNotificationAttachmentを返しています。
extension UNNotificationAttachment {

    static func create(identifier: String,
                       image: NSImage,
                       options: [NSObject : AnyObject]?) -> UNNotificationAttachment? {
        let fileManager = FileManager.default
        let tmpSubFolderName = ProcessInfo.processInfo.globallyUniqueString
        let tmpSubFolderURL = URL(fileURLWithPath: NSTemporaryDirectory()).appendingPathComponent(tmpSubFolderName, isDirectory: true)
        do {
            try fileManager.createDirectory(at: tmpSubFolderURL, withIntermediateDirectories: true, attributes: nil)
            let imageFileIdentifier = identifier + ".png"
            let fileURL = tmpSubFolderURL.appendingPathComponent(imageFileIdentifier)
            let imageData = image.tiffRepresentation
            try imageData?.write(to: fileURL)
            let imageAttachment = try UNNotificationAttachment.init(identifier: imageFileIdentifier,
                                                                    url: fileURL,
                                                                    options: options)
            return imageAttachment
        } catch {
            print("error " + error.localizedDescription)
        }
        return nil
    }
}
フォアグラウンド時の通知表示
- iOSでも見る実装ですね。
- macOSでは
.alertであり、iOSのように.bannerと.listへ分離してないのでこれを指定するのはちょっと違和感がありますが…。
import Cocoa
import UserNotifications

@main
class AppDelegate: NSObject, NSApplicationDelegate {


    func applicationDidFinishLaunching(_ aNotification: Notification) {
        // Insert code here to initialize your application
        UNUserNotificationCenter.current().delegate = self
    }

    // (略)

}

extension AppDelegate: UNUserNotificationCenterDelegate {
    func userNotificationCenter(_ center: UNUserNotificationCenter,
                                willPresent notification: UNNotification,
                                withCompletionHandler completionHandler: @escaping (UNNotificationPresentationOptions) -> Void) {
        return completionHandler([.list, .banner, .sound])
    }
}
システム設定の通知設定を開く
- 通知を未許可とした場合の導線として、アプリからシステム設定の通知設定を開くことを考えます。
- 指定するURLは以下のページを参照。
guard let url = URL(string: "x-apple.systempreferences:com.apple.preference.notifications") else {
    return
}
NSWorkspace.shared.open(url)
システム設定の通知設定の値の保存場所
-
~/Library/Preferences/com.apple.ncprefs.plistに保存されています。

デバッグ時のTips
- 通知バナーにアイコンが表示されない場合
- 設定画面から一度削除する
- 設定画面にアプリが表示されない
- 一度設定画面を閉じて再度開く
