【参考】Log Log Logger:レイアウトエディターからのボタンonClickイベントハンドラの生成方法
ボタンのクリックイベントをどう実装すればいいのか分からない…
VB系言語では、イベントハンドラの設定は直感的にできました。(デザインに配置したボタンをダブルクリックする、など)
それがAndroidStudioでは通用しないので、「ボタンをクリックしたらメッセージが出る」というだけのものを作るのにとても手間取りました。
やっとの思いで見つけた冒頭の記事を参考に、自分で設定してみた経緯を記録します。
正攻法でいくならきちんとListnerを使うべきだと思いつつ、まずはより簡単な android:onClick を用いる方法で実装します。
android:onClick を用いてボタンのクリックイベントを実装する
activity_main.xml にボタンを配置する。(id:myButton)

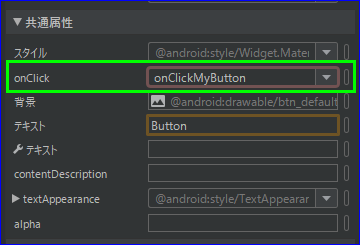
配置したボタンのonClickプロパティに任意のメソッド名を記述する。

コードでは以下の通り。
            <Button
            android:id="@+id/myButton"
            android:layout_width="wrap_content"
            android:layout_height="wrap_content"
            android:onClick="onClickMyButton" 👈ココ
            android:text="Button"
            app:layout_constraintBottom_toBottomOf="parent"
            app:layout_constraintEnd_toEndOf="parent"
            app:layout_constraintStart_toStartOf="parent"
            app:layout_constraintTop_toTopOf="parent" />
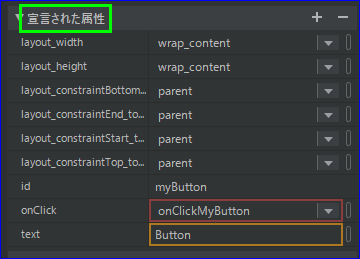
明示的に記述されたプロパティは「宣言された属性」としてデザイン画面に表示される。

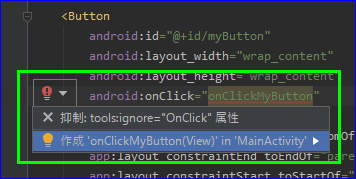
onClickプロパティに記述したメソッドはこの時点で存在しないため、xmlコード上にエラーの赤い電球が表示される。
その赤い電球をクリックして、「作成'onClickMyButton(View)'~」をクリックする。

すると MainActivity.java に onClickMyButton() メソッドが追加される。
public class MainActivity extends AppCompatActivity {

    @Override
    protected void onCreate(Bundle savedInstanceState) {
        super.onCreate(savedInstanceState);
        setContentView(R.layout.activity_main);
    }

    public void onClickMyButton(View view) { //👈ココ
    }
}
ボタンクリックでメッセージを表示する
onClickMyButton() とボタンのクリックイベントが結びついたので、当該メソッドの中に処理を記述する。
import androidx.appcompat.app.AppCompatActivity;

import android.os.Bundle;
import android.view.View;

import android.widget.Toast; //★1

public class MainActivity extends AppCompatActivity {

    @Override
    protected void onCreate(Bundle savedInstanceState) {
        super.onCreate(savedInstanceState);
        setContentView(R.layout.activity_main);
    }

    public void onClickMyButton(View view) {
        try {
            switch (view.getId()) { //★2
                case R.id.myButton:
                    Toast.makeText(this, "ボタンをタップしました", Toast.LENGTH_SHORT).show(); //★3
                    break;
                default:
                    throw new IllegalStateException("Unexpected value: " + view.getId()); //★4
            }
        } catch (IllegalStateException e) { //★5
            Toast.makeText(this, e.getMessage(), Toast.LENGTH_SHORT).show();
        }
    }
}
| ★ | 説明 |
|---|---|
| 1 | Androidアプリ上に表示されるメッセージウィジェット(画面下部にぼやぁ~…と出てきてぼやぁ~…と消える)をインポートしている。 |
| 2 |
onClickMyButton() に渡された view のIDを取得し、どのボタンから発生したイベントなのかを判断する。( case がひとつしかないと、「ひとつしかないなら if でいいんじゃないか?」とメッセージが出るがいずれ増やすので無視する。) |
| 3 | ★1でインポートしたウィジェット Toast を使って、ボタンクリックを認識したらメッセージが出るようにしている。 |
| 4 |
switch case を書いたら「この例外を投げた方がいい」と自動生成されたもの。後ほど調べる。 |
| 5 | ★4で投げている例外を switch の外側でキャッチすればいいのではと安直に考えて暫定で記述したもの。 |
▼上記をビルドしてスマホにデプロイし、起動して「テスト」ボタンをクリックした状態。

ボタンを追加する
activity_main.xmlにボタンを追加する。(id:myButton2)

追加したボタンの android:onClick プロパティを一つ目のボタン同様に設定する。
    <Button
        android:id="@+id/myButton"
        android:layout_width="wrap_content"
        android:layout_height="wrap_content"
        android:onClick="onClickMyButton"
        android:text="@string/myButton"
        app:layout_constraintBottom_toBottomOf="parent"
        app:layout_constraintEnd_toEndOf="parent"
        app:layout_constraintStart_toStartOf="parent"
        app:layout_constraintTop_toTopOf="parent" />

    👇新しく追加したボタン。
    <Button
        android:id="@+id/myButton2"
        android:layout_width="wrap_content"
        android:layout_height="wrap_content"
        android:onClick="onClickMyButton" 👈このボタンのクリックイベントとonClickMyButton()を結びつける。
        android:text="@string/myButton2"
        app:layout_constraintBottom_toBottomOf="parent"
        app:layout_constraintEnd_toEndOf="parent"
        app:layout_constraintHorizontal_bias="0.501"
        app:layout_constraintStart_toStartOf="parent"
        app:layout_constraintTop_toBottomOf="@+id/myButton"
        app:layout_constraintVertical_bias="0.081" />
ActivityMain.javaの onClickMyButton() に追加したボタンの case を記述する。
    public void onClickMyButton(View view) {
        try {
            switch (view.getId()) {
                case R.id.myButton:
                    Toast.makeText(this, "ボタンをタップしました", Toast.LENGTH_SHORT).show();
                    break;
                case R.id.myButton2: //👈ココ
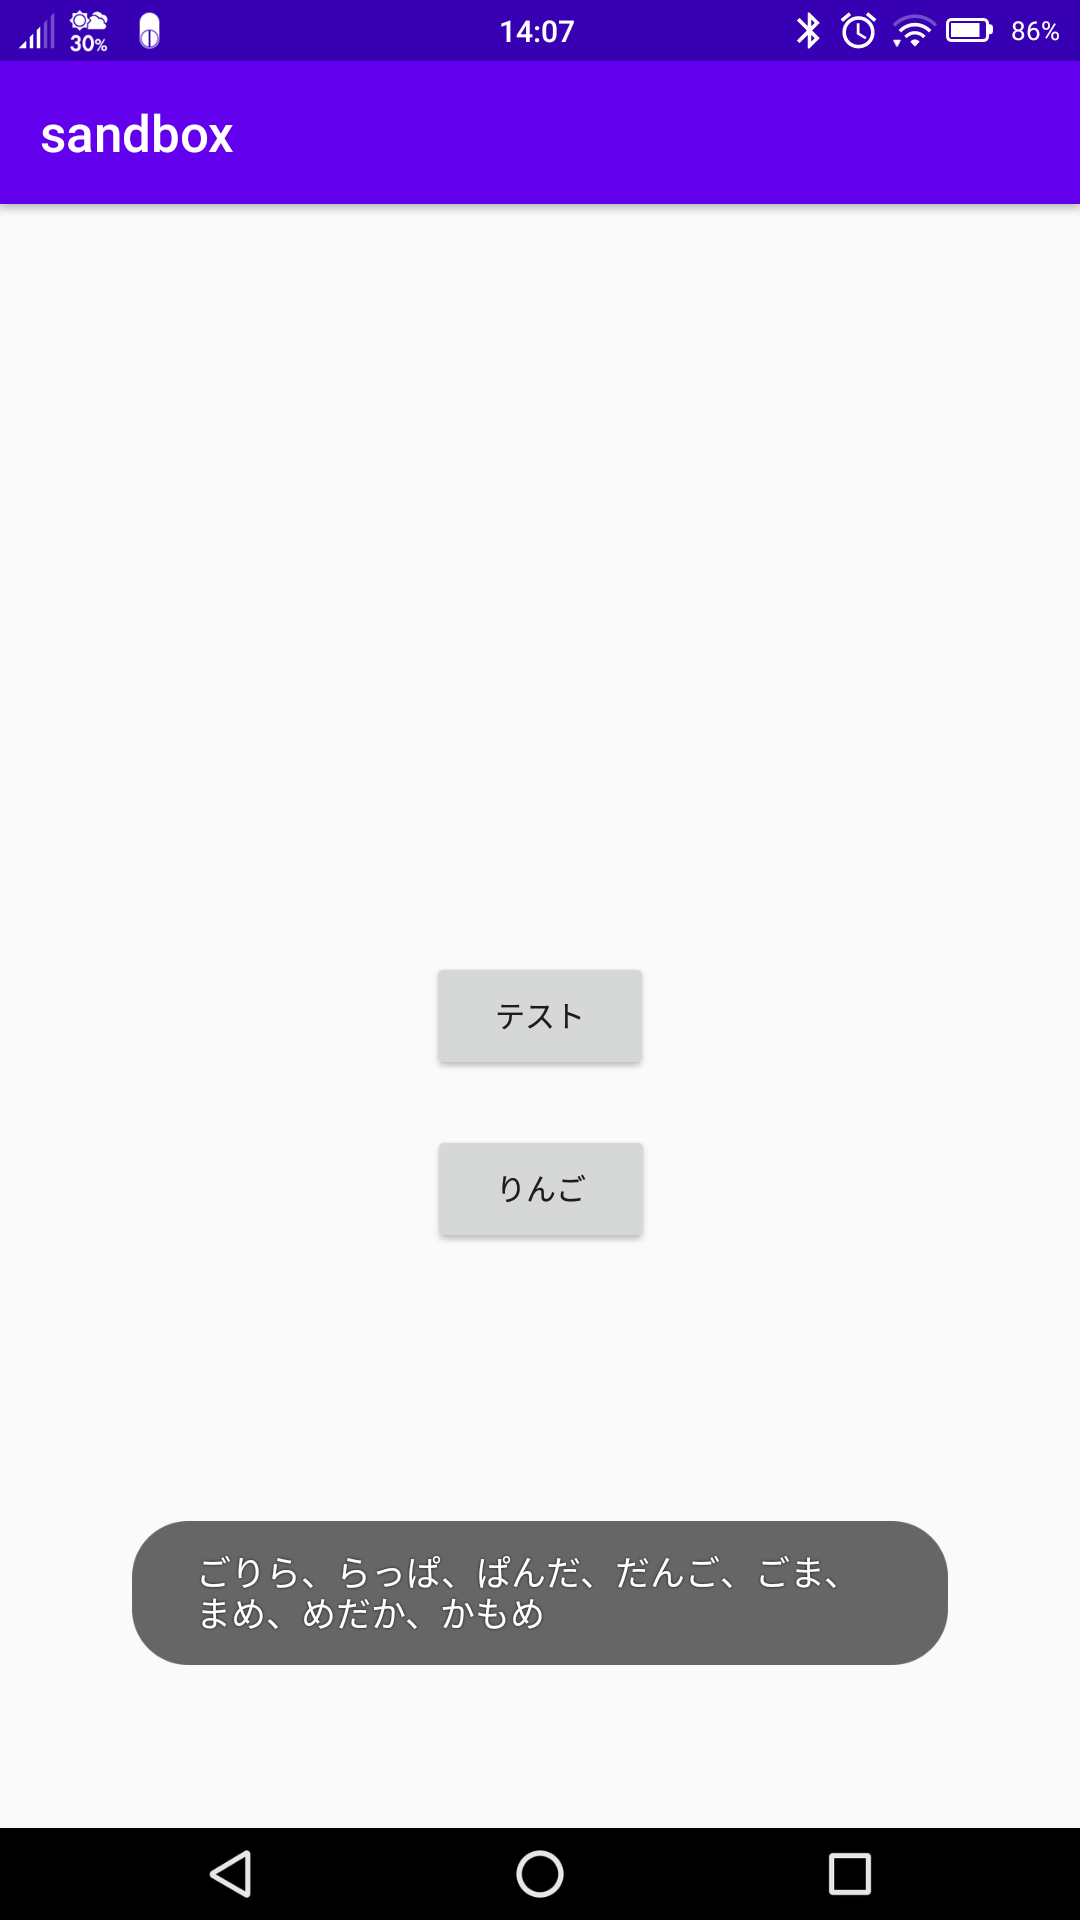
                    Toast.makeText(this, "ごりら、らっぱ、ぱんだ、だんご、ごま、まめ、めだか、かもめ", Toast.LENGTH_LONG).show();
                    break;
                default:
                    throw new IllegalStateException("Unexpected value: " + view.getId());
            }
        } catch (IllegalStateException e) {
            Toast.makeText(this, e.getMessage(), Toast.LENGTH_SHORT).show();
        }
    }
▼上記をビルドしてスマホにデプロイし、起動して「りんご」ボタンをクリックした状態。

おまけ(ボタンのキャプション設定)
<resources>
    <string name="app_name">sandbox</string>
    <string name="myButton">テスト</string>
    <string name="myButton2">りんご</string>
</resources>
![]() 【AndroidStudio】コントロールのキャプション設定方法その1
【AndroidStudio】コントロールのキャプション設定方法その1
以上