はじめに
前書き
- FileMaker Advent Calendar 2020 の 10 日目記事です
対象読者
- Claris FileMaker Server を Linux CentOS 環境で運用をしていて Google ドライブへファイルバックアップしたい
- FileMaker とか知らんけれど CentOS 7.x 系で Rclone を使って Google ドライブへファイルバックアップしたい
Rclone とは?
- 公式サイト
- 公式 GitHub リポジトリ
- rsync のラッパーのようなもの
- 以下、公式サイトより引用
Rclone is a command line program to manage files on cloud storage. It is a feature rich alternative to cloud vendors' web storage interfaces. Over 40 cloud storage products support rclone including S3 object stores, business & consumer file storage services, as well as standard transfer protocols.
- 何も考えずに DeepL で翻訳した結果が以下
Rcloneはクラウドストレージ上のファイルを管理するためのコマンドラインプログラムです。クラウドベンダーのWebストレージインターフェイスに代わる豊富な機能を備えています。40以上のクラウドストレージ製品がRcloneをサポートしており、S3オブジェクトストア、ビジネス&コンシューマー向けファイルストレージサービス、標準転送プロトコルなどが含まれます。
- ここでは簡単に、 Linux のディスク領域に置かれているファイルを Google ドライブへアップロードするためのツール、とだけ理解しておけば大丈夫です
環境
- CentOS 7.8
- Rclone
Rclone インストールと初期設定
インストール
- 公式ドキュメント に記載されている通り、以下コマンドを実行
curl https://rclone.org/install.sh | sudo bash
初期設定
- Google ドライブ用の初期設定ドキュメント
- インストールの最後に
Now run "rclone config" for setupと表示される通り、以下コマンドを実行
rclone config
- すると以下のように質問されるので、
nを入力して進める
2020/12/08 07:41:19 NOTICE: Config file "/home/ptna/.config/rclone/rclone.conf" not found - using defaults
No remotes found - make a new one
n) New remote
s) Set configuration password
q) Quit config
n/s/q> n
- 設定の名前を決めろと言われるので、例えば
FileMakerBackupなど入力して進める
name> FileMakerBackup
- バックアップ先のストレージサービスを選べと言われるので、Google Drive を示す
13を入力して進める
Type of storage to configure.
Enter a string value. Press Enter for the default ("").
Choose a number from below, or type in your own value
 1 / 1Fichier
   \ "fichier"
 2 / Alias for an existing remote
   \ "alias"
 3 / Amazon Drive
   \ "amazon cloud drive"
 4 / Amazon S3 Compliant Storage Provider (AWS, Alibaba, Ceph, Digital Ocean, Dreamhost, IBM COS, Minio, Tencent COS, etc)
   \ "s3"
 5 / Backblaze B2
   \ "b2"
 6 / Box
   \ "box"
 7 / Cache a remote
   \ "cache"
 8 / Citrix Sharefile
   \ "sharefile"
 9 / Dropbox
   \ "dropbox"
10 / Encrypt/Decrypt a remote
   \ "crypt"
11 / FTP Connection
   \ "ftp"
12 / Google Cloud Storage (this is not Google Drive)
   \ "google cloud storage"
13 / Google Drive
   \ "drive"
14 / Google Photos
   \ "google photos"
15 / Hubic
   \ "hubic"
16 / In memory object storage system.
   \ "memory"
17 / Jottacloud
   \ "jottacloud"
18 / Koofr
   \ "koofr"
19 / Local Disk
   \ "local"
20 / Mail.ru Cloud
   \ "mailru"
21 / Mega
   \ "mega"
22 / Microsoft Azure Blob Storage
   \ "azureblob"
23 / Microsoft OneDrive
   \ "onedrive"
24 / OpenDrive
   \ "opendrive"
25 / OpenStack Swift (Rackspace Cloud Files, Memset Memstore, OVH)
   \ "swift"
26 / Pcloud
   \ "pcloud"
27 / Put.io
   \ "putio"
28 / QingCloud Object Storage
   \ "qingstor"
29 / SSH/SFTP Connection
   \ "sftp"
30 / Sugarsync
   \ "sugarsync"
31 / Tardigrade Decentralized Cloud Storage
   \ "tardigrade"
32 / Transparently chunk/split large files
   \ "chunker"
33 / Union merges the contents of several upstream fs
   \ "union"
34 / Webdav
   \ "webdav"
35 / Yandex Disk
   \ "yandex"
36 / http Connection
   \ "http"
37 / premiumize.me
   \ "premiumizeme"
38 / seafile
   \ "seafile"
Storage> 13
- Google Application Client Id を訊かれるが、空欄のまま Enter を押して進める
Google Application Client Id
Setting your own is recommended.
See https://rclone.org/drive/#making-your-own-client-id for how to create your own.
If you leave this blank, it will use an internal key which is low performance.
Enter a string value. Press Enter for the default ("").
client_id>
- OAuth Client Secret を訊かれるが、こちらも空欄のまま Enter を押して進める
OAuth Client Secret
Leave blank normally.
Enter a string value. Press Enter for the default ("").
client_secret>
- Rclone から Google ドライブへのアクセス権限のスコープ設定。Full にしたいので 1 を入力して進める
Scope that rclone should use when requesting access from drive.
Enter a string value. Press Enter for the default ("").
Choose a number from below, or type in your own value
 1 / Full access all files, excluding Application Data Folder.
   \ "drive"
 2 / Read-only access to file metadata and file contents.
   \ "drive.readonly"
   / Access to files created by rclone only.
 3 | These are visible in the drive website.
   | File authorization is revoked when the user deauthorizes the app.
   \ "drive.file"
   / Allows read and write access to the Application Data folder.
 4 | This is not visible in the drive website.
   \ "drive.appfolder"
   / Allows read-only access to file metadata but
 5 | does not allow any access to read or download file content.
   \ "drive.metadata.readonly"
scope> 1
- ルートディレクトリの ID を訊かれるが、これも空欄のまま Enter を押して進める
ID of the root folder
Leave blank normally.

Fill in to access "Computers" folders (see docs), or for rclone to use
a non root folder as its starting point.

Enter a string value. Press Enter for the default ("").
root_folder_id>
- JSON ファイル path の Service Account Credentials …… これも空欄のまま Enter を押して進める
Service Account Credentials JSON file path
Leave blank normally.
Needed only if you want use SA instead of interactive login.

Leading `~` will be expanded in the file name as will environment variables such as `${RCLONE_CONFIG_DIR}`.

Enter a string value. Press Enter for the default ("").
service_account_file>
- 詳細なコンフィグ設定をおこなうかどうか。ここではひとまずおこなわないため n を入力して進める
Edit advanced config? (y/n)
y) Yes
n) No (default)
y/n> n
- 設定環境がローカルか、サーバへ SSH 接続しておこなっているかどうかによって変わります。ここでは SSH 接続しておこなっているため n を入力して進める
Remote config
Use auto config?
 * Say Y if not sure
 * Say N if you are working on a remote or headless machine
y) Yes (default)
n) No
y/n> n
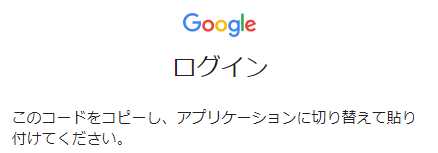
- この URL を開いて表示される認証コードを入力しろ、と言われるので、その通りにして進める
- なお、この際、Google アカウントへのアクセスリクエストを受けるのは、保存したい Google ドライブアカウントにすること
Please go to the following link: https://accounts.google.com/o/oauth2/auth?xxxxxxxxxxxxxxxxxxxxxxxxxxxxxxxxxxxxxxxxxxxxxxxxxxxxxxxx
Log in and authorize rclone for access
Enter verification code> xxxxxxxxxxxxxxxxxxxxxxxx
- チームドライブとして設定するかと訊かれる。そうしないので n を入力して進める
Configure this as a team drive?
y) Yes
n) No (default)
y/n> n
- 最後にこれでよいかと訊かれるので y を入力して完了
--------------------
[FileMakerBackup]
type = drive
scope = drive
token = {"access_token":"xxxxxxxxxxxxxxxxxxxxxxxxxxxxxxxxxxxxxxxxxx","token_type":"Bearer","refresh_token":"xxxxxxxxxxxxxxxxxxxxxxxxxxxxxxxxxx","expiry":"2020-12-08T09:07:38.306864621Z"}
--------------------
y) Yes this is OK (default)
e) Edit this remote
d) Delete this remote
y/e/d> y
- コンフィグの初期画面へ戻ってくるので、q を入力して終了
Current remotes:

Name                 Type
====                 ====
FileMakerBackup      drive

e) Edit existing remote
n) New remote
d) Delete remote
r) Rename remote
c) Copy remote
s) Set configuration password
q) Quit config
e/n/d/r/c/s/q> q
接続確認
- 正しく Google ドライブへ接続できるようになっているか確認するために、以下コマンドを実行してファイル一覧を取得してみる
rclone ls FileMakerBackup:
- ドライブ内に大量にファイルが存在している場合、一覧表示が長々とされ続けてしまうので、
ctrl + Cで中断するのがよし
Google ドライブへのアップロード
一回限りの実行
- たとえばバックアップファイルを全てコピーさせたい場合は、以下コマンドでおこなえる
-
FileMakerBackup:のあとにfilemaker/backup/filemakerservernameというのが付記されていますが、これは Google ドライブの root から見た時のディレクトリ path になります
-
rclone copy /opt/FileMaker/FileMaker\ Server/Data/Backups/ FileMakerBackup:filemaker/backup/filemakerservername/
- 実行環境にもよりますが、おおむね 10GB 程度のアップロードに 30 分ほどかかります
- なお Google ドライブ上に表示される
最終更新の値は、アップロード時のタイムスタンプではなく元々のファイル変更タイムスタンプが適用されるよう- 以下キャプチャ画像のアップロード実行は
2020/12/08
- 以下キャプチャ画像のアップロード実行は
定期的に実行
- 上記を定期的に実行させるために cron に登録しておく。以下コマンドを実行
crontab -e
- 一日一回、毎朝 05:00 に実行させる
- どうしてもネットワーク帯域をこちらに取られてしまうので、アクセスの少ない夜間に設定しておくのがよいでしょう
- crontab の編集は vi がデフォルトになっていると思いますが vi を使ったことない方向けに補足すると……
- 最初は閲覧モードになっているので
iキーを押して編集モードに切り替えてください - 以下のを記述した後で
ESCキーを押すと閲覧モードに戻りますので、その後で:wqを入力して保存 → 終了してください ( write & quit のwqです )
- 最初は閲覧モードになっているので
0 5 * * * rclone copy /opt/FileMaker/FileMaker\ Server/Data/Backups/ FileMakerBackup:filemaker/backup/filemakerservername/`date +\%Y`/
- なお、バックアップ先の末尾に記載されている以下の記述については、現在年を取得するようになります。例えば今が 2020/12/10 であれば 2020 という値が入ります。要は、年でディレクトリ分けしたい場合に必要となる記述です
`date +\%Y`/`
おまけ
- 定期実行を仕込む際にはサーバのタイムゾーンを確認しておきましょう
timedatectl
- もし上記コマンドを実行して
Time zoneの値が自身の希望するもの(ここではAsia/Tokyo)でなければ、以下のように再セットしてください
sudo timedatectl set-timezone Asia/Tokyo
- 再度
timedatectlを実行してTime zoneがAsia/Tokyoになっていれば、予定通りのタイミングでバックアップタスクが実行されるはずです
おわりに
感想
- CentOS 8 系や Ubuntu や Mac 環境での Rclone 導入記事は見つかったものの、 CentOS 7.8 で実際に動くかどうか試したかったので、やってみつつ記事にまとめました。何も問題ありませんでした。
- もっと複雑に設定しないといけないかと思っていたら、予想の三百倍くらい簡単に Google ドライブと連携できてしまって驚きました。今後ほかでも活用していきたい。
- 本題とはズレるけれど Rclone って mount までできてしまうの、すごすぎない……?


