はじめに
アプリでは頻繁に使うWidgetとしてBottomSheet、Dialog、SnackBarの3つがあると思います。
これらを使用する場所でいちいち書いていくのは非効率です。
またデザインなどを変更した場合に全て書き直して回るのは大変ですし、変更漏れの危険もあります。
そこでアプリ全体で共有するWidgetとして定義する方法を書いていきたいと思います。
これを定義するとコード量の減少&保守性アップに繋げることが出来ます。
記事の対象者
- Flutter初学者の方
- 共有Widgetの定義方法を知りたい方
記事を執筆時点での筆者の環境
- macOS 14.3.1
- Xcode 15.2
- Swift 5.9
- iPhone11 pro ⇒ iOS 17.2.1
- Flutter 3.19.0
- Dart 3.3.0
- Pixel 7a ⇒ Android
1. 前提
ソースコードはこちら
ディレクトリ構成
lib
├── my_home_page
│   └── my_home_page.dart
├── shared_widgets
│   ├── action_bottom_sheet.dart
│   ├── confirm_dialog.dart
│   └── custom_snack_bar.dart
└── main.dart
使用パッケージ(共有化には関係ありません)
dependencies:
  flutter:
    sdk: flutter
  flutter_hooks:
  cupertino_icons: ^1.0.6
  gap:

dev_dependencies:
  flutter_test:
    sdk: flutter
  custom_lint:
  flutter_lints: ^3.0.0
  very_good_analysis: ^5.1.0
2. BottomSheet
ユーザーに何かしらの行動を選択肢の中から選んでもらう場合に使用します

2-1. 定義
基本は以下の構成です。
- Widgetを呼び出す関数を定義
- 土台のボトムシートのクラス
- ボトムシートにのせる選択肢のクラス
行動の選択肢であるActionItemを引数で取ることで、呼び出し元によって自由にできるようにしています。
ActionItemはListTileを使っていますが、当然ここもカスタマイズすることでさまざまUIを設定できます。
import 'package:flutter/material.dart';

/// ボトムシートの原型
///
/// ここでがグローバルで宣言しているが[ActionBottomSheet]のstatic methodで宣言してもいい
Future<void> showActionBottomSheet(
  BuildContext context, {
  required List<ActionItem> actions,
}) async {
  // Flutter標準のボトムシートの関数を呼び出す
  // 細かな設定はここで行う
  // 引数のbuilderに[ActionBottomSheet]を返す
  await showModalBottomSheet<void>(
    context: context,
    useRootNavigator: true,
    showDragHandle: true,
    builder: (context) {
      // 引数のactionsはここではなくて呼び出し元で設定するので、
      // [showActionBottomSheet]の引数にする
      return ActionBottomSheet(actions: actions);
    },
  );
}

/// ボトムシートの土台
class ActionBottomSheet extends StatelessWidget {
  const ActionBottomSheet({
    required this.actions,
    super.key,
  });

  /// アクションは別に受け取るようにする
  final List<ActionItem> actions;

  /// staticで宣言したボトムシートの原型
  ///
  /// 今回は[show]メソッドはわず、[showActionBottomSheet]使っている。
  /// どちらでも良い。
  static Future<void> show(
    BuildContext context, {
    required List<ActionItem> actions,
  }) async {
    await showModalBottomSheet<void>(
      context: context,
      useRootNavigator: true,
      showDragHandle: true,
      builder: (context) {
        return ActionBottomSheet(actions: actions);
      },
    );
  }

  @override
  Widget build(BuildContext context) {
    return Padding(
      padding: const EdgeInsets.only(bottom: 20),
      child: Column(
        children: actions,
      ),
    );
  }
}

/// [ActionBottomSheet]にのせる選択肢
class ActionItem extends StatelessWidget {
  const ActionItem({
    required this.icon,
    required this.text,
    this.onTap,
    super.key,
  });

  final IconData icon;
  final String text;

  /// タップ処理を後で書きたい時のためにあえてnull許容にする
  final VoidCallback? onTap;

  @override
  Widget build(BuildContext context) {
    return Padding(
      padding: const EdgeInsets.symmetric(vertical: 10),
      child: ListTile(
        leading: Icon(
          icon,
          size: 32,
        ),
        title: Text(
          text,
          style: Theme.of(context).textTheme.titleLarge,
        ),
        onTap: () {
          // ここでボトムシートを閉じることは確定させておく
          Navigator.pop(context);
          // ここで引数に入った場合は処理が呼ばれる
          onTap?.call();
        },
      ),
    );
  }
}
2-2. 呼び出しの例
class _OnlyBottomSheetButton extends StatelessWidget {
  const _OnlyBottomSheetButton({required this.boxColor});

  final ValueNotifier<Color> boxColor;

  @override
  Widget build(BuildContext context) {
    return ElevatedButton(
      onPressed: () {
        showActionBottomSheet(
          context,
          actions: [
            ActionItem(
              icon: Icons.apple,
              text: '赤色に変更',
              onTap: () => boxColor.value = Colors.red,
            ),
            ActionItem(
              icon: Icons.water,
              text: '青色に変更',
              onTap: () => boxColor.value = Colors.blue,
            ),
            ActionItem(
                icon: Icons.light,
                text: '黄色に変更',
                onTap: () => boxColor.value = Colors.yellow),
            ActionItem(
              icon: Icons.replay_outlined,
              text: '元に戻す',
              onTap: () => boxColor.value = Colors.black,
            ),
          ],
        );
      },
      child: const Text('ボトムシートだけ'),
    );
  }
}
3. Dialog
何かの警告だったり、対象の処理を実行してもいいか確認を取る場合に使います

3-1. 定義
基本は以下の構成です。
- Widgetを呼び出す関数を定義
- Dialogのクラスを定義
Flutter標準のshowDialogメソッドは戻り値がジェネリックで自由に決められます。
今回は主に確認用のダイアログとして使用することを想定しているので戻り値はbool型にしています。
import 'package:flutter/material.dart';

/// カスタマイズしたダイアログを呼び出す
///
/// [isCancelButtonEnable]はデフォルトでtrue
///
/// ただの告知文を出したいだけの場合はここをfalseにすればOKボタンのみになる
Future<bool> showConfirmDialog(
  BuildContext context, {
  Widget? title,
  Widget? content,
  bool isCancelButtonEnable = true,
}) async {
  // Flutter標準のshowDialog関数を呼び出す
  // 引数のbuilderに[ConfirmDialog]を渡す
  return await showDialog<bool>(
        context: context,
        builder: (context) {
          return ConfirmDialog(
            title: title,
            content: content,
            isCancelButtonEnable: isCancelButtonEnable,
          );
        },
      ) ??
      // showDialogの引数`barrierDismissible`はデフォルトでtrueになっている
      // つまりダイアログの外をタップするとダイアログを閉じるので、その場合の戻り値を
      // falseにしておく必要がある
      false;
}

/// ダイアログの基本形
class ConfirmDialog extends StatelessWidget {
  const ConfirmDialog({
    super.key,
    this.title,
    this.content,
    required this.isCancelButtonEnable,
  });

  final Widget? title;
  final Widget? content;

  /// キャンセルボタンの表示を切り替えできるようにするフラグ
  final bool isCancelButtonEnable;

  @override
  Widget build(BuildContext context) {
    return AlertDialog(
      title: title,
      content: content,
      actions: [
        if (isCancelButtonEnable)
          TextButton(
            onPressed: () {
              Navigator.pop(context, false);
            },
            child: const Text('キャンセル'),
          ),
        TextButton(
          onPressed: () {
            Navigator.pop(context, true);
          },
          child: const Text('OK'),
        ),
      ],
    );
  }
}
3-2. 呼び出しの例①
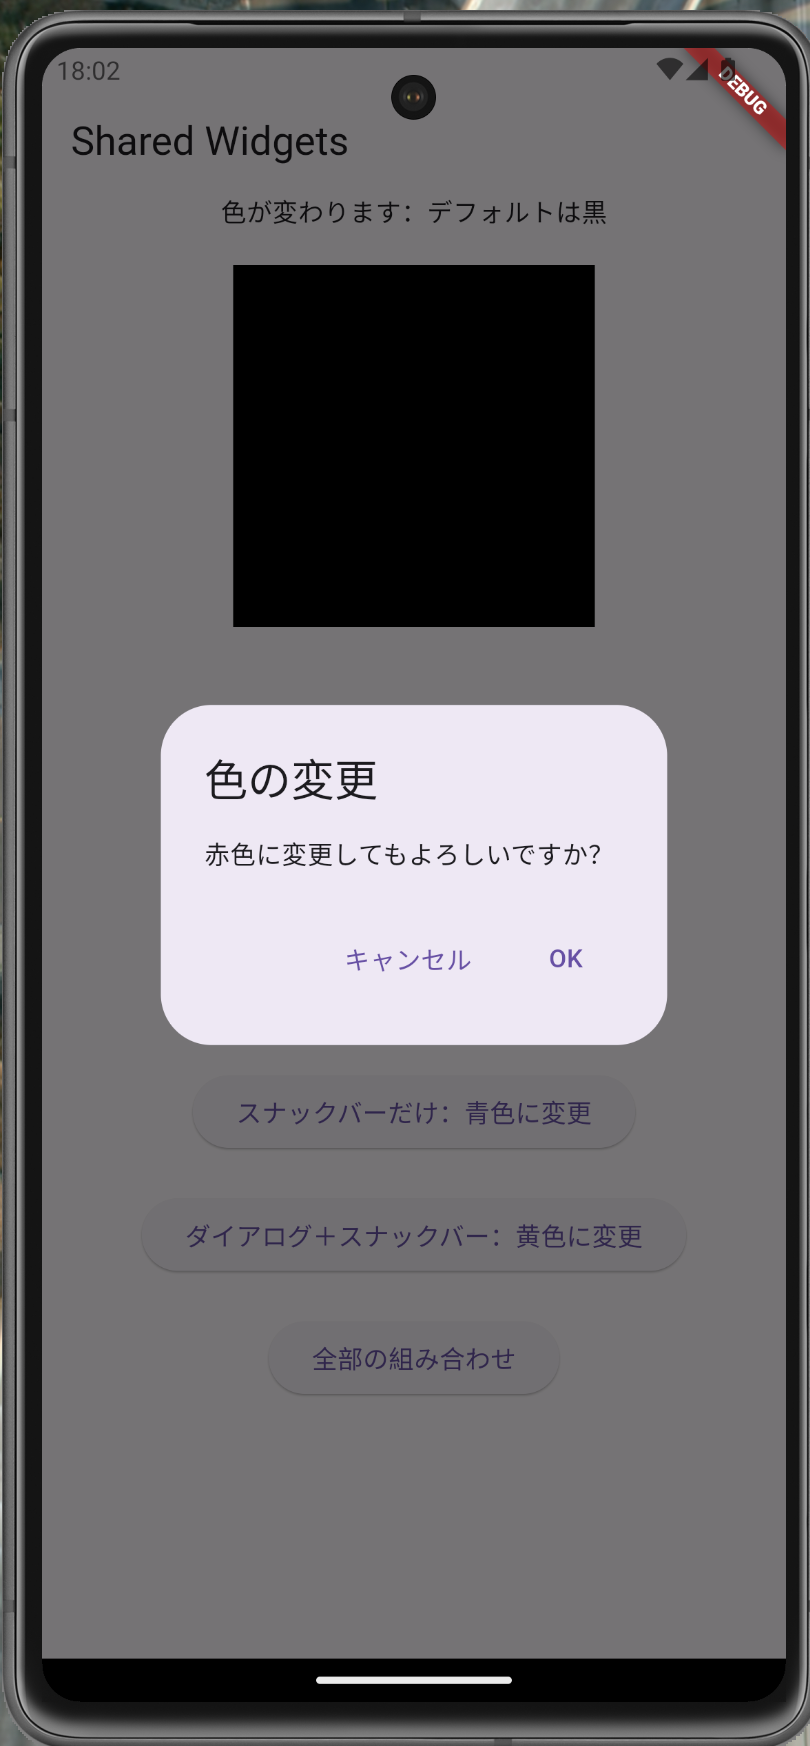
ボトムシートの時と違うのは一度定数resultにshowConfirmDialogの実行結果を入れています。
そしてもしもtrueだった場合に行う処理を書いている点です。
私は昔ダイアログの中で実行処理を書いていましたが、するとそのダイアログは汎用的に出来なくなってしまいます。
あくまでダイアログは質問に対しての結果を返すことに専念させて、その結果どのような処理を行うのかは呼び出し側で定義すると可読性と汎用性を両立させることができるでしょう。
class _OnlyDialogButton extends StatelessWidget {
  const _OnlyDialogButton({required this.boxColor});

  final ValueNotifier<Color> boxColor;

  @override
  Widget build(BuildContext context) {
    return ElevatedButton(
      onPressed: () async {
        final result = await showConfirmDialog(
          context,
          title: const Text('色の変更'),
          content: const Text('赤色に変更してもよろしいですか?'),
        );
        if (result) {
          boxColor.value = Colors.red;
        }
      },
      child: const Text('ダイアログだけ:赤色に変更'),
    );
  }
}
3-3. 呼び出しの例②
今回は引数でisCancelButtonEnable: falseに設定しています。
このことで、キャンセルボタンは生成されずにOKボタンのみになります。
ユーザーに何かしらの情報を読ませたいだけで、選択させる必要がない場合です。
この時は前項のように定数などに入れずにそのまま実行で使えます。
class _OnlyDialogButtonWithOnlyOK extends StatelessWidget {
  const _OnlyDialogButtonWithOnlyOK();

  @override
  Widget build(BuildContext context) {
    return ElevatedButton(
      onPressed: () {
        showConfirmDialog(
          context,
          title: const Text('お知らせ'),
          content: const Text(
            'このダイアログには特に意味がありません。'
            'よって、キャンセルボタンがありません。',
          ),
          isCancelButtonEnable: false,
        );
      },
      child: const Text('ダイアログだけ:何もしない'),
    );
  }
}
4. SnackBar
何かしらの実行結果をユーザーに対して知らせる場合に使います。
今回は通常のスナックバーをカスタマイズした、いわゆるトースト風にしています。

4-1. 定義
グローバル関数で定義し、関数内でスナックバーの設定をしています。
import 'package:flutter/material.dart';

/// カスタマイズしたスナックバーを表示する
///
/// [message]はスナックバーに表示したいメッセージ
/// [duration]はスナックバーを表示する時間(デフォルトは2秒で設定)
void showCustomSnackbar(
  BuildContext context,
  String message, {
  int duration = 2,
}) {
  // スナックバーの設定
  final snackbar = SnackBar(
      content: Text(
        message,
        style: Theme.of(context).textTheme.bodyMedium,
      ),
      duration: Duration(seconds: duration),
      // スナックバーを浮かせる設定
      behavior: SnackBarBehavior.floating,
      // スナックバーの内部のテキストとスナックバーの外側のパディング
      padding:
          const EdgeInsetsDirectional.symmetric(horizontal: 14, vertical: 16),
      // スナックバーと画面とのマージン
      margin: const EdgeInsets.fromLTRB(20, 0, 20, 50),
      // 角丸の設定
      shape: BeveledRectangleBorder(
        borderRadius: BorderRadius.circular(5),
      ),
      backgroundColor: Colors.grey);

  // ScaffoldMessengerを使用してスナックバーを表示
  ScaffoldMessenger.of(context).showSnackBar(snackbar);
}
4-2. 呼び出しの例
こちらは単純に引数を入れて呼び出すだけなので簡単です。
class _OnlySnackBar extends StatelessWidget {
  const _OnlySnackBar({required this.boxColor});

  final ValueNotifier<Color> boxColor;

  @override
  Widget build(BuildContext context) {
    return ElevatedButton(
      onPressed: () {
        boxColor.value = Colors.blue;
        showCustomSnackbar(context, '青色に変更しました');
      },
      child: const Text('スナックバーだけ:青色に変更'),
    );
  }
}
5. 全部を組み合わせてみた例
- ボトムシート起動
- アクション選択
- ダイアログ起動
- ダイアログのOKタップでtrueが返ってくる
- 処理を実施(今回はカラーを変更)
- スナックバーを起動
class _AllButton extends StatelessWidget {
  const _AllButton({required this.boxColor});

  final ValueNotifier<Color> boxColor;

  @override
  Widget build(BuildContext context) {
    return ElevatedButton(
      onPressed: () {
        showActionBottomSheet(
          context,
          actions: [
            ActionItem(
              icon: Icons.apple,
              text: '赤色に変更',
              onTap: () async {
                final result = await showConfirmDialog(
                  context,
                  title: const Text('色の変更'),
                  content: const Text('赤色に変更してもよろしいですか?'),
                );
                if (result && context.mounted) {
                  boxColor.value = Colors.red;
                  showCustomSnackbar(context, '赤色に変更しました');
                }
              },
            ),

            // ~~以下省略~~
          ],
        );
      },
      child: const Text('全部の組み合わせ'),
    );
  }
}
終わりに
今までは毎回使用場所で定義していたのですが、現場に入って上記の設定方法を学ぶことが出来ました。
上記のような基本形をスニペットなどで持っておけば、サンプルアプリの時にもさっと作れて便利そうです。
皆さんも上記を参考にオリジナルのShared Widgetsを作ってみてください。
この記事が誰かのお役に立てれば幸いです。
