追記
- iOS15の対応表も追加しました。(間違いある場合はご指摘ください)
- ※注意:本記事は Xcode 13.0 beta の環境で動作確認したものです。正式版では動作が変わる可能性もあります。
前置き
とりあえず、SwiftUIチュートリアルを触り、後半の方はサク読みで一応見てみたが、、、
いざ、自分が作りたいものを考えたときに、あれ、、、画面遷移とかどうすんの?書いてなくね?
っていうのがチュートリアルの所感。。。(書いてあったらごめんなさいw)
ってなわけで、実践的に使えそうなものを調べたり、リファレンス読んでごにょってたりして、、
それをまとめた感じです。
UIKitとの対応表
iOS15~
Views and Controls
| SwiftUI | UIKit | Note |
|---|---|---|
| AsyncImage | (UIImageView) |
View Layout and Presentation
| SwiftUI | UIKit | Note |
|---|---|---|
| ControlGroup | (UIStackview) | |
| TimelineView | (Timer + layoutIfNeeded) |
iOS14~
Views and Controls
| SwiftUI | UIKit | Note |
|---|---|---|
| TextEditor | TextField | |
| SignInWithAppleButton | ASAuthorizationAppleIDButton | |
| Menu | (iPad UIAlertController) | (UIAlertController.Style = .actionsheet) |
| ColorPicker | UIColorPickerViewController | |
| ProgressView | UIProgressView | |
| Label | UILabel | |
| Link | (UIButton) |
View Layout and Presentation
| SwiftUI | UIKit | Note |
|---|---|---|
| LazyHStack | UIStackview | NSLayoutConstraint.Axis = .horizontal |
| LazyVStack | UIStackview | NSLayoutConstraint.Axis = .vertical |
| LazyHGrid | UICollectionView | scrollDirection = .horizontal |
| LazyVGrid | UICollectionView | scrollDirection = .vertical |
| GridItem | (UICollectionviewflowlayout) | |
| ScrollViewReader | - | (UITableView-scrollToRow) |
| OutlineGroup | (NSDiffableDataSourceSnapshot) | |
| DisclosureGroup | (NSDiffableDataSourceSnapshot) |
iOS13~
Views and Controls
| SwiftUI | UIKit | Note |
|---|---|---|
| Text | UILabel | |
| TextField | UITextFiel | |
| SecureField | UITextField | isSecureTextEntry = true |
| Font | UIFont | |
| Image | UIImageView | |
| Button | UIButton | |
| NavigationLink | - | pushViewController |
| EditButton | (UIBarButtonItem) | canEditRowAtIndexPath is true |
| Toggle | UISwitch | |
| Picker | UIPickerView | |
| DatePicker | UIDatePicker | |
| Slider | UISlider | |
| Stepper | UIStepper | |
| ViewBuilder | - | |
| ViewModifier | - |
View Layout and Presentation
| SwiftUI | UIKit | Note |
|---|---|---|
| HStack | UIStackview | NSLayoutConstraint.Axis = .horizontal |
| VStack | UIStackview | NSLayoutConstraint.Axis = .vertical |
| ZStack | - | (CALayer-zPosition) |
| List | UITableView | |
| ForEach | (UIScrollView) | (forEach) |
| ScrollView | UIScrollView | |
| Axis | NSLayoutConstraint.Axis | |
| Form | (UIStackView) | |
| Group | (UIStackView) | |
| Section | (UICollectionReuseableView) | |
| Spacer | (UIBarButtonItem) | |
| Divider | (UIView) | (separatorStyle/separatorColor/separatorEffect/separatorInset) |
| NavigationView | UINavigationController | |
| TabView | UITabBarController | |
| Alert (Deprecated) |
UIAlertController | UIAlertController.Style = .alert |
| ActionSheet (Deprecated) |
UIAlertController | UIAlertController.Style = .actionSheet |
| EmptyView | - | |
| EquatableView | - | |
| AnyView | - | |
| TupleView | - |
補足
Noteに関しては、UIKitで特定の条件下の場合に、SwiftUIと同じになるということを表しています。
「( )」に関しては、近しい役割 or 代替可能ということを表しています。
コード例
コード例は、最低限のコードにしている部分が多いので、その部分はご容赦ください、、、笑
比較のため再現可能な既存コードも書いてますが、必ずしもそれが対応しているというわけではないです。参考程度に。
画面遷移
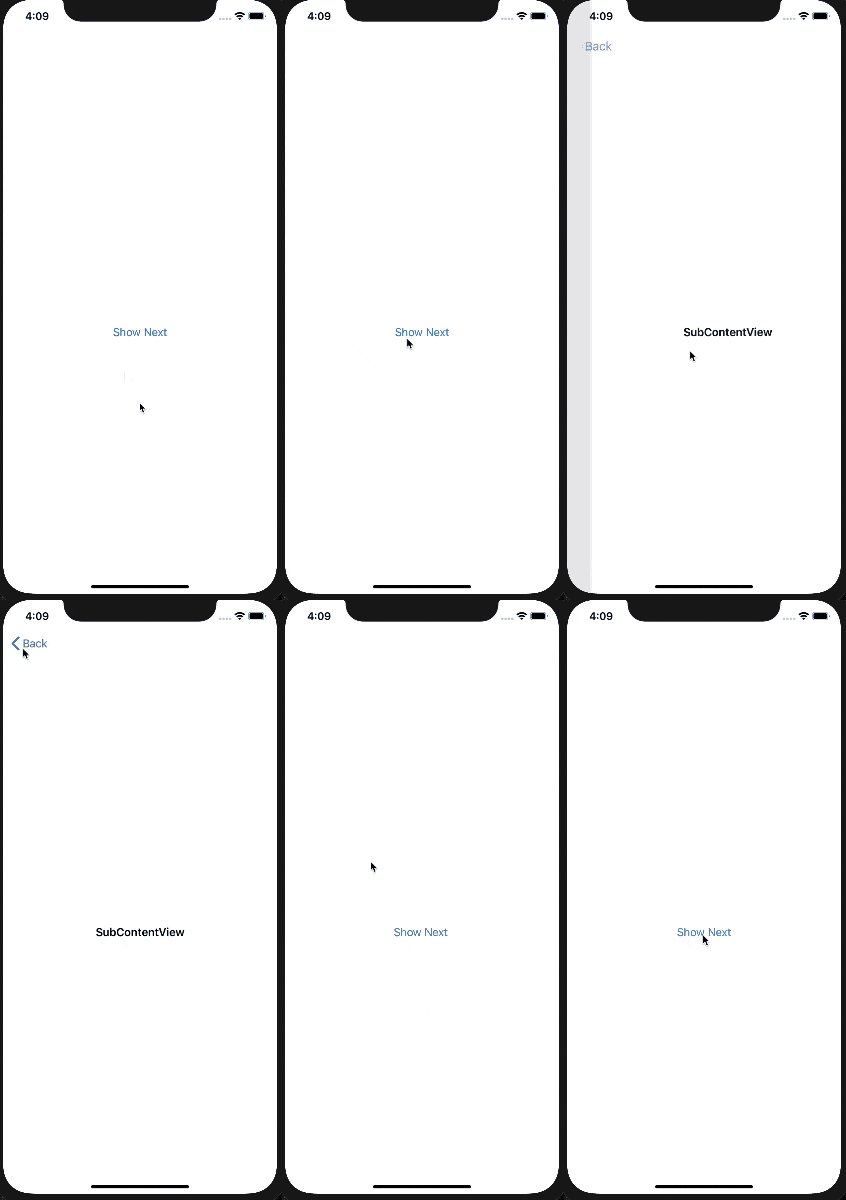
① Navigation
既存
navigationController?.pushViewController(viewController, animated: true)
SwiftUI
// 遷移元
struct ContentView: View {
    var body: some View {
        NavigationView {
            NavigationLink(destination: SubContentView()) {
                Text("Show Next")
            }
        }
    }
}

// 遷移先
struct SubContentView: View {
    var body: some View {
        Text("SubContentView")
    }
}
備考
NavigationViewを配置することで、旧来の**UINavigationController(NavigationBar)**と同じ役割を担える模様。
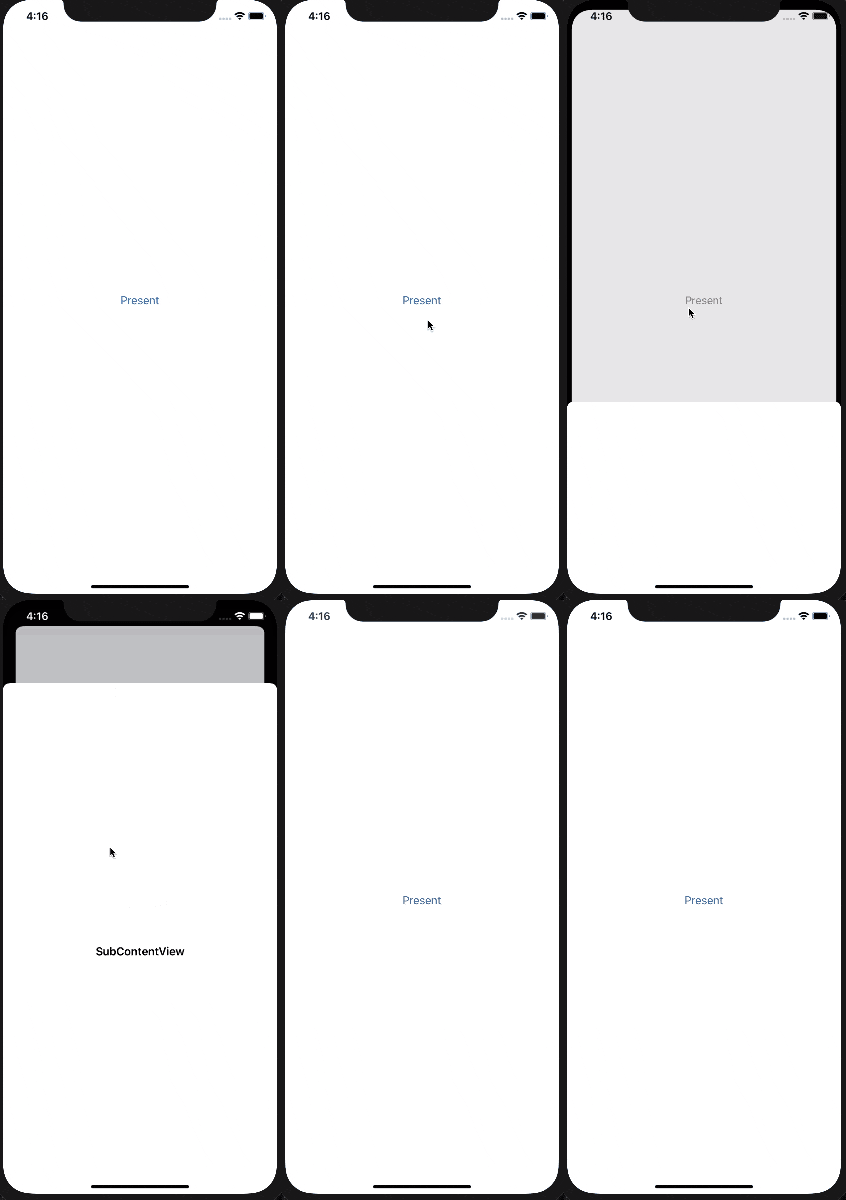
② Present
既存
present(viewController, animated: true)
SwiftUI
// 遷移元
struct ContentView: View {
    var body: some View {
        PresentationButton(Text("Present"), destination: SubContentView())
    }
}

// 遷移先
struct SubContentView: View {
    var body: some View {
        Text("SubContentView")
    }
}
備考
挙動が全く一緒というわけではない。
SwiftUIの方では、次の画面が画面全体に重なるわけではないのに注意。
(※他にpresentに対応するものがちゃんとある、という場合はご教授いただけると、、)
Xcode12、SwiftUI2.0から対応するものが追加されたようです。
public func fullScreenCover<Content>(isPresented: Binding<Bool>, onDismiss: (() -> Void)? = nil, @ViewBuilder content: @escaping () -> Content) -> some View where Content : View
プレゼンテーション
画面作成を行うにあたり、簡単なUIがいくつか用意されているので、ここで紹介していく。
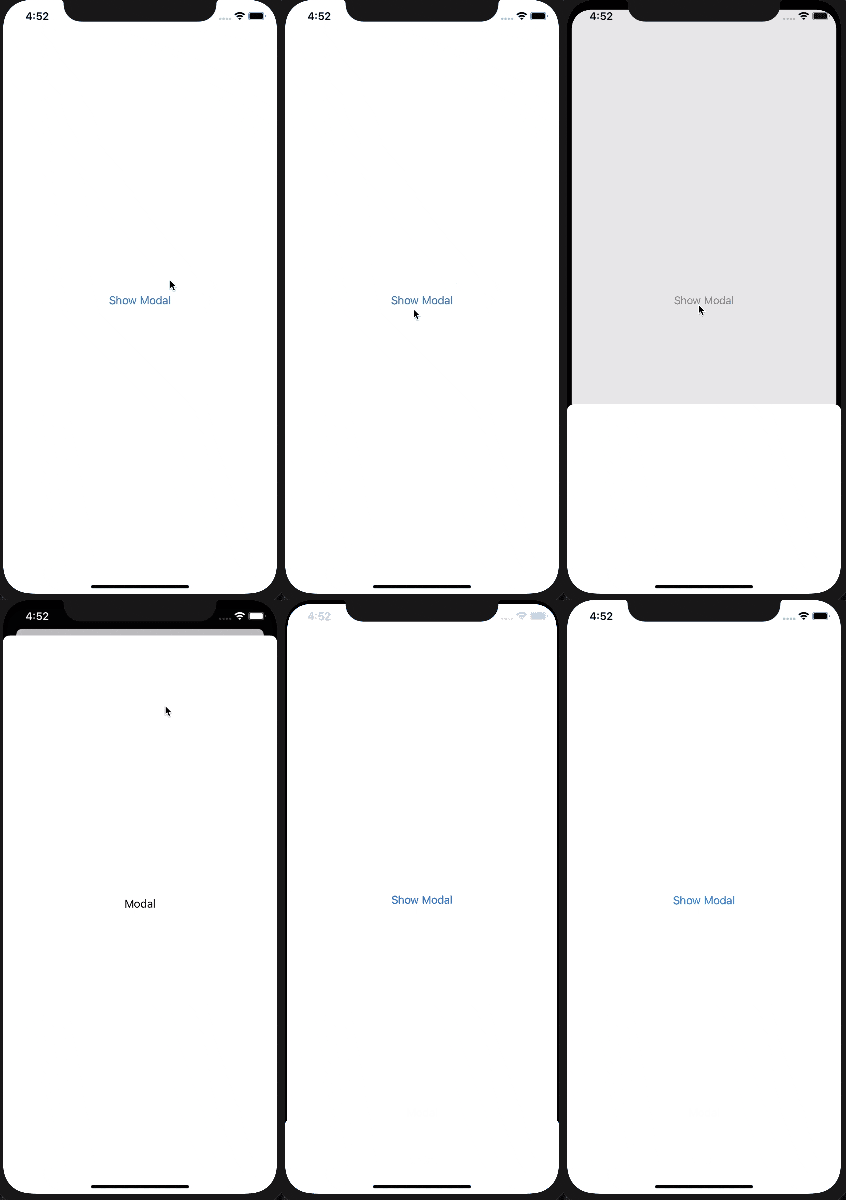
①Modal (現在こちらはDeprecatedになりました)
struct ContentView: View {
    @State var modal: Modal?

    var body: some View {
        Button(action: {
            self.modal = Modal(Text("Modal"), onDismiss: {})
        }) {
            Text("Show Modal")
        }.presentation(modal)
    }
}
備考
- 画面遷移のPresentと同じように見えるが、こちらはあまりカスタマイズできないので、リッチなUIは作れない
- デフォルト引数として
onDismissのクロージャを持つので、閉じる際に何か処理を追加できるメリットあり
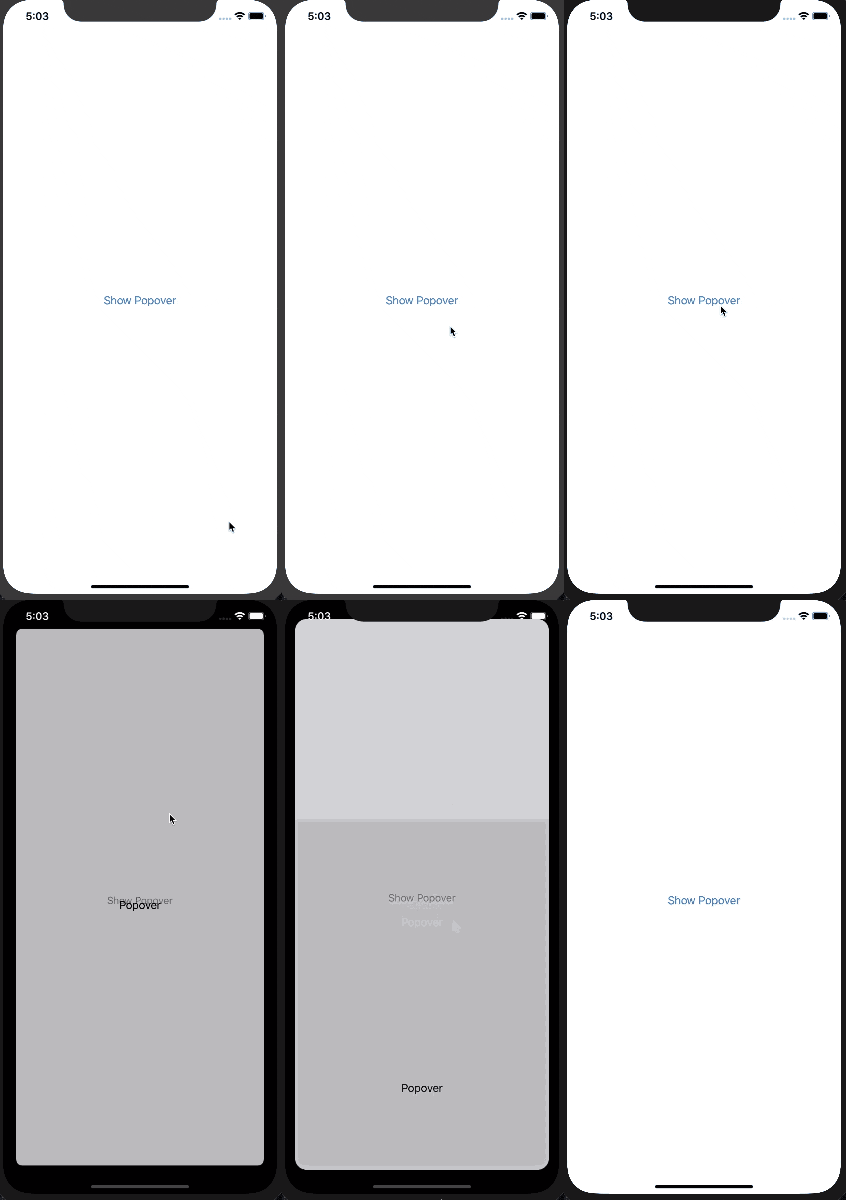
②Popover (現在こちらはDeprecatedになりました)
既存
// UIPopoverPresentationControllerDelegate を使用して

let vc = UIViewController()
vc.modalPresentationStyle = .popover
vc.preferredContentSize = CGSize(width: 200, height: 300)
vc.popoverPresentationController?.sourceView = view
vc.popoverPresentationController?.delegate = self
present(vc, animated: true)
SwiftUI
struct ContentView: View {
    @State var popover: Popover?

    var body: some View {
        Button(action: {
            self.popover = Popover(content: Text("Popover"), dismissHandler: {})
        }) {
            Text("Show Popover")
        }.presentation(popover)
    }
}
備考
- 画面が透過されているが、Modalと挙動は同じ
- Modalと違い
Edgeが設定できるなど、少しだけデザインに幅を持たせられる
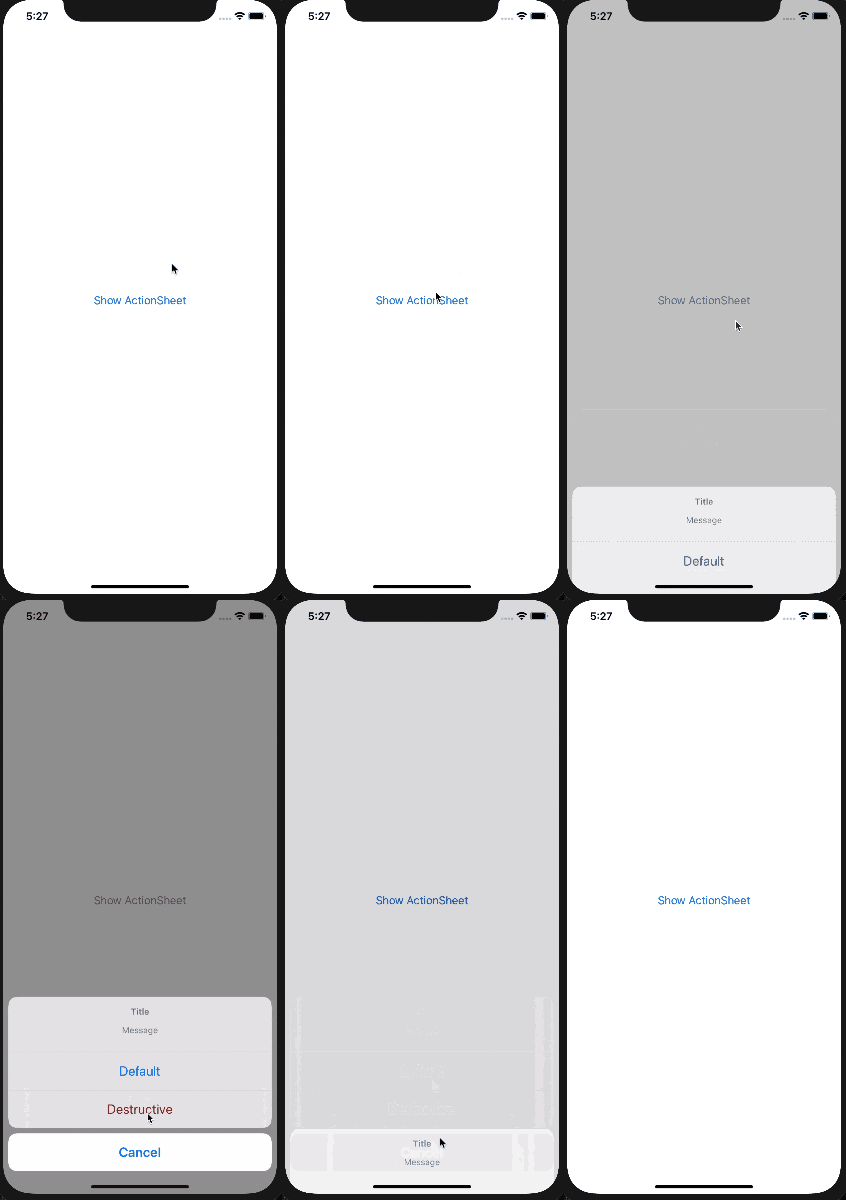
③ActionSheet (iOS15からDeprecatedになりました)
既存
let alert = UIAlertController(title: "Title",
                              message: "Message",
                              preferredStyle: . actionSheet)

let defaultAction = UIAlertAction(title: "Default", style: .default)
let destructiveAction = UIAlertAction(title: "Destructive", style: .destructive)
let cancelAction = UIAlertAction(title: "Cancel", style: .cancel)

alert.addAction(defaultAction)
alert.addAction(destructiveAction)
alert.addAction(cancelAction)

present(alert, animated: true)
SwiftUI
struct ActionSheetView: View {

    @State var isShown = false

    var body: some View {
        Button(action: {
            self.isShown = true
        }) {
            Text("Show ActionSheet")
        }.actionSheet(isPresented: $isShown, content: {
            ActionSheet(
                title: Text("Title"),
                message: Text("Message"),
                buttons: [.default(Text("Default")),
                          .destructive(Text("Destructive")),
                          .cancel()]
            )
        })
    }
}
備考
-
UIAlertControllerとして一括りにされていたのが独立した - 書き方は前と大体同じ印象
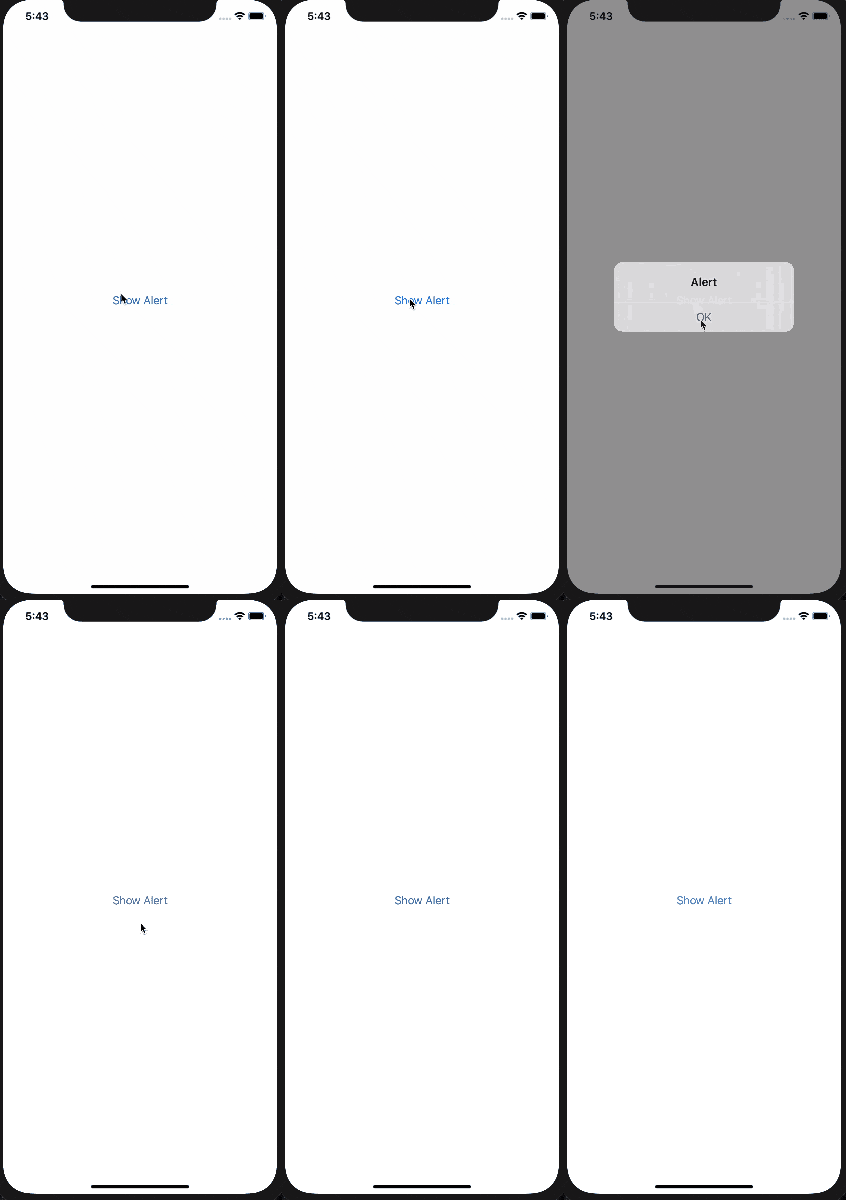
④Alert (iOS15からDeprecatedになりました)
既存
let alert = UIAlertController(title: "Title", preferredStyle: .alert)
present(alert, animated: true)
SwiftUI
struct ContentView: View {
    @State var isShown = false

    var body: some View {
        Button(action: {
            self.isShown = true
        }) {
            Text("Show Alert")
        }.alert(isPresented: $isShown, content:
            Alert(title: Text("Alert"))
        })
    }
}
備考
- ①~③と違いBool値をBindする必要がある
- 基本的には
UIAlertControllerと同じ使い方が可能
ライフサイクル
ライフサイクルというと大袈裟だが、Viewそのものからコントロールできるものが登場。
① onAppear
既存
func viewDidAppear(animated: Bool)
SwiftUI
struct ContentView: View {
    var body: some View {
        Text("Appear").onAppear(perform: {
            // do something
        })
    }
}
② onDisappear
既存
func viewDidDisappear(animated: Bool)
SwiftUI
struct ContentView: View {
    var body: some View {
        Text("Disappear").onDisappear(perform: {
            // do something
        })
    }
}
備考
①と②はチェーンで連続してかける
その他
後書き
もっと良いベストプラクティスがあればコメント欲しいとこです。(本気で)
知見がたまったら、改めてこちらに記載する、、かも、、?
まだBeta版なので変わることありそうだなぁ、、
追記
外人がまとめたものがあるので、ここを見るのが早そう。
SwiftUIチートシート
