Siv3Dで物理ベースレンダリング実装してみた!
Albedo(BaseColor)編(順次追加予定)
今回は、Siv3Dで、物理ベースレンダリング(PBR)の最初のステップである
Albedo(BaseColor) を実装してみます。
まずは、3D空間に Box を描画してみましょう。
Siv3D には、あらかじめ Box を生成するための API が用意されています。
# include <Siv3D.hpp> // Siv3D v0.6.16
Main.cpp 全体
まず、今回使用している Main.cpp の全体像を先に示します。
記事中では後ほど各要素を分解して解説します。
# include <Siv3D.hpp> // Siv3D v0.6.16

void Main()
{
    const ColorF backGroundColor = ColorF{ 0.4, 0.6, 0.8 }.removeSRGBCurve();

    const PixelShader psPBR = HLSL{ U"PBR_PS.hlsl", U"PS" };
    if (!psPBR)
    {
        Print << U"Failed to load PBR_PS.hlsl";
    }

    const MSRenderTexture renderTexture{
        Scene::Size(),
        TextureFormat::R8G8B8A8_Unorm_SRGB,
        HasDepth::Yes
    };

    DebugCamera3D camera{
        renderTexture.size(),
        30_deg,
        Vec3{ 10, 16, -32 }
    };

    Mesh mesh{ MeshData::Box(2.0) };

    while (System::Update())
    {
        camera.update(2.0);
        Graphics3D::SetCameraTransform(camera);

        const ScopedRenderTarget3D target{
            renderTexture.clear(backGroundColor)
        };

        {
            ScopedCustomShader3D shader{ psPBR };
            mesh.draw();
        }

        Graphics3D::Flush();
        renderTexture.resolve();
        Shader::LinearToScreen(renderTexture);
    }
}
Box を Mesh として用意する
Siv3D では、MeshData::Box() を使うことで簡単に立方体メッシュを生成できます。
Mesh mesh{ MeshData::Box(2.0) };
今回は、この Box に対して カスタム PixelShader を適用します。
RenderTexture を用意する
PBR では Linear 空間で計算し、sRGB で表示する ことが重要です。
そのため、今回は RenderTexture を経由して描画します。
const MSRenderTexture renderTexture{
    Scene::Size(),
    TextureFormat::R8G8B8A8_Unorm_SRGB,
    HasDepth::Yes
};
カメラの設定
デバッグ用として DebugCamera3D を使用します。
DebugCamera3D camera{
    renderTexture.size(),
    30_deg,
    Vec3{ 10, 16, -32 }
};
Pixel Shader(Albedoのみ)
今回は、PBR の最初の段階として
Albedo(BaseColor)だけを出力する Pixel Shader を書きます。
cbuffer PSConstants : register(b0)
{
    float3 cameraPos;
    float metallic;
    float roughness;
    float3 albedo;
}

struct PSInput
{
    float4 pos      : SV_POSITION;
    float3 worldPos : POSITION0;
    float3 normal   : NORMAL0;
};

float4 PS(PSInput input) : SV_TARGET
{
    float3 linearColor = float3(1.0, 0.0, 0.0);
    return float4(linearColor, 1.0);
}
描画ループ
カスタム Pixel Shader を ScopedCustomShader3D で適用します。
while (System::Update())
{
    camera.update(2.0);
    Graphics3D::SetCameraTransform(camera);

    const ScopedRenderTarget3D target{
        renderTexture.clear(ColorF{ 0.4, 0.6, 0.8 }.removeSRGBCurve())
    };

    {
        ScopedCustomShader3D shader{ psPBR };
        mesh.draw();
    }

    Graphics3D::Flush();
    renderTexture.resolve();
    Shader::LinearToScreen(renderTexture);
}
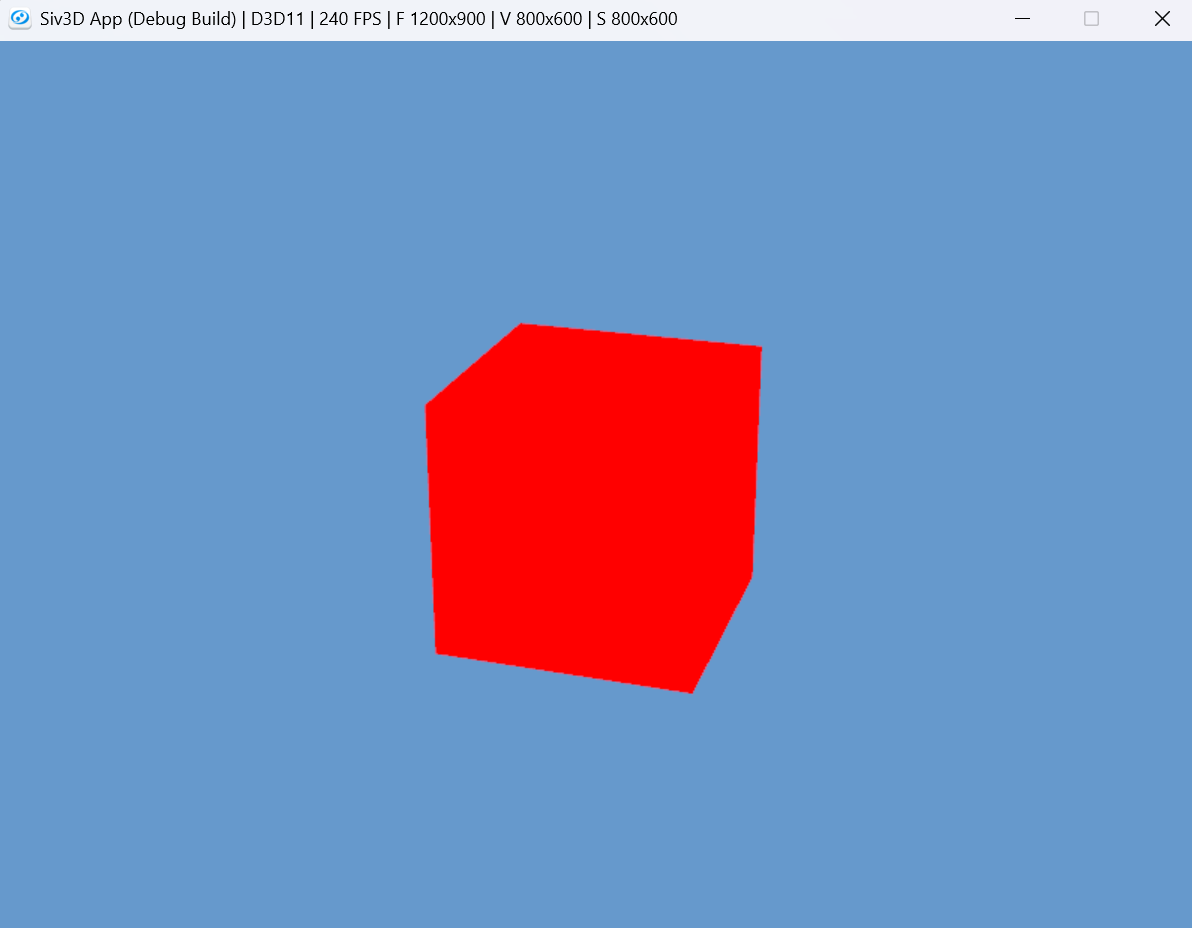
ここまで、進むとBoxが赤くなります。
まとめ
- Siv3D でもカスタムシェーダを使った PBR 実装が可能
- 今回は Albedo(BaseColor)のみ を描画
- 次回は未定(できればライティングとか)