この記事でできること
node.jsとexpress.js, mysqlを使用したアプリをherokuで公開することができるようになる。
特にnode.jsをherokuでデプロイする時にどうmysqlと接続すれば良いか、かなり詰まったのでこの記事
にまとめる。
参考記事
基本のデプロイの参考記事
Vue.jsで作ったアプリをHerokuにデプロイ
herokuでアップロードするファイルでmysqlを使用する場合の参考記事
①Tutorial: How to Create a MySQL Database with Heroku
②Connecting MySql and NodeJS on a Heroku Server (Github code)
①はherokuでclearDBを使用する方法の基本動画
②は実際にデータベースに入れた値を表示する記述まで記載の動画
①ローカル開発
webアプリVSCode記述前の準備
mkdir hellotaro
cd hellotaro
githubにてリポジトリを作成(READMEを作っておく)
URLをコピーする
hellotaroの場所にターミナルでいった状態で
git init
git clone [githubのリポジトリのURL([]この外側のカッコは不要]]
これで github のリポジトリとファイルの紐付け完了。
今後githubで進捗の管理ができる。
VSCodeを使用していく
ターミナル(hello-taroディレクトリ内で)npm init -y
これでpackage.jsonが作成される
{
  "name": "hello-taro",
  "version": "1.0.0",
  "description": "herokuでmysqlを扱う練習",
  "main": "index.js",
  "scripts": {
    "test": "echo \"Error: no test specified\" && exit 1"
  },
  "repository": {
    "type": "git",
    "url": "githubのURLが記載"
  },
  "keywords": [],
  "author": "",
  "license": "ISC",
  "bugs": {
    "url": "https://github.com/ユーザー名/hello-taro/issues"
  },
  "homepage": "https://github.com/ユーザー名#readme"
}
上記内容でファイルが作成される
"main": "index.js",
となっているがサーバー管理のファイル名をapp.jsなど別名にする時はapp.jsなどに変えておくと良さそう
express.jsとmysqlの準備
``` npm install express ``` を実行 (末尾の--saveは今はしなくてもデフォルトの様なので割愛。参考:[npm install --save について](https://qiita.com/takahiro_hata/items/056d2aeb636f343dadaf))各種モジュールの追加。package.jsonに
"dependencies": {
    "express": "^4.17.1"
が追加される。
mysqlのインストール
npm install mysql
packgage.jsonに
"mysql": "^2.18.1"
が追加される。
※mysqlを扱うにはここでは割愛するが事前にhomebrewなどでmysqlをインストールする必要がある
参考:
https://reffect.co.jp/node-js/express-js-connect-mysql#MySQL-4
https://reffect.co.jp/laravel/mysql-laravel-in-mac
コラム
package.jsonの記述を外からコピーしてきてnpm init を実行するとその記述に該当するモジュールをインストールできる様子(この部分はまだ怪しいところもある)
ここまでのpackage.json
{
  "name": "hello-taro",
  "version": "1.0.0",
  "description": "herokuでmysqlを扱う練習",
  "main": "index.js",
  "scripts": {
    "test": "echo \"Error: no test specified\" && exit 1"
  },
  "repository": {
    "type": "git",
    "url": "git+https://github.com/ユーザー名/hello-taro.git"
  },
  "keywords": [],
  "author": "",
  "license": "ISC",
  "bugs": {
    "url": "https://github.com/ユーザー名/hello-taro/issues"
  },
  "homepage": "https://github.com/ユーザー名/hello-taro#readme",
  "dependencies": {
    "express": "^4.17.1",
    "mysql": "^2.18.1"
  }
}
VSCodeでコードを書いていく
index.js
const express = require('express')
var mysql = require('mysql')
const app = express()


var port = process.env.PORT || 5000;

app.get('/',(req, res)=>{

      res.send('helloえくすぷれす');
  })

app.listen(port, () => console.log(`Example app listening on port ${port}!`))
この記述で
をターミナルで実行するとポート5000番にて「helloえくすぷれす」が表示される

解説
const express = require('express')
const mysql = require('mysql')
const app = express()
でexpress.jsを扱い
const mysql = require('mysql')
でmysqlを扱っている。
この辺りはデフォルト記述
重要
var port = process.env.PORT || 5000;
ローカルの立ち上げではこの部分を
var port = 3002
で対応可能だが、herokuでのデプロイでは
process.env.PORT || 5000;
を使用する。
app.get('/',(req, res)=>{

      res.send('helloえくすぷれす');
  })

app.listen(port, () => console.log(`Example app listening on port ${port}!`))
ここではルート「/」にアクセスした時にhelloえくすぷれすを呼び出す記述をしている
app.listen()でポートの読み込み&実行をしている。
ここまででwebアプリのローカル側の記述は完成
②heroku公開(mysql不使用の状態)
※事前にherokuの登録を完了しておく
登録の内容は割愛(ググりでたくさん記事あり)
VSCodeにて新たにProcfileを作成
(Procfileとはherokuでサーバーを立ち上げる時に必要。 localでサーバーを立ち上げる記述である「node index.js」の内容を記述するファイル)Procfile
web: node index.js
Procfileと別でpackage.jsonのscriptに
//今回この内容は使用しません
  "scripts": {
    "start":"node index.js",
    "test": "echo \"Error: no test specified\" && exit 1"
  },
//今回この内容は使用しません
※上記の様に記述している記事を見かけるが今回は不要※
hello-taroディレクトリのターミナルにてherokuアプリを作成する
heroku login
heroku create hello-taro//ここのcrate以下の記載は任意(入力なしだとランダム名になる)
アプリが作成されるとherokuダッシュボードに作成したアプリ名が表示される

デプロイ
ターミナルにてgit add .
git commit -m '任意のコメント'
heroku git:remote -a hello-taro //hellotaro部分は自分のherokuのアプリ名を入れる
git push heroku master
成功するとターミナルに
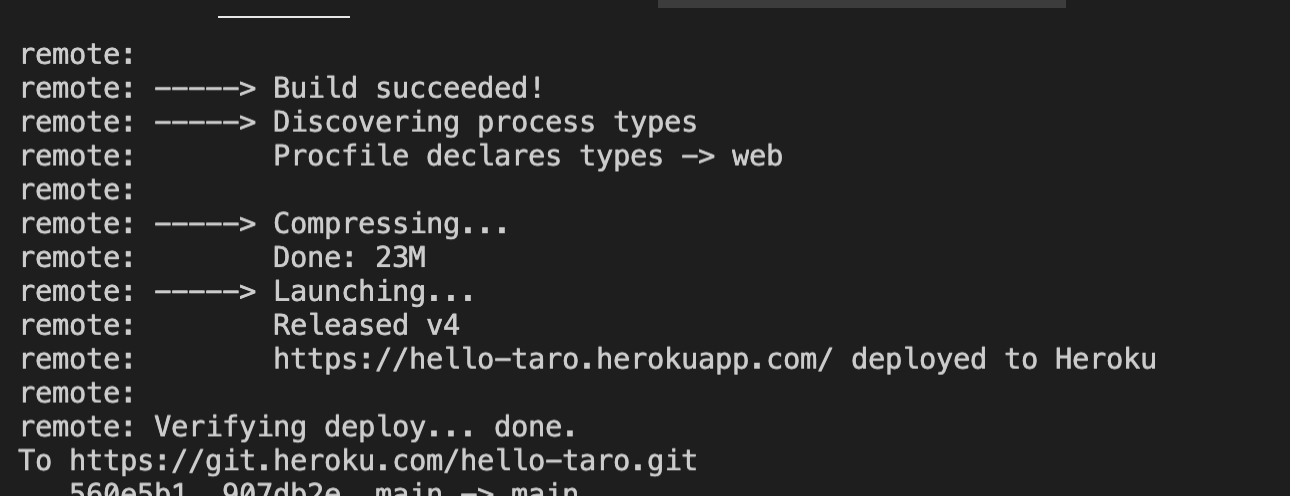
この様な記述が表示される。
https://hello-taro.herokuapp.com/ deployed to Heroku
を⌘+クリックで開くと公開されたhelloえくすぷれすが確認できる。
ちなみにgit push heroku masterがエラーの時はいったん、herokuではなくgithubの指定ブランチ(基本はmaster)にpushして最新にしてから再度
git push heroku masterを試すと良い。
以上でherokuのアップロード(mysql未使用)が完了
③herokuのclearDBを使用し、mysqlを使用可能にする
※clearDBを使用するにはherokuで事前にクレジットカードの登録が必要
clearDB導入〜herokuダッシュボードの対応
ターミナルにてheroku addons:create cleardb:ignite
を実行
この操作でigniteプラン(clearDBの無料プラン)で登録がされる
無事に完了するとherokuダッシュボードの該当アプリのResourcesにclearDBが登録される
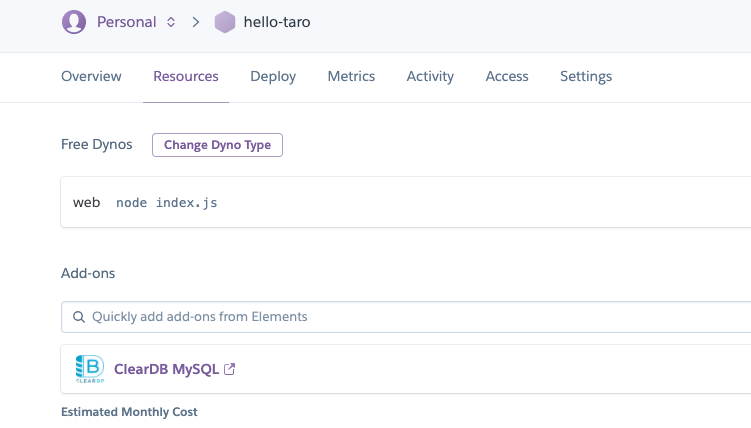
さらにダッシュボードのSettingsを確認すると
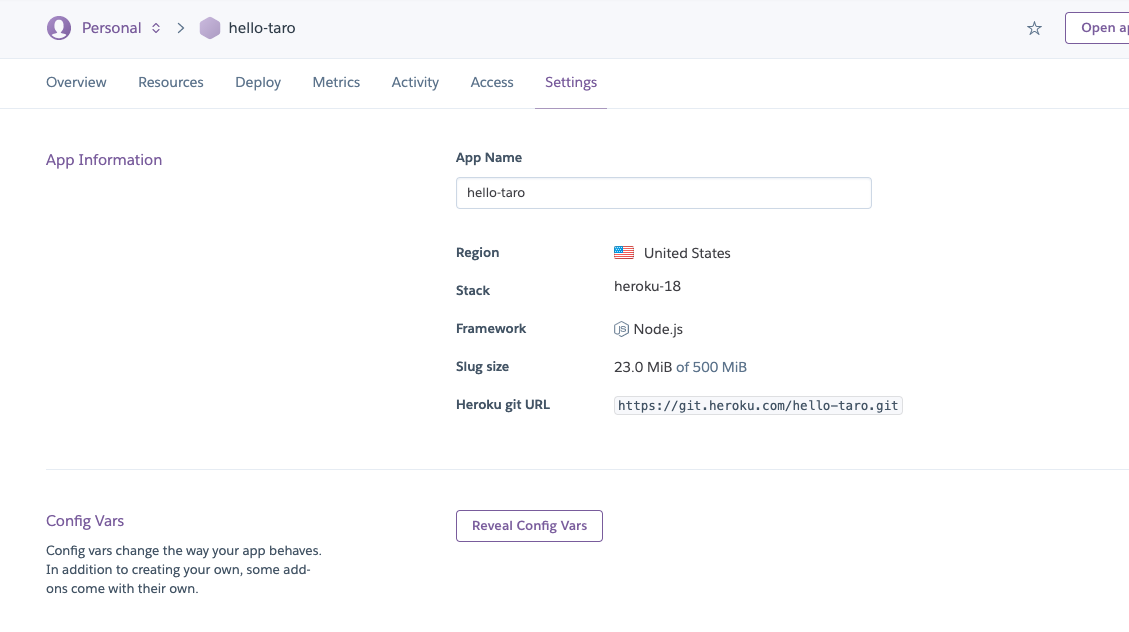
この画面に遷移し、
中段のConfig VarsのReveal Config Varsを選択

上記画面が開く
ここで現状だと
CLEARDB_DATABASE_URL
のみ記述されていることを確認
ターミナルに戻って
heroku config | grep CLEARDB_DATABASE_URL
を実行。
この操作で現在のアプリで使用しているclearDBのmysqlの各項目の登録内容が確認できる
表示結果は以下
//ターミナル画面
あなたのmac@Mac hello-taro % heroku config | grep CLEARDB_DATABASE_URL
CLEARDB_DATABASE_URL: mysql://ユーザー名:パスワード@ホスト名/データベース名?reconnect=true
上記に表示の
mysql://ユーザー名:パスワード@ホスト名/データベース名?reconnect=true
をこれから使用していく。
ここでここで表示された
mysql://ユーザー名:パスワード@ホスト名/データベース名?reconnect=true
をコピーする
heroku config:set DATABASE_URL='mysql://ユーザー名:パスワード@ホスト名/データベース名?reconnect=true'
を実行する
成功すると
先ほどの画面にDATABASE_URLが追加される

以上でherokuダッシュボードの対応は完了
DBの準備
ここからはtable plusというsql管理のGUIツールを使用する事前に今回のアプリの内容を以下の様に整理しておくとこの後の記述が使いやすい
mysql://
bdc03c01341ef9 //ユーザー名
:
b01bd8f4 //パスワード
@
us-cdbr-east-02.cleardb.com //ホスト名
/
heroku_e21642c342a4850 //DB名
?reconnect=true
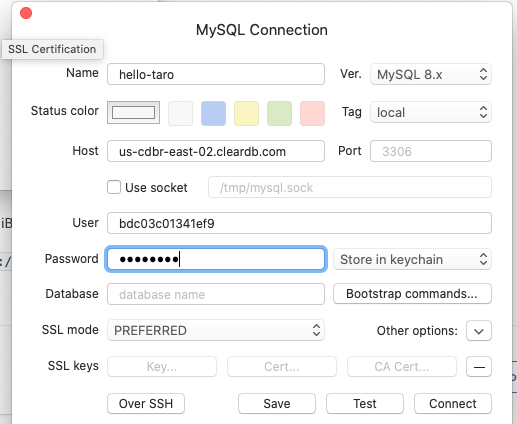
テーブルプラスを開き「Create a new connection」で新規接続を作る
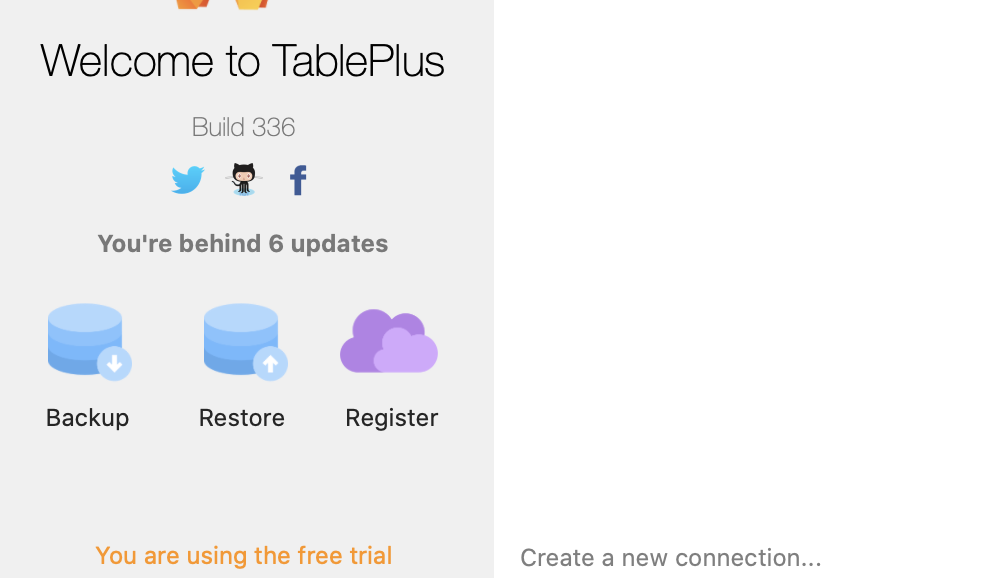
Name:任意でOK(今回はディレクトリと同じ名前でhello-taroにした)
Host:herokuで登録のホスト名
User:herokuで登録のユーザー名
Password:herokuで登録のパスワード
DB選択画面を選択すると自動的にherokuで作成したDB名が既に登録されているので、そのDBを選択しOpen
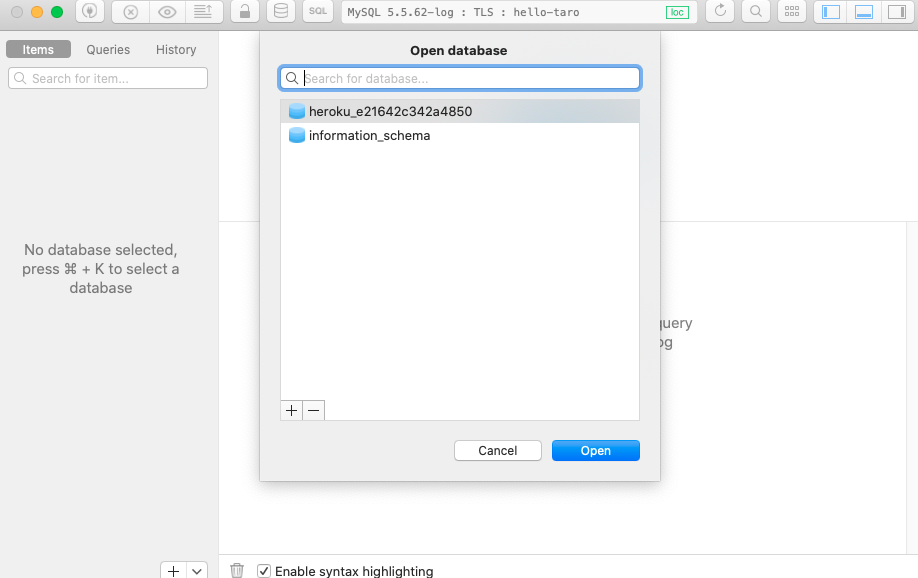
今回はhello太郎を表示させるためtestTableを作成する

作ったtableのデータは上記の通り
ここまででtable plusの準備は完了
VSCodeでデータベース接続の記述を書く
index.jsを以下の様に変更する
const express = require('express')
var mysql = require('mysql')
const app = express()

//ここを追加=============================
const connection =
   mysql.createConnection({
      host:'us-cdbr-east-02.cleardb.com',
      user:'bdc03c01341ef9',
      password:'b01bd8f4',
      database:'heroku_e21642c342a4850'
   });
//============================================


var port = process.env.PORT || 5000;

app.get('/',(req, res)=>{
//ここを追加===================================================
connection.query('SELECT * FROM test',(error,results)=>{
    res.send('hello'+results[0].name+':'+results[0].text);
      console.log(results)
      console.log(results[0])
      console.log(results[0].name)
      console.log(results[0].text)
  })
//===============================================
  })

app.listen(port, () => console.log(`Example app listening on port ${port}!`))
詳細説明
``` const connection = mysql.createConnection({ host:'us-cdbr-east-02.cleardb.com', user:'bdc03c01341ef9', password:'b01bd8f4', database:'heroku_e21642c342a4850' }); ``` ここにherokuのclearDBで取得した各値を入力connection.query('SELECT * FROM test',(error,results)=>{
res.send('hello'+results[0].name+':'+results[0].text);
console.log(results)
console.log(results[0])
console.log(results[0].name)
console.log(results[0].text)
})
getの中の記述でSELECT文を使用しtestテーブルの値を取得。
取得した値は引数resultsに格納される
resultsの値をDBから取得し表示する必要があるため、コンソールで値が入っているか確認している。
取得した値は以下

先ほどtable plusで格納した値が取得できていることがわかる
この状態でnode index.js
を実行すると、ポート5000番で

が表示される。
ローカルでのチェックは以上で完了。
ここからherokuにアップロードする。
方法は前述のherokuアップロードと同様
git add .
git commit -m '任意のコメント'
git push heroku master(ブランチ名は各自変更して下さい)
以上でプッシュが完了するとURLでも同様にhello太郎:優しいが表示される・
以上でnode.js x express.js x mysqlアプリをherokuできました。
ここを応用すれば更に大規模なアプリでも公開できるかと思います。
#セッション使うアプリの時
//heroku用
var serveStatic = require('serve-static');
app.use(serveStatic(__dirname + "/dist"));
この記述がapp.jsに必要そう
