はじめに
DAQ抵抗測定 - NI Communityという記事をみつけ、試しに手元にあるNI-DAQ (NATIONAL INSTRUMENTSのData acquisition device AD/DAデバイス)とPythonで抵抗測定を行いました。その時の覚えとして記載します。
なお、NI-DAQではなくarduinoを利用しても測定できます。今回作った回路(接続)はこちらのサイトを参考にしました。抵抗値を測定する
環境
Windows 10 pro 64bit
Anaconda
python 3.7
NI-DAQをpythonで利用するときのモジュールのインストールは、以前投稿した記事を参考にしてください。
PythonでNI-DAQの利用
回路
原理については、はじめにに記載のサイトを参考にしてください。
下図はNI-USB6002 DAQの接続図です。
基準となる抵抗(R0)に電圧を印加します。R0に入力する電圧、R0の後の電圧、測定したい抵抗(Rx)の後の電圧を測定します。
Setting for NI-USB6002 DAQ channel

     ai2      ai1      ai0
VCC---|---R0---|---Rx---|---G
ao1

VCC: V source analog output
ai0,ai1,ai2 : analog input
R0、Rxに流れる電流は以下のようになります。
I =(ai2-ai1)/R0 = (ai1-ai0)/Rx
R0が既知だとするとRxは以下のようになります。
Rx ={(ai1-ai0)/(ai2-ai1)}*R0
3つの場所の電圧を測ることでRxを求めることができます。
上の式からわかるように、基準抵抗R0の値が重要になります。また、R0を小さいものにすると回路に大量の電流が流れてしまうので、測定装置の電流値の上限なども考慮に入れる必要があります。
実験では、基準抵抗として1KΩ、測定抵抗として680Ω、印可電圧5Vを用いています。ここでは誤差±5%の抵抗(精度は良くない)を用いています。
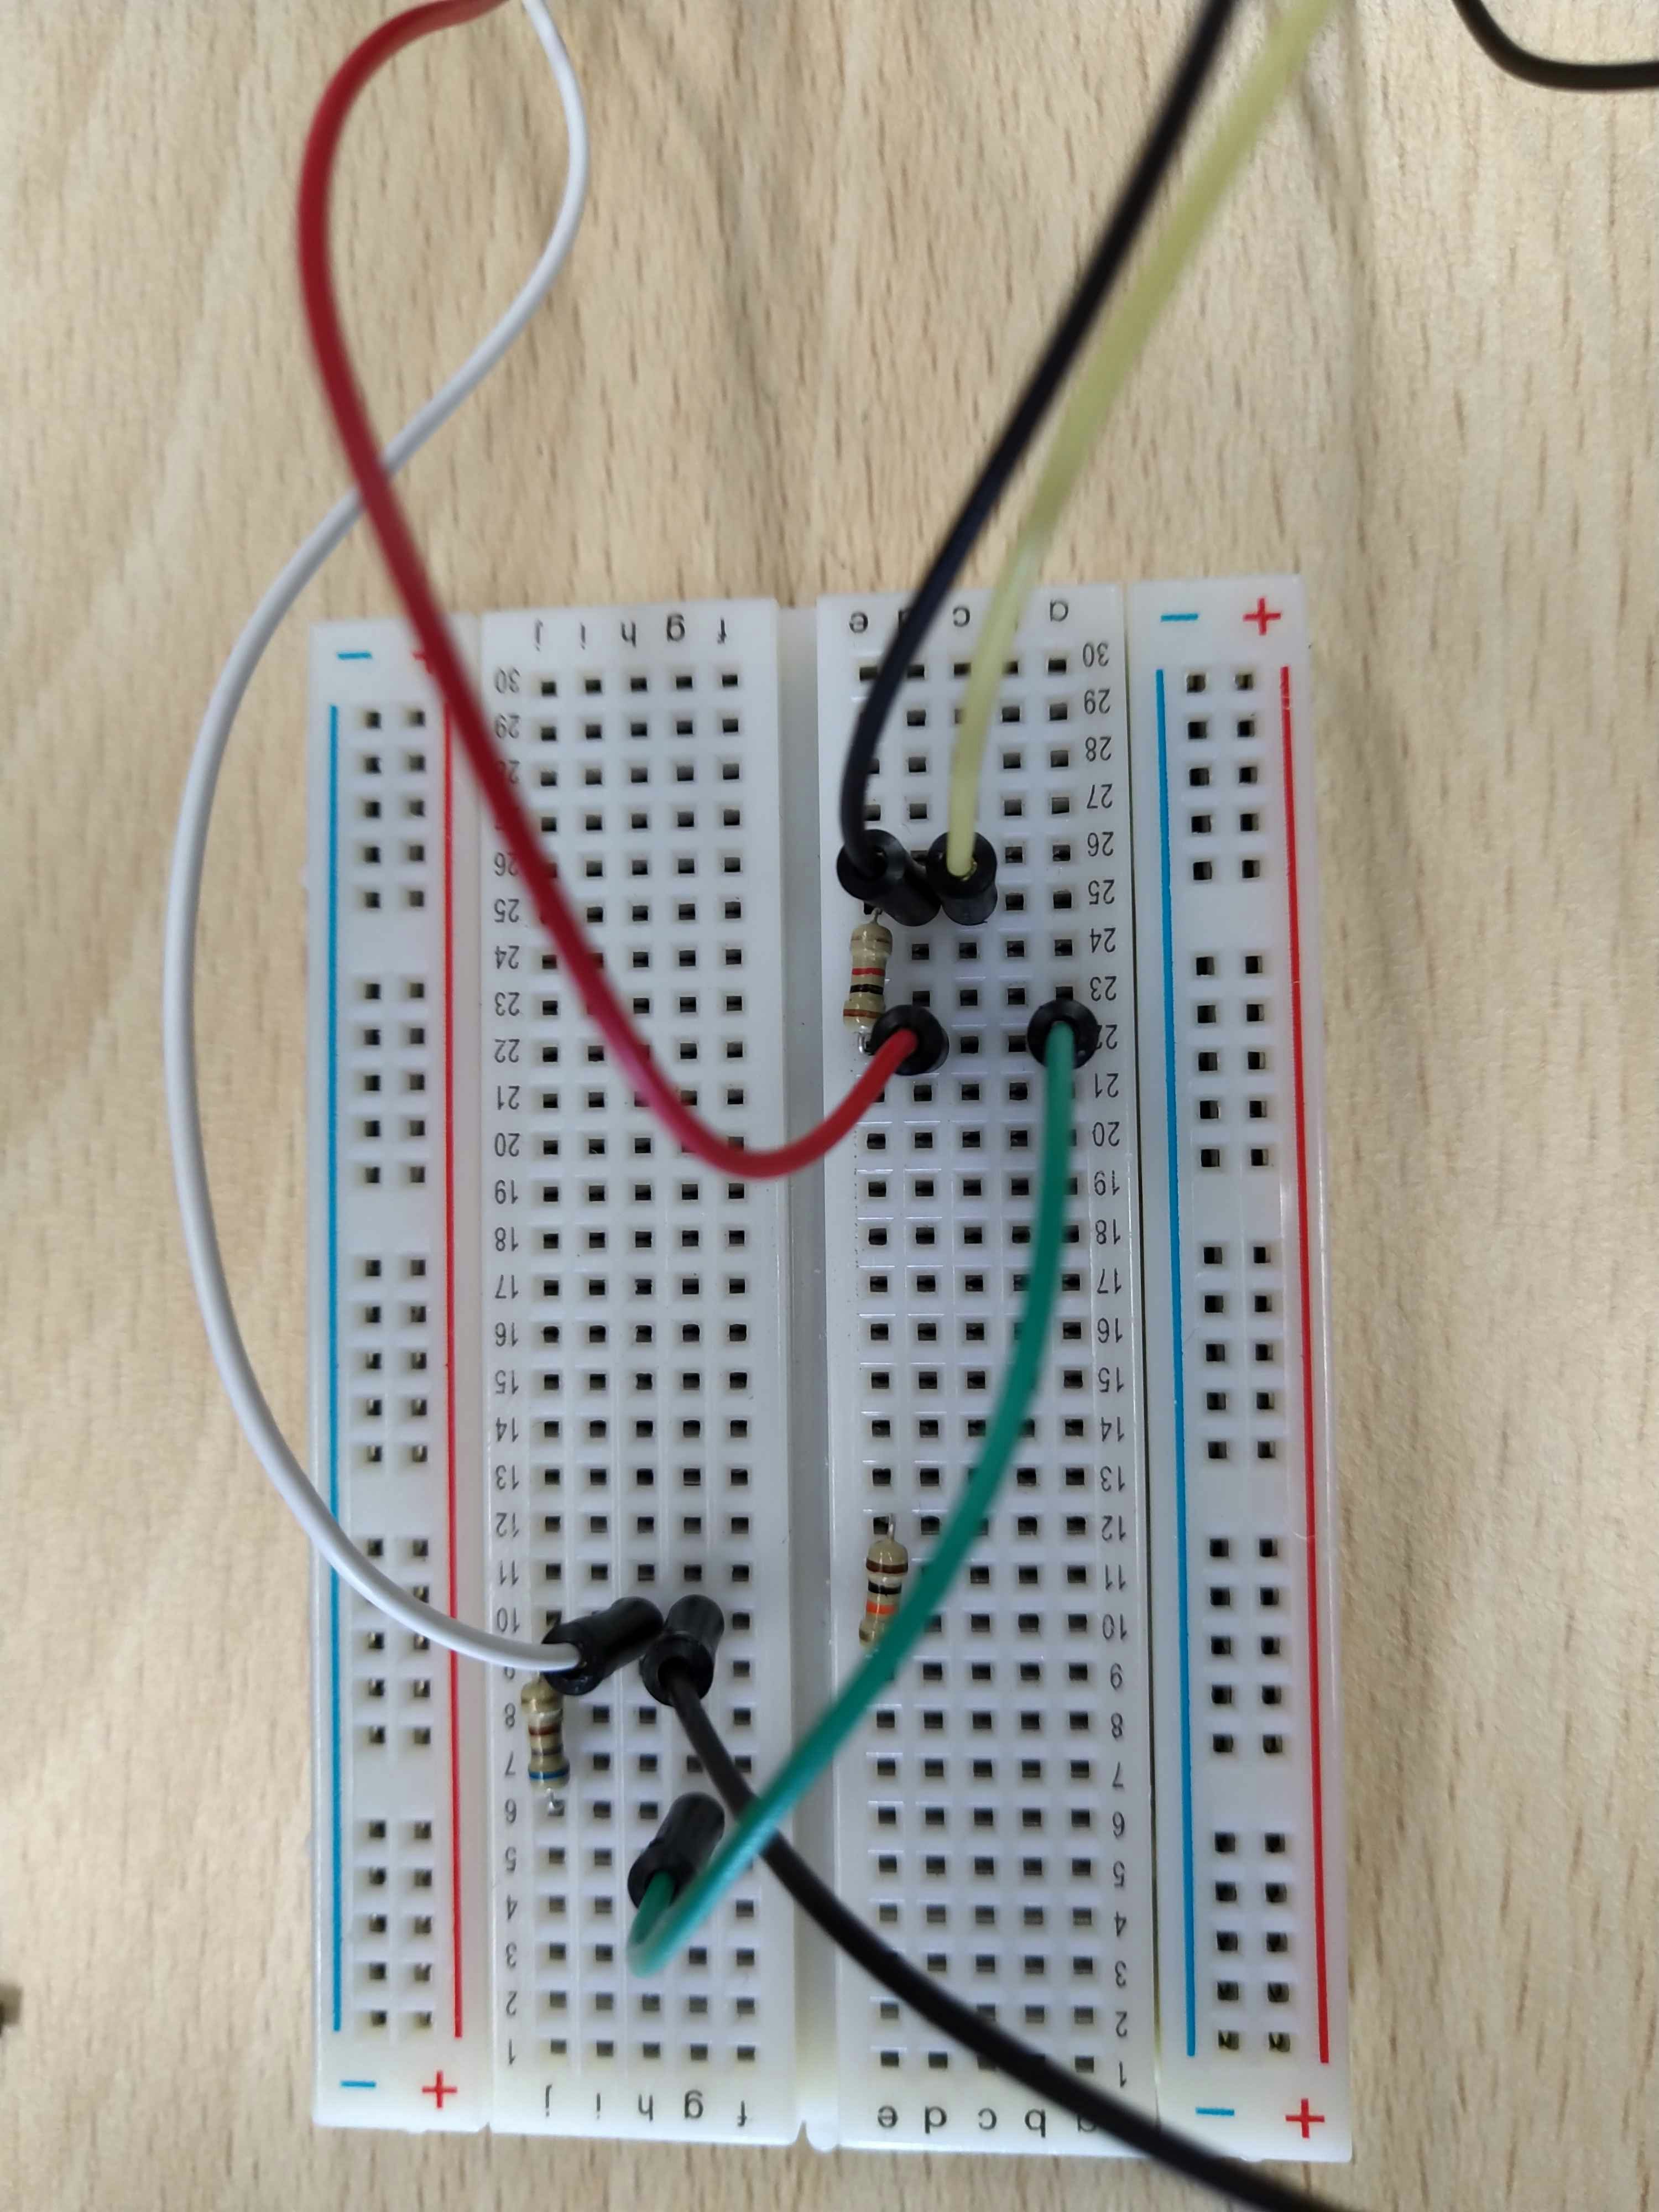
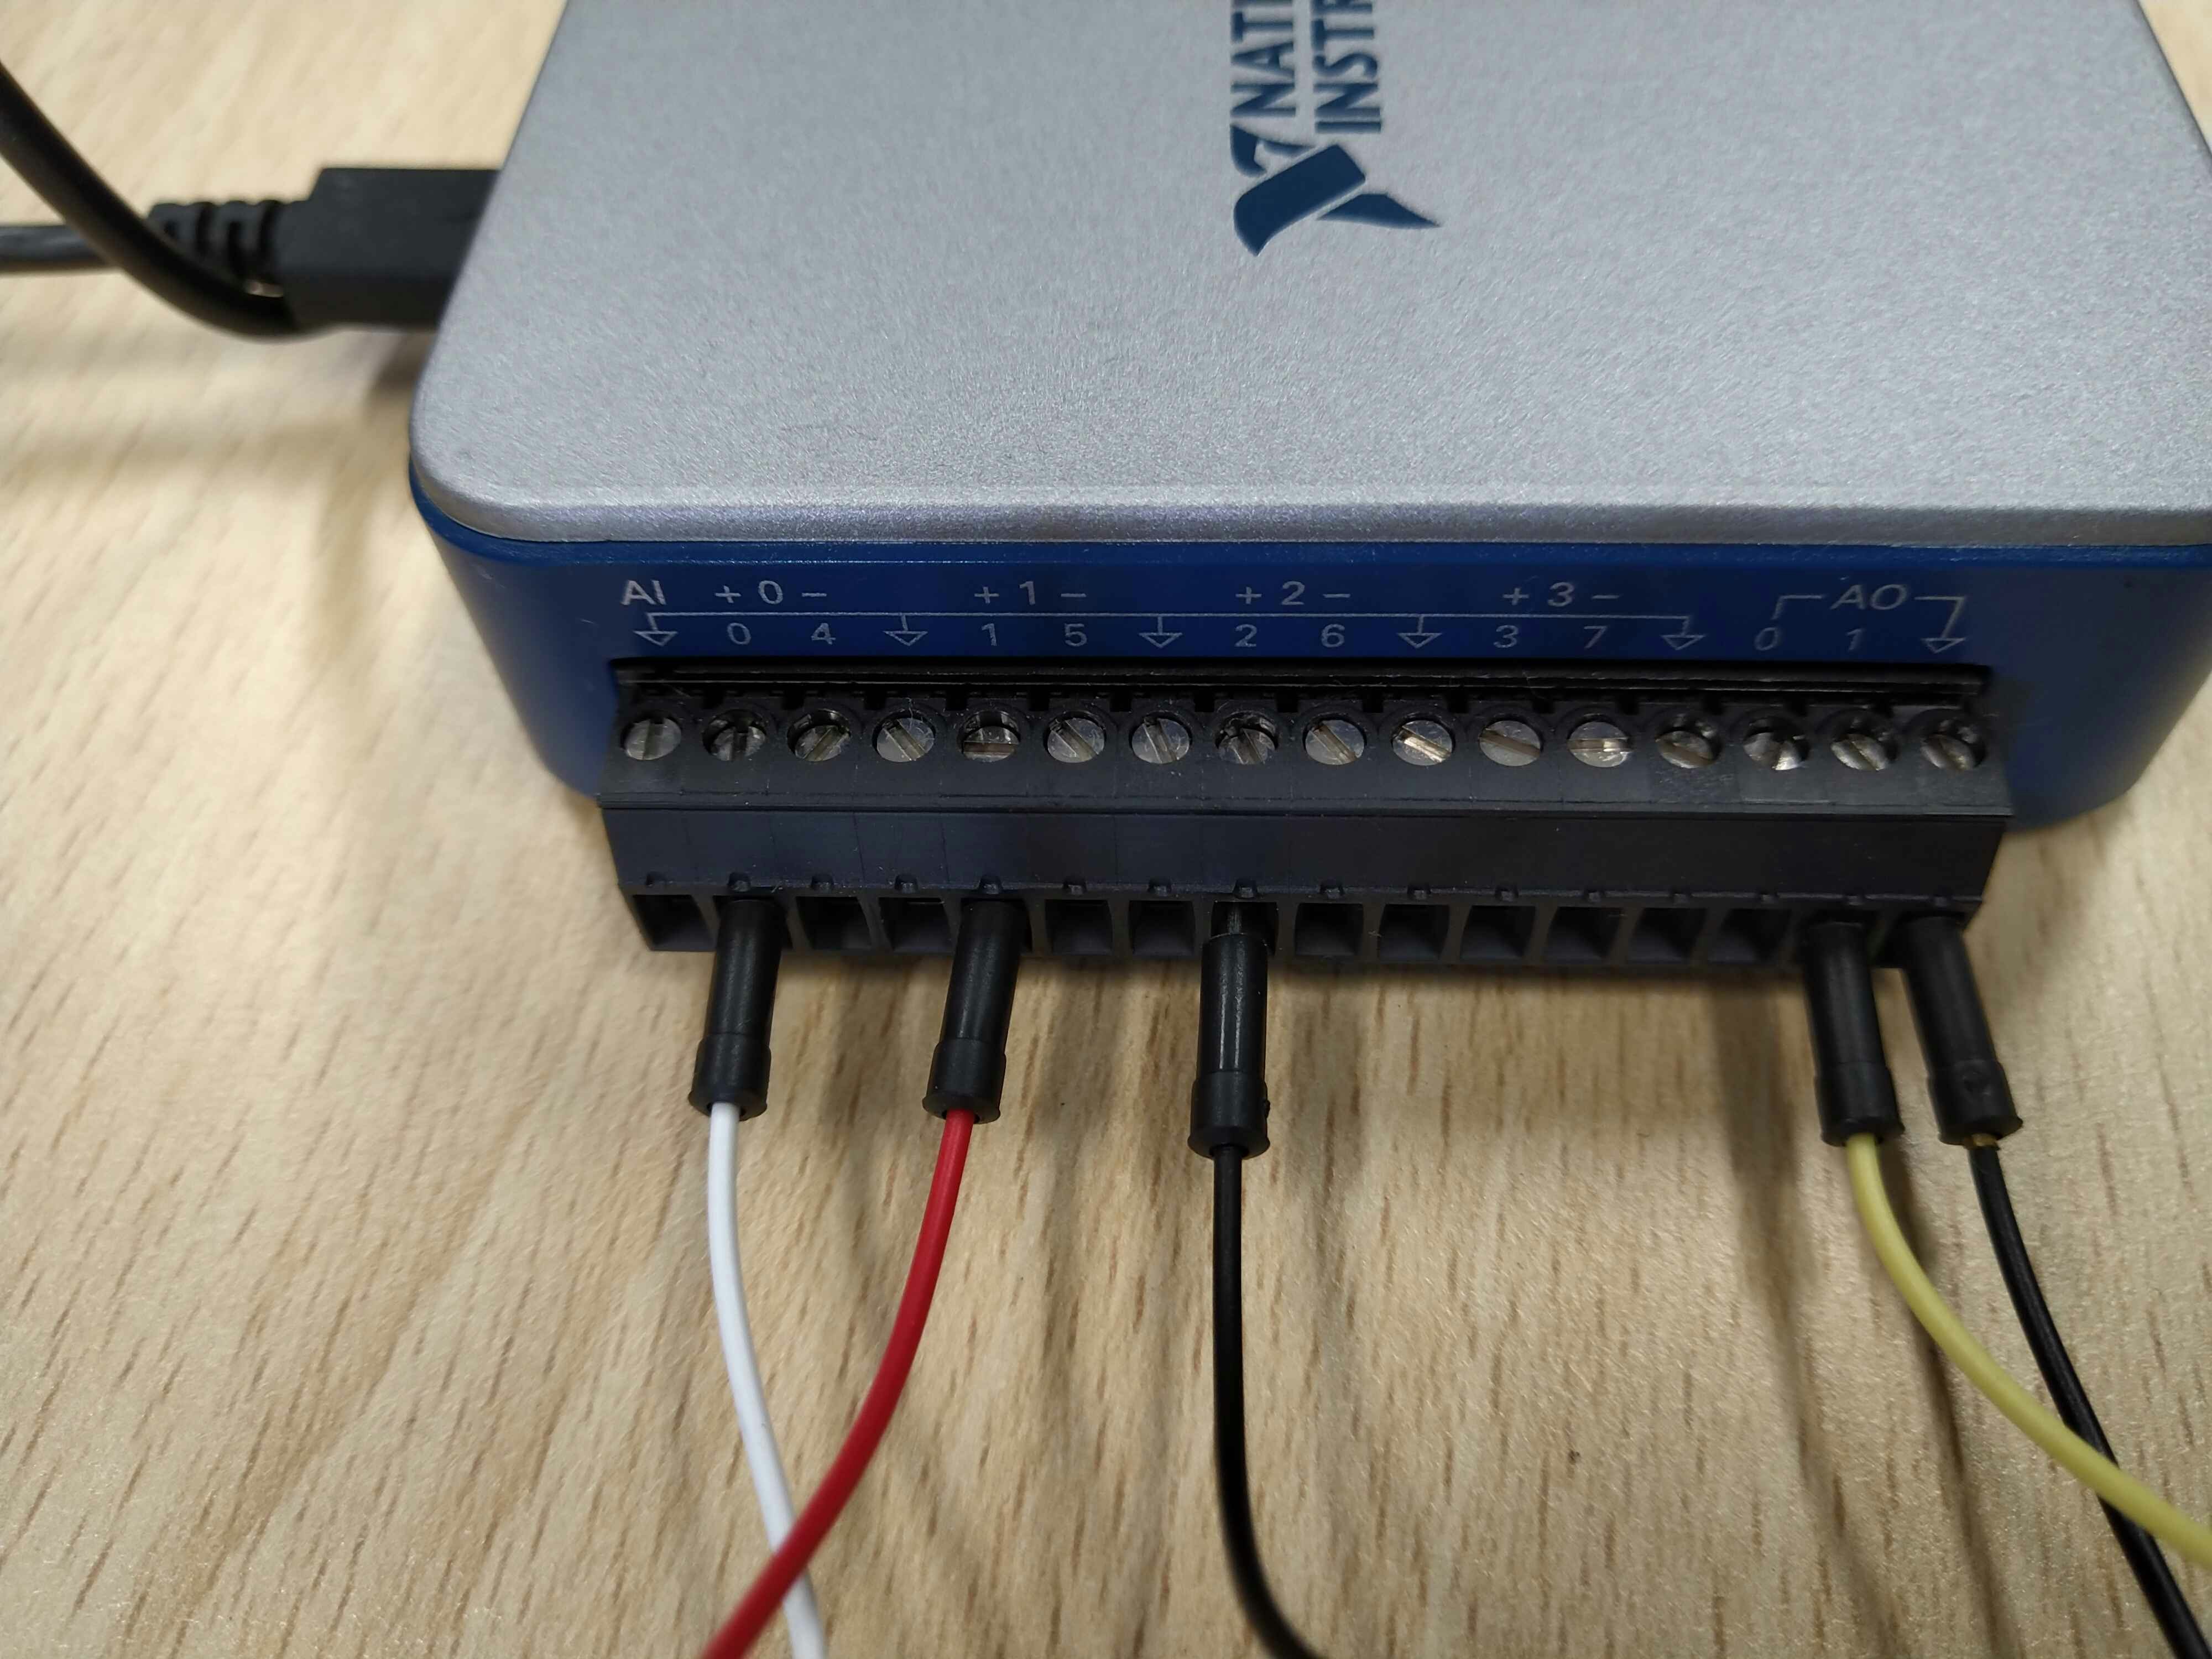
黄線(ao0)が電圧源、黒線(ai2)、赤線(ai1)、白線(ai0)、黒線(GND)
プログラム
モジュールのImport
import time
import numpy as np
from matplotlib import pyplot as plt

import nidaqmx
DAQの動作確認テストコード
withを使ったもの、使っていないものの両方を記載していますが、どちらも同じです。
# Analog input output test code

# Analog out
def analog_out_test(channel="Dev1/ao1", voltage=0):
    task = nidaqmx.Task()
    task.ao_channels.add_ao_voltage_chan(physical_channel=channel, min_val=0, max_val=10)
    task.start()
    task.write(voltage)
    task.stop()
    print(f'{voltage}')
    task.close()


# Analog In (Read)
def analog_input_test(channel="Dev1/ai0"):
    task = nidaqmx.Task()
    task.ai_channels.add_ai_voltage_chan(channel)
    task.start()
    outvalue = task.read()
    print(f'{outvalue}')
    task.stop
    task.close()


# With context
def analog_out_with_test(channel="Dev1/ao1", voltage=0):
    with nidaqmx.Task() as task:
        task.ao_channels.add_ao_voltage_chan(physical_channel=channel, min_val=0, max_val=10)
        task.write(voltage)
        print(f'{voltage}')
        task.stop()

def analog_input_with_test(channel="Dev1/ai0"):
    with nidaqmx.Task() as task:
        task.ai_channels.add_ai_voltage_chan(channel)
        outdata = task.read()
        print(outdata)
analog_input_with_test(channel="Dev1/ai0")
# 0.0005277632735669613
抵抗計算の関数
def calc_ohm(a0,a1,a2,r0=1000):
    """resistance calculation

    Args:
        a0 (float): ground side voltage
        a1 (float): voltage between r0 and rx
        a2 (float): VCC side voltage
        r0 (flaot, optional): reference resistance. Defaults to 1000.

    Returns:
        float: target resistance
    """

    I = (a2-a1)/r0
    # print(f'Current:{I:.2e}')

    rx1=(a1-a0)
    rx2=(a2-a1)
    rx =(rx1/rx2)*r0
    print(f'Resistance: {rx:.2f}')
    return rx
測定Main関数
入力パラメータとして、印可電圧、繰り返し回数、入力・出力チャンネル、基準抵抗値を入力します。
def read_resistance(voltage=5, repeat=10, channel_list= None, reference_ohm=1000):

    if channel_list is None:
        channel_list=['Dev1/ao1',"Dev1/ai0","Dev1/ai1","Dev1/ai2"]

    with nidaqmx.Task() as task:
        task.ao_channels.add_ao_voltage_chan(channel_list[0], min_val=0, max_val=10)
        print(f'Applied voltage {voltage} V')
        task.write(voltage)
        task.stop()
    time.sleep(0.5)

    # 3chをセットします。
    with nidaqmx.Task() as ain:
        ain.ai_channels.add_ai_voltage_chan( channel_list[1])
        ain.ai_channels.add_ai_voltage_chan( channel_list[2])
        ain.ai_channels.add_ai_voltage_chan( channel_list[3])

        an_out=[]
        for i in range(repeat):
            data0 = ain.read()
            an_out.append(data0)

        an_array=np.array(an_out)
        an_ave= np.mean(an_array,axis=0)
        time.sleep(0.2)

    # 0Vに戻します。
    with nidaqmx.Task() as task2:
        task2.ao_channels.add_ao_voltage_chan('Dev1/ao1', min_val=0, max_val=10)
        task2.write(0)
        task2.stop()

    # print(an_out)
    print(f'ai0, ai1, ai2: {an_ave}')

    # 抵抗を計算します。
    # *an_aveの最初の*はアンパックを意味します。an_ave[0],an_ave[1],an_ave[2]と同じです。
    rx = calc_ohm(*an_ave,r0=reference_ohm)
測定結果
read_resistance(voltage=5, repeat=20, reference_ohm=1000)
## Rx:680 ohm +-5%
## R0:1000 ohm +-5%
# Applied voltage 5 V
# ai0, ai1, ai2: [-0.03427018  1.99634144  4.93408828]
# Resistance: 691.21
測定回路を2つにして、2つの抵抗の測定
channel_list_0=['Dev1/ao0',"Dev1/ai0","Dev1/ai1","Dev1/ai2"]
channel_list_1=['Dev1/ao1',"Dev1/ai4","Dev1/ai5","Dev1/ai6"]

# 680 ohm +-5%  channel_list0
# 1000 ohm +-5% Reference
# 10000 ohm +-5% channel_list1

read_resistance(voltage=3, repeat=20, channel_list=channel_list_0, reference_ohm=1000)

# Applied voltage 3 V
# ai0, ai1, ai2: [3.34082707e-04 1.22342686e+00 2.99967134e+00]
# Resistance: 688.58

read_resistance(voltage=3, repeat=20, channel_list=channel_list_1, reference_ohm=1000)

# Applied voltage 3 V
# ai0, ai1, ai2: [1.62528649e-03 2.72916415e+00 2.99747629e+00]
# Resistance: 10165.54