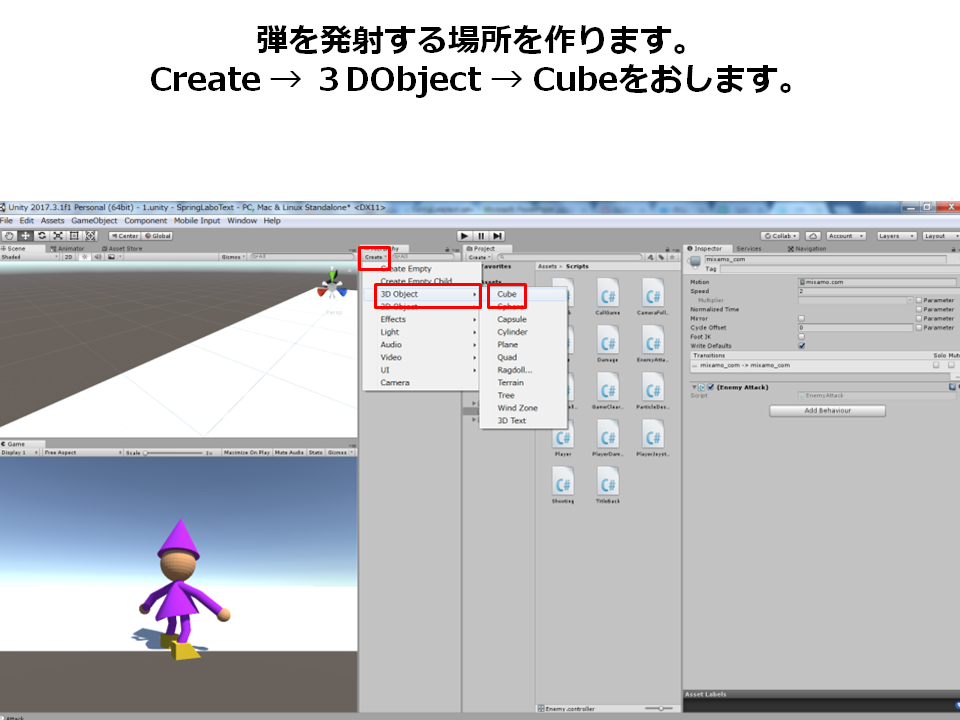
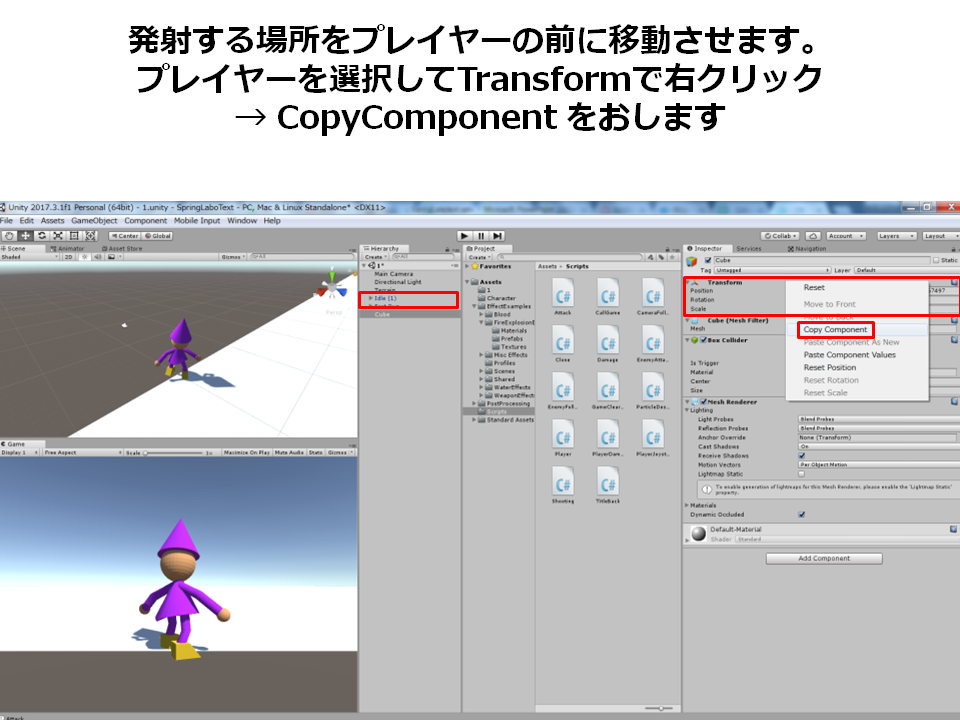
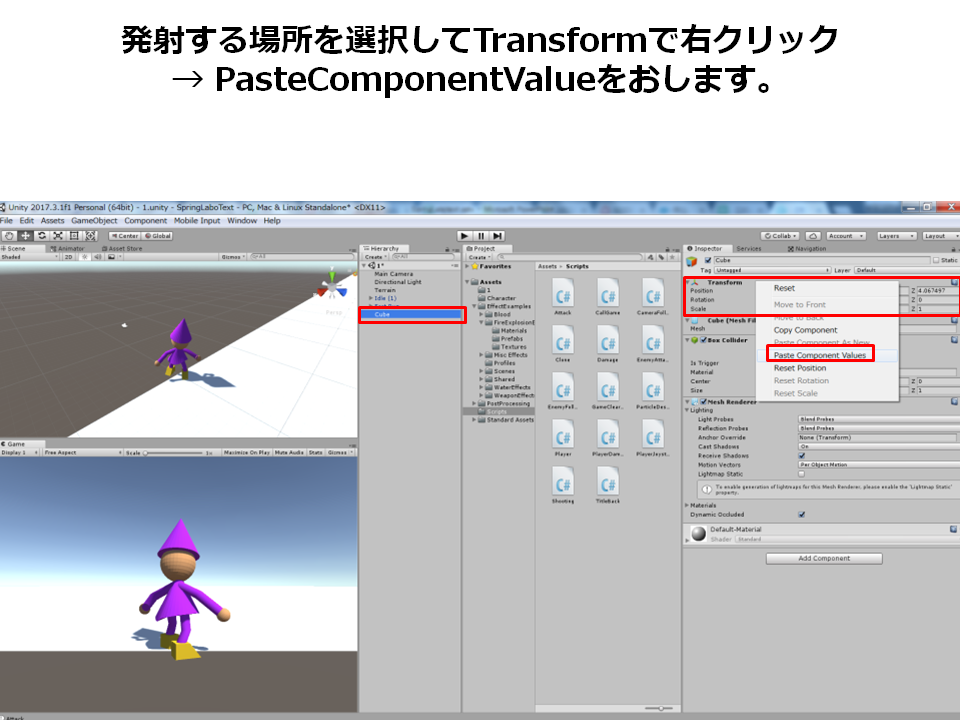
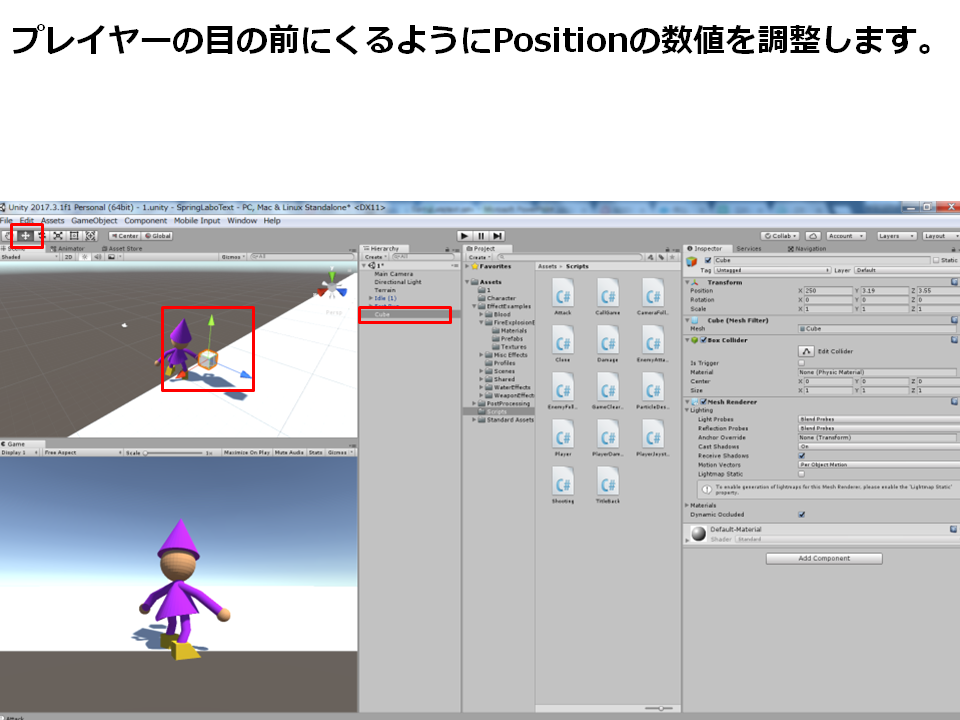
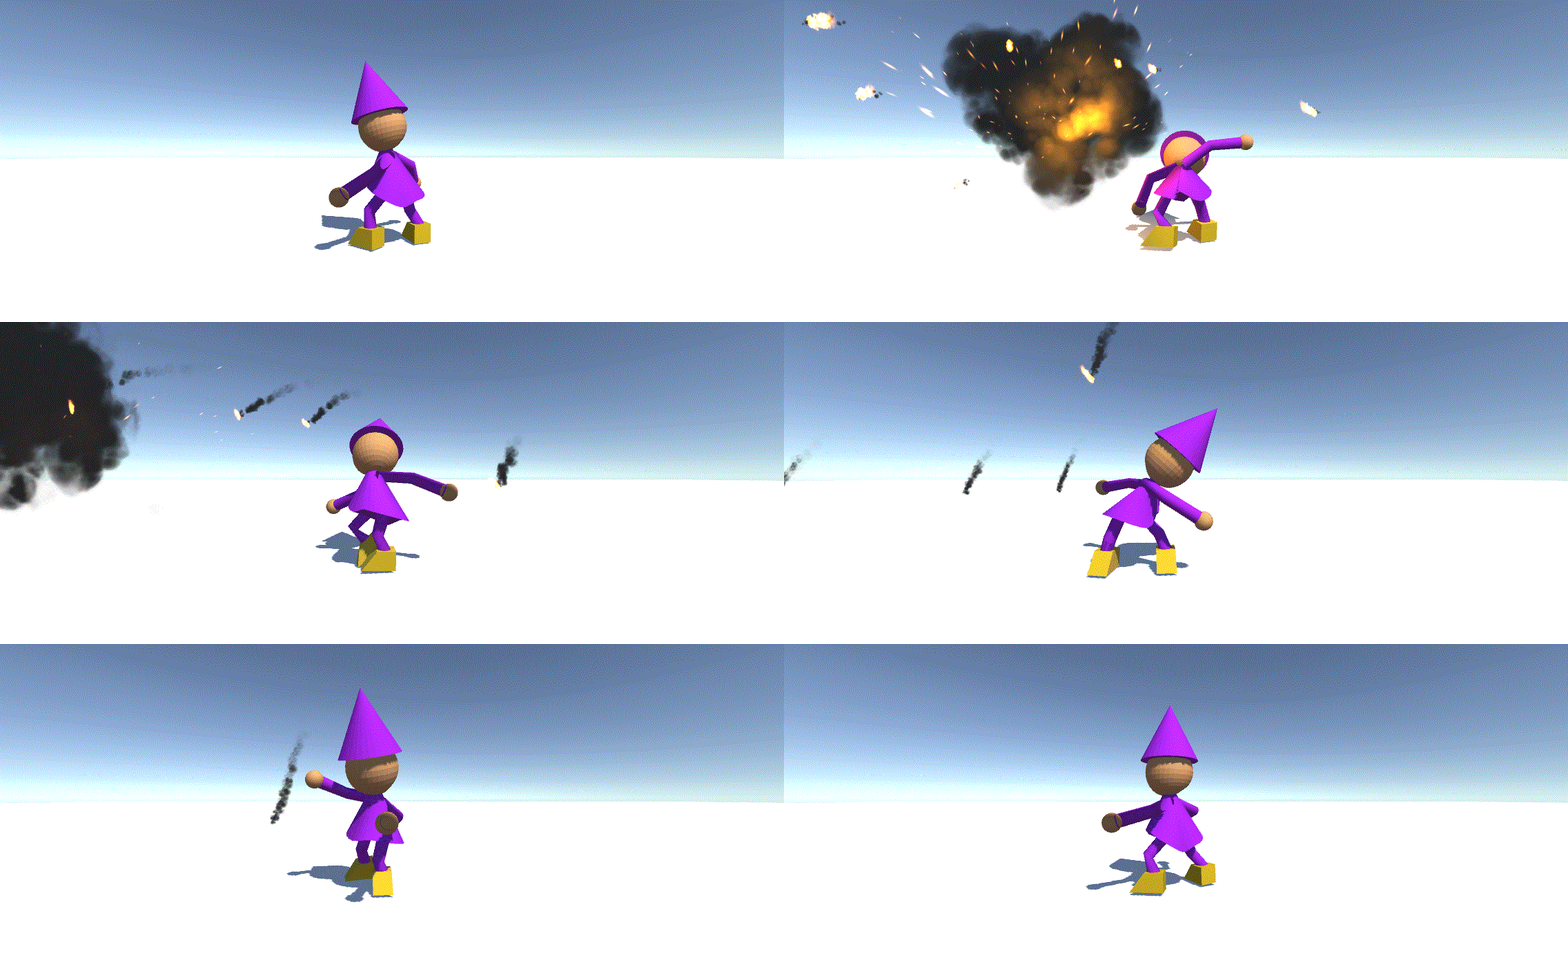
弾を飛ばす
Playerスクリプトに追記していきます。該当する場所に追記していきます。
コルーチンが出てくるので追記する位置に注意しましょう。
※最後に全部を追記したスクリプトも載せるのでご安心を♪
変数を宣言する部分の追記内容
public GameObject bullet;
public Transform muzzle;
public float speed = 1000;
変数を宣言する部分の説明
**public GameObject bullet;**
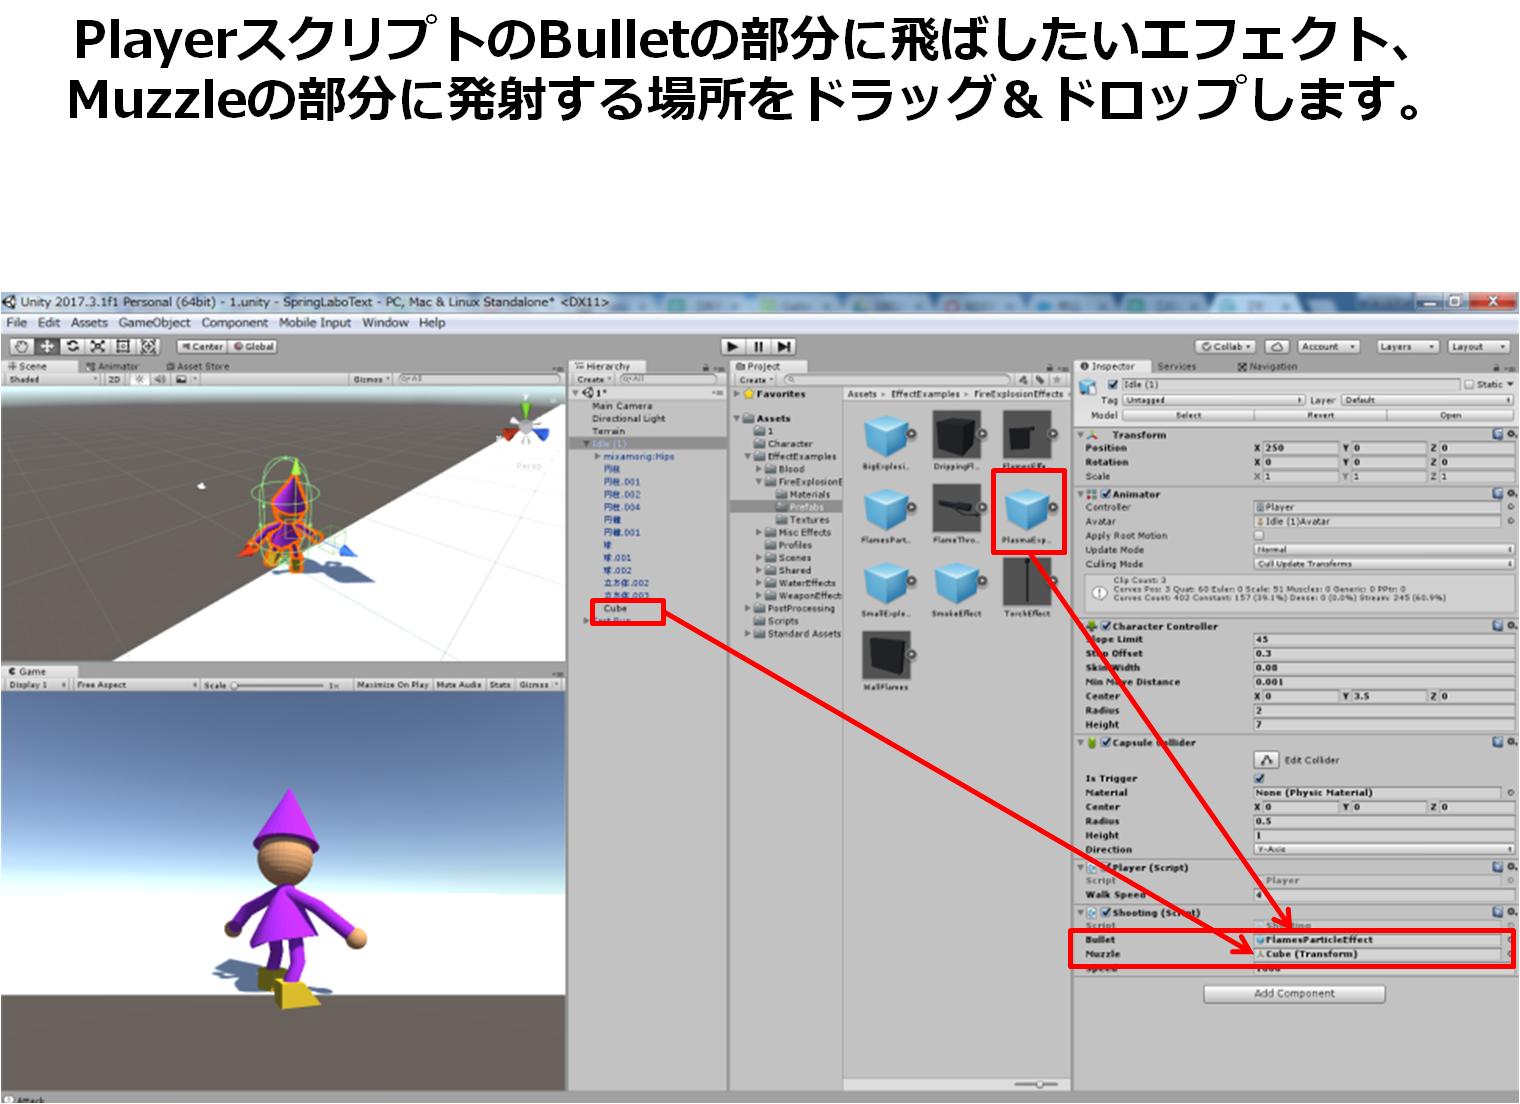
飛ばす弾が何なのかを定義しています。 publicのGameObjectとすることで、後々その物をD&Dで 直接指定できるようになります。**public Transform muzzle;**
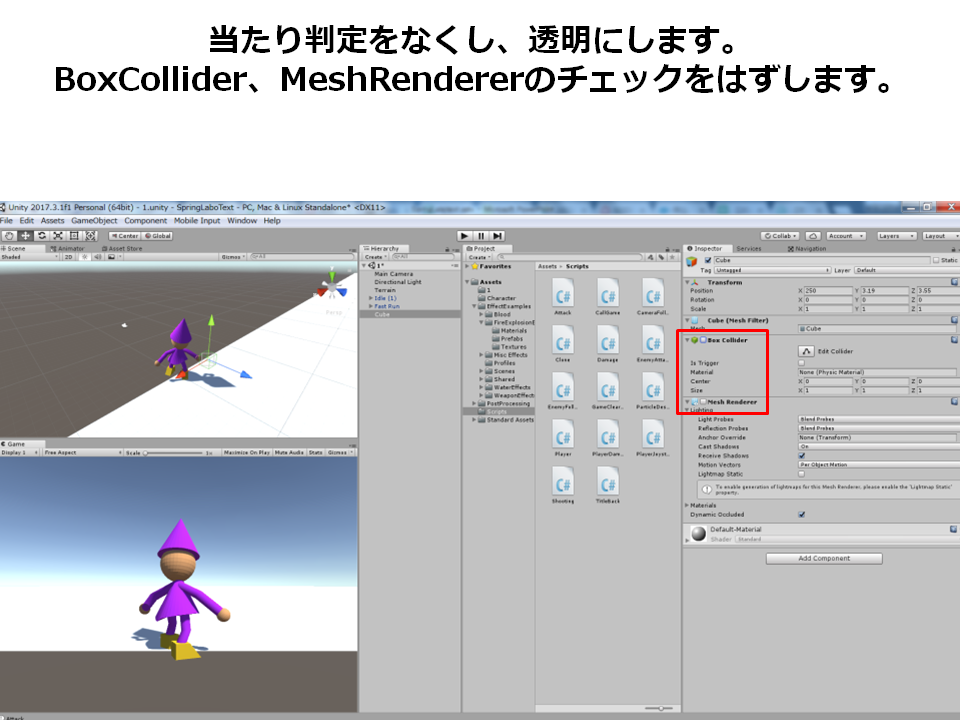
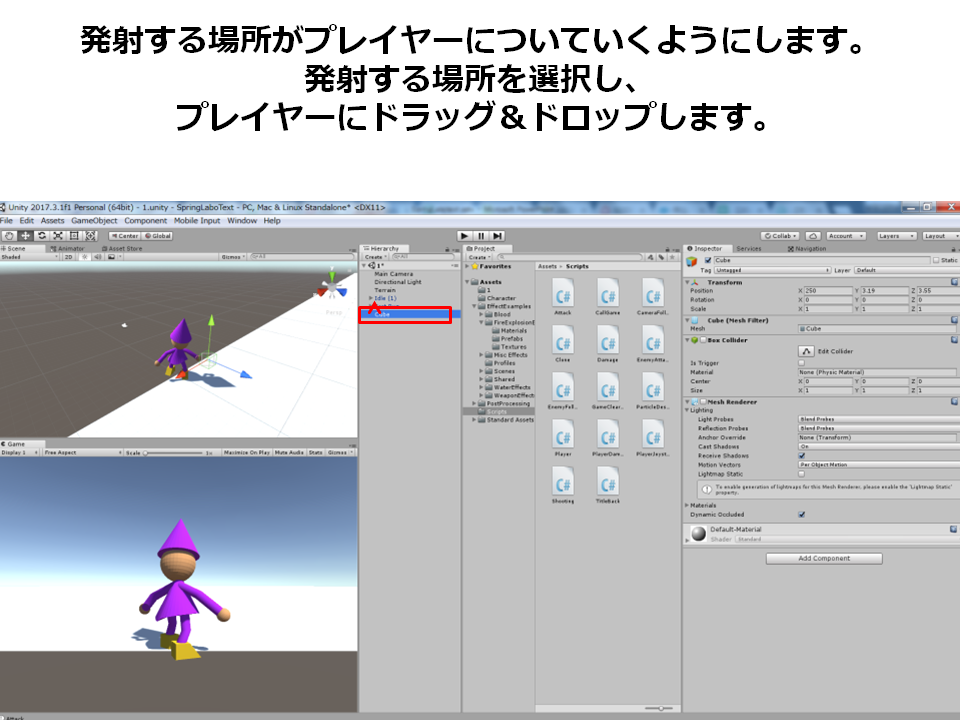
飛ばす弾の発射位置を定義しています。 こちらもpublicにしておくことでD&Dで 発射位置の座標を指定することが出来ます。 先程、プレイヤーの前方に設置したCubeがそれに該当します。**public float speed = 1000;**
飛ばす弾のスピードを定義しています。 今回は1000に設定しています。void FixedUpdateの追記内容
if (Input.GetMouseButtonDown(0))
        {
         StartCoroutine("shot");
        }
void FixedUpdateの説明
**if (Input.GetMouseButtonDown(0))**
マウスが左クリックされたら マウスのボタン入力については[こちら](https://high-programmer.com/2017/11/14/unity-script-mouse-click/)の方がまとめてくれているので参考にしてみて下さい♪**StartCoroutine("shot");**
shotコルーチンを開始する 後に定義するshotコルーチンを開始します。 コルーチンは一度開始したら最後まで実行されます。 実行の仕方は StartCoroutine(”コルーチンの名前”); です。shotコルーチンの内容
IEnumerator shot()
    {
        animator.SetBool("Attack", true);
        yield return new WaitForSeconds(0.5f);
        Vector3 force;
        GameObject bullets = GameObject.Instantiate(bullet) as GameObject;
        bullets.transform.position = muzzle.position;
        force = this.gameObject.transform.forward * speed;
        bullets.GetComponent<Rigidbody>().AddForce(force);
        animator.SetBool("Attack", false);
        Destroy(bullets.gameObject,2);
    }
shotコルーチンの説明
**IEnumerator shot()**
コルーチンを定義する時に使います 定義の仕方は IEnumerator コルーチンの名前() で始めて{}ではさみます。**animator.SetBool("Attack", true);**
AnimatorControllerのAttack変数をtrueにしています。**yield return new WaitForSeconds(0.5f);**
0.5秒待ちます。 攻撃のアニメーションと弾の出るタイミングを合わせるために待ち時間を入れています。**Vector3 force;**
飛ばす弾に加える力を定義しています。 なんでここで変数の定義をしているのかと言うと、コルーチンの中で使う変数はコルーチンの中で 宣言しないと動かないからです。**GameObject bullets = GameObject.Instantiate(bullet) as GameObject;**
弾はbulletに指定したオブジェクトを複製して飛ばすのですが、その複製したbulletを bulletsとして定義しています。 このように指定し直さないと複製されたbulletにshotコルーチンで行っている命令が反映されません。**bullets.transform.position = muzzle.position;**
bulletsを指定したmuzzleの場所に出現させます。**force = this.gameObject.transform.forward * speed;**
forceにプレイヤーの前方への力 × speedの値を代入します。 これにより弾を前方に飛ばしています。**bullets.GetComponent().AddForce(force);**
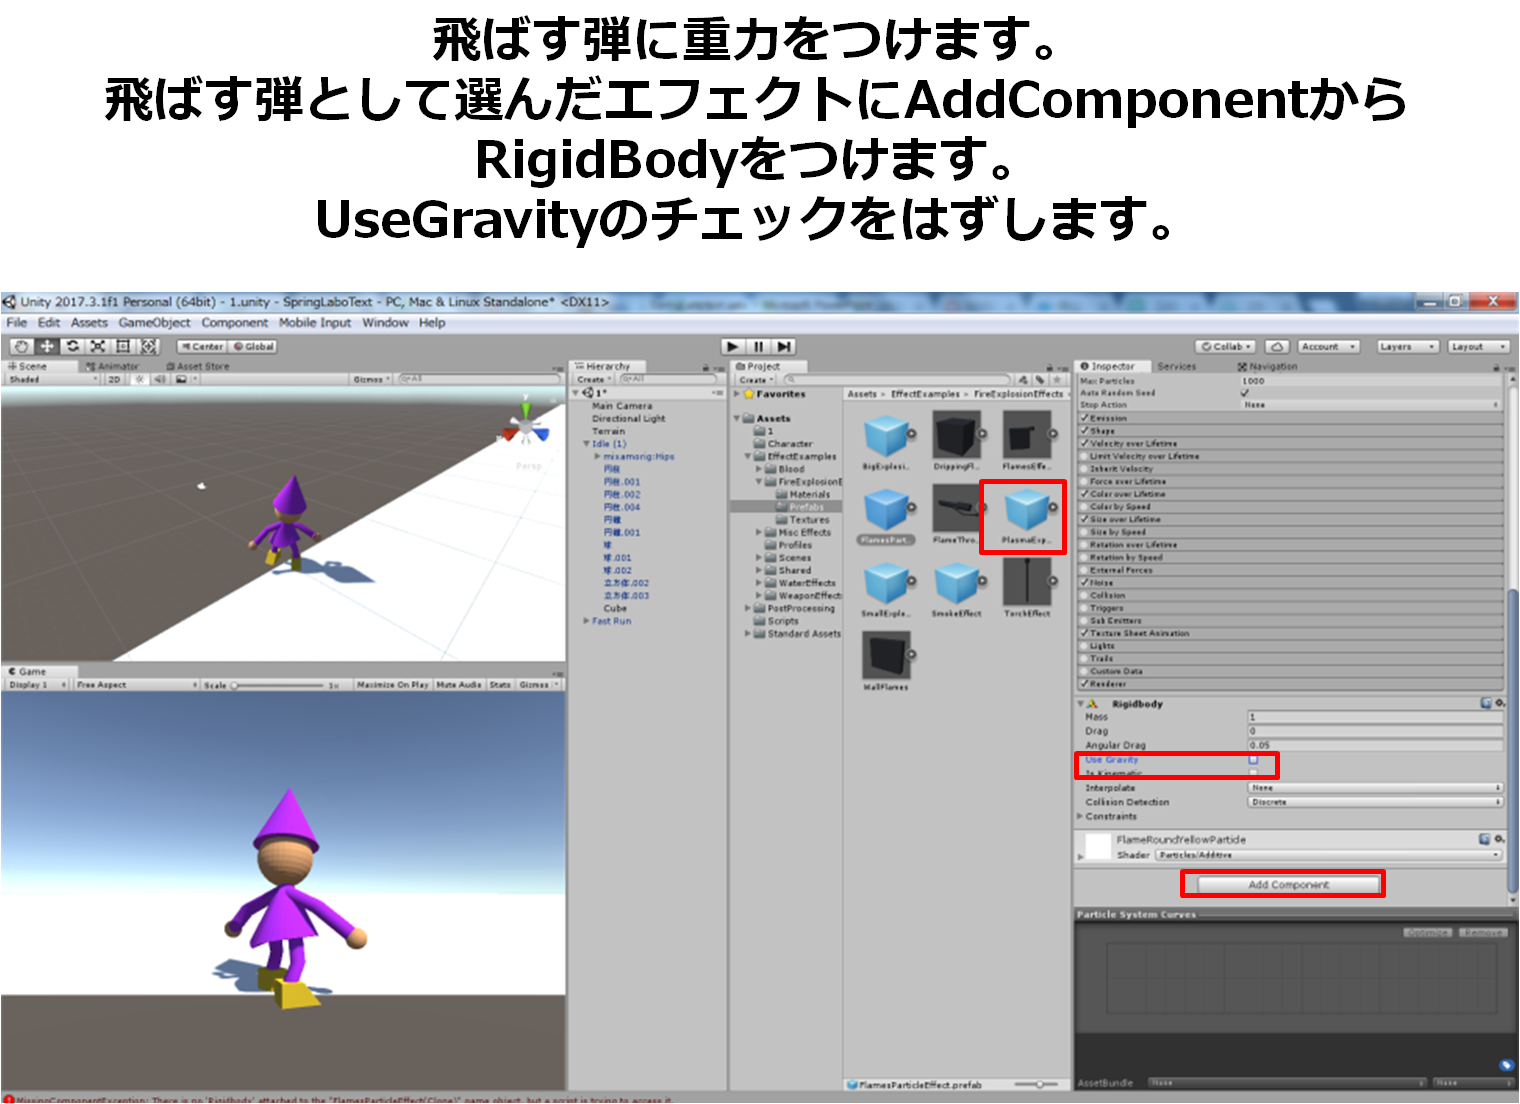
bulletsのRigidBodyを取得し、それに力を加えると指定しています。 RigidBodyとは重力や衝突判定に関係したコンポーネントのことで衝突判定を起こす場合や、 重力処理を行いたい場合につけます。 弾を飛ばす場合には弾の重力に力を加えて飛ばす動きを作っているので取得しておく必要があります。**animator.SetBool("Attack", false);**
Attackをfalseにします。**Destroy(bullets.gameObject,2);**
bulletsを2秒後に消します。 Destroyはオブジェクトを消去する命令で Destroy(消したいオブジェクトの名前.gameObject,消したい秒数); で指定したオブジェクトを消すことが出来ます。完成形のスクリプト
追記内容は※3と表示しています。
Player.cs
using System.Collections;
using System.Collections.Generic;
using UnityEngine;

public class Player : MonoBehaviour
{

    private CharacterController characterController;//※1
    private Vector3 velocity;//※1
    public float walkSpeed;//※1
    private Animator animator;//※2
    public GameObject bullet;//※3
    public Transform muzzle;//※3
    public float speed = 1000;//※3


void Start()//ゲーム開始時に一度だけ実行する内容
    {
        characterController = GetComponent<CharacterController>();//※1
        animator = GetComponent<Animator>();//※2
    }

void FixedUpdate()//ゲーム開始時に何度も実行する内容
    {
        if (characterController.isGrounded)//※1
        {
            velocity = new Vector3(Input.GetAxis("Horizontal"), 0f, Input.GetAxis("Vertical"));//※1
            if (velocity.magnitude > 0.1f)//※1
            {
                animator.SetBool("isRunning", true);//※2
                transform.LookAt(transform.position + velocity);//※1
            }
            else//※2
            {
                animator.SetBool("isRunning", false);//※2
            }
        }
        velocity.y += Physics.gravity.y * Time.deltaTime;//※1
        characterController.Move(velocity * walkSpeed * Time.deltaTime);//※1

if (Input.GetMouseButtonDown(0))//※3
        {
         StartCoroutine("shot");//※3
        }
}

IEnumerator shot()//※3
    {
        animator.SetBool("Attack", true);//※3
        yield return new WaitForSeconds(0.5f);//※3
        Vector3 force;//※3
        GameObject bullets = GameObject.Instantiate(bullet) as GameObject;//※3
        bullets.transform.position = muzzle.position;//※3
        force = this.gameObject.transform.forward * speed;//※3
        bullets.GetComponent<Rigidbody>().AddForce(force);//※3
        animator.SetBool("Attack", false);//※3
        Destroy(bullets.gameObject,2);//※3
    }
}
