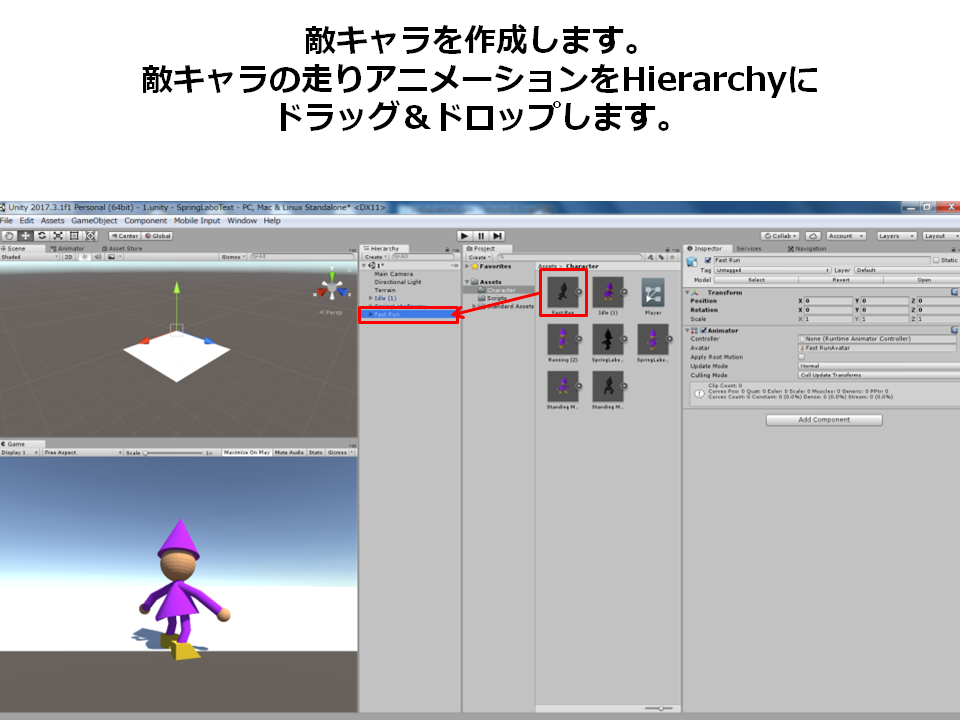
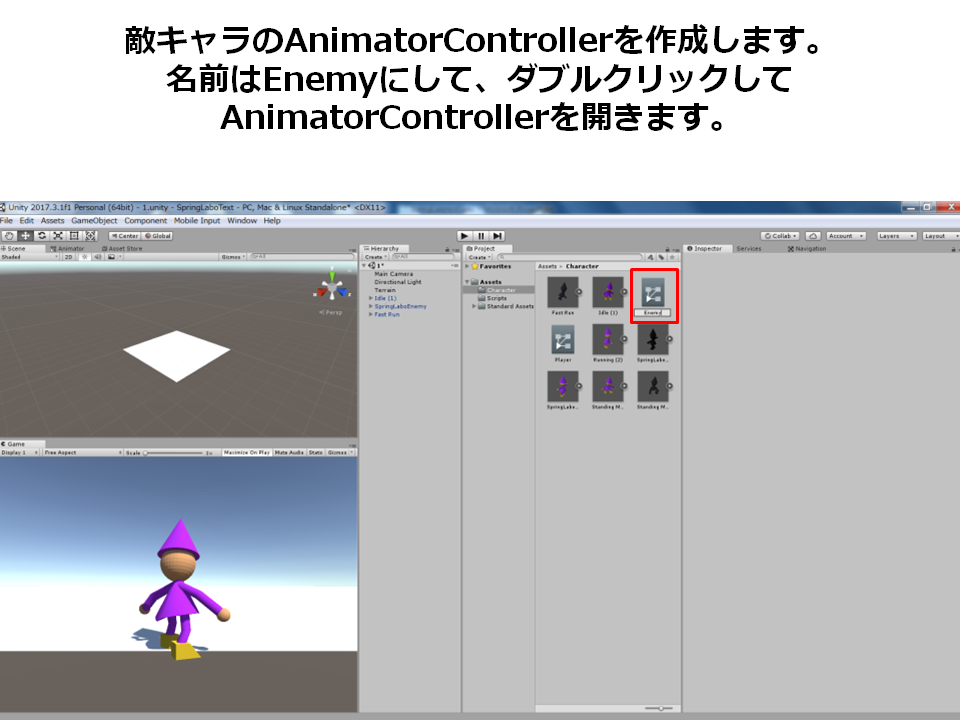
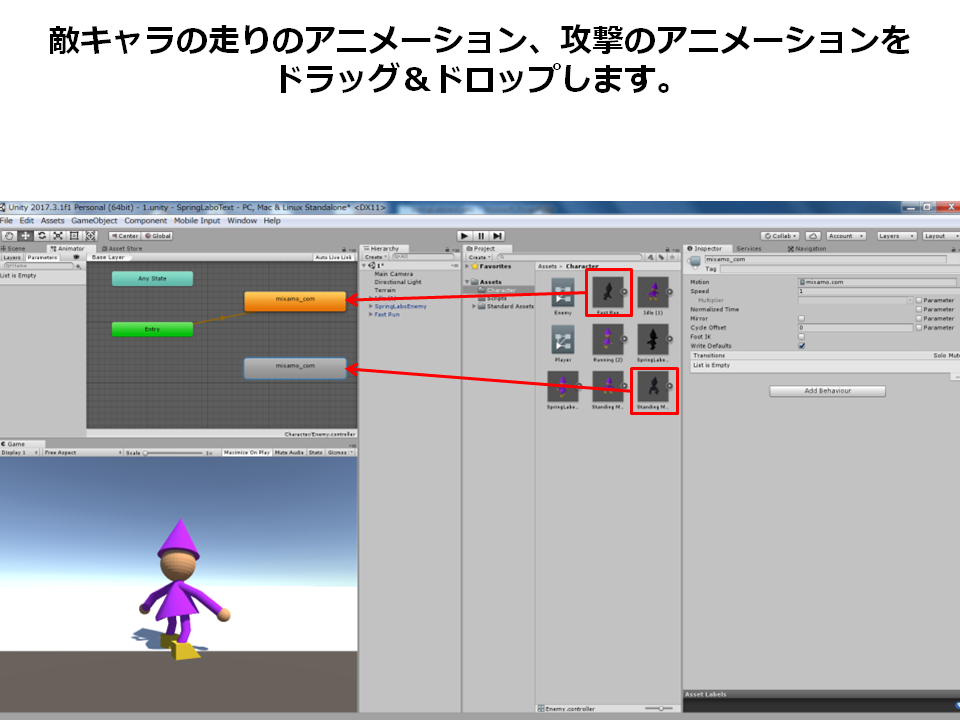
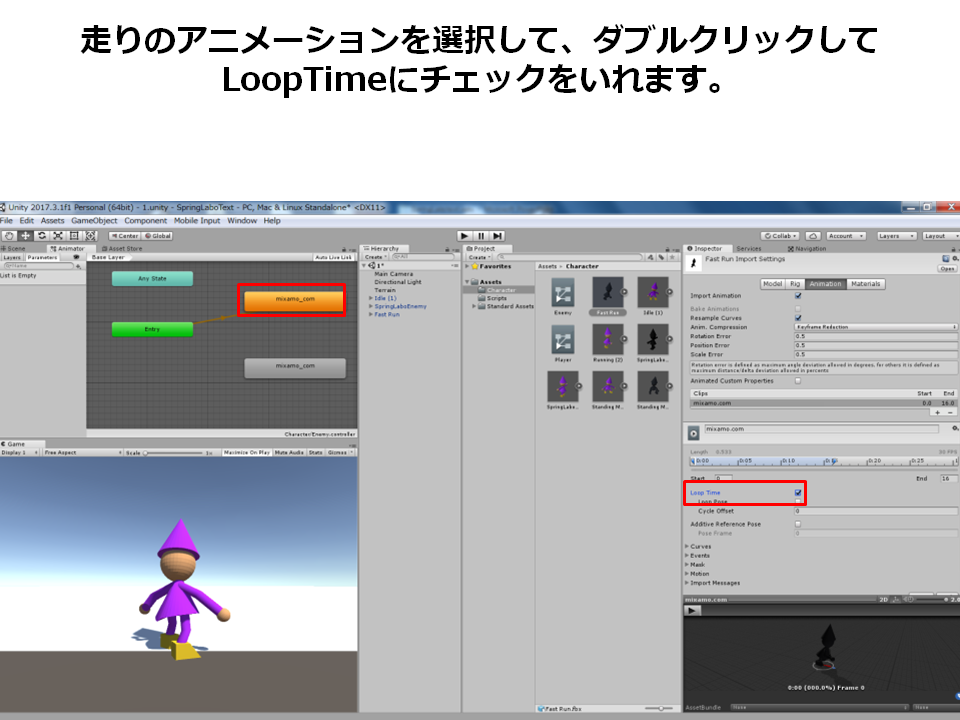
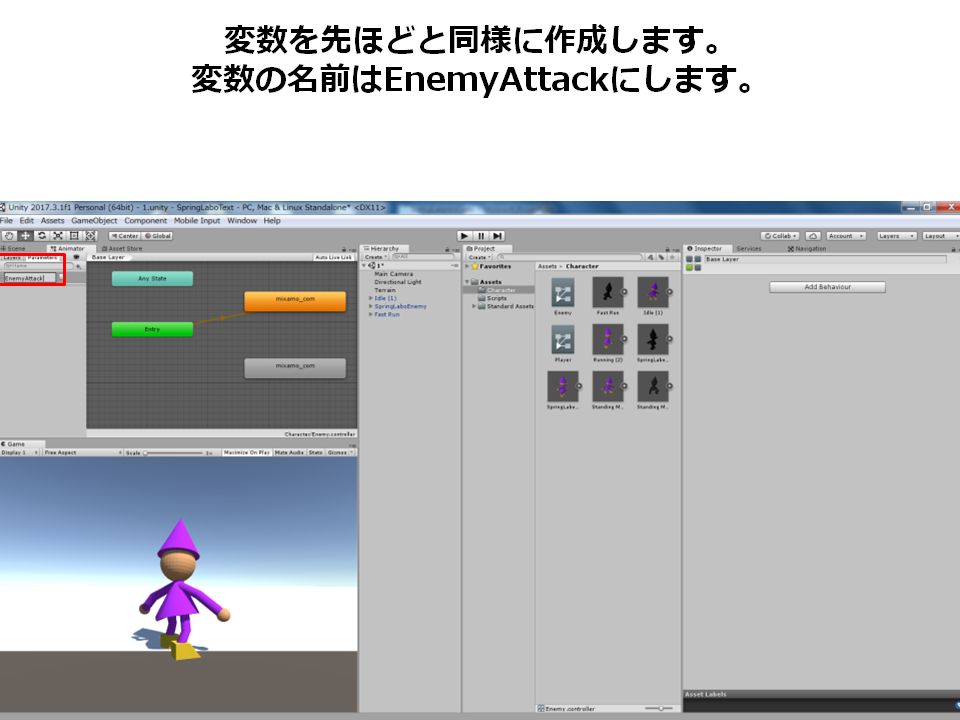
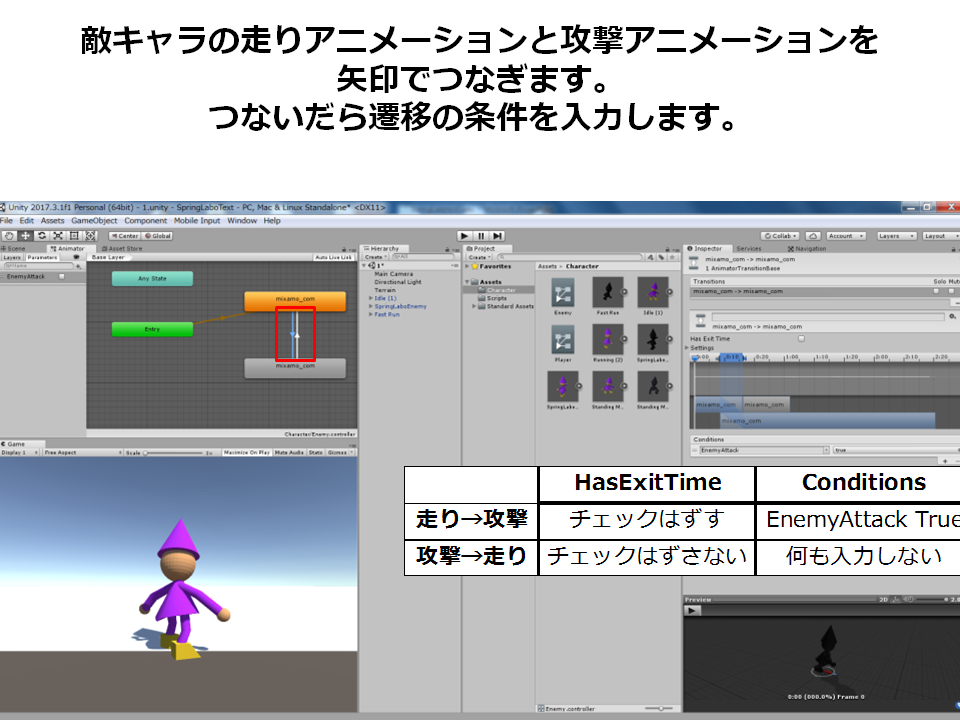
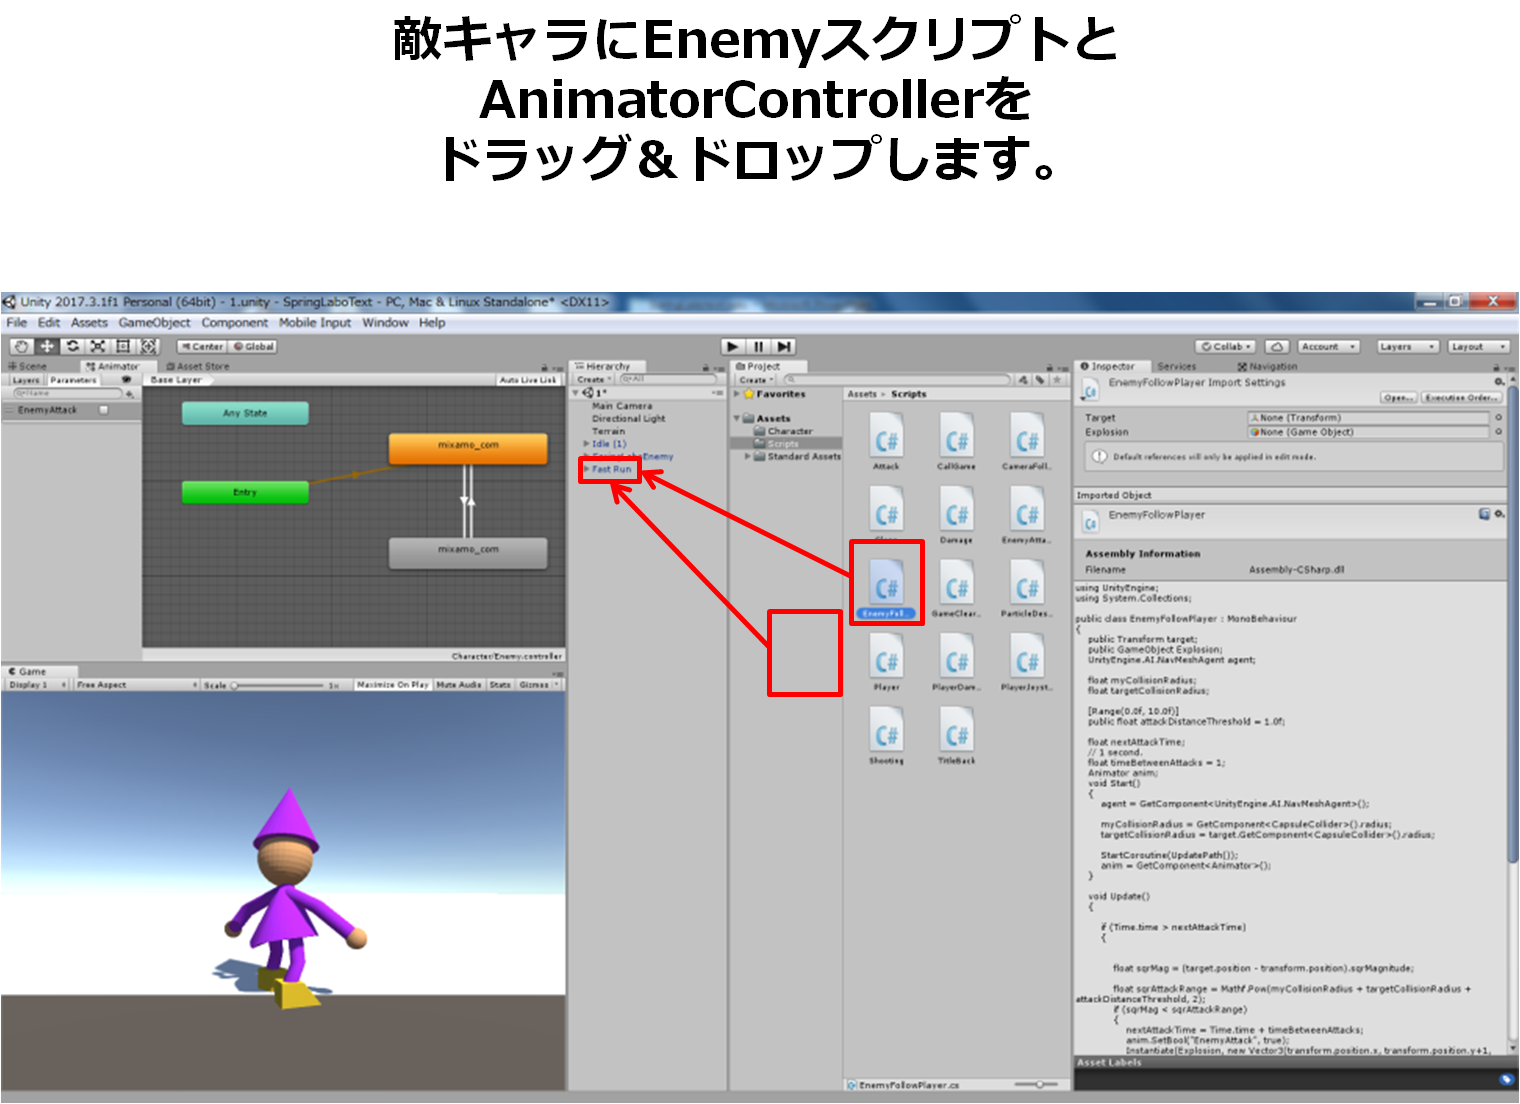
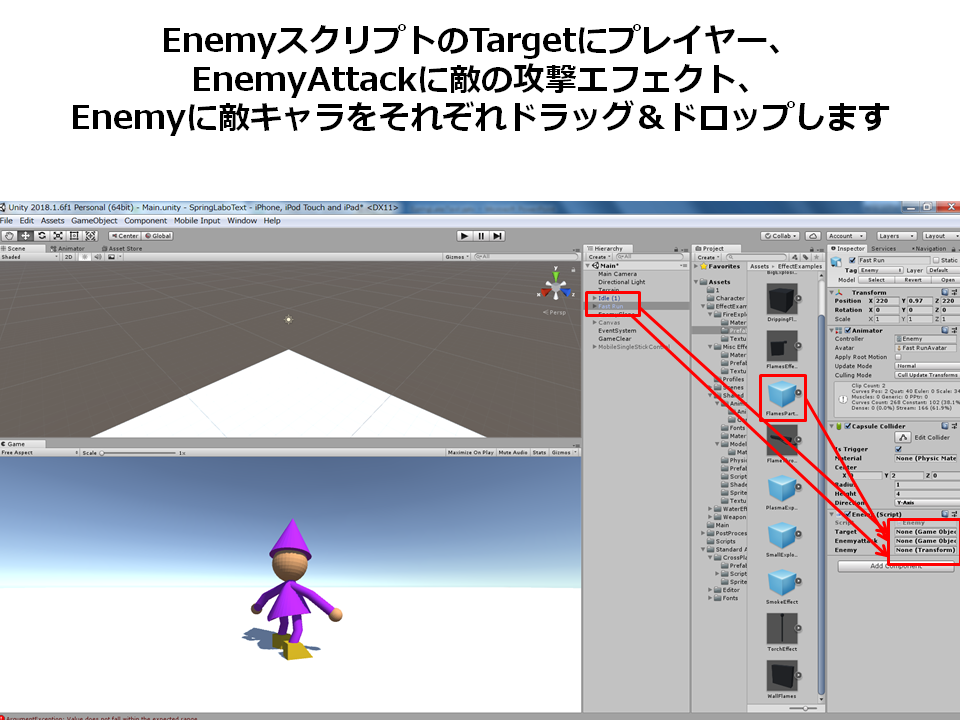
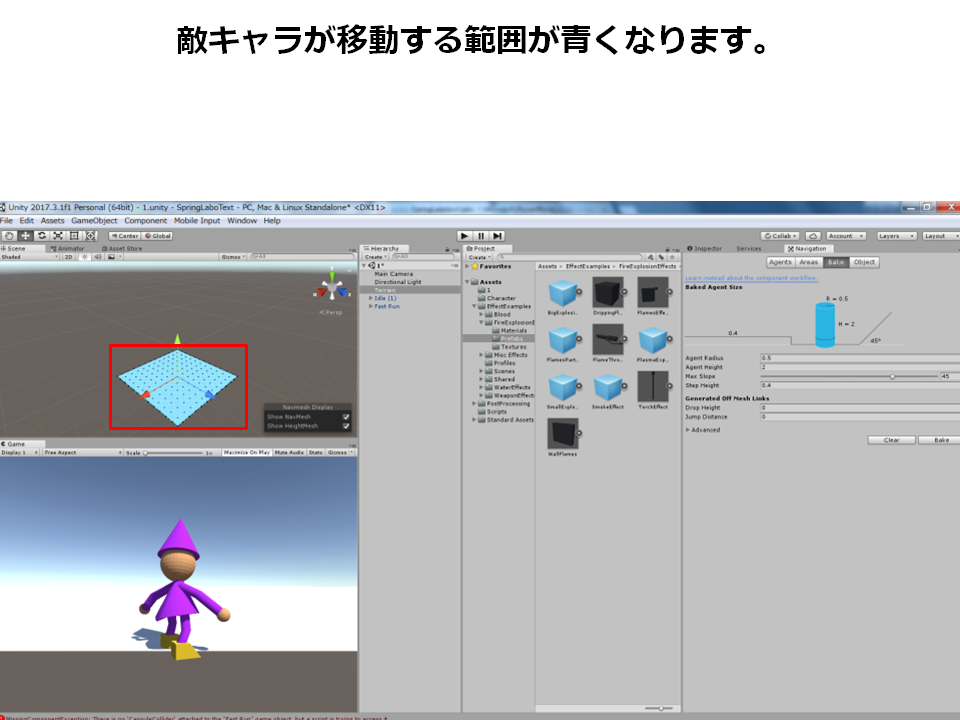
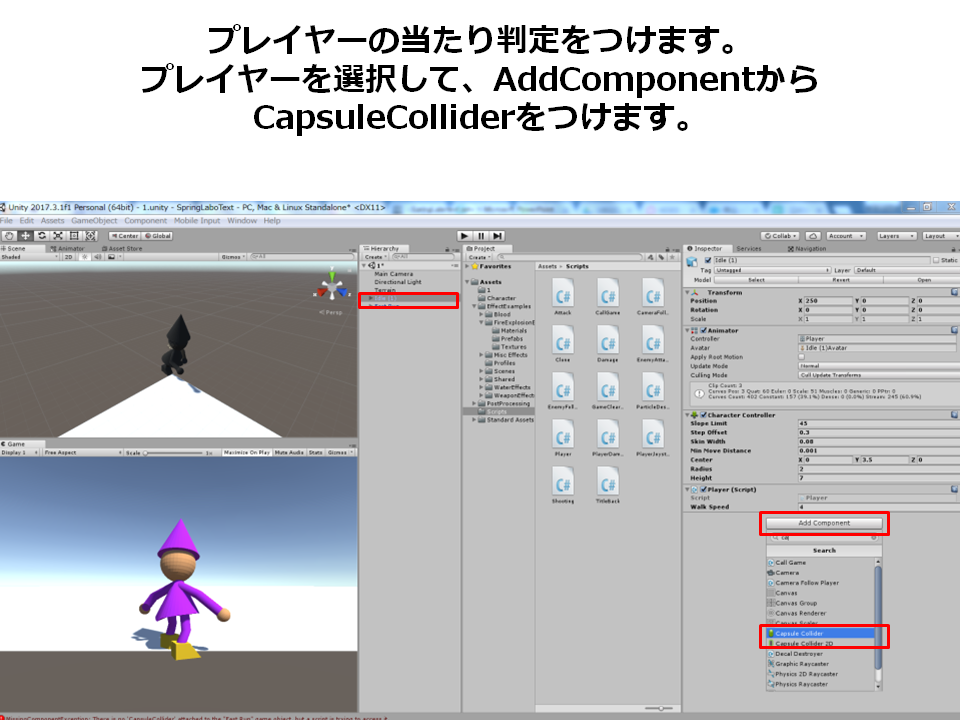
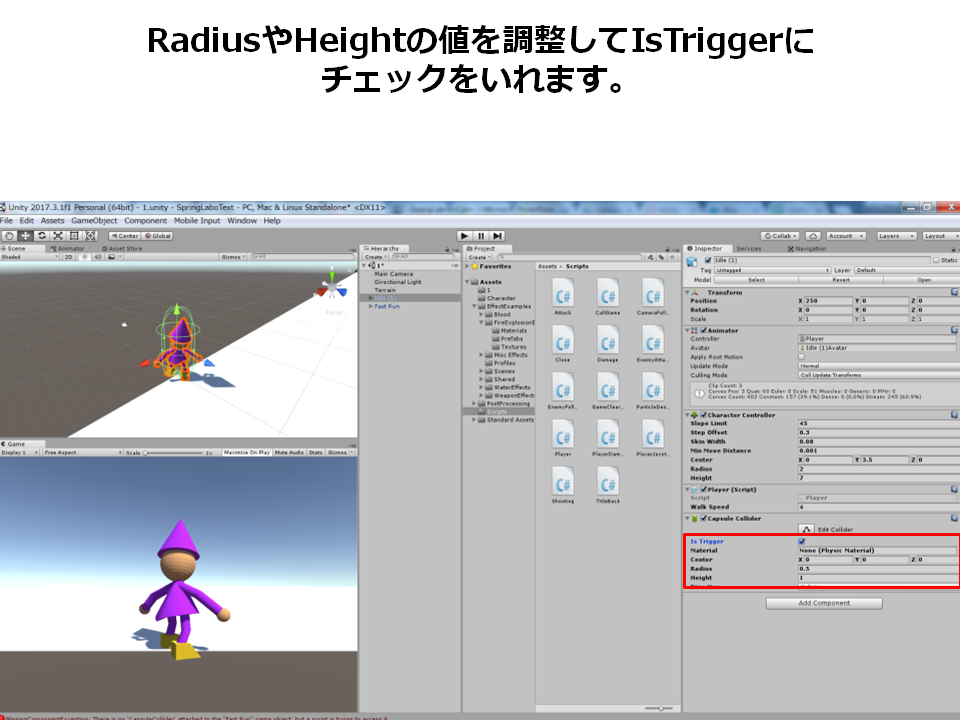
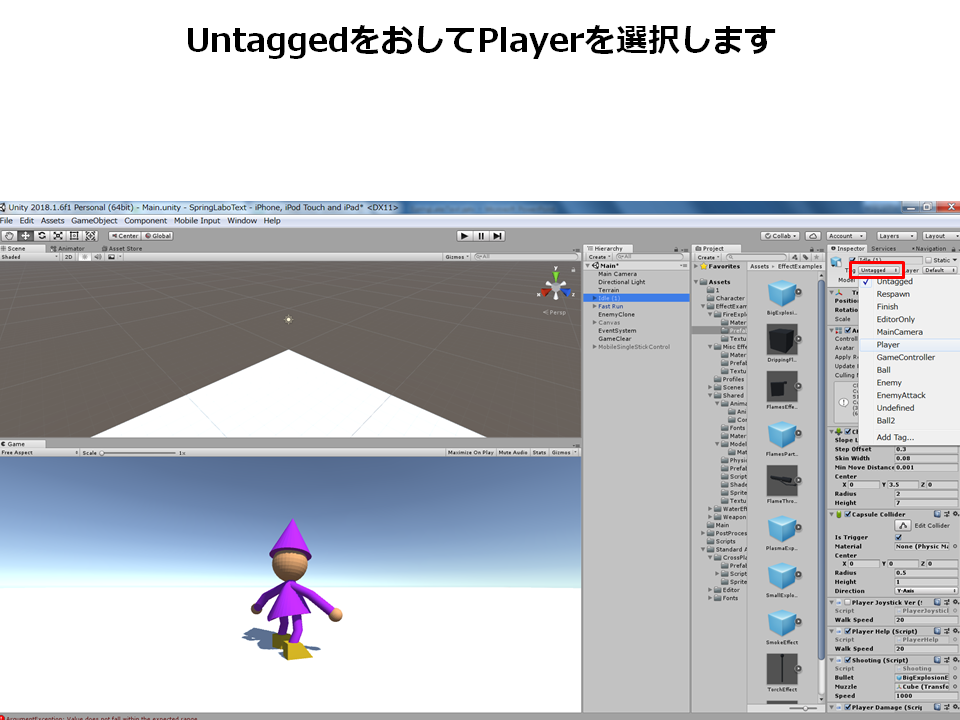
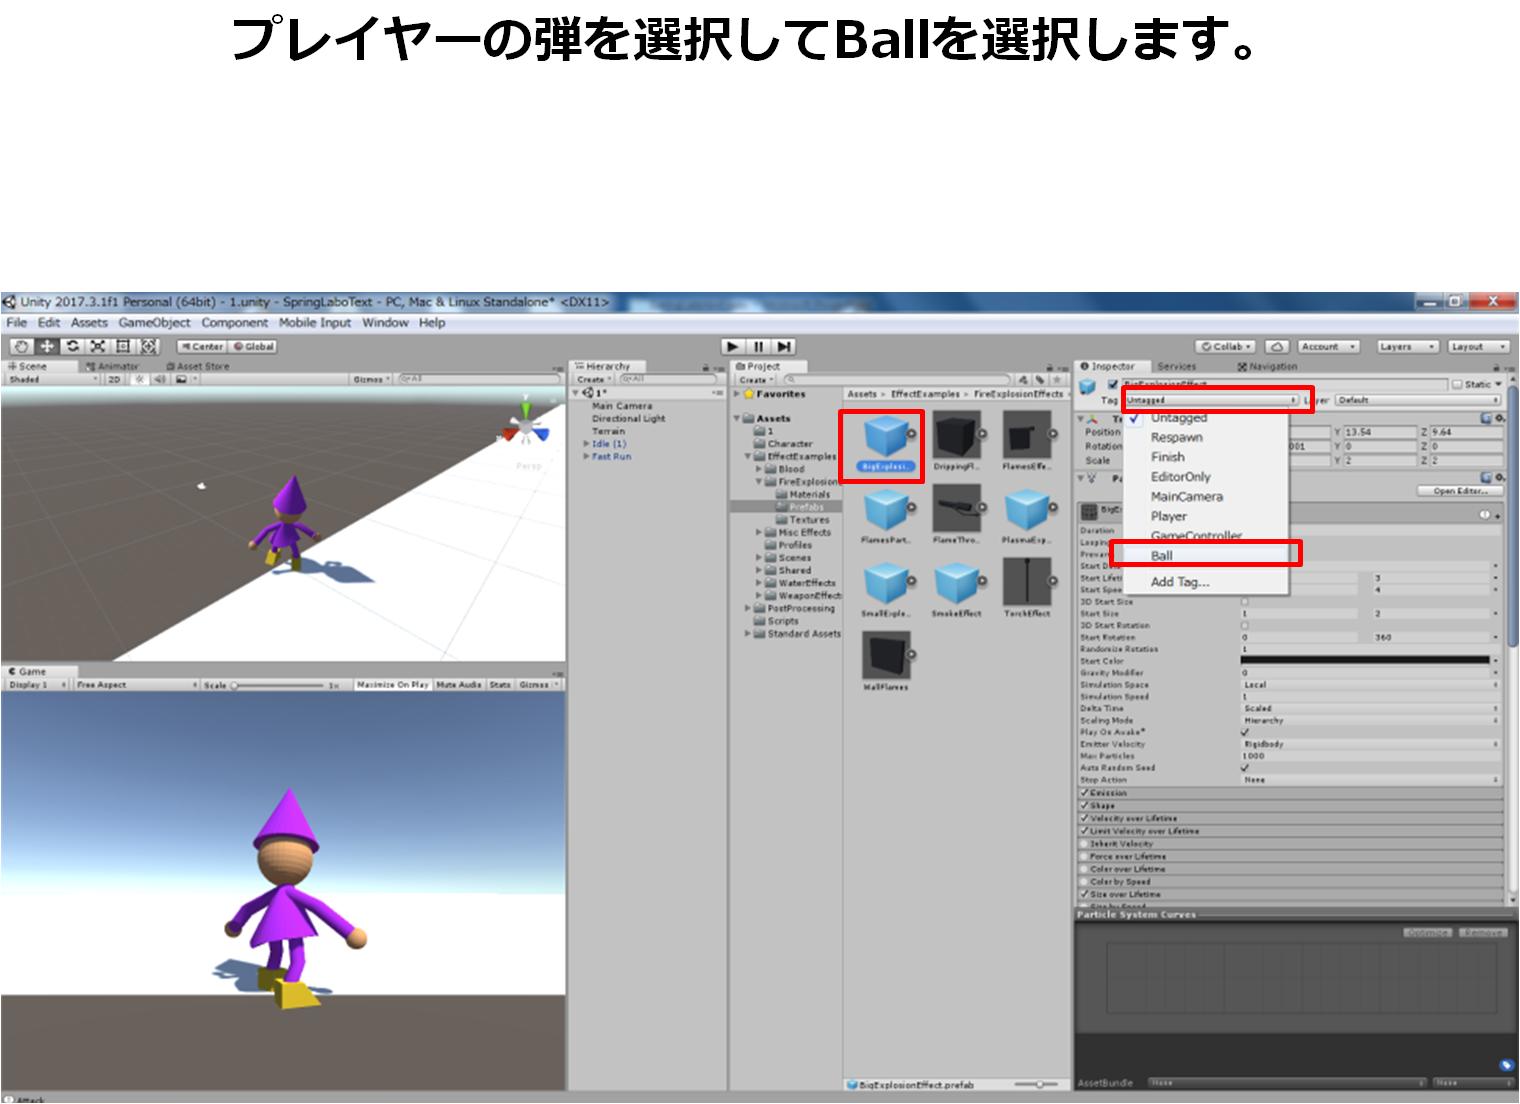
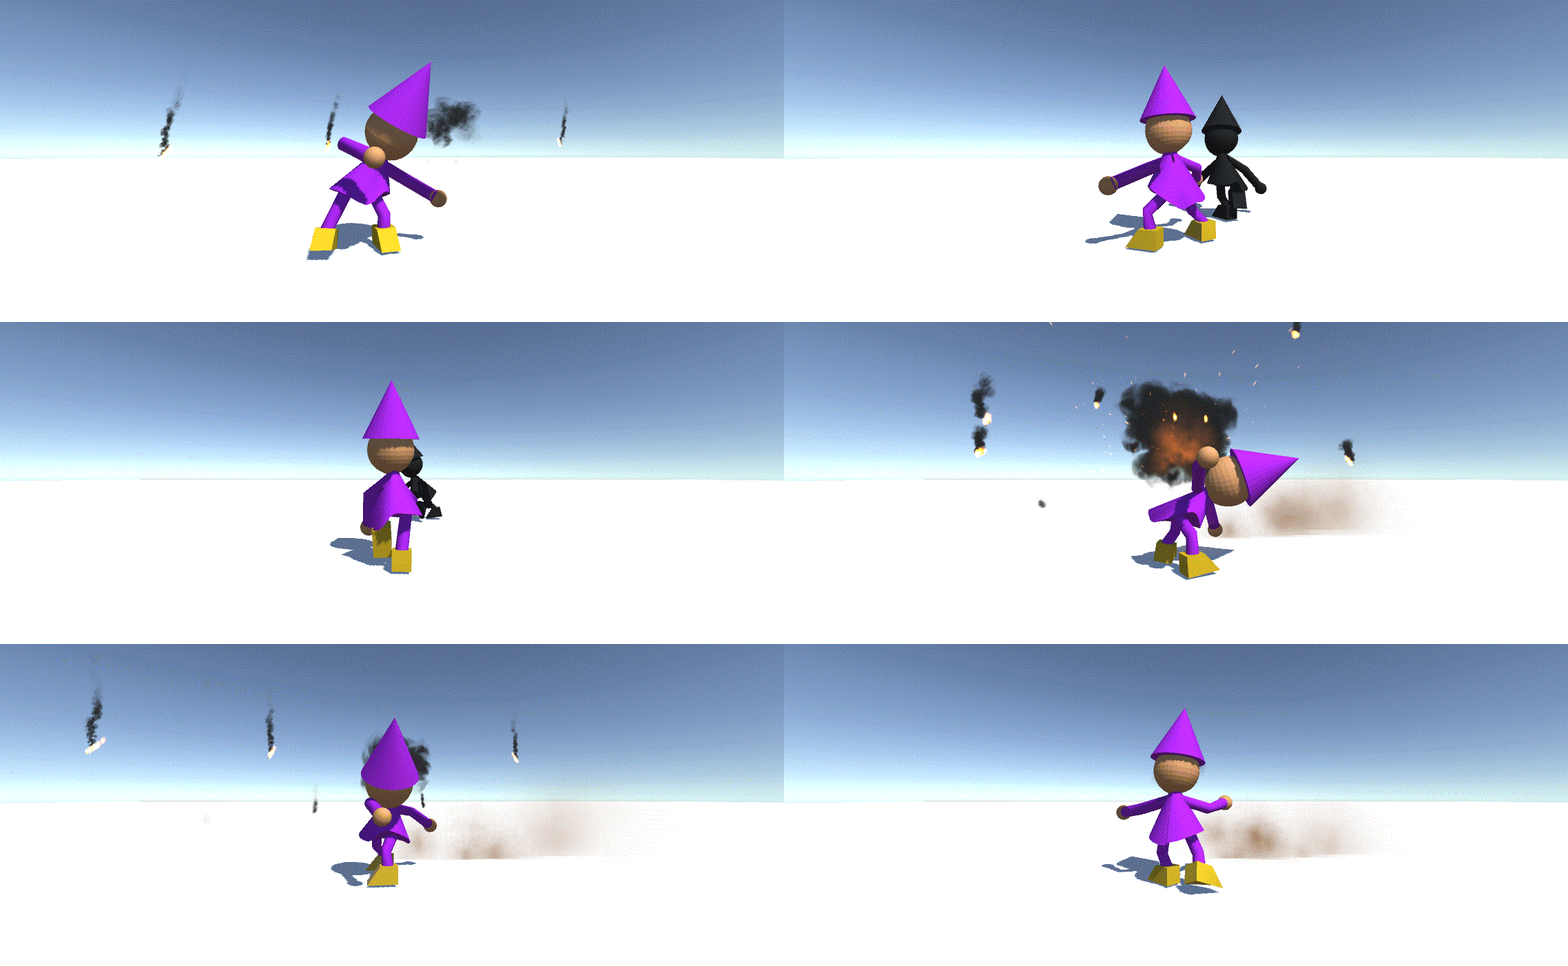
敵キャラの作成、敵がプレイヤーに向かってくるようにする、敵の攻撃、敵のダメージ処理
Enemyスクリプトを作成します
Enemyスクリプトには一番上のusing~の部分にも記入します。
using~の記入内容
using UnityEngine.AI;
using~の説明
**using UnityEngine.AI;**
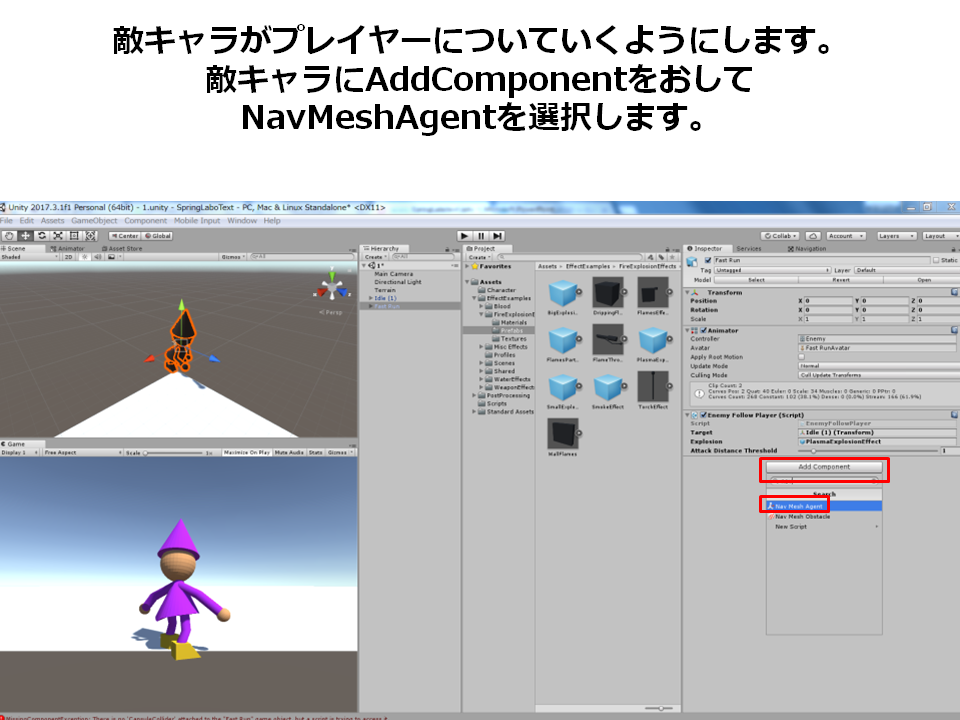
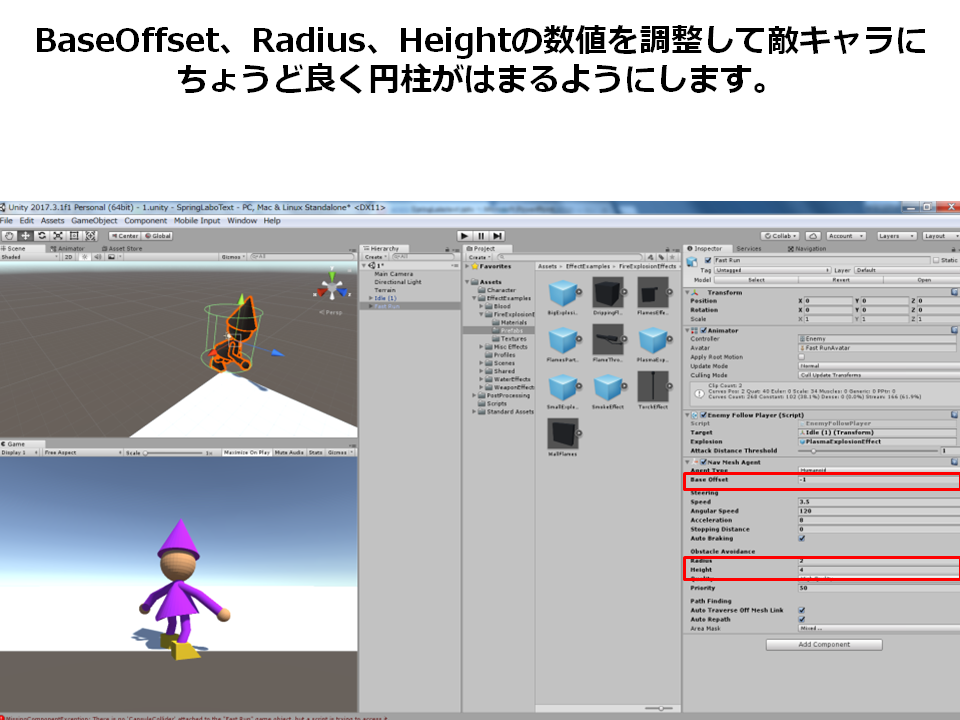
この後に敵キャラクターにつけるNavMeshAgentを使用する場合につけます。 NavMeshAgentとは敵キャラクターの動きをつけやすくするもので、つけることによって 障害物やステージ内の行ける場所を自動で判別して避けてくれるようになります。変数を宣言する部分の記入内容
public GameObject target;
NavMeshAgent agent;
Animator animator;
public GameObject Enemyattack;
public Transform enemy;
変数を宣言する部分の説明
**public GameObject target;**
敵が追従するターゲットを定義します。 今回はプレイヤーに向かってくるようにするのでプレイヤーが該当します。**NavMeshAgent agent;**
NavMeshAgentを使うのでagentという名前をつけて定義しています。 もちろん名前は何でも良いです。**Animator animator;**
Animatorも使うので定義しています。 Playerスクリプトの時と同じです。**public GameObject Enemyattack;**
敵が攻撃する時のエフェクトを定義しています。**public Transform enemy;**
敵の座標を定義しています。後々敵の攻撃エフェクトや敵のやられエフェクトを 敵のいる場所に出現させるためです。void Startの記入内容
agent = GetComponent<NavMeshAgent>();
animator = GetComponent<Animator>();
void Startの説明
**agent = GetComponent();**
agentにNavMeshAgentの値を代入します。**animator = GetComponent();**
同様にanimatorにAnimatorの値を代入します。void Updateの記入内容
agent.destination = target.transform.position;
void Updateの説明
**agent.destination = target.transform.position;**
NavMeshAgentの目的地をtargetの座標に決めています。衝突判定の内容
void OnTriggerEnter(Collider collision)
{
if (collision.gameObject.tag == "Player")
{
StartCoroutine("EnemyAttack");
}
}
衝突判定の説明
**void OnTriggerEnter(Collider collision)**
衝突判定を定義しています。オブジェクトがオブジェクトに衝突した時の処理は全部ここに書きます。 因みに書き方は void OnTriggerEnter(Collider 変数の名前) で始めて{}で閉じます。**if (collision.gameObject.tag == "Player")**
衝突したオブジェクトのタグがPlayerなら…です。 今回はプレイヤーの当たり判定に敵の当たり判定が衝突した場合に敵の攻撃が開始します。**StartCoroutine("EnemyAttack");**
後に記述するEnemyAttackコルーチンを開始します。コルーチンの内容
IEnumerator EnemyAttack()
    {
        animator.SetBool("Attack", true);
        yield return new WaitForSeconds(0.05f);
        GameObject Enemyattacks = GameObject.Instantiate(Enemyattack) as GameObject;
        Enemyattacks.transform.position = enemy.position;
        animator.SetBool("Attack", false);
        Destroy(Enemyattacks.gameObject, 1);
    }
コルーチンの説明
**IEnumerator EnemyAttack()**
EnemyAttackコルーチンを定義します。**animator.SetBool("Attack", true);**
Attack変数をtrueにします。**yield return new WaitForSeconds(0.05f);**
0.05秒待ちます。**GameObject Enemyattacks = GameObject.Instantiate(Enemyattack) as GameObject;**
Enemyattackを複製して複製されたEnemyattackをEnemyattacksと定義しています。**Enemyattacks.transform.position = enemy.position;**
Enemyattacksの生成場所をenemyの場所にしています。**animator.SetBool("Attack", false);**
Attack変数をfalseにします。**Destroy(Enemyattacks.gameObject, 1);**
Enemyattacksを1秒後に消します。完成形のスクリプト
記入内容は※4と表示しています。
Enemy.cs
using System.Collections;
using System.Collections.Generic;
using UnityEngine;
using UnityEngine.AI;//※4

public class Enemy : MonoBehaviour
{
    public GameObject target;//※4
    NavMeshAgent agent;//※4
    Animator animator;//※4
    public GameObject Enemyattack;//※4
    public Transform enemy;//※4

void Start()
    {
        agent = GetComponent<NavMeshAgent>();//※4
        animator = GetComponent<Animator>();//※4
    }

    void Update()
    {
        agent.destination = target.transform.position;//※4
    }

void OnTriggerEnter(Collider collision)//※4
    {
     if (collision.gameObject.tag == "Player")//※4
        {
            StartCoroutine("EnemyAttack");//※4
        }
        }

IEnumerator EnemyAttack()//※4
    {
        animator.SetBool("Attack", true);//※4
        yield return new WaitForSeconds(0.05f);//※4
        GameObject Enemyattacks = GameObject.Instantiate(Enemyattack) as GameObject;//※4
        Enemyattacks.transform.position = enemy.position;//※4
        animator.SetBool("Attack", false);//※4
        Destroy(Enemyattacks.gameObject, 1);//※4
    }
}
テストプレイをしてみると…
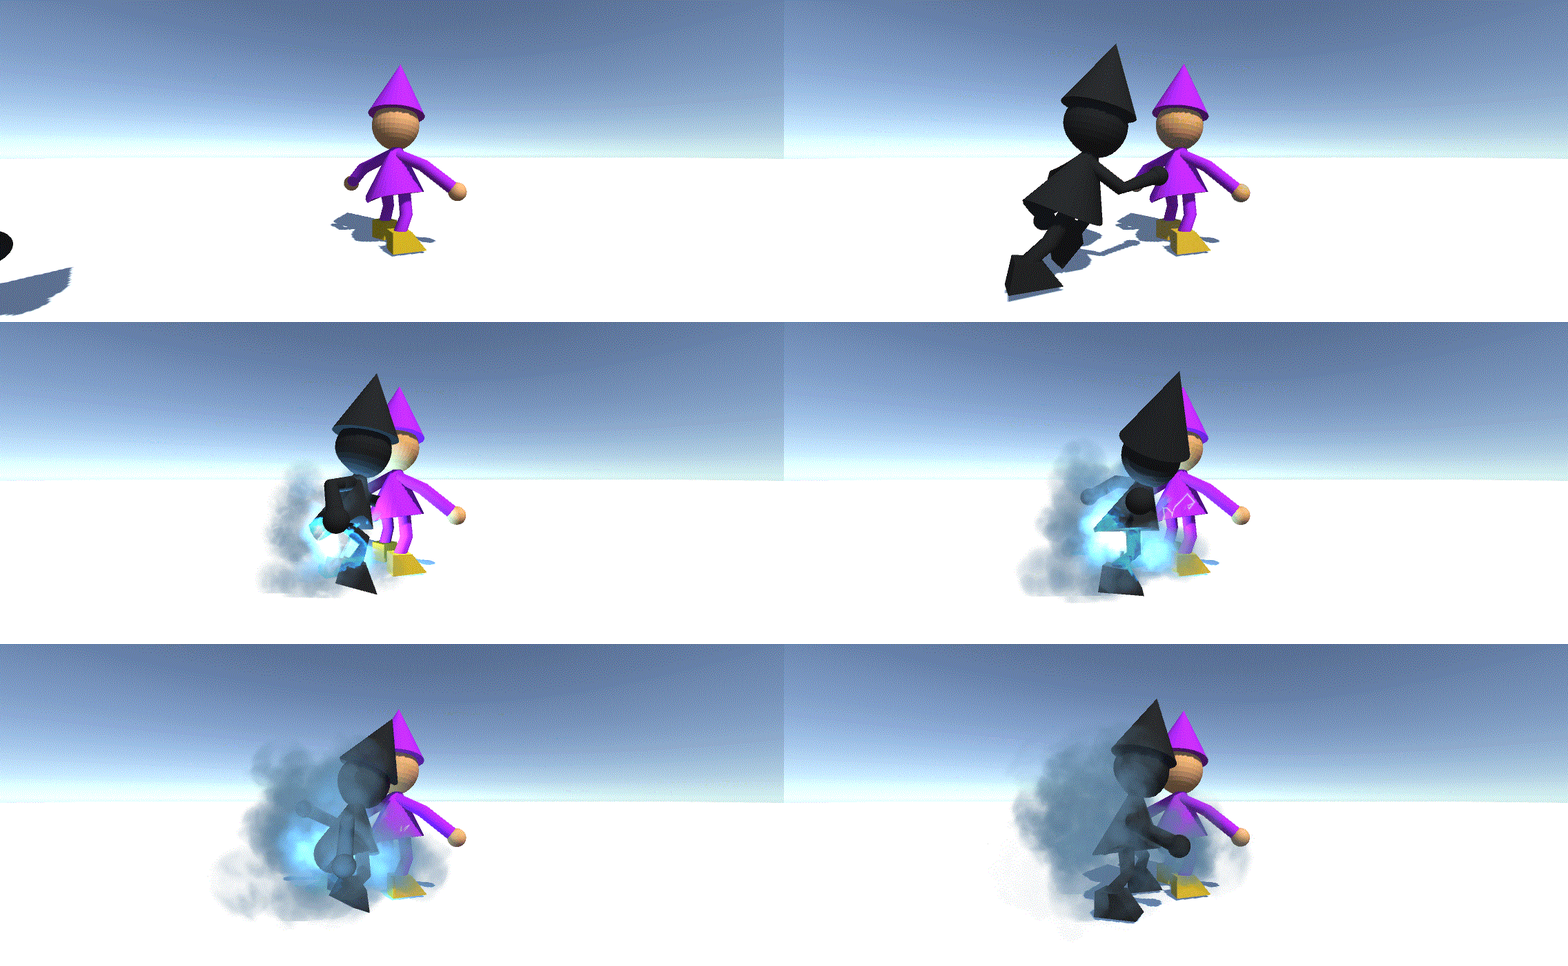
敵が主人公に向かって近づいてきて攻撃してきます。
次は敵を倒せるようにします。更にEnemyスクリプトに追記していきます。
変数を宣言する部分の追記内容
public GameObject Explosion;
変数を宣言する部分の説明
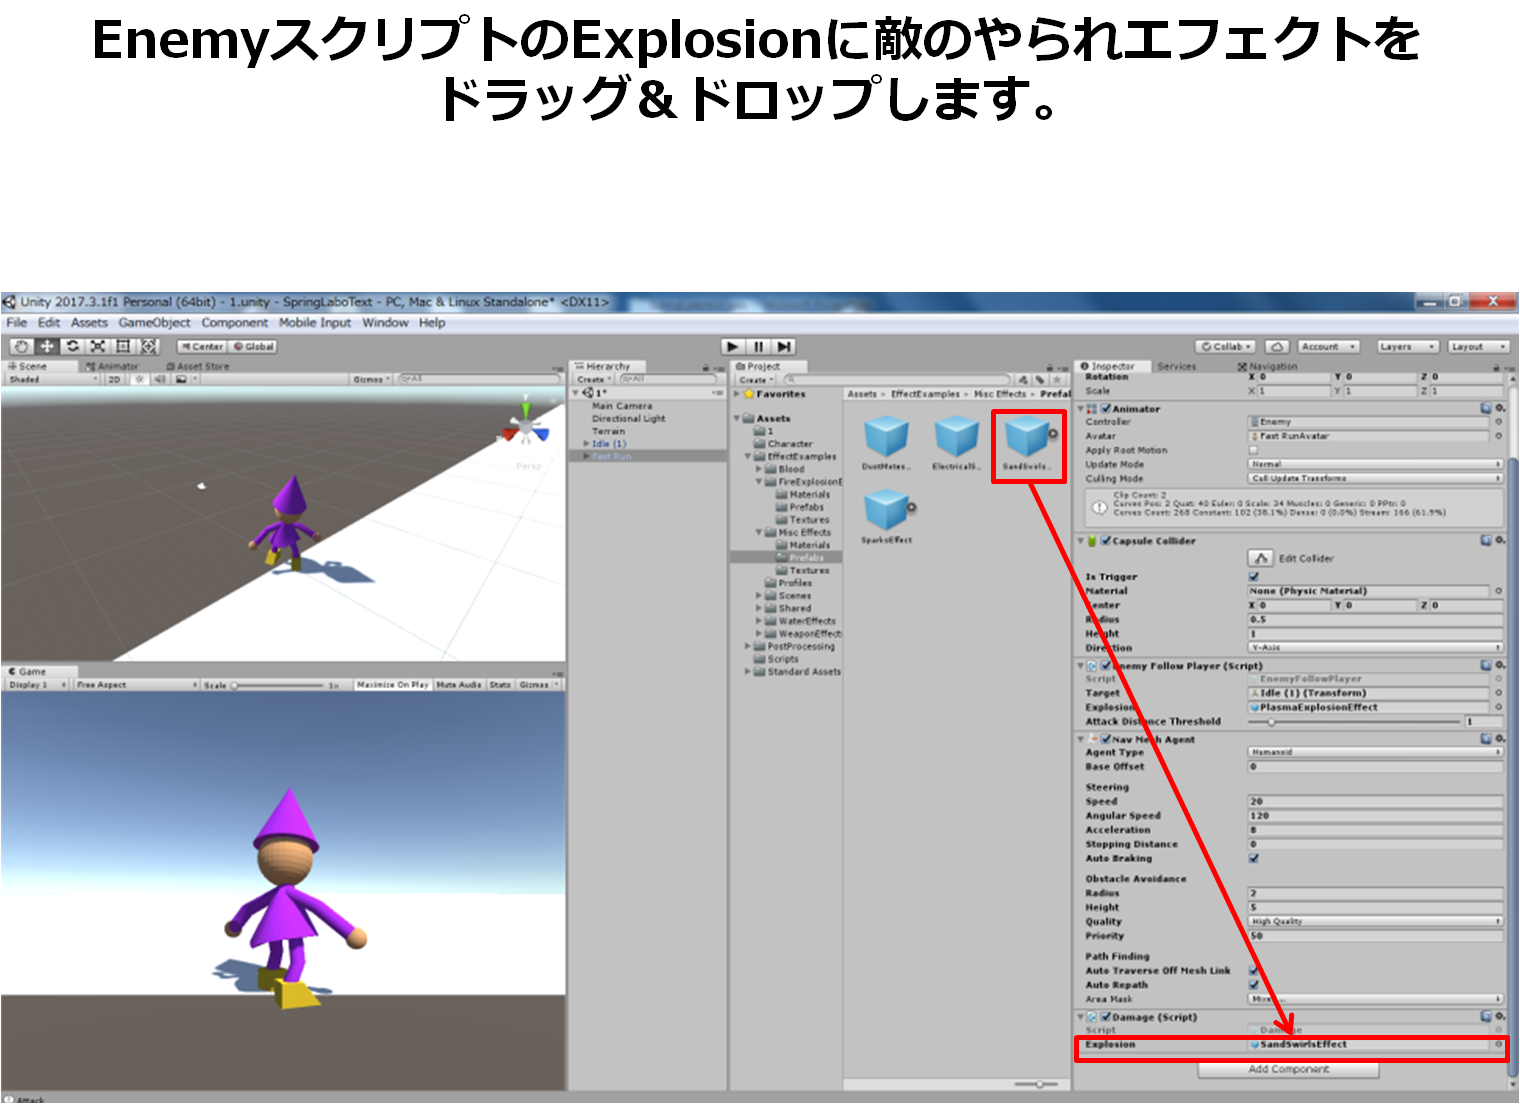
**public GameObject Explosion;**
敵を倒した時に出現させる爆発を定義しています。衝突判定の記入内容
void OnTriggerEnter(Collider collision)
    {
     if (collision.gameObject.tag == "Ball")
        {
          GameObject Explosions = GameObject.Instantiate(Explosion) as GameObject;
          Explosions.transform.position = enemy.position;
          Destroy(this.gameObject);
          Destroy(Explosions.gameObject, 1);
        }
    }
衝突判定の説明
**void OnTriggerEnter(Collider collision)**
衝突判定を定義しています。オブジェクトがオブジェクトに衝突した時の処理は全部ここに書きます。 因みに書き方は void OnTriggerEnter(Collider 変数の名前) で始めて{}で閉じます。**if (collision.gameObject.tag == "Ball")**
衝突した際のオブジェクトについているタグがBallだったらという意味です。この場合はプレイヤーが飛ばす弾を指します。**GameObject Explosions = GameObject.Instantiate(Explosion) as GameObject;**
Explosionを複製して複製されたExplosionをExplosionsと定義しています。**Explosions.transform.position = enemy.position;**
Explosionsの生成場所をenemyの場所にしています。**Destroy(this.gameObject);**
このオブジェクトを消しています。 このオブジェクトとはスクリプトを貼り付けているオブジェクトなので敵を指しています。**Destroy(Explosions.gameObject, 1);**
Explosionsを1秒後に消します。爆発のエフェクトが出続けると変なので消しています。完成形のスクリプト
追記内容は※5と表示しています。
Enemy.cs
using System.Collections;
using System.Collections.Generic;
using UnityEngine;
using UnityEngine.AI;//※4

public class Enemy : MonoBehaviour
{
    public GameObject target;//※4
    NavMeshAgent agent;//※4
    Animator animator;//※4
    public GameObject Enemyattack;//※4
    public Transform enemy;//※4
    public GameObject Explosion;//※5

void Start()
    {
        agent = GetComponent<NavMeshAgent>();//※4
        animator = GetComponent<Animator>();//※4
    }

    void Update()
    {
        agent.destination = target.transform.position;//※4
    }

void OnTriggerEnter(Collider collision)//※4
    {
     if (collision.gameObject.tag == "Player")//※4
        {
            StartCoroutine("EnemyAttack");//※4
        }
     if (collision.gameObject.tag == "Ball")//※5
        {
          GameObject Explosions = GameObject.Instantiate(Explosion) as GameObject;//※5
          Explosions.transform.position = enemy.position;//※5
          Destroy(this.gameObject);//※5
          Destroy(Explosions.gameObject, 1);//※5
        }
    }

IEnumerator EnemyAttack()//※4
    {
        animator.SetBool("Attack", true);//※4
        yield return new WaitForSeconds(0.05f);//※4
        GameObject Enemyattacks = GameObject.Instantiate(Enemyattack) as GameObject;//※4
        Enemyattacks.transform.position = enemy.position;//※4
        animator.SetBool("Attack", false);//※4
        Destroy(Enemyattacks.gameObject, 1);//※4
    }
}
